Welcome To Soup Meets Bowl - The Best Soup Recipes & More

Warm Up With Our Latest Soup Recipes

Roasted Acorn Squash & Apple Soup – Cozy Autumn Delight


Roasted Acorn Squash & Apple Soup (Autumn)

As autumn comes, you might wonder about the perfect seasonal soup. Is it the mix of roasted acorn squash and apple that makes it cozy? Or is it the aromatic spices that make it an autumn classic? Whatever the reason, a delicious roasted acorn squash & apple soup is perfect for a chilly fall evening. It’s easy to make and full of health benefits, making it a favorite.

Preparing this soup takes just 10 minutes, and cooking it takes 50 minutes. So, you can enjoy a warm, comforting bowl of soup in under an hour. This recipe is not only tasty but also full of nutrients like potassium, calcium, and vitamins A and C. What are the main points of this autumn recipe?

Key Takeaways

  • A roasted acorn squash & apple soup is a perfect cozy soup for the autumn season.
  • The recipe is easy to make and can be prepared in under an hour.
  • The soup is packed with nutrients, including potassium, calcium, and vitamins A and C.
  • It’s an excellent seasonal soup recipe that combines the natural sweetness of squash and apples with aromatic spices.
  • The soup can be refrigerated for up to 4 days or frozen for up to 3 months, making it a great option for meal prep.
  • A serving of the soup contains approximately 245 calories and 35 grams of carbohydrates.

The Perfect Fall Comfort Food: Roasted Acorn Squash & Apple Soup

When fall comes, you might want a warm meal to cozy up with. Roasted acorn squash and apple soup is just what you need. It’s a fall comfort food that’s easy to make and full of flavor.

This easy soup recipe mixes the sweetness of roasted acorn squash and apples with spices. It’s a cozy soup that’s ready in under an hour. You’ll need to roast the squash, then blend it with onions, garlic, and apples. Add some broth and cream for a creamy soup.

Using seasonal ingredients in your cooking has many benefits. They’re fresh, flavorful, and support local farmers. Plus, they can save you money and inspire new recipes.

This apple soup is not only tasty but also nutritious. It’s full of fiber, vitamins, and minerals. You can enjoy it as a main dish or a side, topped with sour cream and bread. Try this fall comfort food recipe and feel the warmth it brings to your home.

Essential Ingredients for Your Autumn Soup

Before you start making your roasted acorn squash and apple soup, make sure you have the right ingredients. You’ll need seasonal produce like acorn squash and apples, such as Granny Smith or Honeycrisp. Look for acorn squash that’s heavy and has a hard, smooth skin.

For a cozy soup, pick the right ingredients. You’ll need onions, garlic, and chicken or vegetable broth. If you can’t find acorn squash, try using butternut or kabocha squash instead.

Selecting the Perfect Acorn Squash

When picking an acorn squash, check its weight and skin. A hard, smooth skin means it’s fresh. You can also use butternut or kabocha squash as a substitute.

Choosing the Right Apples

For a sweet and tart taste, pick apples like Granny Smith or Honeycrisp. They’ll add a great flavor to your soup and go well with the acorn squash.

Additional Ingredients and Substitutions

You’ll also need onions, garlic, and chicken or vegetable broth for your soup. Apple cider can be a tasty substitute for added flavor.

acorn squash soup ingredients

  • Coarse salt
  • Ground cumin
  • Ground coriander
  • Ground ginger
  • Cayenne pepper
  • Freshly ground black pepper

These spices will make your soup richer and warmer. It’s a perfect dish for the autumn season.

Kitchen Tools and Equipment Needed

To make the roasted acorn squash and apple soup, you’ll need some key kitchen tools and equipment. A big pot is needed for simmering the soup. You’ll also need a blender or immersion blender to make the soup smooth. Plus, a baking sheet is required for roasting the squash and apples.

Other important soup equipment includes a cutting board, knife, and measuring cups. Having a set of utensils, like a spoon and spatula, is also handy. These tools help you prepare and cook the soup well.

Here’s a list of the main kitchen tools and equipment you’ll need:

  • Large pot
  • Blender or immersion blender
  • Baking sheet
  • Cutting board
  • Knife
  • Measuring cups
  • Utensils (spoon, spatula)

kitchen tools

By getting these essential kitchen tools and soup equipment, you’re ready to make tasty and healthy soups. Like the roasted acorn squash and apple soup.

Preparing Your Ingredients

To make cooking smooth and efficient, focus on ingredient preparation. This step is key to bringing out the flavors and textures of your roasted acorn squash and apple soup. Start by cleaning and cutting the acorn squash carefully to avoid accidents. Squash cleaning means scooping out the seeds and pulp, which can be roasted later as a snack.

Then, prepare the apples by peeling, coring, and chopping them into small pieces. This helps them cook evenly and quickly. As you prepare, organize your mise en place. Measure out the remaining ingredients, like onions, garlic, and broth, for a harmonious kitchen organization.

Here’s a quick list of what you’ll need to prepare:

  • 1.5 lbs acorn squash
  • 2 small yellow onions
  • 3 cloves of garlic
  • 2 apples

By following these steps and keeping your kitchen organized, you’ll make a delicious roasted acorn squash and apple soup. Focus on ingredient preparation and kitchen organization for a successful cooking experience.

ingredient preparation

Now that your ingredients are ready, you’re set to start making your roasted acorn squash and apple soup.

Ingredient Quantity Preparation
Acorn Squash 1.5 lbs Clean and cut in half
Apples 2 Peel, core, and chop
Onions 2 small Chop
Garlic 3 cloves Mince

Roasting Methods for Maximum Flavor

To get the best taste from your roasted acorn squash and apple soup, choose the right roasting methods. First, preheat your oven to 400°F (200°C). This helps in caramelizing and developing flavors. Place the acorn squash, cut side up, on a baking sheet and roast for 30-40 minutes. It should be tender and caramelized.

Then, add the apples to the baking sheet. Roast them for 20-25 minutes, until they’re tender and lightly browned. This apple roasting method brings out their natural sweetness. It matches well with the acorn squash’s flavor. Experimenting with different temperatures and times can help you find the best flavor.

Some important things to think about when roasting acorn squash and apples include:

  • Temperature: 400°F (200°C) is best for roasting vegetables and fruits.
  • Time: Roasting time depends on the size and tenderness you want for the squash and apples.
  • Flavor enhancement: Roasting increases sugars and creates new flavors through the Maillard reaction.

roasting methods

Using the right roasting methods can enhance the flavor of your roasted acorn squash and apple soup. The mix of caramelized squash and tender apples makes a tasty, comforting dish. With some practice, you can master apple roasting and create a memorable flavor experience.

Creating the Perfect Soup Base

To make a delicious and creamy soup, start with a solid base. This base is where you build your flavors. Begin by sautéing onions and garlic, then add roasted acorn squash and apples. Finish with chicken or vegetable broth.

Building flavor layers is all about balance. Mix the squash and apples’ sweetness with onions and garlic’s savory taste. Add salt, pepper, and nutmeg for extra flavor. Taste and adjust as you go to ensure depth and complexity.

Seasoning Tips for a Perfect Soup

Here are some seasoning tips for a perfect soup base:

  • Use a mix of salt, pepper, and nutmeg for depth and warmth.
  • Add a pinch of cinnamon for sweetness and spice.
  • Try different herbs and spices like thyme and rosemary for unique flavors.

Achieving the Right Consistency

To get the right consistency, simmer the base for 15-20 minutes. Use a blender or immersion blender for a smoother soup. Remember, taste and adjust as you go to achieve the perfect consistency.

By following these tips, you can make a delicious and creamy soup base. It’s perfect for any meal, whether it’s a weeknight dinner or a special occasion.

Ingredient Quantity
Acorn squash 3 medium-sized
Onions 2 medium
Garlic 2 cloves
Apples 2 medium

Blending and Finishing Techniques

To make a creamy soup, blending techniques are key. Use an immersion blender to puree the soup right in the pot. This method keeps the soup smooth without needing to transfer it.

For another option, use a blender in batches. This prevents it from getting too full. After blending, return the soup to the pot. Add any last seasonings or cream for a richer texture.

When using an immersion blender, be careful not to splash the soup. Blend in a steady motion. You can also use a food processor or regular blender if you prefer. The goal is to find what works best for you.

Creating the perfect creamy soup is about balance. Use roasted acorn squash, apples, and cream for a delicious soup. With practice, you’ll master soup finishing. Your creamy soup will impress everyone.

Serving Suggestions and Pairings

Now that you’ve mastered the art of creating this cozy autumn delight, it’s time to explore the best ways to serve and enjoy your roasted acorn squash and apple soup. This versatile dish can be savored as a main course, a starter, or even as part of a larger fall-themed feast.

For a satisfying main dish, pair the soup with a side of crusty bread or a fresh green salad. The creamy, comforting flavors of the soup will be the perfect accompaniment to heartier fall recipes, such as roasted chicken or a hearty beef stew. If serving as a starter, consider segueing into a seasonal main course, such as Butternut Squash Ravioli or Maple-Glazed Pork Tenderloin.

When hosting a fall gathering or party, the roasted acorn squash and apple soup is sure to be a crowd-pleasing favorite. Serve it alongside an array of seasonal appetizers and sip-worthy beverages, like Mulled Cider or Pumpkin Spice Lattes. The soup’s vibrant color and cozy aroma will set the tone for a delightful autumnal celebration.

FAQ

What are the essential ingredients for roasted acorn squash and apple soup?

You’ll need acorn squash, apples, onions, garlic, and chicken or vegetable broth for this soup.

How do I select the perfect acorn squash and apples for the recipe?

Choose acorn squash that’s heavy and has a hard, smooth skin. For apples, pick a sweet and tart type like Granny Smith or Honeycrisp.

What kitchen tools and equipment are needed to make this soup?

You’ll need a large pot, a blender or immersion blender, and a baking sheet for roasting.

How do I prepare the acorn squash and apples for the soup?

Clean and cut the acorn squash in half lengthwise, removing seeds and pulp. Peel, core, and chop the apples.

What is the best way to roast the acorn squash and apples for maximum flavor?

Preheat the oven to 400°F (200°C). Roast the squash for 30-40 minutes, then add the apples for 20-25 minutes more.

How do I build the perfect soup base for roasted acorn squash and apple soup?

Sauté onions and garlic first. Then add the roasted squash and apples, and the broth. Simmer for 15-20 minutes, seasoning with salt, pepper, and nutmeg.

What is the best way to blend and finish the roasted acorn squash and apple soup?

Blend the soup until smooth. Return it to the pot and add any last seasonings or cream.

How can I serve roasted acorn squash and apple soup?

Serve it as a main dish with bread or a salad, or as a starter. It’s perfect for fall gatherings or parties.

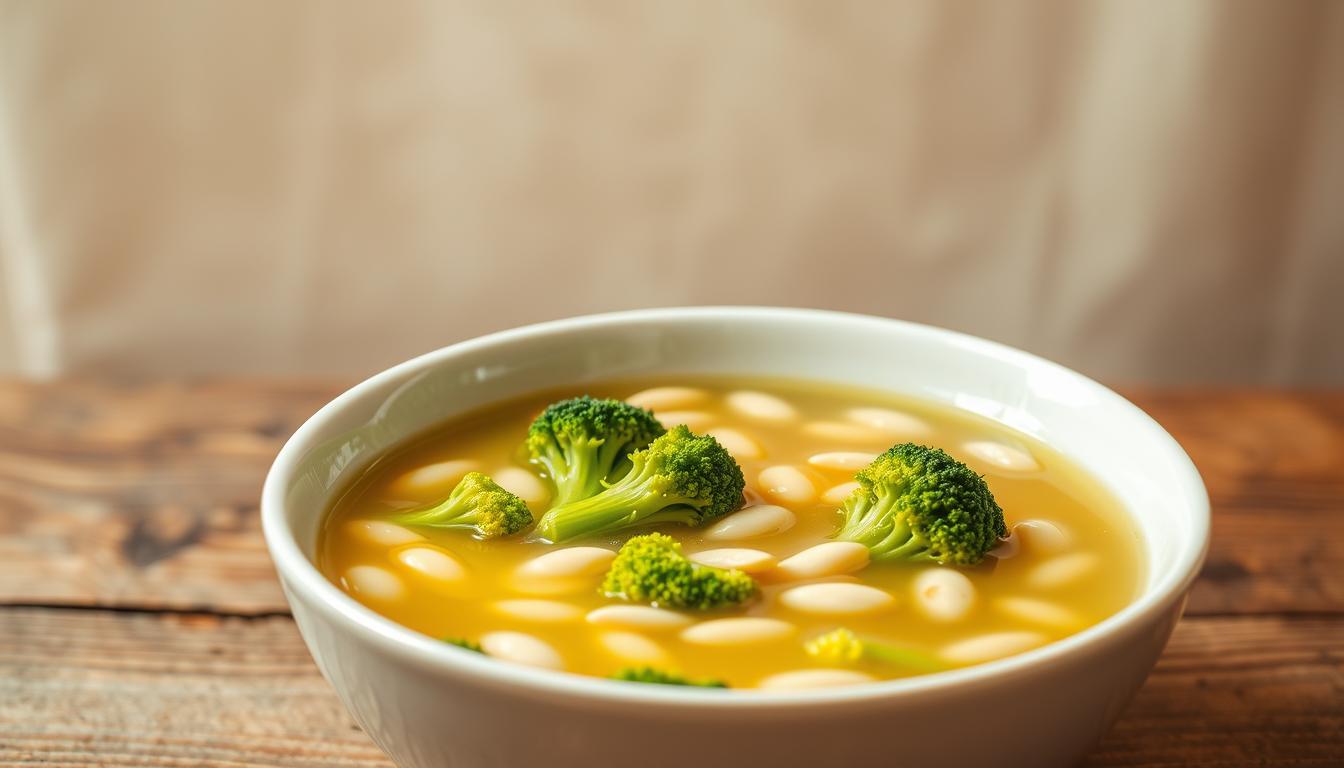
Broccoli & White Bean Detox Soup: A Nourishing Recipe


Broccoli & White Bean Detox Soup

Looking for a healthy and tasty way to detox your body? Try a broccoli & white bean detox soup. It’s a mix of broccoli and white beans, packed with nutrients. This homemade soup is high in protein and fiber, ideal for a vegetarian detox.

But what’s so special about this soup? And how can you make it at home?

Introduction to Detox Soups

A broccoli and white bean detox soup is a healthy choice you can make at home. It’s not just tasty but also full of nutrients. This makes it a great option for a homemade detox soup.

With a prep time of about 40 minutes, you can enjoy a nutritious meal quickly.

Key Takeaways

  • A broccoli & white bean detox soup is a healthy and delicious way to cleanse your body.
  • This homemade detox soup is high in protein and fiber, making it a nutritious and filling option.
  • The soup can be made with cannellini beans, broccoli, and vegetable broth, making it a great vegetarian detox recipe.
  • Each serving of the soup contains approximately 357 calories and 15 grams of protein.
  • The soup can be frozen for up to 3 months and reheated in approximately 30 minutes after thawing.
  • This broccoli & white bean detox soup is a great example of a healthy soup recipe that can be made at home.

Understanding the Power of Broccoli & White Bean Detox Soup

Exploring clean eating soup, you’ll find a plant-based detox soup is a game-changer. Broccoli and white beans make a delicious, nutritious soup. It’s great for cleansing your body and boosting well-being.

This soup is a powerhouse for your immune system. Broccoli, kale, and garlic give your body the strength to fight off sickness. White beans add protein and fiber, making it filling and satisfying.

Some of the key benefits of this soup include:

  • High in fiber and protein
  • Rich in vitamins and minerals
  • Supports immune system function
  • Aids in detoxification

Adding this soup to your diet is a step towards better health. It’s perfect for those seeking an easy detox or a plant-based option. This recipe will quickly become a favorite in your kitchen.

Essential Ingredients for Your Detox Soup

To make a tasty broccoli and white bean soup, you need some key ingredients. You’ll need cannellini beans, broccoli, vegetable broth, and olive oil. These ingredients make a healthy detox soup recipe that’s both delicious and full of nutrients.

A nutritious soup with broccoli and beans is great for your diet. It’s perfect if you’re looking for a healthy detox soup recipe. The ingredients are simple to find, and making it is easy. Here’s what you’ll need:

  • 1 can of cannellini beans, drained and rinsed
  • 3 cups of broccoli florets
  • 4 cups of vegetable broth
  • 2 tablespoons of olive oil

These ingredients will help you make a delicious broccoli and white bean soup. It’s perfect for a healthy detox soup recipe. You can also add garlic, ginger, or lemon juice to make it your own.

broccoli and white bean soup

Kitchen Tools and Equipment Needed

To make a tasty and healthy detoxifying soup, you’ll need some basic kitchen tools. These essentials will help you prepare your soup efficiently. They ensure your soup is both delicious and nutritious.

For cooking a detoxifying soup, the right equipment is key. You’ll need a large pot for sautéing and simmering. A blender is vital for pureeing the soup to your liking. Don’t forget a cutting board for chopping vegetables and other ingredients.

Basic Kitchen Essentials

  • Large pot
  • Blender
  • Cutting board

Optional Equipment for Enhanced Preparation

While the basics are enough to start, some optional tools can make things easier. An immersion blender can puree the soup right in the pot. This saves time and effort. A food processor is also handy for quick ingredient chopping.

With these kitchen tools, you’re ready to make a delicious and healthy detoxifying soup. This can be a gluten-free soup or a cleansing soup, helping you reach your weight loss goals.

Step-by-Step Preparation Guide

To make a simple detox soup at home, start by sautéing onions and garlic in a pot. This step is key as it sets the flavor base. Next, add broccoli and beans to the pot, stirring well to mix.

The key to a great soup is to mix all ingredients well. Now, add low-sodium vegetable broth to the pot and bring to a boil. Then, reduce the heat and simmer for 30 minutes, letting the flavors blend.

While the soup cooks, prepare your gremolata. This includes flat-leaf parsley and fresh basil leaves. It adds a burst of freshness to your soup.

After the soup cooks, blend it until smooth with an immersion blender. For a chunkier texture, blend only half. This way, you get a delicious and nutritious soup.

Here is a summary of the nutritional benefits of your soup:

  • Calories per serving: 419
  • Protein per serving: 19g
  • Fiber per serving: 16g
  • Sodium per serving: 677mg

homemade detox soup with broccoli and white beans

With these simple steps, you can make a tasty and healthy soup. It’s perfect for a detox diet. Remember to store your soup in the fridge for up to 3-4 days or freeze it for 2-3 months.

Mastering the Cooking Process

To make a tasty detox soup, you need to get the cooking right. This means knowing about temperature, timing, and texture. These steps help make a soup that’s good for you and tastes great.

Start with the right ingredients and cooking methods for a detox soup. You can make it in under 30 minutes. Use broccoli, white beans, and spices to get the flavors and textures right.

Here are some tips for cooking well:

  • Keep the temperature right to avoid overcooking.
  • Time your cooking so veggies are tender.
  • Make the soup smooth and creamy.

Follow these tips to make a soup that’s both tasty and healthy. It’s perfect for a cleanse. Whether you want a detox soup or a nourishing meal, mastering cooking is key.

delicious detox soup for a cleanse

It’s also important to know why detox soups are good for you. They help remove toxins and boost health. Use ingredients like broccoli, white beans, and spices for a soup that’s both tasty and nutritious.

Ingredient Quantity Benefits
Broccoli 2 cups Rich in vitamins and antioxidants
White beans 1 can High in fiber and protein
Spices 1 tsp Anti-inflammatory properties

By using these ingredients and mastering cooking, you can make a soup that’s great for a cleanse. This recipe is perfect for anyone looking for a healthy soup or a detox soup.

Enhancing Your Soup’s Detoxifying Properties

To boost your healthy detox soup, add ingredients that help the body detox. A vegetarian soup recipe like broccoli and white bean soup can be improved with lemon juice, garlic, and ginger.

These ingredients make your soup more effective. They’re great for your easy soup recipe collection. You can also add:

  • Lemon juice, which aids digestion and supports liver detox
  • Garlic, with sulfur compounds that boost liver function and protect liver cells
  • Ginger, which fights inflammation and eases nausea and digestive issues

healthy detox soup

Adding these ingredients to your healthy detox soup makes it tasty and healthy. It’s perfect for your vegetarian soup recipe. Whether you want an easy soup recipe or a complex broccoli and white bean soup, these ingredients elevate your soup.

Serving Suggestions and Garnishing Options

There are many ways to serve your nutrient-rich soup. You can add nuts, seeds, or avocado on top. This adds a nice crunch and healthy fats. For a fuller meal, try it with whole grain bread or a side salad.

This healthy detox soup recipe can be made to your liking. You can add fresh parsley, a lemon wedge, or red pepper flakes. These not only taste great but also make the soup look good.

Here are some pairing ideas for your nutritious soup with broccoli and beans:

  • Whole grain bread for dipping into the soup
  • A side salad with mixed greens and a light vinaigrette
  • A sprinkle of nuts or seeds for added crunch

Remember to control your portion size when serving your soup cleanse. Aim for about 250g per serving. This balance of protein, fiber, and healthy fats makes for a satisfying meal. By following these tips, you can enjoy a meal that’s both tasty and good for you.

Storage and Meal Prep Tips

It’s important to cool your detox soup to room temperature before refrigerating or freezing. This step helps keep the nutrients and flavor fresh. You can store it in the fridge for up to 5 days or freeze it for 1-2 months. To reheat, thaw it overnight in the fridge and then heat it up as needed. This makes it a great easy detox soup to make at home and enjoy all week.

For meal prep, portion out individual servings of the soup and store them in airtight containers. This makes it easy to have a healthy meal on-the-go. The soup is not only tasty, but it’s also a gluten-free soup and perfect for those trying to lose weight. Its high fiber and protein make it great for a soup for cleansing and refreshing your body.

  • Label and date the containers so you can easily keep track of how long they’ve been stored.
  • Reheat the soup to an internal temperature of at least 165°F to ensure food safety.
  • Consider adding a squeeze of fresh lemon juice or a sprinkle of herbs to give the soup a boost of flavor.

By following these tips, you can enjoy your delicious and nutritiousdetox soupall week long.

Conclusion: Making the Most of Your Detox Journey

Discovering a healthy detox soup recipe like the nutritious soup with broccoli and beans is a great start. It can help you live a more detoxifying and rejuvenating life. This soup supports your body’s natural cleansing and boosts your overall health.

Detoxification is a journey, not a quick fix. Keep finding ways to make an easy detox soup at home. Also, add habits like drinking plenty of water, exercising regularly, and managing stress. Every small step helps towards your long-term health and energy.

FAQ

What is a broccoli and white bean detox soup?

A broccoli and white bean detox soup is a healthy and tasty recipe. It helps cleanse your body. This soup combines broccoli and white beans for a meal full of nutrients.

What are the health benefits of a broccoli and white bean detox soup?

This soup detoxifies your body and supports your health. It’s packed with vitamins, minerals, and antioxidants. These help your body detox naturally.

What are the key ingredients in a broccoli and white bean detox soup?

The main ingredients are broccoli, white beans, onions, garlic, and vegetable broth. You also need herbs and spices. Together, they make a nourishing and tasty soup.

What kitchen tools and equipment are needed to prepare a broccoli and white bean detox soup?

You’ll need a cutting board, knife, and a large pot or Dutch oven. A high-powered blender or immersion blender can also be helpful. They make the soup smooth and creamy.

How do I prepare a broccoli and white bean detox soup?

Start by sautéing onions and garlic. Then add broccoli and white beans. Simmer in vegetable broth until the veggies are tender.Blend the soup to your liking. Season with herbs and spices for extra flavor.

What tips can I follow to ensure the broccoli and white bean detox soup is cooked properly?

Focus on temperature, timing, and texture. Keep the right temperature and simmer for the right time. Blend or simmer to get the perfect texture.

How can I enhance the detoxifying properties of my broccoli and white bean soup?

Add lemon, ginger, or turmeric to boost detoxification. These ingredients support natural detox and add health benefits.

How should I serve and garnish a broccoli and white bean detox soup?

Add toppings like fresh herbs, olive oil, or nuts. These enhance flavor and nutrition. Consider portion sizes for a satisfying meal.

How can I store and meal prep a broccoli and white bean detox soup?

Cool the soup, store in airtight containers, and reheat gently. Meal prepping keeps the soup fresh and nutritious all week.

Bake the Best Coconut Flour Bread at Home


Coconut Flour Bread

Are you searching for a tasty and healthy bread option? Coconut flour bread is perfect for those on gluten-free diets or watching their carb intake. It’s a low-carb choice that’s easy to make at home.

Coconut flour bread is packed with nutrients and is a great alternative to regular bread. Each slice has just 1.6g of net carbs. This makes it perfect for those counting carbs.

Introduction to Coconut Flour Bread

This article will dive into coconut flour bread’s benefits, ingredients, and how to bake it. We’ll give you a detailed recipe and tips for making the dough. Coconut flour bread is low in carbs and high in fiber, making it a healthy choice.

Key Takeaways

  • Coconut flour bread is a low-carb and gluten-free alternative to traditional bread
  • Each slice of coconut flour bread contains only 1.6g of net carbs
  • Coconut flour bread is high in fiber and protein, making it a healthy option
  • The recipe yields 16 slices of bread, with each slice containing 141 calories
  • Coconut flour bread can be stored in the refrigerator for up to 10 days or frozen for several months
  • With the right recipe and ingredients, coconut flour bread can be a delicious and healthy option for those looking for a gluten-free and low-carb alternative to traditional bread

Understanding Coconut Flour and Its Unique Properties

Exploring gluten-free and low-carb baking, you’ll find coconut flour. It’s made from dried coconut meat. It’s a great choice for healthy bread recipes.

Coconut flour is packed with fiber and protein. It’s perfect for those who want gluten-free and low-carb options.

Coconut flour has many nutritional benefits. It has about 2 grams of protein and 5 grams of fiber per 2 tablespoons. Its glycemic index is lower than wheat flour, helping control blood sugar. It also has more fat than wheat flour but is processed to remove saturated fats.

  • High fiber content for better digestion and regular bowel movements
  • Lower glycemic index for blood sugar control
  • Gluten-free, great for those with celiac disease or autoimmune disorders
  • Low-carb, ideal for low-carb diets

Coconut flour can make bread denser and drier than traditional flour. But, with the right ingredients and techniques, you can make moist and delicious bread. Adding coconut flour to your baking lets you enjoy gluten-free and low-carb diets while enjoying your favorite bread recipes.

Essential Equipment for Baking Coconut Flour Bread

To bake a tasty coconut flour bread recipe, you need the right baking equipment. This includes a quality mixer, a loaf pan, and an oven. The right tools greatly improve your homemade bread quality.

Choosing the right equipment depends on the bread you want to make. For a simple coconut flour bread recipe, basic tools are enough. But, if you bake often, investing in top-notch tools is wise.

baking equipment

  • Silicone muffin liners for fragile keto muffins and cupcakes
  • Parchment paper for easy release of low-carb baked goods
  • Offset spatulas for spreading batter and frosting
  • Silicone baking mats for easy cleanup

Investing in the right baking equipment helps you make delicious homemade bread for any event. Whether you’re new or experienced, the right tools enhance your coconut flour bread recipe quality.

Key Ingredients for Perfect Coconut Flour Bread

To make perfect coconut flour bread, you need the right ingredients. The main ones are coconut flour, eggs, oil, and salt. These ingredients give the bread structure, flavor, and nutrition.

Choose fresh and high-quality ingredients for the best results. Fresh eggs make the bread taste better and feel softer. Also, pick a good coconut flour for a gluten-free bread with the right texture.

coconut flour bread ingredients

You can also add optional ingredients to make your bread even better. Some good ones are:

  • Vinegar for a tangy taste
  • Ground flax meal for extra nutrition and texture
  • Arrowroot powder or tapioca flour as a flour substitute

With the right mix of ingredients, you can make a tasty and healthy coconut flour bread. Always use fresh and quality ingredients for the best taste and texture.

Mastering the Perfect Coconut Flour Bread Recipe

To make a tasty coconut flour bread, you need to know how to work with coconut flour. It soaks up more liquid than almond flour, needing only half a cup for the same amount as almond flour. This makes coconut flour bread a great, low-carb choice for a healthy snack.

For the best coconut flour bread, use the right ingredients and tools. You’ll need 1/2 cup of coconut flour, 1 stick of butter, and 6 large eggs. High-quality ingredients are key for the best taste. You can also tweak the recipe to fit your preferences, making it easy to customize.

To bake the bread, set your oven to 350 degrees Fahrenheit for 40-50 minutes. Let it cool for about 60 minutes before slicing to avoid crumbling. Each serving has 147 calories, with 12.5 grams of fat, 3.5 grams of carbs, 2 grams of fiber, and 4.6 grams of protein. It’s a nutritious choice for any meal.

coconut flour bread recipe

Coconut flour is low in calories and fat, with just 60 calories and 2 grams of fat per serving. It’s also affordable, costing about $0.16 per ounce. By using a reliable coconut flour bread recipe, you can make a tasty, healthy snack for any time.

Mixing and Preparation Techniques

Making coconut flour bread requires the right mixing techniques. You need to mix the ingredients to get a smooth batter. Start by whisking together the dry ingredients like coconut flour, gluten-free flour, baking powder, and salt.

Then, mix the wet ingredients separately. This includes unsweetened almond milk, apple cider vinegar, and egg whites. Once the wet ingredients are well mixed, slowly add them to the dry ingredients. Mix until you get a smooth batter. Avoid overmixing to prevent a dense bread.

Here are some important tips for mixing coconut flour bread:
* Use the correct ratio of coconut flour to liquid ingredients.
* Don’t overmix the batter.
* Let the batter rest for a few minutes before baking.
* Use a gentle folding motion to mix the ingredients.

By following these tips and using the right mixing techniques, you can make a delicious gluten-free coconut flour bread. It’s perfect for any occasion.

Baking Tips and Temperature Guidelines

Baking coconut flour bread needs the right temperature. Preheat your oven to the correct temperature for a light and fluffy bread. Temperature guidelines depend on the recipe, but usually, bake at 350°F for 25-30 minutes. Adjust the temperature and time for the perfect crust.

Here are some key baking tips to remember:

  • Use the right ratio of coconut flour to liquid, as coconut flour is highly absorbent
  • Add eggs to improve moisture and structure in your bread
  • Don’t overmix the batter, as this can result in a dense bread

Coconut flour bread can be tricky, but with the right temperature guidelines and baking tips, you can make a delicious loaf. Store your coconut flour in an airtight container at room temperature. Follow these tips to bake perfect coconut flour bread.

coconut flour bread

Troubleshooting Your Coconut Flour Bread

When baking coconut flour bread, you might face some common issues. These can mess up the bread’s texture and taste. To fix these problems, it’s key to know how to troubleshoot.

One big problem is dryness. This often happens if you use too much coconut flour or not enough liquid. To fix it, try adding more liquid or using less coconut flour.

Another issue is density. This might be due to not using enough eggs or not mixing well. To solve this, add more eggs or mix the ingredients better. Remember, coconut flour soaks up a lot of liquid, so adjust your recipe as needed.

Here are some common problems and solutions for coconut flour bread:

  • Dryness: increase liquid content or reduce coconut flour
  • Density: add more eggs or mix ingredients more thoroughly
  • Crumbly texture: add more liquid or use a mix of coconut flour and other flours

By using these tips, you can solve common issues and make great coconut flour bread. Always tweak your recipe to fit your taste and needs. Don’t hesitate to try new ingredients and methods.

Common Problem Solution
Dryness Increase liquid content or reduce coconut flour
Density Add more eggs or mix ingredients more thoroughly
Crumbly texture Add more liquid or use a mix of coconut flour and other flours

Storage and Serving Suggestions

Proper storage is key to keeping your coconut flour bread fresh. You can store it at room temperature for up to 4 days. Or, refrigerate it for up to 1 week, or freeze it for up to 2 months.

For serving, slice the bread and top it with your favorites like avocado, eggs, or cheese. Each slice has about 148 calories, 8 grams of carbs, and 4 grams of protein. Here are some important nutritional facts:

  • Calories per slice: 148
  • Carbohydrates per slice: 8g
  • Protein per slice: 4g
  • Fat per slice: 11g

Coconut flour bread is a low-carb, gluten-free option. It’s great for toast, sandwiches, or as a side. To keep it fresh, store it in an airtight container and slice just before serving.

By following these tips, you can enjoy your coconut flour bread longer. It’s perfect for a healthy breakfast or a tasty snack. Its rich nutrients and delicious taste make it a great meal addition.

Conclusion: Perfecting Your Coconut Flour Bread Journey

Baking the perfect coconut flour bread at home needs patience and practice. It’s about mastering the unique coconut flour and finding the right techniques. This way, you can make a delicious and healthy loaf that will wow everyone.

The journey to perfecting your coconut flour bread is a long one. Don’t hesitate to try new recipes and methods. With each try, you’ll learn more and solve any problems that come up.

Enjoy the baking process and celebrate every success, big or small. Each loaf of coconut flour bread you make shows your hard work and skill. Keep learning and enjoying, and you’ll become a true expert in this art.

FAQ

What makes coconut flour different from other flours?

Coconut flour is made from dried coconut meat. It’s packed with fiber and protein. It tastes sweet and nutty. Unlike wheat flour, it’s gluten-free and low in carbs, perfect for gluten-free or low-carb diets.

What are the nutritional benefits of using coconut flour?

Coconut flour is a nutritional powerhouse. It’s full of fiber for better digestion and fullness. It also has protein, healthy fats, and vitamins like manganese and copper.

What equipment do I need to bake coconut flour bread?

You’ll need a mixer, loaf pan, and oven to bake coconut flour bread. Basic tools like a whisk, spatula, and measuring cups are also helpful.

What are the key ingredients in coconut flour bread?

Coconut flour bread needs coconut flour, eggs, oil or butter, and salt. You can add sweeteners, baking powder, or herbs to enhance flavor.

How do I properly mix and prepare the coconut flour bread dough?

Mixing and preparing the dough is key for the right texture. Use a stand or hand mixer gently. Measure ingredients carefully for the best results.

What temperature should I bake coconut flour bread at?

Bake coconut flour bread at 325°F to 350°F. Keep an eye on it to avoid overbrowning or drying.

How can I troubleshoot common problems with coconut flour bread?

For texture, moisture, or appearance issues, try adjusting ingredients or baking time. Tweaking mixing and preparation can also help.

How should I store and serve coconut flour bread?

Store coconut flour bread in an airtight container at room temperature. It stays fresh for 3-5 days. Slice and enjoy with your favorite toppings or on its own.

Savor the Flavors of Autumn with Butternut Squash & Apple Soup


Butternut Squash & Apple Soup (Autumn)

As autumn arrives, you might wonder about the perfect fall soup. Butternut squash and apples are in season, making a delicious and cozy soup. Butternut squash is full of vitamin A and low in calories. Adding apples makes the soup even more comforting.

Butternut squash and apple soup is a great autumn treat. It’s easy to make and ready before school. This soup is not only tasty but also boosts your health with mushrooms and spices like cinnamon and nutmeg.

Celebrating the Harvest Season with Butternut Squash & Apple Soup

This soup gives you 10-15% of your daily fiber, helping your digestion. Adding fresh herbs can make the flavor up to 40% better. So, why is butternut squash and apples a great pair for a cozy soup?

Key Takeaways

  • You can create a delicious and comforting autumn soup using butternut squash and apples.
  • Butternut squash is rich in vitamin A and low in calories, making it an excellent choice for a fall soup.
  • The combination of butternut squash and apples celebrates the harvest season and provides several health benefits.
  • Fresh herbs can enhance the flavor of your soup by up to 40%.
  • A bowl of butternut squash and apple soup can provide about 10-15% of your daily fiber intake.
  • This seasonal soup is a great way to enjoy the flavors of autumn and can be prepared using a simple method.

Celebrating the Harvest Season with Butternut Squash & Apple Soup

As the harvest season comes, we all look forward to autumn comfort food. Butternut Squash & Apple Soup is a top choice. It’s made with seasonal ingredients that are good for us.

The mix of butternut squash and apples is amazing. The apples’ sweetness pairs well with the squash’s earthy taste. This soup is not just tasty but also boosts your immune system. It’s full of vitamins and minerals from the seasonal ingredients.

Some of the key health benefits of this soup include:

  • High in vitamin A and C, which helps to fight off infections and support healthy skin
  • Rich in fiber, which can help to lower cholesterol levels and regulate blood sugar
  • Good source of potassium, which can help to lower blood pressure and support healthy heart function

By picking seasonal ingredients and enjoying autumn comfort food like Butternut Squash & Apple Soup, we get the best of the harvest season. We also support local farmers and help the environment.

Essential Ingredients for Your Autumn Soup

To make a tasty autumn soup, you’ll need butternut squash and apples. The apples you pick can really change the soup’s taste. Honeycrisp, Gala, or Fuji apples are sweet. Mixing different apples can add more flavor.

Other key ingredients are onions, carrots, and garlic. They add texture, taste, and depth. Spices like cinnamon, nutmeg, and ginger make the soup warm and cozy.

  • 1 butternut squash (about 3 pounds)
  • 4 large apples, cut into 4-5 chunks
  • 1 small yellow onion
  • 2 small carrots
  • 1 cup of organic pumpkin puree
  • 1 tablespoon of tomato paste
  • 2 tablespoons of avocado oil

These ingredients will help you make a delicious autumn soup. It’s perfect for the fall season.

Kitchen Equipment You’ll Need

To make a tasty Butternut Squash & Apple Soup, you need the right tools. These tools make cooking easier and faster. The right kitchen equipment is key to a great dish.

Start by thinking about what you’ll need. A big pot is essential for cooking the squash and apples. You’ll also need a spoon, peeler, and knife for chopping and sautéing. A blender or immersion blender helps make the soup smooth.

Remember to be careful with hot equipment and keep utensils clean. This ensures your soup is safe and delicious. With the right tools and care, you’ll make a wonderful Butternut Squash & Apple Soup.

Essential Tools

  • Large pot
  • Utensils (spoon, peeler, knife)
  • Blender or immersion blender

Optional but Helpful Equipment

  • Hand mixer
  • Soup ladle

Safety Considerations

Always handle hot equipment with care, and ensure all utensils are clean to prevent contamination. By following these safety considerations and using the right kitchen equipment, you’ll be able to enjoy a smooth and enjoyable soup preparation experience.

Preparing Your Butternut Squash and Apples

Choosing the freshest ingredients is key when preparing butternut squash and apples for soup. You’ll need about 2 pounds of butternut squash and 4 red or golden apples, with one extra for garnish. Start by peeling and chopping the squash into 1/2-inch pieces. Make sure to remove any seeds or pulp to ensure even cooking and avoid bitterness.

Then, core and chop the apples into pieces similar in size. It’s important to have a mix of sweet and tart flavors in your soup. Using a combination of red and golden apples will help achieve this balance.

Here are some tips for preparing butternut squash and apples:

  • Choose fresh and firm butternut squash and apples
  • Peel and chop the butternut squash into 1/2-inch pieces
  • Core and chop the apples into similar-sized pieces
  • Use a mix of apple varieties for added depth of flavor

By following these tips, you’ll make a delicious and flavorful soup perfect for autumn. Always use fresh, high-quality ingredients. Take your time when preparing butternut squash and apples for soup.

preparing butternut squash and apples

With these ingredients and tips, you’re ready to make a delicious and comforting soup for autumn. Whether you’re experienced or new to cooking, preparing butternut squash and apples is a great way to start making soup.

Step-by-Step Cooking Instructions

To make the perfect Butternut Squash & Apple Soup, follow these cooking instructions. Start by preparing the ingredients, including 6 lbs of butternut squash and 2 apples. The step-by-step guide will help you through the process, from initial preparation to blending techniques and final seasoning.

The total preparation time for the soup is 2 hours and 10 minutes, and it yields 12 servings. Each serving contains 385 kcal, with 207 kcal from fat. The cooking instructions are easy to follow, and the result is a delicious and comforting soup.

  • Preheat the oven to 400 degrees Fahrenheit.
  • Rinse and peel the butternut squash, then cut it into cubes.
  • Roast the squash in the oven for approximately 45 minutes, or until it’s tender.
  • Sauté the onions and garlic until they’re translucent, then add the apples and cook for an additional 15 minutes.
  • Combine the roasted squash, sautéed onions and apples, chicken stock, and apple cider in a large pot.
  • Simmer the mixture for 30 minutes, then use blending techniques to achieve the desired consistency.
  • Lastly, add the final seasoning, including salt, pepper, and any other desired spices.

Seasoning and Spice Combinations

To make your Butternut Squash & Apple Soup even better, try different seasonings and spices. The right mix can make the dish warm and rich, creating a memorable taste. Ground cinnamon is a great choice, as it complements the apples’ sweetness and the squash’s earthiness.

Exploring flavor enhancement is fun and endless. Mix cinnamon with allspice and nutmeg for a special aroma. Or, use a bit of salt and black pepper to highlight the soup’s natural tastes. The goal is to find the right balance that enhances the soup without overwhelming it.

Here are some seasonings to think about:

  • Ground ginger for a warm, spicy kick
  • Paprika for a smoky, sweet taste
  • Garlic powder for a savory depth

Seasoning and spice mixing is all about trying new things and finding what you like. Don’t hesitate to experiment with unique combinations to create a unique flavor.

seasoning and spice combinations

Also, try serving your Butternut Squash & Apple Soup with wine for an extra flavor boost. Chardonnay or Viognier are great choices, as they match the soup’s sweet and savory notes perfectly, making the experience unforgettable.

Creative Garnishing Ideas

When you’re ready to serve your Butternut Squash & Apple Soup, think about garnishing. The right garnish can make your dish pop with color, texture, and freshness. It makes your meal look great and perfect for Instagram. You can choose classic toppings like sour cream or croutons, or try something new like toasted nuts or seeds.

Seasonal garnishes offer endless options. Use fresh herbs like sage or parsley for a bright, refreshing touch. For a fancy touch, top your soup with toasted pecans and a sprinkle of paprika. The goal is to mix flavors and textures that enhance the soup without taking over.

Classic Combinations

  • Sour cream and chives
  • Croutons and grated cheese
  • Fresh herbs like parsley or sage

Modern Twists

  • Toasted nuts like pecans or walnuts
  • Seeds like pumpkin or sunflower
  • Spicy elements like red pepper flakes or sliced jalapeños

The garnish is the final touch to your dish. So, have fun and get creative with your garnishing ideas. Mix traditional toppings with modern twists for a unique and tasty look.

Storage and Reheating Tips

To enjoy your Butternut Squash & Apple Soup for days, follow these storage tips. Cool the soup down first, then put it in airtight containers in the fridge or freezer. This stops bacteria from growing and keeps the soup fresh.

In the fridge, the soup stays good for 3 days. In the freezer, it lasts up to a month.

When reheating, do it safely. You can use the microwave or stovetop, stirring often. If frozen, thaw it in the fridge overnight before reheating. Always follow safe food handling to avoid spoilage and illness.

Here are more tips for storing and reheating your soup:

  • Use airtight containers to prevent contamination and spoilage.
  • Label and date the containers so you know how long they’ve been stored.
  • Reheat the soup to an internal temperature of at least 165°F to ensure food safety.

Butternut Squash and Apple Soup preservation tips

By following these storage tips and reheating guidelines, you can enjoy your delicious Butternut Squash & Apple Soup for several days while maintaining its quality and safety.

Dietary Modifications and Substitutions

Enjoying the Butternut Squash & Apple Soup can be made easier with some tweaks. You might want it vegan, gluten-free, or low-calorie. There are many ways to make it fit your needs without losing its taste or health benefits.

For a vegan version, swap chicken broth for vegetable broth. Omit heavy cream or use a plant-based creamer to cut calories and fat. If you’re gluten-free, pick a gluten-free broth and check the ingredients of any spices or seasonings you buy.

Customizing Your Soup

Here are some tips to tailor your soup to your dietary needs:

  • Use low-sodium broth to lower sodium
  • Choose low-calorie sweeteners like stevia or honey to cut sugar
  • Add chia seeds or flaxseeds for more fiber
  • Try different spices and seasonings to find your favorite flavors

With a few simple changes, you can enjoy the Butternut Squash & Apple Soup your way. Whether you’re vegan, gluten-free, or watching calories, there’s a version for you.

Dietary Need Modification Benefits
Vegan Use vegetable broth, omit heavy cream Reduced saturated fat, increased fiber
Gluten-free Choose gluten-free broth, check spice ingredients Reduced gluten intake, improved digestion
Low-calorie Use low-sodium broth, reduce sugar content Reduced calorie intake, improved weight management

With these tweaks, you can enjoy the Butternut Squash & Apple Soup to your liking. Try different ingredients and flavors to find your perfect bowl.

Pairing Suggestions for a Complete Meal

Creating a complete meal with Butternut Squash and Apple Soup is easier with the right pairings. Start by serving the soup with different breads like rustic sourdough or crusty bread. This helps soak up the flavorful broth. A light salad with arugula, roasted beets, and goat cheese adds a refreshing contrast to the warm soup.

It’s important to balance flavors and textures when pairing. Here are some popular choices:

  • Rustic sourdough bread with a side salad featuring mixed greens, cherry tomatoes, and a balsamic vinaigrette
  • Crusty bread with a roasted vegetable medley, such as Brussels sprouts and carrots
  • Garlic butter rolls with a savory steak and squash salad

Beverage pairings also play a big role. A glass of Chardonnay or Viognier can complement the soup’s flavors. Sparkling water with lemon or a warm tea can also offer a nice contrast to the rich soup.

pairing suggestions

By using these pairing suggestions, you can make your meal more satisfying. Whether the soup is the main dish or part of a larger meal, the right pairings can elevate the experience.

Troubleshooting Common Issues

When making the Butternut Squash & Apple Soup, you might run into some common problems. Troubleshooting these issues is key to a smooth cooking experience. If the soup is too thick or too thin, you can fix it by adding broth or cream.

Another issue is if the soup tastes too bland or too strong. You can solve this by tweaking the spices and seasonings. Also, the ingredients you choose can change the soup’s taste and texture. For instance, using low-sodium broth can make the soup less flavorful.

To avoid these common issues, it’s important to stick to the recipe and adjust as needed. Here are some tips for troubleshooting common problems:

  • Adjust the consistency of the soup with broth or cream
  • Adjust the amount of spices and seasonings to taste
  • Use high-quality ingredients to ensure the best flavor and texture

By following these tips and being ready for any issues, you can have a stress-free cooking time. Always taste and adjust the seasoning as you go. Don’t be afraid to try new things. With practice and patience, you’ll become great at solving common soup problems.

Common Issue Solution
Soup is too thick Adjust the consistency with broth or cream
Soup is too thin Adjust the consistency with broth or cream
Flavor is too bland Adjust the amount of spices and seasonings

Conclusion

As the seasons change, embracing the flavors of autumn becomes a delightful experience. The butternut squash & apple soup is a perfect example of how to enjoy the harvest season. This recipe combines the natural sweetness of butternut squash with the crispness of apples, creating a symphony of flavors that will warm your heart and nourish your body.

By following the simple steps outlined in this article, you can create a comforting and satisfying soup that is perfect for cozying up on a chilly autumn evening. The combination of roasted butternut squash and apples, along with aromatic spices and herbs, creates a harmonious blend of flavors that will leave you craving for more.

So, why not take advantage of the abundance of autumn ingredients and create your own butternut squash & apple soup? It’s a delicious way to celebrate the harvest season and savor the flavors of the season. Whether you’re hosting a dinner party or simply treating yourself to a cozy night in, this autumn recipe is sure to impress and satisfy.

FAQ

What makes Butternut Squash & Apple Soup the perfect autumn comfort food?

The mix of butternut squash and apples is sweet, creamy, and warm. It’s perfect for autumn. Using seasonal ingredients, we celebrate the harvest season.

What are the health benefits of using seasonal ingredients in this soup?

Butternut squash and apples are full of vitamins, minerals, and antioxidants. Choosing seasonal ingredients means better flavors and supports local farmers. It also helps the environment.

What varieties of apples work best in this soup?

Try using Granny Smith, Honeycrisp, or Fuji apples. They add a nice balance of flavors to the soup.

What equipment is needed to prepare this soup?

You’ll need pots, utensils, and a blender or immersion blender. A food processor can also help with prep.

How do I properly prepare the butternut squash and apples for the soup?

Peel, seed, and chop the butternut squash into even pieces. Core and chop the apples into similar sizes for blending.

What are some creative ways to garnish the Butternut Squash & Apple Soup?

Try sour cream or croutons, or get creative with toasted nuts, seeds, or fresh herbs. They add texture, flavor, and look.

How can I modify the soup to accommodate dietary restrictions?

For a vegan version, use vegetable broth and plant-based cream. For gluten-free, check all ingredients. Low-calorie? Use less cream or butter.

What common issues might I encounter when making this soup, and how can I troubleshoot them?

If the soup is too thick or thin, adjust with more broth or cream. Stick to the recipe and make small changes to get it right.

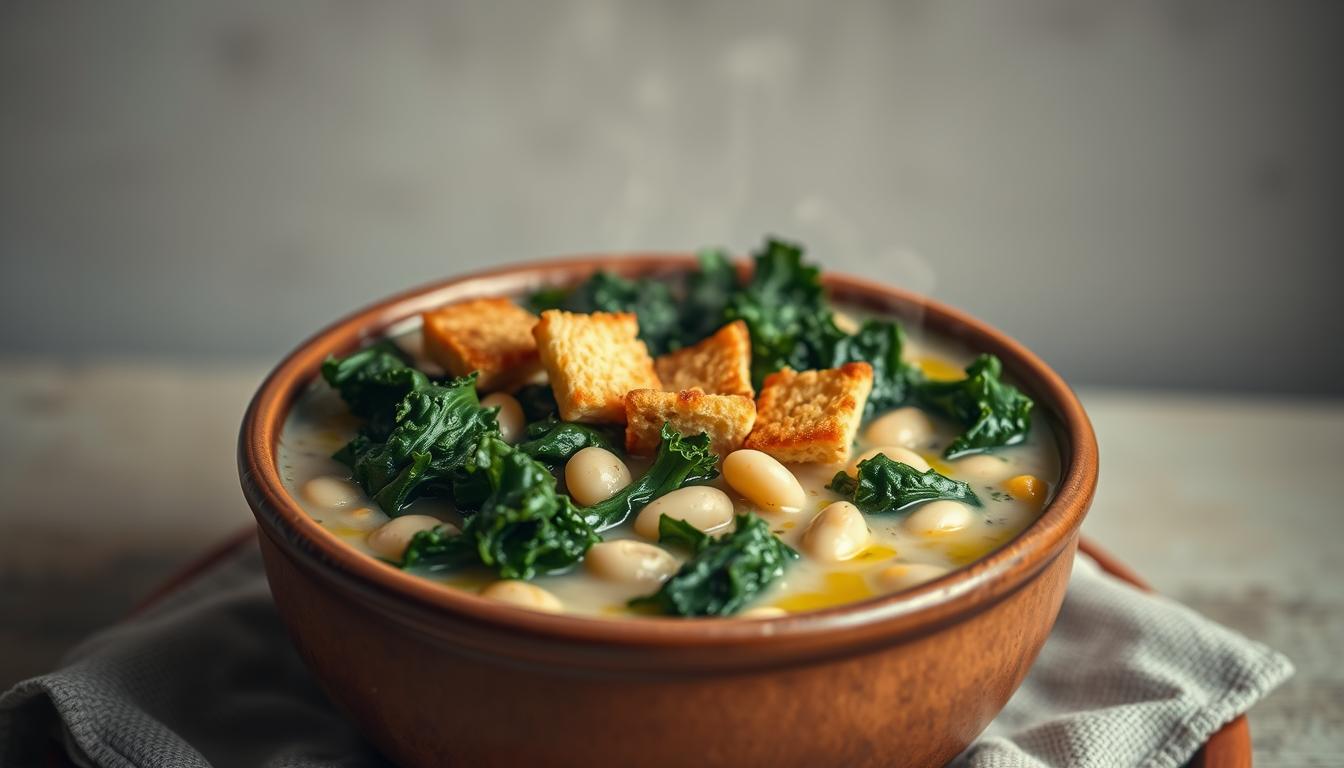
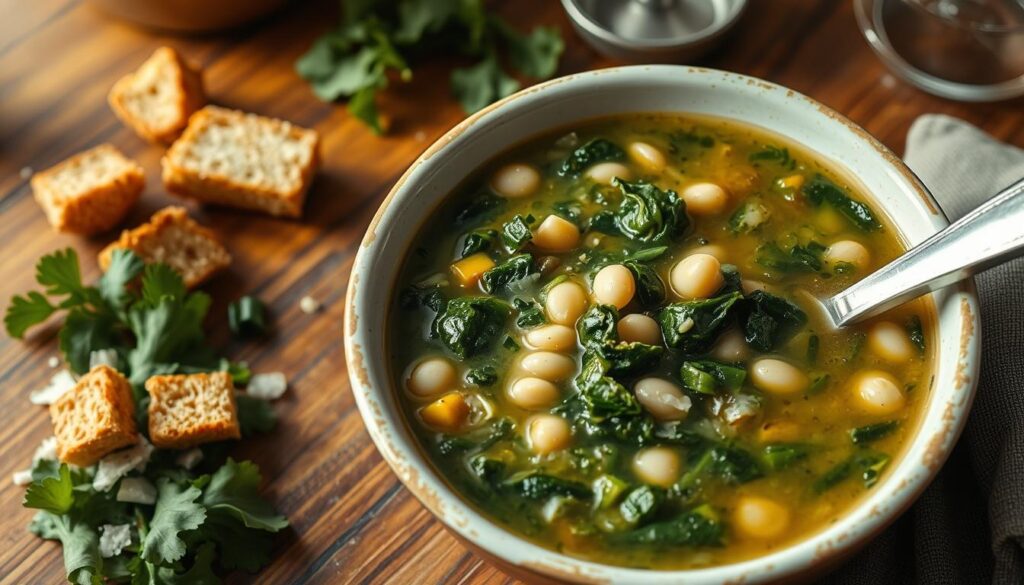
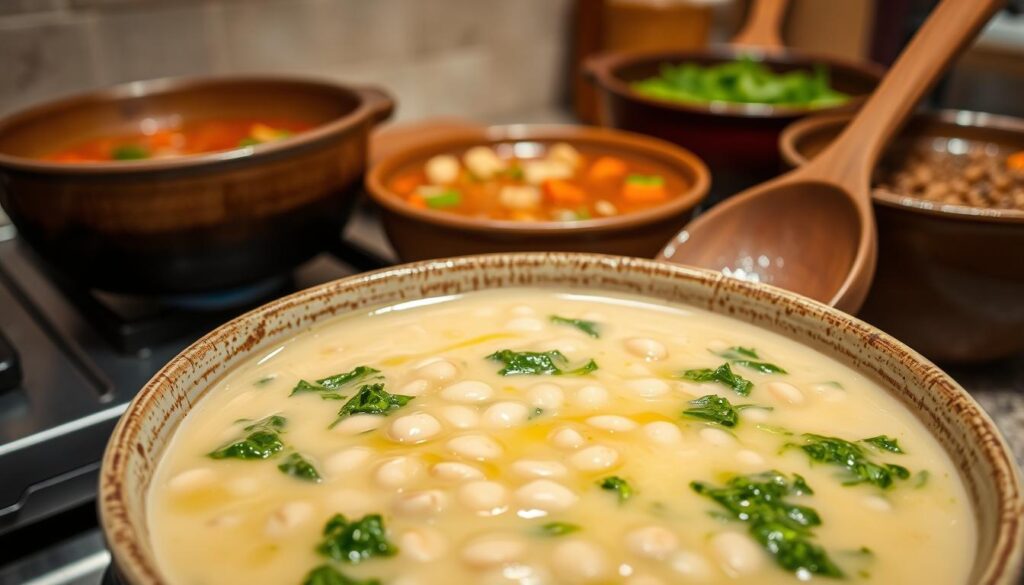
Cozy Kale, White Bean & Garlic Soup


garlic soup recipe

What makes a healthy soup like kale, white bean & garlic soup great for a quick weeknight meal? How can you make it in under 20 minutes to enjoy its health benefits?

Introduction to Cozy Kale, White Bean & Garlic Soup

This white bean kale soup is a winter favorite. It’s hearty and rich, thanks to parmesan broth and mashed beans. It’s full of vegetables and flavor, making it a fantastic easy homemade soup.

Key Takeaways

  • You can make a delicious and nutritious kale, white bean, and garlic soup in under 20 minutes.
  • This healthy garlic soup recipe is a perfect winter staple, rich in protein and fiber.
  • The recipe allows for ingredient substitutions, including frozen kale or spinach, and the option to omit meat entirely.
  • The soup is part of a collection of “20 Soups You Can Make in 20 Minutes,” highlighting its quick preparation.
  • You can easily double the recipe for larger servings, and it can be stored in the refrigerator for about 4 days or frozen for up to 3 months.
  • This vegetarian soup is a great option for those seeking a gluten-free and Mediterranean diet-friendly meal.

Benefits of Kale, White Bean & Garlic Soup

This nutrient-rich soup is not only tasty but also good for you. It’s a great choice for a healthy meal. Kale, white beans, and garlic make a hearty soup perfect for winter. Kale is packed with fiber and antioxidants, helping to control blood sugar.

This delicious winter warming soup is perfect for cold months. Its simple soup recipe makes it easy to make. White beans add magnesium, fiber, and protein, helping to keep blood sugar levels down. This comfort food recipe warms you up and gives you a balanced mix of carbs, proteins, and fats.

This soup offers many benefits, thanks to its ingredients. Kale, white beans, and garlic make a hearty soup that’s both tasty and nutritious. It’s full of fiber and antioxidants, making it a great addition to a healthy diet.

Nutritional Value

The soup is full of vitamins A, C, and K, and minerals like calcium, potassium, and magnesium. White beans offer protein and fiber, while kale boosts antioxidants and vitamins.

Health Benefits

This delicious winter warming soup has many health benefits. It helps lower blood sugar and supports a healthy digestive system. The garlic, onion, and white beans support a healthy gut. Kale’s antioxidants reduce inflammation and improve health.

Seasonal Appeal

This comfort food recipe is ideal for winter. It’s a warm, nourishing bowl of soup that makes you feel cozy. The simple soup recipe is easy to make, and the ingredients are easy to find. It’s a quick and easy meal option.

Essential Ingredients Overview

To make a tasty and healthy soup recipe like kale, white bean & garlic soup, you need top-notch ingredients. The parmesan broth is key, made with parmesan rinds for a rich flavor. You can pick curly or lacinato kale and pair it with white beans like cannellini or great northern beans.

The soup’s heart is the aromatics: garlic and onions sautéed in olive oil. This brings out their natural taste. For an easy homemade soup, canned beans are a great shortcut. Don’t forget diced tomatoes, vegetable broth, and spices like thyme and rosemary.

Here are some tips for picking the best ingredients:
* Choose fresh kale with crisp leaves
* Use high-quality canned beans for convenience
* Select a variety of garlic that suits your taste
* Opt for low-sodium vegetable broth to reduce salt content

Kitchen Equipment You’ll Need

To make a tasty easy garlic soup recipe, you’ll need some basic kitchen tools. These tools will help you prepare your nutritious kale soup and hearty white bean soup easily. For a homemade soup for winter, having the right tools makes cooking fun and efficient.

Having the right equipment is key when cooking. Here are some basic tools you’ll need to start:

  • Large stock pot
  • Blender
  • Cutting board
  • Knife
  • Measuring cups and spoons

You might also want some optional equipment to make cooking easier. A slow cooker or an immersion blender can be great for making big batches of soup.

With the right kitchen tools, you can make a delicious and healthy soup for winter. Whether it’s a hearty white bean soup or a nutritious kale soup, the right equipment makes a big difference.

Equipment Description
Large stock pot Used for cooking the soup
Blender Used for blending the soup to a smooth consistency
Cutting board Used for chopping vegetables and herbs

Preparing Your Ingredients

To make a tasty homemade soup with kale, start by preparing your ingredients well. Clean and chop the kale, prepare the garlic and aromatics, and cook the white beans. You’ll need 3 cans of white beans, each 14 ounces, for a total of 42 ounces. This will be a key part of your comfort food.

Begin by cleaning and chopping 1 head of kale, which is about 10 to 12 ounces. You’ll also need to prepare 6 garlic cloves, minced, to add flavor. Plus, dice 1 sweet onion and 1 cup each of carrots and celery, making 2 cups of diced veggies. These will be the base of your hearty winter soups.

garlic soup recipe - homemade soup with kale

  • 3 cans of white beans, drained and rinsed
  • 1 head of kale, chopped
  • 6 garlic cloves, minced
  • 1 sweet onion, diced
  • 2 cups of diced vegetables (carrots and celery)

By following these steps and using these ingredients, you’ll make a delicious and comforting homemade soup with kale. It’s perfect for a cold winter’s day.

Step-by-Step Cooking Instructions

To start, sauté onions, carrots, and celery in a pot. This forms the base of your easy weeknight dinner. It also adds flavor to your plant-based recipe. After the vegetables are tender, add garlic and cook for a minute more.

Then, add white beans, vegetable broth, and kale to the pot. Bring it to a boil, then lower the heat. Let it simmer for about 20 minutes, or until the kale is tender. This soup is not only easy to make but also full of nutrients, ready in under 30 minutes.

Here are some tips to make cooking easier and faster:

  • Use pre-chopped vegetables to save time on prep work
  • Keep the vegetable broth warm before adding it to the pot
  • Stir the soup occasionally to prevent the kale from sticking to the bottom of the pot

By following these steps, you can make a tasty and nutritious meal for a weeknight dinner. This plant-based recipe is perfect for those seeking a delicious, easy-to-make soup option.

Mastering the Perfect Soup Consistency

Enjoying easy homemade soups means paying attention to consistency as much as flavor. Hearty winter soups should be thick and comforting but easy to eat. Adjusting the soup’s thickness is key to getting it just right.

Nutritious soup options, like plant-based recipes, use veggies, beans, and lean proteins. Simple soup meals can be tailored to your taste and diet. By tweaking seasoning and thickness, you can make a meal that’s both delicious and satisfying.

Thickness Adjustment Tips

To change your soup’s thickness, add more broth or water if it’s too thick. Or, simmer it a bit if it’s too thin. You can also thicken it with a slurry of flour or cornstarch. For example, mix 1 tablespoon of flour with 2 tablespoons of water, then add it to the soup and simmer.

Seasoning Guidelines

Once your soup is the right consistency, focus on seasoning. Hearty winter soups often use aromatic spices and herbs like garlic and kale. Add a pinch of salt, a few grinds of pepper, and some herbs to enhance flavor. Feel free to try different seasoning combinations to find your favorite.

garlic soup recipe - easy homemade soups

By following these tips, you can make delicious and nutritious soups for any time. Whether it’s a hearty winter soup or a light summer one, the secret is to experiment and have fun with ingredients and seasonings.

Soup Type Consistency Seasoning
Hearty Winter Soup Thick and comforting Aromatic spices and herbs
Light Summer Soup Thin and refreshing Citrus and herbs

Recipe Variations and Adaptations

Exploring kale, white bean & garlic soup opens up a world of possibilities. This healthy soup recipe can be tailored to fit many diets. Whether you follow a vegetarian, vegan, or gluten-free diet, you can make this easy homemade soup your own. Just a few changes can turn it into a delicious, nutritious meal for a cozy night in.

Here are some ways to make this recipe your own:

  • Try using different beans like Great northern or navy beans for a new taste and texture.
  • Replace kale with collards or Swiss chard for a change in your greens.
  • For a vegan option, skip animal products and use a plant-based broth.

By trying out these variations, you can craft a special kale, white bean & garlic soup. It will be tailored to your dietary needs and tastes. So, get creative and enjoy making this healthy soup your own!

Storage and Reheating Guidelines

Storing and reheating your homemade soups is key to keeping their taste and nutrients. You can keep your soups in the fridge for up to 5 days. Or, freeze them for up to 3 months.

For plant-based soups, use airtight containers to avoid contamination. When reheating, make sure the soup reaches 165°F (74°C) to be safe. You can reheat it in the microwave or on the stovetop, stirring often to avoid burning.

Here are some tips for storing and reheating your soups:

  • Let the soup cool to room temperature before refrigerating or freezing it.
  • Use airtight containers to prevent contamination and spoilage.
  • Label and date the containers so you can easily identify the contents and how long they’ve been stored.
  • Reheat the soup to an internal temperature of at least 165°F (74°C) to ensure food safety.

easy homemade soups

By following these guidelines, you can enjoy your soups longer. This includes hearty winter soups and plant-based recipes. You’ll keep their flavor and nutrients intact.

Serving Suggestions and Pairings

When serving your kale, white bean, and garlic soup, aim for a complete meal. This easy dinner pairs well with various breads, like crusty or whole wheat garlic bread. Adding a side salad, such as a Farro Salad or Wild Rice Pilaf with Roasted Sweet Potatoes, boosts flavor and texture.

For a tasty soup, try homemade croutons or a sprinkle of Parmesan cheese. If you prefer a plant-based recipe, skip the cheese and add roasted sweet potatoes or sautéed spinach. This easy weeknight dinner is quick to make, ready in under an hour.

  • Serve with a side of roasted vegetables, like broccoli or Brussels sprouts
  • Add some crusty bread or whole wheat crackers for dipping
  • Top with some chopped fresh herbs, like parsley or rosemary
  • Serve with a side salad, like a Beet Salad with Goat Cheese and Balsamic

These suggestions turn your kale, white bean, and garlic soup into a full and satisfying meal. It’s ideal for any weeknight.

Troubleshooting Common Issues

When making homemade soup with kale, you might face some common problems. These can ruin the taste and feel of your dish. One big issue is texture problems, which can happen if you cook the ingredients too long or too short.

A good winter soup needs the right mix of flavors and textures. If your soup is too thick, add a bit more vegetable broth. If it’s too thin, simmer it a bit longer to thicken it. This way, you get the perfect balance in your soup.

homemade soup with kale

Seasoning can also be a challenge. If your soup tastes too salty or not salty enough, you can fix it. Just add more salt, pepper, or herbs to taste. Taste the soup as you go and adjust the seasoning to make it just right.

Remember, using the best ingredients matters. Choose fresh kale and good-quality canned white beans. Also, don’t overcook the ingredients. This keeps the soup’s texture and taste great. Follow these tips to make a delicious, comforting soup for any time.

Time-Saving Tips and Prep Shortcuts

To make cooking easier and save time, use shortcuts like pre-chopped veggies and pre-cooked beans. This cuts down prep time, letting you enjoy your soup sooner. Whether it’s a nutritious kale soup or a hearty white bean soup, these tips help.

Here are some more ways to save time:

  • Use canned beans to cut cooking time from 1.5 hours to 30 minutes.
  • Chop kale or mince garlic ahead of time.
  • Cook in bulk and freeze for later, perfect for winter soup.
Prep Time Cook Time Servings
10 minutes 1 hour 30 minutes 6 people

With these shortcuts, you can quickly make your favorite soup. Whether it’s an easy garlic soup, a nutritious kale soup, or a hearty white bean soup, you’ll save time. It’s perfect for a quick, homemade soup in winter.

Conclusion

The kale, white bean & garlic soup is a tasty and healthy soup recipe. It’s perfect for adding to your cooking collection. With kale, white beans, and garlic, it’s a filling and vegetarian soup.

Making this easy homemade soup is simple. It has a flavor that everyone will love. Enjoy the cozy feeling of making this soup at home.

It’s a great way to make your meals more special. This soup will make your cooking even better. Try it and see how it changes your meals!

FAQ

What are the benefits of kale, white bean, and garlic soup?

This soup is full of vitamins, minerals, and nutrients. It’s a healthy and comforting meal for winter.

What are the key ingredients in the kale, white bean, and garlic soup?

The main ingredients are kale, white beans, garlic, onions, carrots, celery, and broth or stock.

What kitchen equipment is needed to make this soup?

You’ll need a large stock pot, a blender, and basic tools like knives and cutting boards. Optional tools can also help.

How do I prepare the ingredients for the kale, white bean, and garlic soup?

Clean and chop the kale, prepare the garlic and aromatics, and cook the white beans. Then, assemble the soup.

Can I make variations or adaptations to the kale, white bean, and garlic soup recipe?

Yes, you can make it vegetarian, vegan, or gluten-free by substituting ingredients.

How should I store and reheat the kale, white bean, and garlic soup?

Store it in the fridge or freezer. Reheat gently on the stovetop or in the microwave to keep the flavor and texture.

What are some common issues that may arise when making this soup?

Issues like texture or seasoning problems can be fixed by adjusting cooking or ingredient amounts.

Are there any time-saving tips or prep shortcuts for making the kale, white bean, and garlic soup?

Yes, use pre-chopped veggies and pre-cooked beans to make prep faster and save time.

Slow Cooker Turkey & Vegetable Soup: Comforting And Delicious


Slow Cooker Turkey & Vegetable Soup

What makes slow cooker turkey & vegetable soup perfect for a cold day? It’s the easy prep, healthy ingredients, and rich flavors. You can make a tasty and nutritious meal with this recipe. It’s great for using leftover turkey, ground turkey, or chicken, making it budget-friendly and quick for a weeknight dinner.

This soup stands out because of its mix of ingredients. It includes 7 cups of low-sodium chicken broth, 3 cups of shredded turkey, and veggies like carrots, celery, and onion. It’s a quick 10-minute prep, perfect for busy days. The slow cooker makes it a warm, comforting meal that’s both healthy and delicious.

Key Takeaways

  • You can make a delicious slow cooker turkey & vegetable soup using leftover turkey, ground turkey, or chicken.
  • This slow cooker turkey & vegetable soup recipe is an easy recipe that can be customized to suit your taste preferences.
  • The slow cooker method makes it a convenient and healthy option for a weeknight dinner or a cold fall day.
  • The recipe includes a blend of nutritious ingredients, including low-sodium chicken broth, turkey, and a variety of vegetables.
  • You can store the soup in the refrigerator for up to 3 days or freeze it for up to 3 months, making it a great option for meal prep.
  • The slow cooker turkey & vegetable soup is a healthy comfort food option that is high in protein, fiber, and vitamins, and low in calories and fat.

Understanding the Magic of Slow Cooker Turkey & Vegetable Soup

Exploring slow cooker recipes, you’ll find crockpot soup is a favorite for many. It’s quick to make and low in calories, great for those watching their diet. Slow cooker turkey and vegetable soup is a hearty meal, perfect for any time.

This recipe is simple and versatile. You can use leftover turkey to make a nutritious meal. The slow cooking process blends flavors, making the soup rich and satisfying. It’s ideal for a cozy weeknight dinner or a special occasion.

Some key benefits of this recipe include:

  • High-protein content from the turkey
  • Low-calorie count, making it an excellent option for those watching their weight
  • Rich in vitamins and minerals from the variety of vegetables used
  • Can be prepared in advance, making it a quick dinner idea

Slow cooker turkey and vegetable soup also helps reduce food waste and saves money. Its ease of preparation and delicious taste make it a favorite among many cooks.

Essential Ingredients for Your Soup

To make a tasty and healthy slow cooker turkey & vegetable soup, you need some key ingredients. You’ll need ground turkey breast, various vegetables like carrots, zucchini, and onion, and spices. Using fresh, healthy ingredients makes the soup both delicious and nutritious.

Here are the main ingredients you’ll need:

  • 1 pound of ground turkey breast
  • 3 large carrots, peeled and chopped
  • 2 large stalks of celery, chopped
  • 1 large onion, chopped
  • 1.5 teaspoons of crushed dried rosemary
  • 1 teaspoon of dried thyme
  • 2 bay leaves
  • 7 cups of low-sodium chicken broth

This recipe is great for a healthy comfort food meal. You can adjust the ingredients to fit your taste and dietary needs. Feel free to add other veggies like green peas, green beans, or diced sweet potatoes to the soup.

slow cooker turkey & vegetable soup

You can find these ingredients at your local grocery store. The recipe is easy to follow. With these ingredients, you can create a delicious and healthy slow cooker turkey & vegetable soup. It’s perfect for a weeknight dinner or a special event.

Preparing Your Kitchen and Equipment

To start making your delicious one-pot meal, a homemade soup, you need to prepare your kitchen. Gather all the necessary tools and ingredients for a smooth cooking process. Make sure your slow cooker is at least 6-quart to hold all the ingredients.

Having the right kitchen tools is key. You’ll need a slow cooker, a cutting board, a knife, and a can opener. A 6-quart slow cooker is best for this recipe. Cook your dish on low for 5-6 hours or on high for 3-4 hours.

Required Kitchen Tools

  • Slow cooker (at least 6-quart)
  • Cutting board
  • Knife
  • Can opener

Slow Cooker Size and Settings

For this recipe, use a 6-quart slow cooker. Adjust the settings to your liking, low or high, for the perfect soup. Always defrost frozen vegetables before adding them to your soup to avoid foodborne illnesses.

Proper Food Safety Measures

Defrosting frozen vegetables before adding them to your soup is essential for food safety. This simple step helps prevent foodborne illnesses. It ensures your one-pot meal is safe to eat.

Step-by-Step Vegetable Preparation Guide

To start, wash and peel the carrots, zucchini, and onion. This is key to making your soup safe and tasty. Cut the carrots into rounds, slice the zucchini in half, and chop the onion finely.

Choosing fresh veggies is vital for a low-calorie soup. The third web source offers a detailed guide on vegetable prep. Here’s a quick look at the steps:

  • Wash and peel the vegetables
  • Chop the carrots into bite-sized rounds
  • Slice the zucchini into halves
  • Chop the onion into small pieces

After prepping the veggies, add them to your slow cooker with other ingredients. Cook the onion for about 3 minutes until it’s soft. This helps your soup cook evenly and taste great.

healthy soup recipes

By following these steps, you can make a tasty, healthy soup. It’s perfect for a quick, easy meal. With the right ingredients and planning, you’ll enjoy a meal that’s good for you and delicious.

Turkey Preparation Techniques

Preparing your turkey for slow cooker turkey and vegetable soup is easy. You can use leftover turkey, ground turkey, or even chicken. Choose the turkey that fits your taste and the recipe best. For a hearty homemade soup, ground turkey breast is a great choice. It’s lean and perfect for crockpot turkey soup.

To start, pick the right turkey cuts. You can use boneless, skinless turkey breast or thighs. Trim any excess fat and cut the turkey into bite-sized pieces. This ensures it cooks evenly and quickly in your slow cooker.

crockpot turkey soup

Choosing the Right Turkey Cuts

Here are some tips for choosing the right turkey cuts:

  • Opt for leaner cuts like turkey breast or tenderloin for a healthier option
  • Use darker cuts like turkey thighs for more flavor and moisture
  • Consider using a combination of both lean and dark cuts for a balanced flavor

Proper Seasoning Methods

To add flavor to your turkey, mix herbs and spices that match your soup’s ingredients. Use salt, pepper, and herbs like thyme, rosemary, or sage. Season the turkey evenly and adjust to taste.

Layering Ingredients in Your Slow Cooker

To make a tasty and healthy slow cooker soup, layering ingredients is key. Start by sautéing the onion to add flavor. Then, add the turkey, veggies, and broth for a hearty soup.

Think about how long each ingredient takes to cook. For example, veggies need about 10 minutes before adding the rest. Use this time to prep the turkey and seasonings for extra flavor.

Here are some tips for layering:

  • Use 1 to 1 1/2 cups of chopped carrots, onion, and celery for added flavor and nutrients.
  • Add 3 to 4 quarts of turkey stock to create a rich and savory broth.
  • Season with 2 teaspoons of poultry seasoning, or more to taste, to enhance the flavor of your easy turkey soup recipe.

By following these tips and layering correctly, you’ll make a delicious and healthy slow cooker soup. It’s perfect for any occasion, whether you want a hearty vegetable soup or a comforting turkey soup.

healthy slow cooker soup

Mastering the Cooking Process

To make a tasty soup for winter, like turkey and veggie stew, you need to know how to cook it. You must set the right temperature and timing. Also, knowing when to add each ingredient is key. A one-pot turkey soup is easy to make in a slow cooker, making it a great choice.

Cooking the soup takes about 6 hours on low heat in a slow cooker. You can also use an Instant Pot, which cooks it in about 30 minutes. Remember, the total time includes waiting for the Instant Pot to pressurize and the natural release.

When making turkey and veggie stew, add ingredients at the right time. For example, add pasta like ditalini near the end to keep it from getting mushy. The recipe includes various veggies like celery, carrots, and green beans, which add flavor and nutrients.

To ensure your soup is cooked right, look for tender veggies and a rich broth. Check the turkey’s internal temperature to make sure it’s safe. With these tips, you can make a delicious, comforting soup for winter.

Customization and Variations

Exploring homemade slow cooker soup reveals the importance of customization. It’s all about making a healthy soup that you love. You can change up your easy crockpot meals with simple tweaks. Try using seasonal vegetables for a fresh flavor and color.

Adding pasta or rice can make your soup more filling. Or, swap out spices and seasonings for a unique taste. For instance, cumin adds a smoky flavor, while paprika brings a smoky depth. You can make it as healthy or indulgent as you prefer.

To really personalize your soup, list your favorite ingredients and flavors. This could include fresh herbs or exotic spices. Adjust cooking times and temperatures to get the perfect flavor and texture. This way, you’ll have a soup that’s just right for you.

Here are some ideas for making your soup your own:

  • Adding lean proteins like chicken or turkey for extra nutrition
  • Using low-sodium broth for a healthier twist
  • Experimenting with different types of milk or cream for a creamy texture

By customizing your soup, you can enjoy a variety of delicious and healthy meals. It’s all about making it your own.

Storage and Reheating Guidelines

Storing and reheating your homemade soup right is key to keeping it tasty and healthy. You can keep leftovers in an airtight container in the fridge for 4-5 days. Or, freeze it for up to 6 months. This makes it a great choice for winter meals.

To reheat, use the microwave or stovetop. If you have a slow cooker, make sure it’s half full for even heating. Always reheat the soup to 165°F or higher to kill off bad bacteria. This is vital for keeping your soup safe and healthy.

Here are some tips for reheating and storing your soup:

  • Use airtight containers to prevent contamination and spoilage
  • Label and date containers for easy identification
  • Reheat soup to an internal temperature of above 165°F
  • Avoid reheating soup too slowly to prevent bacterial growth

By following these tips, you can enjoy your homemade soup for longer. It stays flavorful and nutritious. This soup is perfect for any winter meal.

Conclusion: Enjoying Your Homemade Comfort in a Bowl

As you sit down to enjoy your homemade slow cooker turkey and vegetable soup, you’ll be struck by the comforting aroma. The satisfying flavors have developed over hours of gentle simmering. This one-pot meal is perfect for busy weeknights or cozy weekend gatherings.

The beauty of this slow cooker recipe lies in its simplicity and versatility. By letting the flavors meld together, you’ve created a comfort food masterpiece. It’s bursting with the natural sweetness of the vegetables and the tender, juicy turkey. Whether you’re serving it as a main course or as a hearty side, this soup is sure to become a family favorite.

FAQ

What are the health benefits of slow cooker turkey and vegetable soup?

This soup is packed with nutrients. It has fresh veggies and lean turkey. It’s a great choice for a healthy, comforting meal.

Why is the slow cooking process important for this recipe?

Slow cooking blends flavors for a rich soup. It also makes the turkey and veggies tender. This results in a hearty, flavorful dish.

When is the best time to serve this slow cooker turkey and vegetable soup recipe?

Serve it any time, like a busy weeknight or a special occasion. It’s perfect for warming up in winter or on a cold fall day.

What are the essential ingredients needed for this slow cooker turkey and vegetable soup?

You’ll need fresh veggies like carrots, zucchini, and onion. Also, ground turkey breast and spices. These ingredients make the soup tasty and nutritious.

What kitchen tools and equipment are needed to prepare this slow cooker turkey and vegetable soup?

You’ll need a slow cooker, cutting board, knife, and measuring cups. Also, wash and prep ingredients safely for a successful cook.

How do I properly prepare the vegetables for the slow cooker turkey and vegetable soup?

Wash, peel, and chop veggies evenly. This ensures they cook well and blend into the soup. It helps get the right texture and flavor.

What are the best techniques for preparing the turkey for this slow cooker recipe?

Choose the right turkey cuts and season them well. You might pre-cook the turkey before adding it to the slow cooker. This ensures it’s cooked right and adds flavor to the soup.

How do I layer the ingredients in the slow cooker for the best results?

Start with onions, sautéing them first. Then add other veggies and turkey. This releases flavors and blends ingredients for a harmonious soup.

What are some tips for mastering the cooking process of this slow cooker turkey and vegetable soup?

Watch the temperature and cooking times. Add ingredients at the right time. Look for signs like tender veggies and balanced flavors to know it’s ready.

How can I customize and vary this slow cooker turkey and vegetable soup recipe?

Try different veggies, spices, or adjust the thickness. Customizing lets you make it your own, fitting your taste.

How do I properly store and reheat the leftover slow cooker turkey and vegetable soup?

Store it in the fridge or freezer to keep it fresh. Reheat safely and efficiently to preserve the taste and texture.