Welcome To Soup Meets Bowl - The Best Soup Recipes & More

Warm Up With Our Latest Soup Recipes

Creamy Roasted Garlic & Zucchini Soup – Delicious And Healthy


Zucchini Soup

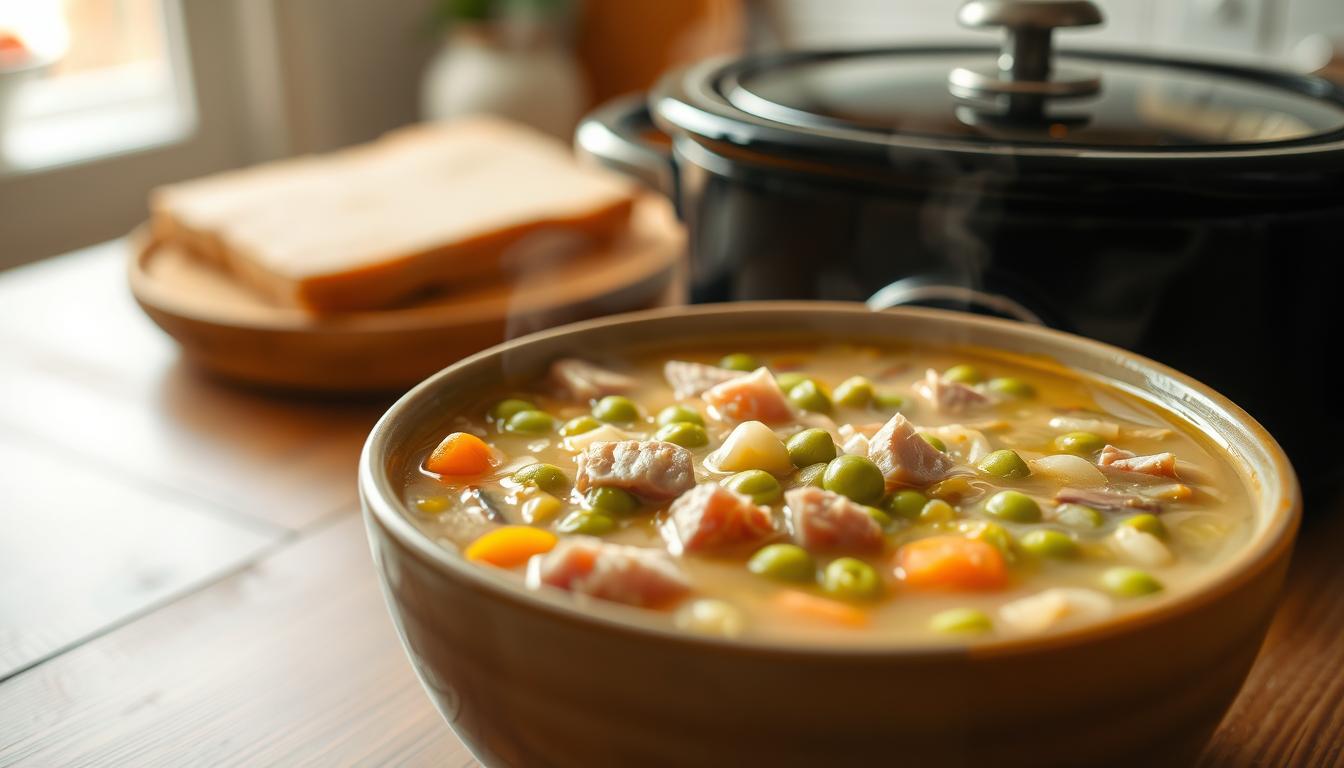
Are you ready to try a creamy roasted garlic & zucchini soup? It’s not just tasty but also full of nutrients. This garlic zucchini soup mixes roasted garlic with zucchini for a great taste and health boost. You can enjoy it as a main dish or a side, and it’s easy to make it your own.

This creamy zucchini soup with roasted garlic is simple yet elegant. It takes just 55 minutes to make, serving 8 people. Each serving has 138 kcal, 9g carbs, 4g protein, and 10g fat. It’s a healthy and filling choice.

Key Takeaways

  • You can make creamy roasted garlic & zucchini soup in under an hour, with a prep time of 10 minutes and a cook time of 45 minutes.
  • This recipe serves 8 people, with each serving containing 138 kcal and 9g of carbohydrates.
  • The combination of roasted garlic and zucchini creates a rich and creamy texture, perfect for a garlic zucchini soup.
  • You can customize the recipe to suit your taste and dietary preferences, making it a versatile option for any meal.
  • Creamy zucchini soup and roasted garlic soup are not only delicious but also packed with nutrients, including vitamin A, vitamin C, and potassium.
  • This recipe is easy to follow and requires minimal ingredients, including 2 heads of garlic, 4 pounds of zucchini, and 5 tablespoons of olive oil.

Understanding the Magic of Creamy Roasted Garlic & Zucchini Soup

Exploring homemade soup recipe reveals creamy soups’ rich history. Many cultures have shaped their evolution. This vegetarian soup combines roasted garlic and zucchini for a unique taste. It’s comforting and healthy, with just 45 calories per serving.

The zucchini’s natural sweetness and roasted garlic’s depth make this easy soup recipe special. You’ll need 700g of peeled zucchini, 2 cups of broth, and 1 cup of 0% fat milk. Adding diced carrots, celery, and cooked chicken breast boosts flavor and nutrition.

  • Low in calories: 45 calories per serving
  • Rich in vitamin C: 26 mg per serving
  • Good source of potassium: 435 mg per serving
  • Low in sodium: 401 mg per serving

This comfort food recipe is not only tasty but also full of nutrients. It’s a great choice for a healthy soup that’s simple to make and enjoy.

Health Benefits of Your Homemade Soup

As you make your healthy soup recipe, you’ll know it’s good for you. Zucchini and garlic, key ingredients, offer many health perks. Zucchini is low in calories and full of nutrients, making it perfect for a comfort food recipe. It has only 4.5g of net carbs per serving, ideal for those watching carbs.

This homemade soup is great for your health. Zucchini and garlic make it tasty and nutritious. Each serving has 136 calories, 6.9g of protein, and 9.5g of fat, making it both filling and healthy.

Zucchini Soup - healthy soup recipe

  • Boosting the immune system with the help of garlic’s antibiotic and antiviral properties
  • Reducing inflammation due to the anti-inflammatory properties of zucchini and garlic
  • Supporting digestive health with the fiber content of zucchini and other vegetables

Adding this healthy soup recipe to your meals is a smart choice. It’s a tasty and nutritious comfort food recipe that supports your health and wellbeing.

Essential Ingredients for Perfect Results

To make a tasty and healthy creamy vegetable soup, picking the right ingredients is key. For healthy soup ideas, the zucchini you choose is very important. Look for firm, heavy, and dark green zucchinis without soft spots or wrinkles.

Garlic is a big deal in a vegetarian soup recipe like this. The right garlic and how you prepare it can really change the flavor of your easy soup recipes. Roasting garlic makes it sweeter, which goes great with zucchini.

Selecting the Best Zucchini

Here are some tips for picking the best zucchini for your creamy vegetable soup:

  • Choose zucchinis that are heavy for their size
  • Opt for dark green zucchinis with no signs of yellowing
  • Avoid zucchinis with soft spots or wrinkles

Garlic Selection and Preparation

For the best taste, use top-quality garlic and prepare it right. Here’s a quick guide:

  1. Roast the garlic in the oven until tender and mashed
  2. Mince the roasted garlic and sauté it with onions
  3. Use the roasted garlic to add depth to your vegetarian soup recipe

creamy vegetable soup ingredients

Additional Ingredients Checklist

Here’s a list of extra ingredients you’ll need for your easy soup recipes:

Ingredient Quantity
Olive oil 1 tablespoon
Butter 2 tablespoons
Onion 1 small yellow onion, diced
Fresh parsley 2 tablespoons, chopped
Fresh thyme ½ teaspoon

With these ingredients and tips, you’ll be on your way to making a delicious and healthy creamy vegetable soup. It’s perfect for any time.

Kitchen Tools and Equipment Needed

To make the creamy roasted garlic and zucchini soup, you’ll need some key kitchen tools and equipment. A big soup pot is needed to cook the zucchini and garlic. You’ll also need a blender to blend the soup until it’s smooth. Other tools like a chef’s knife, cutting board, and measuring cups are also important.

Here’s a list of the main kitchen tools and equipment you’ll need:

  • A large soup pot for cooking the zucchini and garlic
  • A blender for pureeing the soup
  • A chef’s knife for chopping the onion and garlic
  • A cutting board for preparing the ingredients
  • Measuring cups for accurate measurements

Having the right kitchen tools and equipment makes cooking easier and faster. A good blender ensures the soup is smooth and creamy. A large soup pot helps cook the ingredients well. With these tools, you can make a tasty and healthy creamy roasted garlic and zucchini soup.

kitchen equipment

Mastering the Roasted Garlic Process

To get the best flavor from your garlic, roasting is key. You can roast garlic by wrapping it in foil and baking it. The best oven temperature is 400 degrees Fahrenheit. It takes about 30-40 minutes to roast.

Check if the garlic is done every 5 minutes after the first 30 minutes. You can also roast individual cloves for about 30 minutes. Roasted garlic can be stored in the fridge for 3-4 days or frozen for 2-3 months.

roasted garlic

  • Use 1-2 teaspoons of olive oil per head of garlic
  • Cook at 400 degrees Fahrenheit for 30-40 minutes
  • Check for doneness every 5 minutes after the initial cooking time
  • Store in the refrigerator for 3-4 days or freeze for 2-3 months

Temperature and Timing Guidelines

The right temperature and timing are important for roasting garlic. They affect the flavor and texture. Finding the perfect balance is key for your garlic recipe.

Storage of Roasted Garlic

After roasting, you can store garlic in different ways. You can refrigerate it, freeze it, or keep it in olive oil. These methods help preserve its flavor and texture.

Storage Method Duration
Refrigerator 3-4 days
Freezer 2-3 months
Olive Oil up to 2 weeks

Step-by-Step Soup Preparation Method

To make the creamy roasted garlic and zucchini soup, follow this guide. First, sauté garlic and zucchini in olive oil. Then, blend them with broth and cream for a creamy texture.

Start by sautéing 2 cloves of garlic and 1 large zucchini in 2 tablespoons of olive oil.

Next, add 1 cup of vegetable broth and 1/4 cup of heavy whipping cream. Simmer until the zucchini is tender, about 10-15 minutes.

Now, let’s outline the key ingredients and their quantities in a bulleted list:

  • 1 large zucchini
  • 3 cloves of roasted garlic
  • 2 tablespoons of olive oil
  • 1 cup of vegetable broth
  • 1/4 cup of heavy whipping cream

Blend the mixture in batches until smooth. Season with salt and pepper to taste. This recipe is a great example of a step-by-step guide to a delicious meal.

The following table summarizes the key information for preparing the soup:

Ingredient Quantity
Zucchini 1 large
Garlic 3 cloves
Olive oil 2 tablespoons
Vegetable broth 1 cup
Heavy whipping cream 1/4 cup

Achieving the Perfect Creamy Texture

To get the perfect creamy soup, mastering blending techniques is key. Blend the ingredients until they’re fully mixed and smooth. You can use an immersion blender or a regular blender for this.

The soup’s texture is also important. You can change it by adding more broth or cream. For a thicker soup, add less broth or more cream. For a thinner soup, add more broth. These steps help you get the perfect creamy soup.

Here are some tips for the perfect creamy texture:

  • Use a high-powered blender to ensure the ingredients are fully incorporated.
  • Blend the soup in batches if necessary, to avoid overloading the blender.
  • Adjust the consistency of the soup by adding more broth or cream.

Follow these tips and master blending techniques for the perfect creamy soup. Adjust the consistency to your liking. Don’t be afraid to try different ingredients and techniques to find your perfect creamy soup.

Ingredient Quantity
Broth 4 cups
Cream 1 cup

Serving Suggestions and Garnishing Tips

There are many ways to serve your creamy roasted garlic and zucchini soup. You can make it a main dish or a side. For -serving suggestions, try it with crusty bread or a green salad for a full meal.

For garnishing tips, add a dollop of cream or fresh herbs. This will make the soup look and taste better. You can also serve it with crackers or croutons for extra texture.

Here are some tasty side dishes that go well with this soup:

  • Garlic bread
  • Roasted vegetables
  • Grilled cheese sandwiches

Presenting your soup well is key. With these serving suggestions and garnishing tips, you’ll make a meal that looks and tastes great. Choose sides like gluten-free bread or a salad to add nutrition to your meal.

Storage and Reheating Guidelines

There are a few ways to store your creamy roasted garlic and zucchini soup. You can keep it in an airtight container in the fridge for up to 3 days. Or, you can freeze it for up to 3 months. Make sure to leave space at the top of the container for it to expand.

For optimal storage, consider dividing the soup into smaller portions. This makes reheating easier.

Reheating your soup is easy. You can use the microwave or the stovetop. In the microwave, heat for about 2 minutes per bowl, stirring halfway. On the stovetop, heat it over low heat, stirring often, until it’s warm.

Here are some tips for soup storage and reheating:

  • Label and date containers before storing in the refrigerator or freezer.
  • Reheat to an internal temperature of at least 165°F to ensure food safety.
  • Consider using a thermometer to check the temperature of the soup.

By following these guidelines, you can enjoy your creamy roasted garlic and zucchini soup for days. And you’ll make the most of your storage and reheating efforts.

Dietary Modifications and Variations

Exploring creamy roasted garlic and zucchini soup? You might wonder how to make it fit your diet. Luckily, this dish can be changed to meet many dietary needs. You can make it vegan or gluten-free with a few tweaks.

Want to cut down on gluten? Try using gluten-free flour or different broths. For a vegan version, swap dairy for coconut or almond milk.

Here are some tips for changing the recipe:

  • Choose vegetable broth for a vegan option
  • Play with spices and herbs to match your taste
  • Try different milks for a gluten-free or vegan twist

Adapting the recipe lets you make a version that’s just right for you. Whether you’re after vegan or gluten-free options, or just want to try new flavors, there’s a lot to explore.

Conclusion

By the end of this article, you’ve learned how to make a tasty and healthy creamy roasted garlic and zucchini soup. This recipe is great for your taste buds and your health. Just follow the steps and use the right ingredients to enjoy this comforting soup anytime.

The mix of roasted garlic, fresh zucchini, and spices makes a delicious flavor balance. It’s creamy and packed with nutrients, making it a perfect meal. Serve it as a starter or main dish, and everyone will love it.

As you try new recipes and grow your cooking skills, remember what you learned from this soup. You can change it to fit your taste and diet, making it a favorite. Keep exploring flavors and making your own special dishes.

FAQ

What is the history behind creamy soups and the combination of roasted garlic and zucchini?

Creamy soups have been loved for a long time. The mix of roasted garlic and zucchini is special. It combines the zucchini’s sweetness with the garlic’s depth, making a dish that’s both tasty and comforting.

What are the health benefits of making homemade soup with zucchini and garlic?

Making homemade soup with zucchini and garlic is good for you. It’s not just tasty but also packed with nutrients. These nutrients help fight inflammation and boost your immune system. Using fresh ingredients makes it a healthy and cozy meal.

What are the essential ingredients needed for the creamy roasted garlic and zucchini soup?

The key ingredients are zucchini, garlic, broth, and cream. Choosing fresh zucchini and preparing the garlic right is key to a great soup.

What kitchen tools and equipment are required for making the soup?

You’ll need a big soup pot, a blender, a knife, a cutting board, and measuring cups. These tools help cook the zucchini and garlic and blend the soup to the right consistency.

How do you properly roast the garlic for the soup?

Roasting garlic is a must for this soup. Getting the temperature and timing right brings out its sweetness and flavor. The section also talks about storing roasted garlic for later.

How do you achieve the perfect creamy texture for the soup?

Getting the soup creamy is important. Blending it right is key. The section gives tips on blending and adjusting the soup’s consistency with broth or cream.

What are the serving suggestions and garnishing tips for the creamy roasted garlic and zucchini soup?

The soup is great as a main dish or side. It suggests sides like bread or a salad. It also offers ideas for garnishing with herbs or a dollop of cream.

How do you store and reheat the creamy roasted garlic and zucchini soup?

The soup can be kept in the fridge for days or frozen. The section gives tips on reheating, including the best temperature and timing.

What dietary modifications and variations can be made to the creamy roasted garlic and zucchini soup?

The recipe can be made vegan and gluten-free. It also talks about adjusting the spice level by adding more garlic or herbs.

Delicious Slow Cooker Split Pea & Ham Soup


Slow Cooker Split Pea & Ham Soup

What makes slow cooker split pea & ham soup perfect for a cold day? It’s the easy prep, the mix of flavors, and its health benefits. This soup is a great choice for anyone wanting a tasty, simple meal. It only takes 5 minutes to prepare and cooks for 4 hours, making it ideal for busy days.

Introduction to Slow Cooker Split Pea & Ham Soup

Slow cooker split pea & ham soup is a classic comfort food. It’s easy to make and great for any season. Its creamy texture and mix of split peas, ham, and veggies make it a favorite. It’s a quick, healthy meal option.

Key Takeaways

  • You can prepare a delicious slow cooker split pea & ham soup with minimal effort.
  • This homemade split pea soup recipe is perfect for busy days, with a prep time of just 5 minutes.
  • Slow cooker split pea & ham soup is a comfort food classic that’s easy to make and perfect for any time of the year.
  • This soup is a healthy, nutritious option, with a single serving containing approximately 295 kcal and 20g of fiber.
  • You can store the soup in the refrigerator for up to 1 week or freeze it for up to 3 months.
  • Slow cooker split pea & ham soup is a versatile dish that can be customized to suit your tastes and dietary preferences.

Understanding the Classic Appeal of Split Pea & Ham Soup

When you dive into comfort food, you’ll find the classic split pea and ham soup. It’s a dish loved for centuries. Its simplicity, health benefits, and warmth make it a favorite for cozy nights.

The history of split pea soup goes back to ancient times. It’s found in many cultures worldwide. This soup is loved for its easy ingredients and long-lasting appeal.

Some key benefits of this soup include:

  • It’s high in protein and fiber, making it nutritious and filling.
  • It’s low in calories and fat, great for a healthy meal.
  • It’s rich in vitamins and minerals like vitamin A, C, and potassium.

Adding this soup to your meals can boost your health. It helps lower cholesterol and provides vital nutrients. Its history, simplicity, and health benefits make it a beloved dish.

Essential Equipment for Perfect Results

To make delicious slow cooker split pea and ham soup, you’ll need the right cooking equipment. A slow cooker, also known as a crockpot, is the most essential piece of kitchen essentials for this recipe. With a slow cooker, you can cook your soup over a long period without constant monitoring, making it easy to prepare and cook.

When choosing a slow cooker, consider the size of the recipe you’re making. For this split pea and ham soup, a 5.5L (6 Quart) slow cooker is recommended. This size allows for the right amount of liquid and ingredients to cook evenly. Other necessary equipment includes a cutting board, knife, and measuring cups.

In addition to a slow cooker, you’ll need some basic kitchen essentials like a can opener, wooden spoon, and ladle. These tools will help you prepare and serve your soup with ease. By having the right equipment, you’ll be able to focus on the cooking process and enjoy a delicious, homemade meal.

Some popular slow cooker brands include Cuisinart, Hamilton Beach, and Black+Decker. When selecting a slow cooker, consider the features that are important to you, such as programmable timers, temperature control, and ease of cleaning. By investing in a good quality slow cooker and using it with other essential kitchen equipment, you’ll be able to make a variety of delicious meals, including this tasty split pea and ham soup.

Key Ingredients for Slow Cooker Split Pea & Ham Soup

To make a delicious slow cooker split pea and ham soup, you need the right ingredients. You’ll need split peas, ham, and other ingredients that add flavor and texture. Recipes from SpendWithPennies and Emily Bites show that using quality ingredients is key.

Split peas come in green or yellow, each with its own taste and health benefits. You can use a meaty ham bone or leftover ham for flavor. Essential ingredients include diced celery, carrots, onion, and garlic for flavor and aroma.

Here is a list of the main ingredients you will need:

  • 1 pound of split peas
  • 2 cups of diced ham or 1 ham hock
  • 1 quart of chicken stock
  • 2 cups of water
  • 1 cup of diced celery
  • 2 cups of diced carrots
  • 3 cloves of garlic
  • 1-2 bay leaves
  • 1 teaspoon of smoked paprika
  • 2 teaspoons of kosher salt

With these ingredients, you can make a hearty slow cooker split pea and ham soup. It’s perfect for a cold winter’s day. The soup is rich in protein, fiber, and vitamins, making it a nutritious meal.

Follow this easy recipe and use the right ingredients for a delicious meal. This soup is great for any occasion, whether you need a quick lunch or a hearty dinner.

Ingredient Quantity
Split Peas 1 pound
Diced Ham 2 cups
Chicken Stock 1 quart
Water 2 cups

Preparing Your Ingredients

To begin your slow cooker split pea and ham soup, start by preparing your ingredients. Rinse 1 (16-ounce) package of dried split peas. This is a key step in ingredient preparation. Next, dice 3 medium carrots, 1/2 cup coarsely chopped onion, and 2 stalks of celery.

Also, mince 2 cloves of garlic and chop 1/4 cup of fresh parsley or use 2 teaspoons of dried parsley flakes.

Remember, split peas cook well without soaking, unlike dry beans. But, soaking them for at least four hours or overnight can shorten cooking time. For this recipe, you’ll need 6 cups of hot water or broth, a common need in many slow cooker recipes.

Here’s a summary of the ingredients you’ll need:

  • 1 (16-ounce) package of dried split peas
  • 3 medium carrots
  • 1/2 cup coarsely chopped onion
  • 2 stalks of celery
  • 2 cloves of garlic
  • 1/4 cup of fresh parsley or 2 teaspoons of dried parsley flakes
  • 1 large bay leaf
  • 1/2 teaspoon of freshly ground black pepper
  • 1 tablespoon of seasoned salt
  • 6 cups of hot water or broth

slow cooker recipes

By following these cooking tips and preparing your ingredients correctly, you’ll be well on your way to making a delicious slow cooker split pea and ham soup. Always use fresh and high-quality ingredients for the best flavor and texture in your slow cooker recipes.

Step-by-Step Cooking Instructions

To start cooking your slow cooker split pea and ham soup, prepare all the ingredients first. You’ll need 16 oz of dried green split peas, 3 garlic cloves, and 1 cup of chopped onion. Also, 1 cup of chopped celery, 1 cup of chopped peeled carrots, 16 oz of cooked ham, 4 cups of lower sodium chicken broth, and 2 cups of water are required. With these ingredients, you can easily make a tasty and healthy meal.

Slow cooker recipes work best when ingredients cook slowly over time. For this recipe, cook the soup on low for 8 hours. This ensures the split peas are tender and the flavors blend well. Cooking with a slow cooker is all about patience and letting it do the work.

Initial Setup

The initial setup is easy. Just add all the ingredients to the slow cooker, stir, and cover it. Make sure it’s on low heat and cook for 8 hours.

Cooking Process

Let the slow cooker handle the cooking. The soup will thicken as it cools. You can also adjust the seasoning to taste. Slow cooker recipes usually take 6 to 8 hours, so you can plan ahead and enjoy a ready-to-eat meal.

Timing Guidelines

Timing is key for slow cooker recipes. Start cooking the soup 8 hours before you want to eat it. This way, it will be perfectly cooked and ready when you are. By following these steps and timing, you’ll have a delicious and easy meal with your slow cooker.

Achieving the Perfect Consistency

Getting the right soup consistency in slow cooker split pea and ham soup is key. As it cooks, the peas break down, making the soup creamy and hearty. But, the soup’s consistency can change, getting thicker after it cools. To fix this, you can add water or cook it longer.

Many cooking sites, like SpendWithPennies, suggest cooking the soup for 30 minutes to 1 hour to thicken it. This makes the soup more comforting. For a thinner soup, add a bit of water or chicken broth and cook for 15-30 minutes more.

Here are some slow cooker tips for the perfect consistency:

  • Use a 6-quart or larger slow cooker for even cooking and to avoid too thick soup.
  • Cook the soup on low for 8-10 hours or high for 4-6 hours. This ensures the peas are tender and the soup is thick.
  • Stir the soup now and then to stop the peas from sticking to the bottom.

soup consistency

By using these tips and adjusting cooking time and liquid, you can get the perfect soup consistency. Don’t forget to taste and adjust the seasoning. Enjoy your delicious and comforting soup.

Consistency Adjustment
Thicker Cook for an additional 30 minutes to 1 hour
Thinner Add a small amount of water or chicken broth and cook for an additional 15-30 minutes

Seasoning Tips and Flavor Enhancements

Exploring slow cooker split pea and ham soup reveals the power of seasoning tips and flavor enhancements. A few tweaks can turn this classic dish into a rich, satisfying experience. Remember, balance is key when seasoning. Too much salt can overwhelm, while vinegar or citrus can boost flavors.

Culinary surveys show that people often use 3-5 seasonings in a soup. Garlic and onion, used in 75% of recipes, add depth. Try herbs and spices like cumin, smoked paprika, or thyme for a unique taste. For spice, add a jalapeno or soak New Mexico chillies in boiling water for 30 minutes.

  • Adding a squeeze of fresh lemon juice to brighten the flavors
  • Using cracked black peppercorns to add a subtle kick
  • Incorporating chopped fresh parsley or cilantro for a fresh and herbaceous note

These tips can make your slow cooker split pea and ham soup delicious and satisfying. It’s great for any occasion, from a cozy weeknight meal to a hearty soup for a gathering. This versatile dish is sure to impress.

Serving Suggestions and Pairings

When serving your slow cooker split pea and ham soup, think about different serving suggestions. You can pair it with sides like crusty bread, salads, or other dishes. For a full meal, try it with toasted baguette, honey wheat bread, cornbread, or fluffy biscuits.

Some excellent soup pairings include a green salad, roasted veggies, or cornbread. You can also add crusty bread and cheese or charcuterie for a bigger meal. The goal is to match flavors without overwhelming the soup.

Here are some popular pairing options:

  • Freshly toasted baguette
  • Honey wheat bread with soft whipped butter
  • Cornbread
  • Fluffy biscuits

serving suggestions

The right serving suggestions and soup pairings depend on your taste and the event. With a bit of creativity, your slow cooker soup can become a tasty meal for any time.

Storage and Reheating Guidelines

After making your slow cooker split pea and ham soup, it’s key to store it right. This keeps it fresh and tasty. SpendWithPennies and Emily Bites suggest refrigerating leftovers for up to 2 days. When you reheat, add a bit of water because it thickens after cooling.

For longer storage, freezing is a good option. Portion the soup into airtight containers or freezer bags. This makes thawing and reheating easy. Frozen soup can last up to 3 months. Always heat it to 165°F to keep it safe to eat.

  • Label and date your containers or bags before freezing
  • Reheat soup gently over low heat, stirring occasionally
  • Add a splash of water or broth if the soup becomes too thick

By following these tips, you can enjoy your soup for longer. It keeps the flavor and nutrients intact.

Troubleshooting Common Issues

When making slow cooker split pea and ham soup, you might face some common problems. These issues can affect how good your soup tastes. Some common issues include the soup being too thick or too thin, flavors not mixing well, and other soup problems that can happen while cooking.

To fix these common issues, knowing the causes and how to correct them is key. If your soup is too thick, adding more stock or water can help. If it’s too thin, simmering it longer can reduce the liquid and make the flavors stronger. Troubleshooting these problems takes patience and attention to detail. But with practice, you can make a perfect bowl of slow cooker split pea and ham soup every time.

Here are some tips to help you troubleshoot common issues:

  • Check the soup’s consistency often and adjust the cooking time or liquid as needed.
  • Taste and adjust the seasoning often to make sure the flavors are balanced and tasty.
  • Be patient and don’t rush the cooking process, as this can affect the soup’s texture and flavor.

troubleshooting soup problems

By following these tips and being aware of common issues, you can make a delicious and satisfying bowl of slow cooker split pea and ham soup. Remember to stay calm and patient when troubleshooting any problems. Don’t hesitate to experiment and try new things to get the perfect flavor and texture.

Recipe Variations and Dietary Modifications

Exploring slow cooker split pea and ham soup can lead to wanting to change the recipe. You can make it fit your dietary needs by trying different variations. For example, you can make a vegetarian version by using a plant-based ham or leaving it out.

Many sources, like Emily Bites and SpendWithPennies, show how to adjust the recipe for different diets. You can make it gluten-free by using special broth and checking the ingredients. These changes let you enjoy a tasty and healthy soup, no matter your dietary limits.

Variations for Different Diets

  • Vegetarian: substitute ham with a plant-based alternative or omit it
  • Gluten-free: use gluten-free broth and be mindful of ingredients
  • Vegan: replace ham with a vegan alternative and use plant-based broth

Trying out these variations lets you make a slow cooker split pea and ham soup that fits your taste and diet. Whether you’re vegetarian, gluten-free, or vegan, you can enjoy this comforting soup.

Benefits of Adaptation

Changing the recipe for different diets makes the soup more inclusive. It also lets you try new flavors and ingredients. Adding vegetarian or vegan options can make your diet more interesting and help you find new favorites. Plus, it helps you stay on track with your dietary goals and get the nutrients you need.

Dietary Modification Benefits
Vegetarian Increased variety, reduced saturated fat
Gluten-free Improved digestion, reduced inflammation
Vegan Increased antioxidant intake, reduced environmental impact

Conclusion

Discovering the joy of making slow cooker split pea soup is truly special. It not only warms the heart but also brings many health benefits from the split peas. This simple yet tasty recipe will make your family and friends love it.

Sharing meals is at the heart of cooking. Invite your loved ones to enjoy the soup together. It’s perfect for any occasion, from cozy weekends to weeknight dinners. Bon appétit!

FAQ

What is the history of split pea soup?

Split pea soup has a long history. It dates back to ancient times. The ancient Greeks and Romans loved it for its health benefits and affordability.

Why is split pea and ham soup considered a comfort food classic?

Split pea and ham soup is a beloved classic. It’s hearty and filling, making it a warm and comforting dish. The mix of split peas and ham creates a delicious flavor that many enjoy.

What are the health benefits of split peas?

Split peas are very nutritious. They are full of fiber, protein, and vitamins and minerals. They are a great plant-based protein source and help keep your diet balanced.

What equipment is needed to make slow cooker split pea and ham soup?

You need a slow cooker for this soup. It cooks the soup slowly, making it rich and tender.

What are the best types of split peas to use for this recipe?

You can use green or yellow split peas. Each type adds different flavors and textures. Try them to see which you like best.

What are the best options for ham in split pea soup?

You can use diced ham, ham hocks, or leftover ham. Choose a high-quality ham for the best flavor.

How do I prepare the ingredients for slow cooker split pea and ham soup?

Preparing the ingredients is easy. Rinse the split peas, chop the ham and veggies, and measure the spices. Proper preparation makes cooking smooth.

How do I achieve the perfect consistency for slow cooker split pea and ham soup?

Adjust the soup’s consistency as you like. It may thicken as it cools. Add water or cook longer to get the right texture.

What are some tips for seasoning and enriching the flavor of slow cooker split pea and ham soup?

Try adding spices, herbs, or a bit of acidity. These can enhance the flavor and make your soup unique.

How should I serve slow cooker split pea and ham soup?

Serve it with crusty bread, like sourdough or dinner rolls. A fresh salad or other sides also work well for a complete meal.

How do I store, reheat, and freeze slow cooker split pea and ham soup?

Store it in airtight containers and reheat gently. Follow freezing and thawing tips to enjoy it later.

What are some common issues that can arise when making slow cooker split pea and ham soup, and how can I troubleshoot them?

Issues like too thick or thin soup, or split peas not softening can happen. Knowing how to fix these problems ensures your soup turns out great every time.

What variations and dietary modifications can I make to the slow cooker split pea and ham soup recipe?

For a vegetarian version, skip the ham or use a plant-based protein. You can also make it gluten-free for more people to enjoy.

How to Make Delicious Blueberry Bread


Blueberry Bread

What makes the perfect blueberry bread? Can you really make it easy? You’re about to find out. Homemade blueberry bread is a great way to start your day. With the right ingredients and techniques, you can make a moist and flavorful loaf. It’s perfect for breakfast, snack, or dessert.

The Magic of Homemade Blueberry Bread

With the right recipe, you can make a delicious and healthy treat. It’s packed with nutrients and flavor. Use fresh and high-quality ingredients like 1 1/2 cups of fresh blueberries and 1 1/2 cups of all-purpose flour.

A blend of sugar, eggs, and milk is key. By following a simple recipe, you can make homemade blueberry bread for any occasion.

Key Takeaways

  • You can make delicious blueberry bread with an easy blueberry bread recipe
  • Homemade blueberry bread is a great way to start your day
  • The best blueberry bread recipe balances sweetness and richness
  • Fresh and high-quality ingredients are essential for a great blueberry bread
  • You can customize your blueberry bread recipe to suit your tastes and preferences
  • Blueberry bread can be a healthy and nutritious treat when made with the right ingredients

The Magic of Homemade Blueberry Bread

When you take a bite of freshly baked fresh blueberry bread, you feel a deep satisfaction. The mix of sweet and tangy flavors, with its soft texture, is irresistible. Homemade blueberry bread stands out because it uses healthy blueberry bread ingredients like fresh blueberries. These are full of nutrients and antioxidants.

Homemade blueberry bread also lets you enjoy a delicious blueberry bread just the way you like it. With just a few ingredients and basic kitchen tools, you can make a delicious loaf. It’s perfect for breakfast, a snack, or dessert. Making homemade blueberry bread is rewarding, whether you’re experienced or new to baking.

  • Control over ingredients and portion sizes
  • Customization of flavors and textures
  • Potential health benefits from using fresh and wholesome ingredients

Given these benefits, it’s clear why homemade blueberry bread is loved by many. So, why not try making it yourself and enjoy the magic of freshly baked fresh blueberry bread?

Choosing the Perfect Ingredients

To make a delicious blueberry bread loaf, you need to choose the perfect ingredients. The quality of your ingredients can make a big difference in the taste and texture of your moist blueberry bread. Fresh blueberries are best, but frozen ones work too if they’re out of season. Just make sure to measure them right to avoid a dense and dry bread.

Here are some key ingredients to consider when making your blueberry quick bread:

  • 1 1/2 cups of fresh blueberries
  • 2 cups of all-purpose flour
  • 3/4 cup of sugar
  • 1/2 cup of milk
  • 1/2 cup of oil
  • 2 teaspoons of baking powder
  • 1 teaspoon of vanilla extract

Using the right ratio of ingredients is also important. For example, the ratio of blueberries to flour should be about 1:1. This will help you achieve a moist and flavorful loaf. Remember to measure your ingredients carefully to ensure the best results for your blueberry bread loaf.

blueberry bread loaf

By choosing the perfect ingredients and following a few simple tips, you can make a delicious and moist blueberry bread that is perfect for any occasion. Whether you are making a blueberry quick bread or a more traditional blueberry bread loaf, the key is to use high-quality ingredients and to measure them carefully.

Mastering the Basic Blueberry Bread Recipe

To make the best blueberry bread, start with a reliable recipe. A good recipe mixes dry and wet ingredients carefully. This creates a smooth batter. Remember, don’t overmix to avoid a dense bread.

Expert bakers say quality ingredients are key. Use fresh or frozen blueberries and mix the batter gently. This way, you’ll get a moist and delicious loaf. It’s perfect for breakfast or a snack.

blueberry bread recipe

  • Use 2 cups of fresh or frozen blueberries for the best flavor and texture.
  • Don’t overmix the batter, as this can lead to a dense bread.
  • Use a combination of granulated sugar and brown sugar for a rich and caramel-like flavor.
  • Add a hint of lemon zest and lemon juice for a bright and citrusy flavor.

Follow these tips and a simple recipe to make delicious blueberry bread. It’s great for any occasion. Whether you’re experienced or new to baking, blueberry bread is a tasty project.

Fresh vs. Frozen Blueberries: Making the Right Choice

Choosing between fresh or frozen blueberries is key for a tasty blueberry loaf. Fresh blueberries are great for looks and taste, with a sweet and tangy flavor. Frozen blueberries are available all year and can taste just as good.

For baking, blueberry bread with streusel topping works with both fresh and frozen blueberries. But frozen ones might make the dough wetter. To fix this, dust frozen blueberries with flour before mixing. This trick helps keep your simple blueberry bread moist and tasty.

Here are some key things to think about when picking between fresh and frozen blueberries:

  • Fresh blueberries are pricier and only available for a short time
  • Frozen blueberries are cheaper and available all year
  • Frozen blueberries might need recipe changes because they release more liquid
  • Flour-coating frozen blueberries stops them from sinking and losing color

blueberry bread

The choice between fresh and frozen blueberries depends on what you like and what you want to achieve. With a few tweaks, both can make a delicious blueberry loaf. By weighing the pros and cons, you can make a blueberry bread with streusel topping that will wow everyone.

Step-by-Step Baking Process

To make a tasty blueberry bread loaf, follow a simple baking process. First, preheat your oven to 350°F. Then, grease and flour the loaf pan for easy removal. This recipe makes a healthy blueberry bread perfect for any time.

Start by getting your ingredients ready. You’ll need 2 cups of all-purpose flour, 1 teaspoon of baking soda, and 1/2 teaspoon of salt. Mix these dry ingredients in a bowl and set them aside. Next, mix 1/2 cup of unsalted butter, softened, with 2/3 cup of granulated sugar and 1/4 cup of brown sugar.

In another bowl, whisk together 2 large eggs, 1/2 cup of sour cream, and 1 and 1/2 teaspoons of vanilla extract. Add 1 and 1/2 cups of fresh blueberries to the mix and fold them in gently. Pour the batter into the loaf pan and smooth the top.

Proper Mixing Order

When mixing, follow the right order. Start with the dry ingredients, then mix the wet ingredients separately. Gradually add the dry ingredients to the wet, mixing until just combined. Avoid overmixing to prevent a dense loaf.

Folding in Blueberries

Folding in blueberries requires care. Add the blueberries to the batter and fold them in with a rubber spatula. Be gentle to avoid crushing the blueberries and losing their juice.

Baking Temperature and Timing

Bake the blueberry bread at 350°F for 60-65 minutes. Cover it with foil at the 30-minute mark to prevent overbrowning. After baking, let it cool in the pan for 10 minutes before transferring it to a wire rack. Your healthy blueberry bread is now ready to enjoy.

Creating the Perfect Streusel Topping

To make the best blueberry bread, a delicious streusel topping is key. A streusel topping is a mix of flour, sugar, and butter that’s crumbly and tasty. You’ll need ⅔ cup of sugar, ½ cup of all-purpose flour, and ⅓ cup of cold unsalted butter. Mix these until you get a crumbly mix.

The right mix of butter and sugar is important. A 1:2 ratio is ideal, meaning ⅓ cup of butter to ⅔ cup of sugar. You can tweak this to your liking, but this ratio is a good start. The streusel topping makes blueberry quick bread special.

blueberry bread recipe

When baking blueberry bread, use top-notch ingredients. Fresh or frozen blueberries are best. Making blueberry bread with love and the freshest ingredients creates a treat for any time.

Troubleshooting Common Issues

When making easy blueberry bread, you might face some common problems. These can affect how your blueberry loaf turns out. To make sure your blueberry bread with streusel topping is perfect, it’s key to know how to fix these issues.

A soggy bottom is a common problem. To avoid this, let the bread cool in the pan for 10-20 minutes before moving it to a wire rack.

Sunken blueberries can also happen. To prevent this, gently fold in the blueberries into the batter. Don’t overmix the batter. Using the wrong method to measure flour can make your bread dense, by up to 40%.

Here are some tips to solve these issues:

  • Use the correct pan size to ensure even baking
  • Don’t overmix the batter to prevent dense texture
  • Allow the ingredients to come to room temperature before baking

By following these tips, you can make a delicious easy blueberry bread. It will impress your family and friends with its streusel topping.

Storage and Serving Suggestions

After baking a tasty blueberry bread, it’s key to store it right. This keeps it fresh and flavorful. Store your homemade blueberry bread in an airtight container at room temperature for up to 4 days. For longer storage, freeze it for up to 3 months.

To keep your best blueberry bread recipe fresh, store it in a cool, dry place. Wrap it tightly in plastic wrap or aluminum foil and refrigerate for up to 1 week. If freezing, wrap it tightly and put it in a freezer-safe bag.

When ready to serve, thaw your blueberry bread at room temperature or reheat in the oven. Here are some serving ideas:

  • Slice and serve with butter or jam
  • Toast and top with fresh blueberries and whipped cream
  • Use as a base for French toast or bread pudding

Follow these tips to enjoy your homemade blueberry bread longer. Always check the bread for spoilage before eating.

Conclusion: Enjoying Your Fresh-Baked Blueberry Bread

Baking a delicious blueberry bread is a fun and rewarding experience. You can enjoy it at any time of the day. By using fresh and high-quality ingredients, you can make a healthy blueberry bread loaf to share with family and friends.

For a successful blueberry bread, measure and mix ingredients carefully. Fold in the blueberries gently. Bake at the right temperature and time. Try adding a streusel topping or using frozen blueberries to find your favorite.

Enjoy your blueberry bread warm from the oven. Savor the soft, moist crumb and the juicy blueberries in every bite. Share it with loved ones and create memories around the table with this healthy treat.

FAQ

What are the health benefits of blueberries in baking?

Blueberries are packed with fiber, vitamin C, and vitamin K. They’re a superfood that’s good for you.

What essential kitchen equipment is needed to make blueberry bread?

You’ll need a loaf pan, mixing bowls, and a hand mixer or stand mixer. Don’t forget basic tools like a spatula and measuring cups.

How do I choose the perfect ingredients for blueberry bread?

Pick fresh, high-quality blueberries, flour, sugar, and spices. Measuring them right is key for a moist, tasty loaf.

What is the best way to mix the batter for blueberry bread?

Mix dry and wet ingredients carefully for a smooth batter. Avoid overmixing to get the perfect consistency.

Should I use fresh or frozen blueberries for blueberry bread?

Both fresh and frozen blueberries work well. It comes down to what you prefer and what’s available.

How do I bake the perfect blueberry bread?

Follow a step-by-step guide for mixing, folding in blueberries, and baking. Keep an eye on temperature and timing.

How do I make a delicious streusel topping for blueberry bread?

Making a great streusel topping is simple. Use the right ingredients and mix them correctly for a crumbly, tasty topping.

How can I troubleshoot common issues with blueberry bread?

Issues like a soggy bottom or dense texture can be fixed. Check out the guide for tips and solutions.

How should I store and serve blueberry bread?

Store blueberry bread at room temperature to keep it fresh. Freeze it for later. Enjoy it with loved ones.

Slow Cooker Beef & Barley Soup: Hearty And Flavorful


Slow Cooker Beef & Barley Soup

Wondering what to make for a cozy meal? Slow cooker beef & barley soup is perfect for cold days. It’s a comforting dish that’s easy to make in a slow cooker. Enjoy a warm bowl of this soup, a great choice among easy slow cooker recipes.

Slow cooker beef & barley soup is a hearty choice. It takes 6 hours to cook and serves 1 cup. Each serving has 353 kcal, 23g carbs, and 27g protein. You’ll need a 7-quart slow cooker, 2 pounds of beef, 6 cups of broth, and ¾ cup of barley.

Key Takeaways

  • You can make slow cooker beef & barley soup in a 7-quart slow cooker with 2 pounds of beef chuck roast and ¾ cup of pearl barley.
  • This soup is a great example of comfort food recipes and hearty soup recipes that can be made easily in a slow cooker.
  • Slow cooker beef & barley soup is an excellent option for chilly days, with a cooking time of 6 hours and a serving size of 1 cup.
  • You can enjoy a nutritious meal with 353 kcal, 23g of carbohydrates, and 27g of protein per serving.
  • Slow cooker beef & barley soup is one of the many easy slow cooker recipes available, making it a perfect choice for a delicious and comforting meal.
  • This soup can be served with crusty bread or popovers, making it a great option for a satisfying meal.

Understanding the Magic of Slow Cooker Beef & Barley Soup

Exploring slow cooker recipes, you’ll find comfort food is key. Hearty soups, like beef and barley, are great for slow cooking. They make meat tender and veggies perfectly cooked. The slow cooker’s long cooking time makes the broth rich and flavorful.

For slow cooker recipes, prep your ingredients and let the cooker work. Brown the beef and sauté the veggies before adding them. This step boosts the flavor and sets the stage for the rest of the dish. Slow cooking brings out a depth of flavor that’s hard to get with other methods.

Slow cooking has many benefits, and it’s amazing for beef and barley soup. It makes the meat tender and the barley absorbs the broth’s flavors. This adds a nutty and sweet taste. Slow cooker recipes like this are perfect for a comforting meal or a healthy option.

To make the most of your slow cooker, learn the basics. Prep your ingredients, set the right cooking time, and use the right amount of liquid. With practice, you’ll make delicious soups like beef and barley. So, why not try slow cooker recipes and enjoy the comfort of homemade food?

Essential Ingredients for Your Soup

For a tasty beef and barley soup, you need the right stuff. You’ll need tender beef, pearl barley, and fresh veggies. Don’t forget a good beef broth and some slow cooker ingredients like Worcestershire sauce and tomato paste.

First, pick a lean beef cut like chuck roast or round. Trim any fat. Then, choose your barley, like pearl or pot barley. Gather fresh veggies like onions, carrots, celery, and mushrooms.

hearty soup ingredients

  • 1.5-2 pounds beef chuck roast or round
  • 2/3 cup pearl barley
  • 1 cup diced onion
  • 1 cup chopped carrots
  • 1 cup sliced mushrooms
  • 6 cups low-sodium beef broth
  • 1 tablespoon Worcestershire sauce
  • 1 teaspoon dried thyme

With these hearty soup ingredients, you’re set for a tasty beef and barley soup. It’s perfect for a chilly day. Whether slow cooking or stovetop, quality ingredients and patience are key.

Preparation and Setup Steps

Getting ready for slow cooker recipes is key. For a tasty beef and barley soup, start by browning the beef and sautéing the veggies. This step boosts the soup’s flavor. Choose the right beef and barley for your comfort food.

Layering ingredients in a slow cooker is important. Add the browned beef, then the veggies, and lastly the barley. Pour in the broth, following the liquid to solid ratio. This makes your soup rich and flavorful.

Remember a few tips for prep and setup. Use the right liquid amount, don’t overfill the cooker, and adjust cooking time. These tips help make a delicious beef and barley soup. It’s great for cold winter nights or any time you need a warm meal.

Setting up your slow cooker is easy. Prep takes 15-20 minutes, and cooking is 6-8 hours on low. It’s perfect for busy days, giving you a ready meal when you get home. Follow these steps for a satisfying beef and barley soup any time of year.

Creating the Perfect Flavor Base

To make a rich flavor base for your beef and barley soup, focus on browning the beef and sautéing the veggies. Building the broth is also key. This will make the soup taste amazing, with a comfort food flavor you’ll love.

For a hearty soup flavor, use 2 lbs of chuck roast and 3 tablespoons of olive oil. Add 1.5 cups of chopped carrots, 1 cup of chopped celery, and 2 cups of chopped yellow onion. These ingredients will give your soup a classic mirepoix taste.

flavor base

By following these steps and using the right ingredients, you’ll create a delicious flavor base for your beef and barley soup. It’s perfect for a cold winter’s day.

Slow Cooking Process and Timing

Patience is key in slow cooking. For a delicious beef and barley soup, cook it on low for 7-8 hours or on high for 4-5 hours. This slow cooking process melds flavors, making the soup hearty and comforting. The cooking time depends on how tender you like the beef and the barley.

The beef and barley soup cooking process fills your kitchen with a warm aroma. It’s perfect for a cold winter’s day. This method is great for comfort food, simmering ingredients to create a rich broth. It’s ideal for family dinners or special occasions.

Here are some key points to keep in mind when slow cooking your beef and barley soup:

  • Cooking time: 8 hours on low or 4-5 hours on high
  • Total time for preparation and cooking: 8 hours 20 minutes
  • Servings per full recipe: approximately 4 large servings

By following these guidelines, you’ll make a delicious and comforting beef and barley soup. The slow cooking process may take time, but it’s worth it. So, sit back, relax, and let the slow cooker create a hearty and flavorful soup that will become a family favorite.

Cooking Method Cooking Time
Low 7-8 hours
High 4-5 hours

Adding Finishing Touches

As you near the end of preparing your beef and barley soup, it’s time to add the finishing touches. These touches can make your soup go from good to great. Think about the flavors and textures you want to highlight.

Adjusting the seasonings is key. Add a pinch of salt, a few grinds of black pepper, or some fresh herbs. These will give your soup a flavor boost. For a cozy feel, add comfort food touches that make it feel like a warm hug.

Getting the perfect consistency is also important. If you like it thicker, simmer it longer. For a thinner soup, add more beef broth. Find the balance that suits your taste.

beef and barley soup finishing touches

Don’t forget about garnishing. A sprinkle of fresh herbs, a dollop of sour cream, or crusty bread can enhance your soup. These small touches can greatly improve your soup’s presentation and enjoyment.

Other ideas include adding fresh lemon juice, grated cheese, or cooked bacon. The possibilities are endless. Experiment to find the perfect finishing touches for your beef and barley soup.

Storage and Reheating Guidelines

Storing and reheating your beef and barley soup right is key. It keeps the soup safe and tasty. You can keep it in the fridge for up to 4 days or freeze it for 3 months in a safe bag or container.

Let the soup thaw in the fridge before reheating. You can heat it in the microwave or on the stovetop. For frozen soup, simmer it until it’s hot all the way through. This stops ice crystals and ensures even heating.

Here are some tips for storing and reheating your beef and barley soup:

  • Store the soup in a covered container in the refrigerator at a temperature of 40°F (4°C) or below.
  • Label the container with the date and contents, so you can easily keep track of how long it’s been stored.
  • When reheating, make sure the soup reaches a minimum internal temperature of 165°F (74°C) to ensure food safety.
  • Consider portioning the soup into individual servings before freezing, so you can easily reheat only what you need.

By following these guidelines, you can enjoy your beef and barley soup longer. It stays safe and tasty, whether in the fridge or freezer. These tips help you make the most of your comfort food and hearty soup storage.

Always check the soup for spoilage before eating. If it smells bad, looks slimy, or has mold, throw it away. Proper storage and reheating mean you can enjoy your soup for a longer time. It becomes a favorite in your comfort food and hearty soup collection.

Storage Method Storage Time Reheating Method
Refrigerator Up to 4 days Microwave or stovetop
Freezer Up to 3 months Simmering in a saucepan

Recipe Variations and Dietary Adjustments

Exploring beef and barley soup variations opens up a world of possibilities. You can add carrots or broccoli to boost fiber. Or, you can add more beef or try lamb or pork for a heartier soup.

To tweak the recipe, use leaner beef or less broth. Adding beans or lentils can also up the protein. For instance, 1/2 cup of cooked beans or lentils can add 40 grams of protein per serving.

Here are some other recipe variations to try:

  • Experiment with different barley types, like pearl or pot barley
  • Introduce new spices or herbs, such as thyme or rosemary
  • Try using a slow cooker for a quicker cooking time of 3-4 hours on high or 7-8 hours on low

beef and barley soup variations

By experimenting with these recipe variations and dietary adjustments, you can craft a hearty soup that meets your preferences and dietary requirements. Whether you lean towards a comfort food variation or a hearty soup variation, the key is to keep trying until you find the perfect blend for you.

Troubleshooting Common Issues

When making beef and barley soup, you might face some common problems. These can mess with the soup’s texture, taste, and quality. Knowing how to fix these issues is key to a great soup. Troubleshooting is a vital part of cooking.

Some common issues include texture problems, flavor balance, and temperature concerns. For example, if your soup is too thick, adding more broth can help. If it’s too thin, simmering it longer can reduce the liquid.

Here are some tips for fixing common beef and barley soup problems:

  • Check the cooking time: Make sure you’re not overcooking or undercooking the soup, as this can affect the texture and flavor.
  • Adjust the seasoning: If the soup is too salty or bland, try adjusting the seasoning to taste.
  • Use the right ingredients: Make sure you’re using the right type of barley and beef, as this can affect the texture and flavor of the soup.

By following these tips, you can make a delicious beef and barley soup. It’s perfect for any occasion, whether you’re craving a comfort food or a hearty soup. With practice and patience, you’ll master beef and barley soup troubleshooting. Then, you can enjoy a tasty meal any time of year.

Conclusion: Mastering Your Slow Cooker Beef & Barley Soup

Now you know how to make a delicious slow cooker beef and barley soup. This dish is great for both experienced cooks and beginners. It’s a hearty, comforting meal that’s perfect for cold days or gatherings.

Don’t be afraid to try different beef cuts, broths, and seasonings. This way, you can make the soup your own. With a few changes, you’ll have a version that everyone will love. Slow cooker beef and barley soup is the ultimate comfort food.

So, enjoy the process, smell the amazing aromas, and relish the tasty results. Your slow-simmered masterpiece is ready to be enjoyed.

FAQ

What is the purpose of this article?

This article introduces a delicious slow cooker beef and barley soup recipe. It’s perfect for cold weather and easy to make.

What are the benefits of slow cooking?

Slow cooking is great for making hearty soups like beef and barley. It’s also a way to enjoy comfort food.

What are the essential ingredients for the beef and barley soup recipe?

The article talks about the best beef, barley, and vegetables to use. It also covers broth and seasoning options. Tips are given to pick the right ingredients for a tasty soup.

How do I prepare and set up the recipe?

The article guides you on preparing ingredients, like browning beef and sautéing vegetables. It also explains how to set up the slow cooker.

What is the importance of creating the perfect flavor base for the soup?

Browning beef and sautéing vegetables add depth to the flavor. The article shares tips on making a flavorful broth.

How long does the slow cooking process take?

The article talks about cooking times on low or high. It stresses the importance of slow cooking for flavor.

How do I add the finishing touches to the soup?

The article covers adjusting seasonings, achieving the right consistency, and garnishing. These steps make the soup look and taste great.

How do I store and reheat the soup?

The article explains how to cool, freeze, and reheat the soup safely. This helps keep its flavor and texture.

Can I make any variations or adjustments to the recipe?

Yes, you can customize the recipe to your liking. The article offers tips for different tastes and dietary needs.

What are some common issues that may arise during the cooking process?

The article addresses common problems like texture, flavor, and temperature. It provides solutions to ensure a perfect soup.

Creamy Chilled Avocado & Cucumber Soup (Summer)


Chilled Avocado & Cucumber Soup (Summer)

Looking for a cool summer soup to beat the heat? Chilled avocado and cucumber soup is a great pick. It’s a mix of creamy avocado and refreshing cucumber, making it both tasty and nutritious. It’s a healthy, easy meal for any day.

Introduction to Chilled Avocado & Cucumber Soup

This soup is perfect for cooling down in summer. It’s quick to prepare, needing just 15 minutes, and then it chills for 2 hours. Ready in 2 hours and 15 minutes, it serves 8 people. Each serving has 101 kcal, 8g carbs, 2g protein, and 8g fat.

Key Takeaways

  • Chilled avocado and cucumber soup is a refreshing summer soup perfect for hot summer days.
  • This cold soup recipe is easy to make and requires minimal cooking.
  • The soup is packed with nutrients, including healthy fats, protein, and fiber.
  • It is suitable for various diets, including low-carb, Atkins, diabetic, and ketogenic diets.
  • The soup can be prepared in just 15 minutes and chilled for 2 hours.
  • Each serving contains 101 kcal, 8g of carbohydrates, 2g of protein, and 8g of fat.

Why Chilled Avocado & Cucumber Soup Is Perfect for Summer

Looking for a cool and healthy summer dish? Try chilled avocado and cucumber soup. It’s simple to make and super refreshing. It’s a top pick for hot summer days.

This soup uses ingredients that cool you down. Cucumber and avocado are great for beating the heat. Plus, it’s easy to make and cooks quickly.

Cooling Properties of Ingredients

Cucumber and avocado make this soup cool and refreshing. They’re not just cooling; they’re also good for you. This makes it a fantastic choice for summer.

Seasonal Benefits

This recipe uses summer’s best ingredients. Cucumber and avocado are in season then. It’s a tasty way to enjoy the season’s freshness.

No-Cook Convenience

This soup is a breeze to make, perfect for summer. Just mix the ingredients, chill, and serve. It’s a quick, easy, and healthy option for any time.

Essential Ingredients for Your Refreshing Summer Soup

To make a tasty summer soup, you need a few key ingredients. These add unique flavors and textures. For a refreshing soup, use avocado, cucumber, jalapeno, lemon juice, and cilantro. Avocado makes it creamy, while cucumber adds a cool taste.

A chilled soup like avocado cucumber gazpacho is ideal for summer. It’s refreshing and healthy, perfect for hot days. Feel free to try different ingredients to make your own summer soup.

summer soup dishes

  • 2 medium avocados
  • 1 ½ cups of water
  • 1 cup of almond or other alt-milk
  • 2 tablespoons of lemon juice
  • 2 ½ teaspoons of seasoning salt

These ingredients will help you make a delicious summer soup. You can also adjust the recipe to fit your taste and dietary needs. It’s a great choice for a summer soup.

Kitchen Tools and Equipment Needed

To make a refreshing cold summer soup, you’ll need some key tools. A blender is essential for a smooth texture. You’ll also need a cutting board for chopping ingredients and measuring cups for the right amounts.

Having the right equipment is key for a cold summer soup. Invest in a good blender for handling tough ingredients like cucumbers and avocados.

cold summer soup equipment

Essential Equipment

  • Blender
  • Cutting board
  • Measuring cups

Optional Tools for Enhanced Results

  • Juicer or food processor for a more refined texture
  • Hand blender for extra smoothing

With the right tools, you can make a delicious cold summer soup. It’s perfect for hot days. A bit of practice will help you make a healthy and tasty chilled soup.

Step-by-Step Preparation Method

To make a tasty summer chilled soup, follow a simple method. It’s great for hot days and is ready in minutes. It takes about 5 minutes to prepare and serve.

You’ll need 5 main ingredients and some water and salt. Use 1 medium avocado, 1 large cucumber, 1 teaspoon of cumin or 1/2 teaspoon of dill, 1 clove of garlic, and 1 lemon’s juice. You can also add diced tomatoes, red onions, and cilantro for extra flavor.

Here’s how to make this refreshing soup:

  1. Peel and chop the cucumber and avocado into small pieces.
  2. In a blender, mix the chopped cucumber, avocado, garlic, cumin or dill, and lemon juice.
  3. Blend until it’s smooth and creamy.
  4. Add salt and water to taste, and blend again.
  5. Chill the soup in the fridge for 2-3 hours before serving.

This soup is not just tasty but also healthy. It’s perfect for hot days and can be a light meal. Its quick preparation and simple ingredients make it a great choice for a quick meal.

Nutrient Amount
Calories 283 kcal
Carbohydrates 28g
Protein 7g
Fat 17g

This summer chilled soup is a cool and refreshing choice for hot months. It’s easy to make and healthy. Try it out and enjoy a delicious, refreshing soup today!

Nutritional Benefits and Health Advantages

Enjoying your avocado cucumber soup is not just tasty. It’s also packed with nutrients. This soup is perfect for hot summer days. It’s full of vitamins, minerals, and helps with digestion.

The soup has 242 calories, 18g of carbs, 8g of protein, and 17g of fat. It’s also a good source of potassium, with 625mg per serving. Plus, it has 4g of fiber and 6g of sugar. You’ll get 677 IU of vitamin A and 11mg of vitamin C.

Cucumber & Chilled Avocado Soup  benefits

  • Hydration: The high water content in cucumbers helps to keep you hydrated and cool during the summer months.
  • Digestive health: The fiber content in avocados and cucumbers can help to promote healthy digestion and prevent constipation.
  • Immune system: The vitamin C content in the soup helps to boost the immune system and protect against illnesses.

The avocado cucumber soup is a great choice for summer. It’s not only healthy but also refreshing. Try it out and enjoy the many benefits it offers.

Serving Suggestions and Garnishing Ideas

There are many ways to serve your refreshing soup. It’s great as a light chilled soup for hot summer days. Try garnishing it with chopped cilantro, diced cucumber, or feta cheese for extra taste and texture.

Chilled avocado and cucumber soup goes well with many sides. Toasted bread or a simple green salad are good choices. You can also add grilled chicken or shrimp for more protein. For a fuller meal, serve it with crusty bread or a bed of mixed greens.

refreshing soup recipe

  • Serving it in small cups or bowls as an appetizer or snack
  • Pairing it with a variety of crackers or croutons for a satisfying crunch
  • Adding some heat to your meal by serving the soup with a side of spicy sauce or hot sauce

Keep your serving simple to let the soup’s flavors stand out. A bit of creativity can make your easy summer soup a delicious meal for any time.

Storage Tips and Make-Ahead Options

Storing your delicious cold soup right is key to keeping it fresh and safe. You can keep your summer cooling recipe in the fridge for 3 days or freeze it for 2 months. Always use airtight containers and mark them with the date and what’s inside.

For your creamy avocado soup to stay fresh, keep it in a cool, dry spot. You can also make it ahead and store it in the fridge or freezer. This makes it a great choice for meal prep or batch cooking.

Here are some tips for storing and reheating your delicious cold soup:

  • Store in airtight containers to prevent contamination and spoilage.
  • Label containers with the date and contents for easy identification.
  • Reheat the soup gently over low heat, stirring occasionally, to prevent curdling or separation.

By following these tips, you can enjoy your creamy avocado soup all summer. It’s perfect for hot days and stays fresh with proper storage. You can enjoy its delicious taste whenever you like.

Recipe Variations and Customization Options

Exploring chilled soups opens up a world of flavors. A chilled avocado soup recipe is a summer treat you can make your own. It’s all about trying new things to find your favorite taste.

Customizing a chilled avocado soup is easy. You can add jalapeno for spice, garlic for more flavor, or lemon juice for a tangy taste. It’s also great for those who follow vegan or gluten-free diets. This way, you can enjoy a healthy and tasty summer dish.

Here are some ways to make your chilled avocado soup special:

  • Adding protein like rotisserie chicken or shrimp makes it more nutritious
  • Try non-dairy milk or Greek yogurt for different textures and tastes
  • Fresh herbs like dill or mint can give it a refreshing flavor

With these options, you can make a chilled avocado soup that’s just right for you. It’s a perfect way to cool down on a hot summer day.

Conclusion: Mastering Your Summer Soup Creation

Discovering how to make a chilled avocado and cucumber soup is a great way to enjoy summer’s flavors. By following simple steps and using the right ingredients, you can make a refreshing soup. You can also add your own twist, whether it’s spicy or creamy, to make it your own.

This soup is not only delicious but also healthy and easy to make. It’s perfect for hot summer days. So, get creative and make this soup a part of your summer. Your taste buds will love it!

FAQ

What are the key ingredients used in chilled avocado and cucumber soup?

The main ingredients are avocado, cucumber, jalapeno, lemon juice, and cilantro. These make the soup refreshing and tasty.

What kitchen tools and equipment are needed to make chilled avocado and cucumber soup?

You’ll need a blender to mix the ingredients. A juicer or food processor can also help with texture.

How do you prepare chilled avocado and cucumber soup?

Blend avocado, cucumber, jalapeno, lemon juice, and cilantro together. Chill it in the fridge for 30 minutes to blend the flavors.

What are the nutritional benefits and health advantages of chilled avocado and cucumber soup?

This soup is packed with vitamins and minerals like vitamin C and potassium. It boosts your immune system and keeps you hydrated. It also helps with digestion and soothes the stomach.

How can chilled avocado and cucumber soup be customized and modified?

You can add jalapeno for spice, garlic for extra flavor, and lemon juice for a tangy taste. It’s also easy to make vegan or gluten-free to fit different diets.

Smoky Tomato & Red Pepper Soup: A Cozy Classic


Smoky Tomato & Red Pepper Soup

What makes smoky tomato & red pepper soup so special? How can you make this tasty soup at home with just a few ingredients? You’ll need fresh tomatoes and red bell peppers for a perfect homemade or vegan soup.

To make a great smoky tomato & red pepper soup, you need to know the basics. You’ll combine a tomato soup recipe with roasted red peppers for a unique taste. This recipe is quick, with only 10 minutes of prep and 45 minutes of cooking. It’s perfect for those who are short on time but want a healthy, delicious meal.

Key Takeaways

  • You can make a delicious smoky tomato & red pepper soup at home with just a few simple ingredients.
  • This easy soup recipe requires only 10 minutes of active time to prepare.
  • The recipe features fresh summer ingredients, including tomatoes and red peppers, which are roasted and then pureed together in a blender.
  • This homemade red pepper soup is a great option for a vegan soup recipe.
  • The soup is perfect for a quick and healthy meal, with a total cooking time of 45 minutes.
  • You can customize the recipe to suit your taste preferences, making it a great option for a smoky tomato & red pepper soup.

The Magic Behind Smoky Tomato & Red Pepper Soup

Smoky tomato and red pepper soup is a beloved comfort food. It’s known for its rich, velvety texture and deep smoky taste. It’s perfect for vegetarians and anyone looking for a warm soup for winter.

The mix of roasted tomatoes and red peppers gives it a unique flavor. It’s quick to make, ready in under 30 minutes. Roasted red peppers add a sweet and smoky taste, found in a 12-oz jar.

This soup is not only tasty but also nutritious. A single serving has 294 kcal, 28g of carbs, and 6g of protein. It’s also high in fiber, with 4g per serving, making it a healthy and filling choice.

The soup is packed with vitamins A and C from the tomatoes and red peppers. The vegetable broth adds sodium and potassium. It’s a great mix of flavors and nutrients, perfect for any meal.

Essential Ingredients for Perfect Results

To make a delicious soup, like tomato or red pepper, you need top-notch ingredients. A great smoky soup comes from balancing flavors. For vegan soups, picking animal-free ingredients is key.

For this recipe, you’ll need 3 pounds of fresh tomatoes, 2 medium red bell peppers, 1 medium sweet yellow onion, 4-5 garlic cloves, and 3 tablespoons of extra virgin olive oil. These will give your soup a rich, smoky taste. It’s perfect for any event.

When picking ingredients, go for fresh and ripe produce. Tomatoes should be firm and red, and red peppers should be glossy and without blemishes. This ensures your soup tastes and feels its best. The quality of ingredients greatly impacts the taste, whether it’s vegan or traditional.

smoky soup ingredients

You can also add extras to boost your soup’s flavor. Smoked paprika, cayenne powder, or herbs and spices are great options. They add a unique, delicious taste to your soup.

Here are some tips for choosing the best ingredients:

  • Choose fresh and ripe produce
  • Select high-quality spices and herbs
  • Use extra virgin olive oil for the best flavor
  • Consider adding smoked paprika or cayenne powder for extra flavor

By using these tips and ingredients, you can make a tasty soup for any time. Whether it’s vegan, tomato, or red pepper, focus on quality and flavor balance. With practice, you’ll make a smoky soup that impresses everyone.

Equipment and Kitchen Tools You’ll Need

To make a tasty and healthy soup like smoky tomato and red pepper soup, you’ll need some key tools. The right tools can greatly improve your cooking experience. For a healthy soup like tomato soup with red peppers, you’ll need the right equipment to prepare and cook the ingredients.

You’ll need a blender, like a Kitchenaid blender or immersion blender, to puree the soup. A large pot is also necessary to cook the vegetables and simmer the soup. Don’t forget basic utensils like a chopping knife, cutting board, and spoon.

soup recipe equipment

Optional but helpful tools include a food processor for chopping vegetables or a hand blender for pureeing in the pot. You can also use a slow cooker to simmer the soup or a hand mixer to blend the ingredients.

With the right equipment and tools, making a delicious and healthy soup like smoky tomato and red pepper soup is easy. Whether it’s for a weeknight dinner or a special occasion, having the right tools will help you get the best results.

Preparation Methods and Techniques

To make a tasty homemade tomato and pepper soup, knowing the right preparation methods is key. Roasting is a great technique to bring out the sweetness in tomatoes and peppers. Roast 12 Roma tomatoes and 3-4 red bell peppers in the oven with olive oil, salt, and pepper for 35-45 minutes.

Sautéing onions and garlic is another important step. Use 2 small yellow onions and 5-6 cloves of garlic, sautéed in 2 tablespoons of olive oil until they’re soft and fragrant. Then, add the roasted tomatoes and peppers, some vegetable broth, and tomato paste for a rich soup.

For a spicy twist, add cayenne pepper or red pepper flakes. Or, try roasting the vegetables first and then blend them for a smooth soup. These methods help you make a delicious homemade tomato and pepper soup for any time.

homemade tomato and pepper soup

When making homemade tomato and pepper soup, use fresh and ripe ingredients. Also, avoid over-processing the soup to keep it thick and tasty. By following these tips, you’ll make a soup that everyone will love.

Step-by-Step Cooking Instructions

To make a delicious and healthy tomato and pepper soup, follow some simple steps. This recipe is great for vegetarians who want a nutritious and tasty meal. First, preheat your oven to 425 °F (220 °C). While it heats up, prepare your veggies: 2 lbs of tomatoes, 2 large red bell peppers, and 6-7 garlic cloves.

Next, roast your veggies in the oven. Tomatoes, onion, and garlic take about 45 minutes. Red bell peppers need about 15 minutes. After roasting, let them cool. Then, peel off the skin and remove the seeds.

Blending and Finishing

Now, blend your roasted veggies with vegetable broth and spices. Use a blender or food processor until smooth. Add salt, sugar, and herbs like basil and thyme to taste. This soup is not only delicious but also full of nutrients and fiber.

  • Preheat the oven to 425 °F (220 °C)
  • Roast the vegetables for 45 minutes
  • Let the vegetables cool down and peel off the skin
  • Blend the mixture with vegetable broth and spices
  • Season with salt, sugar, and herbs

This easy tomato and pepper soup recipe is perfect for a quick and healthy meal. Its rich flavor and high nutritional value make it great for vegetarians and non-vegetarians alike.

Flavor Variations and Customization Options

Creating the best tomato and pepper soup is all about personal taste. You can mix in sundried tomatoes or roasted bell peppers for a richer taste. This makes it perfect for those who love to make their own soup.

With a homemade soup, you can play with flavors. Add cayenne pepper for spice or smoked paprika for a smoky taste. The goal is to find the flavor mix you love. You can also adjust the creaminess by changing the amount of oat or coconut cream.

Here are some ways to customize your soup:

  • Adding fresh basil or oregano for a fresh flavor
  • Using different types of peppers, such as Anaheim or Poblano, for a unique flavor
  • Adding a squeeze of fresh lemon juice for a burst of citrus flavor

By trying out these variations, you can make a tomato and pepper soup that’s just right for you. Whether you want it spicy or creamy, the choices are endless.

Tomato Red Pepper Soup

With these options, you can make a delicious homemade soup for any time. So, be creative and find your favorite flavor mix for a hearty tomato and pepper soup.

Ingredient Quantity
Sundried Tomatoes 1/4 cup
Roasted Bell Peppers 2 peppers
Cayenne Pepper 1 pinch

Storage and Reheating Guidelines

Enjoying your hearty soup later needs the right storage and reheating. To keep the smoky flavors and texture, follow simple steps.

Your tomato and red pepper soup can stay in the fridge for 5 days or in the freezer for 6 months. Always heat it to 165°F (74°C) to stay safe.

Here are tips for reheating your soup:

  • Reheat in the microwave or on the stovetop, stirring often, until it’s hot.
  • For even heating, try the oven at 425°F (218°C) for 20-25 minutes, until it’s hot.

By following these tips, you can enjoy your hearty soup with smoky flavors and comfort food goodness anytime. It keeps your tomato and red pepper soup tasting great.

Perfect Pairings and Serving Suggestions

Enjoying smoky tomato and red pepper soup is even better with the right pairings. Try it with grilled cheese or homemade croutons for a cozy meal. The smoky taste goes well with the cheese, making it a perfect match.

Red pepper soup goes well with many sides. Here are some ideas:

  • Grilled cheese sandwiches
  • Homemade croutons
  • Garlic bread
  • Green salad with a light vinaigrette

Adding fresh herbs like parsley or basil can brighten up your soup. A dollop of sour cream or some grated cheese can also add a nice touch.

Looking for a quick, comforting meal? Smoky tomato and red pepper soup is perfect. Its rich flavor will make it a favorite. So, get creative with your pairings and enjoy a healthy, delicious soup any time.

Troubleshooting Common Issues

When making a homemade soup, like smoky tomato and red pepper soup, you might face some problems. To make sure your soup is tasty, let’s look at common issues and how to fix them. If your soup doesn’t have enough smoky taste, add more smoked paprika or chipotle peppers.

Smoky tomato and red pepper soup should be rich and comforting. If it’s too watery, reduce the vegetable broth or add more roasted red peppers. If it’s too thick, add a bit more broth to get the right consistency.

  • Flavor imbalances: Adjust the amount of salt, pepper, or herbs to taste.
  • Texture issues: Blend the soup to the desired consistency or add more cream for a smoother texture.
  • Cooking problems: Make sure to cook the soup for the recommended 30 minutes to ensure all the flavors meld together.

By following these tips, you’ll make a delicious homemade soup. It will be full of smoky flavors and comfort. Always taste and adjust as you go. Don’t be afraid to try new ingredients to make it your own.

Conclusion: Mastering Your Homemade Soup

Making a tasty smoky tomato & red pepper soup at home is easy and fun. You now know the key ingredients, how to cook them, and how to make it your own. This recipe is great for anyone who loves tomato soup recipes or wants a tasty homemade red pepper soup. It’s also perfect for those who follow a vegan-friendly diet.

The secret to making this soup amazing is in the little details. Roasting the veggies and getting the flavors just right is important. Try different spices and add-ins to make it your own. Soon, you’ll be making this smoky tomato & red pepper soup for everyone to enjoy.

So, get ready to start! Collect your ingredients and turn on the stove. Start your journey to becoming a homemade soup expert. Enjoy the smell and taste of your own smoky tomato & red pepper soup.

FAQ

What is the origin of smoky tomato and red pepper soup?

Smoky tomato and red pepper soup comes from Mediterranean and Spanish cuisines. It’s a comfort food made with roasted tomatoes and red peppers. This mix creates a rich, flavorful soup loved by many for generations.

What makes this recipe so delicious and effective?

The secret is the roasted tomatoes and red peppers. They add a deep, smoky taste and a smooth texture when blended. Using fresh, high-quality ingredients also boosts the soup’s flavor and health benefits.

What are the health benefits of the ingredients used in this soup?

Tomatoes and red peppers are full of vitamins, minerals, and antioxidants. They offer many health benefits. Plus, the soup is vegan or vegetarian, making it great for plant-based diets.

What are the essential ingredients needed to make smoky tomato and red pepper soup?

You’ll need fresh tomatoes, red peppers, onions, garlic, and olive oil. The quality of these ingredients is key for the best taste and texture.

What equipment and kitchen tools are required to make this soup?

You’ll need a blender or food processor for pureeing. Also, pots and utensils for cooking. While some tools can help, you can make the soup with basic kitchen gear.

How do I properly prepare the vegetables for this soup?

To get the right texture and flavor, roast the tomatoes and red peppers. Then, sauté the onions and garlic. Blend everything for a smooth soup.

Can I customize the flavor of this soup?

Yes, you can change the flavor of smoky tomato and red pepper soup. Try different spices, herbs, or add other veggies to make it your own.

How should I store and reheat leftover smoky tomato and red pepper soup?

Store the soup in the fridge for up to a week or freeze it for longer. When reheating, use gentle heat to keep the flavor and texture good.

What are some recommended pairings and serving suggestions for this soup?

Serve the soup with crusty bread, grilled cheese, or a fresh salad. Try garnishes like herbs, croutons, or cream to add to the presentation and taste.

How can I troubleshoot any issues that may arise when making this soup?

If you run into problems, like flavor or texture issues, troubleshoot and adjust as needed. This might mean changing the seasoning, cooking methods, or using different equipment.