Welcome To Soup Meets Bowl - The Best Soup Recipes & More

Warm Up With Our Latest Soup Recipes

Bake the Best Cranberry Orange Bread at Home


Cranberry Orange Bread

Ever wondered how to make the perfect cranberry orange bread at home? It’s a favorite with a 4.97 out of 5 rating from 459 votes. To make it, you need quality ingredients and a simple recipe. Whether you’re searching for a homemade recipe or tips, you’re in the right spot.

Introduction to Cranberry Orange Bread

Thinking of making your own cranberry orange bread? It’s special because of its mix of cranberries and orange zest. This article will guide you through making this tasty treat. We’ll cover the basics and advanced techniques, including a simple recipe.

Key Takeaways

  • Learn how to make the best cranberry orange bread at home with a simple recipe
  • Understand the importance of using high-quality ingredients in your cranberry orange bread recipe
  • Discover the essential kitchen tools and equipment needed to create delicious cranberry orange bread
  • Get tips on how to store and freeze your cranberry orange bread for maximum freshness
  • Explore creative variations and add-ins to take your cranberry orange bread to the next level
  • Find out how to achieve the perfect texture and flavor in your homemade cranberry orange bread
  • Learn how to serve and pair your cranberry orange bread for any occasion

The Magic Behind Cranberry Orange Bread

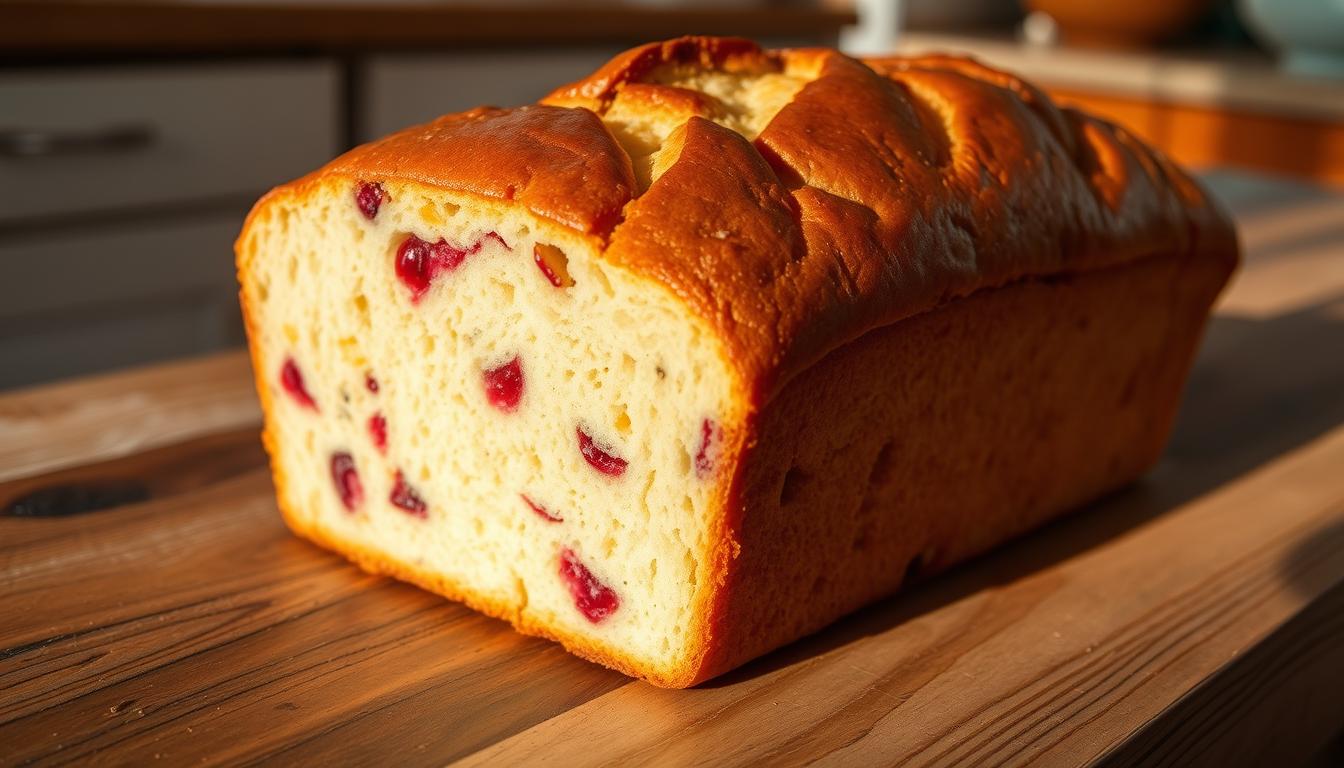
Exploring baking, you find some flavor pairs are timeless. Cranberries and oranges make a classic combo, perfect for any event. Their tart and sweet mix has made this bread a favorite for ages.

Making easy cranberry orange bread is all about balance. The cranberries’ tartness meets the oranges’ sweetness, creating a perfect harmony. This balance is why the bread is loved for breakfast, snacks, or dessert.

A cranberry orange quick bread is great for quick bakes. It’s moist and delicious, ready in under an hour. It’s ideal for busy days when you need a fast treat.

  • Use fresh cranberries for the best flavor and texture
  • Don’t overmix the batter, as this can result in a dense bread
  • Experiment with different types of oranges, such as navel or blood oranges, for a unique twist

Follow these tips and a simple recipe to make a memorable cranberry orange bread. It’s perfect for both seasoned bakers and beginners, a classic choice for a tasty bread.

Essential Ingredients for Perfect Cranberry Orange Bread

To make delicious cranberry bread, you’ll need a few key ingredients. You’ll need all-purpose flour, baking powder, and salt. Also, you’ll need milk, orange zest, and juice, unsalted butter, granulated sugar, eggs, and fresh or frozen cranberries.

Here’s a list of the main ingredients for your homemade bread:

  • 2 cups all-purpose flour
  • 1 1/2 teaspoons baking powder
  • 1/2 teaspoon salt
  • 3/4 cup granulated sugar
  • 1/2 cup unsalted butter, softened
  • 1 large egg
  • 3/4 cup orange juice
  • 1 tablespoon orange zest
  • 2 cups fresh or frozen cranberries

These ingredients will give your orange bread the right structure, flavor, and moisture. You can find them in most grocery stores or online. With these ingredients and a simple baking recipe, you can make a tasty cranberry orange bread at home.

Kitchen Tools and Equipment You’ll Need

For holiday baking, the right tools and equipment are key. They help make delicious sweet bread and fruit bread. As you start your seasonal baking, here are the essentials you’ll need.

You’ll need a medium-sized mixing bowl, a whisk, a measuring cup, and a 9×5-inch loaf pan. These basics are vital for mixing, measuring, and baking your cranberry orange bread perfectly.

Basic Equipment Requirements

  • Mixing bowl
  • Whisk
  • Measuring cup
  • 9×5-inch loaf pan

Optional Tools for Better Results

Tools like a stand mixer, a pastry brush, and a wire rack can improve your baking. They make the process easier and help you get better results.

kitchen tools for holiday baking

Measuring Tools and Their Importance

Measuring tools are very important. They ensure your ingredients are measured correctly. This is key for the perfect texture and flavor in your holiday baking projects, like sweet bread and fruit bread.

Preparing Your Ingredients the Right Way

To make a tasty homemade bread, like cranberry orange bread, you need to prepare your ingredients well. Rinse and dry the cranberries, zest and juice the oranges, and soften the butter. Make sure all ingredients are at room temperature. This helps the dough mix smoothly.

When baking an easy bread, measuring ingredients accurately is key. Use the right amount of flour, sugar, and yeast. You can use a digital scale or measuring cups for accuracy. Also, choose fresh and quality ingredients, like real cranberries and orange zest, for the best taste.

Cranberry orange bread is great for special events. To enhance it, add a glaze of powdered sugar and orange juice. This adds a sweet and tangy touch. You can also top it with fresh cranberries for a beautiful and tasty finish.

homemade bread recipe

By following these tips, you can make a delicious homemade bread perfect for any event. Whether it’s an easy or complex recipe, using quality ingredients and preparing them right is key. With practice and patience, you’ll impress your loved ones with a festive dessert.

The Best Cranberry Orange Bread Recipe

Baking with cranberries is a great way to enjoy the season’s flavors. The best cranberry orange bread recipe combines the right ingredients. You’ll need 2 cups of all-purpose flour, 1 cup of granulated sugar, and 1/2 cup of light brown sugar.

You’ll also need 1/2 cup of unsalted butter, 2 large eggs, and 1/2 cup of sour cream. The best cranberry orange bread recipe includes 2 cups of fresh or frozen cranberries. Cut them in half for even flavor. Add 1 teaspoon of ground cinnamon, 1/4 teaspoon of ground nutmeg, and 1/4 teaspoon of ground cardamom for spice.

Here is a list of the ingredients you will need:

  • 2 cups all-purpose flour
  • 1 cup granulated sugar
  • 1/2 cup light brown sugar
  • 1/2 cup unsalted butter
  • 2 large eggs
  • 1/2 cup sour cream
  • 2 cups fresh or frozen cranberries
  • 1 teaspoon ground cinnamon
  • 1/4 teaspoon ground nutmeg
  • 1/4 teaspoon ground cardamom

cranberry orange bread

To make the best cranberry orange bread, mix dry ingredients in one bowl and wet ingredients in another. Then, combine them until just mixed. This way, you avoid overmixing. The result is a delicious quick bread perfect for snacking or serving guests.

Step-by-Step Baking Process

To bake a delicious moist cranberry orange bread, first preheat your oven to 350°F. Then, prepare a loaf pan by greasing it with butter and coating it with flour. This makes the cranberry orange bread loaf easy to remove after baking.

Once your oven is ready, pour the batter into the loaf pan. Bake for 45-50 minutes, or until the top is golden. To check if it’s done, insert a toothpick into the center. It should come out clean or with a few crumbs.

After baking, let the simple cranberry orange bread cool in the pan for 15 minutes. Then, transfer it to a wire rack to cool completely. This keeps the bread moist and flavorful.

cranberry orange bread

  • Preheat oven to 350°F
  • Prepare loaf pan with butter and flour
  • Bake for 45-50 minutes, or until golden brown
  • Cool in pan for 15 minutes, then transfer to wire rack

By following these steps, you’ll make a delicious and moist cranberry orange bread. It’s perfect for any occasion.

Tips for Achieving the Perfect Texture

To get the perfect texture for your cranberry orange bread, focus on a few key things. You want it to be moist and tender, with a crispy crust and a soft inside. Follow these simple tips to make a fresh cranberry orange bread that’s great for any event.

When baking a tangy cranberry orange bread, controlling moisture and temperature is key. Bake it at 350°F for 55 to 70 minutes, or until it’s 210°F inside. To avoid over-browning, check it at 40 minutes and cover it with foil if needed.

Moisture Control and Temperature Management

Controlling moisture is essential for the perfect texture. Make sure to measure ingredients correctly and don’t overmix the dough. The recipe makes about 1 loaf, and use a 5×9 inches loaf pan.

Testing for Doneness

To check if the bread is done, insert a toothpick into its center. If it comes out clean, it’s ready. If not, bake a bit longer and check again. This way, your cranberry orange bread will be moist and tender.

By following these tips, you’ll make a fresh cranberry orange bread with the perfect texture. It’s perfect for sharing with family and friends. With these tips, you’ll get the perfect texture every time.

Creative Variations and Add-ins

When baking cranberry orange bread, you can try new things. Add nuts like pecans or walnuts for texture and taste. Or, use whole wheat or almond flour for a healthier option. For a sweet twist, add chocolate chips or dried fruits.

A baking recipe is more than just following steps. It’s about trying new things and having fun. Cranberry orange bread is a great way to start your day with a tasty, healthy meal. Add a streusel topping or a glaze of orange juice and sugar for a bakery style touch.

  • Using different types of citrus zest, such as lemon or lime, to give your bread a unique flavor
  • Adding a hint of spice, such as cinnamon or nutmeg, to complement the orange and cranberry flavors
  • Using Greek yogurt or sour cream to add moisture and tenderness to the bread

By trying different variations and add-ins, you can make a unique cranberry orange bread. It will be tailored to your taste and preferences.

Storage and Freshness Tips

To keep your cranberry orange bread fresh, store it right. You can keep it at room temperature for up to 3 days. This way, it stays tasty and perfect for any time.

For longer storage, refrigerate it in an airtight container for a week. Or freeze it for 3 months. Wrap it tightly in plastic and foil to avoid freezer burn. To thaw, just refrigerate it overnight and let it come to room temperature before serving.

  • Store the bread in an airtight container at room temperature for up to 3 days.
  • Refrigerate the bread in an airtight container for up to 1 week.
  • Freeze the bread for up to 3 months, wrapped tightly in plastic wrap and foil.

By following these tips, you can enjoy your cranberry orange bread for longer. Share it with your loved ones. It’s a hit as a snack or dessert.

Serving Suggestions and Pairings

There are many ways to enjoy your cranberry orange bread. You can have it as a breakfast treat, toasted with butter or jam. Or, it’s great as a snack with cheese or charcuterie. For a special treat, try using it for French toast or bread pudding.

Your cranberry orange bread recipe can also pair well with savory dishes. It’s perfect with a cheese ball or on a charcuterie board. The goal is to mix flavors and textures that make your cranberry orange bread even better.

Here are some ideas for serving your cranberry orange bread:

  • Toast with butter or jam for a classic breakfast
  • Pair with cheese or charcuterie for a satisfying snack
  • Use as a base for French toast or bread pudding
  • Complement with a cheese ball or charcuterie board

These suggestions let you enjoy your cranberry orange bread in many ways. Whether you want something sweet or savory, your homemade cranberry orange bread will always be a hit.

Conclusion: Mastering Your Cranberry Orange Bread Journey

Baking the best cranberry orange bread at home is within reach. You just need the right ingredients, tools, and techniques. This will help you make a moist, flavorful loaf that everyone will love.

Follow the easy cranberry orange bread recipe closely. Try out different variations and be patient as you get better at baking.

The cranberry orange loaf is great all year round. It’s perfect for breakfast, an afternoon snack, or dessert. Mastering this recipe means you’ll always have a delicious treat ready for any occasion.

Enjoy the journey and feel free to tweak the recipe to your liking. With each try, you’ll become more confident and skilled. Making homemade cranberry orange bread brings happiness to those who taste it.

FAQ

What is the history of cranberry orange bread?

Cranberry orange bread has a long history. It started in the early American colonies. Back then, cranberries were common, but oranges were rare and expensive.The mix of these two created a tasty flavor. This flavor has been loved by many for generations.

What makes the flavors of cranberry and orange work so well together?

The secret is how the tart cranberries balance with the sweet oranges. This creates a perfect mix of flavors.

What are the essential ingredients for making cranberry orange bread?

You’ll need flour, baking powder, and salt. Also, milk, orange zest and juice, and unsalted butter are key. Don’t forget granulated sugar, eggs, and fresh or frozen cranberries.

What kitchen tools and equipment are needed to bake cranberry orange bread?

You’ll need a mixing bowl, whisk, measuring cup, and a 9×5-inch loaf pan. A stand mixer, pastry brush, and wire rack can also help.

How should the ingredients be prepared for the best results?

Preparing ingredients right is important. Rinse and dry the cranberries. Zest and juice the oranges, and soften the butter. Make sure all ingredients are at room temperature for smooth dough.

What are the key steps in the cranberry orange bread recipe?

The recipe starts with mixing dry ingredients like flour, baking powder, and salt. Then, add wet ingredients like milk, orange zest and juice, and eggs. Proper mixing is key for the right texture.

How can the perfect texture be achieved for cranberry orange bread?

For the perfect texture, control moisture and temperature. The bread should be moist, tender, with a crispy crust and soft inside.

Can cranberry orange bread be customized with different variations and add-ins?

Yes, you can customize the bread. Add nuts, chocolate chips, or dried fruits for unique flavors. Try different flours for a healthier version.

How should cranberry orange bread be stored and how long will it stay fresh?

Enjoy the bread fresh, but it can last up to 3 days at room temperature. Freeze for up to 3 months. Store it in an airtight container or wrap tightly in plastic wrap.

In what ways can cranberry orange bread be served and enjoyed?

Serve it as breakfast bread, toasted with butter or jam. It’s great as a snack with cheese or charcuterie. Or, use it for French toast or bread pudding.

Hearty Slow Cooker Chickpea & Kale Soup


Slow Cooker Chickpea & Kale Soup

Looking for a meal that’s both nourishing and easy to make? Try slow cooker chickpea and kale soup. It’s a mix of chickpeas, kale, and veggies. This soup is a great example of how simple it is to make a healthy meal.

Making this soup is a breeze thanks to a slow cooker. It only takes 20 minutes to prepare. You’ll get 6 cups of soup, with each serving having 57 kcal, 4g of carbs, and 0.4g of protein. It’s both nutritious and filling.

Key Takeaways

  • You can make a hearty slow cooker chickpea and kale soup with simple ingredients like chickpeas, kale, and vegetables.
  • This slow cooker chickpea & kale soup is an example of easy slow cooker recipes that can be prepared in no time.
  • The soup is a healthy soup recipe, containing 57 kcal, 4g of carbohydrates, and 0.4g of protein per serving.
  • The total preparation time for this soup is 20 minutes, and it yields 6 cups of soup.
  • You can store the soup in the refrigerator for up to 5 days or freeze it for up to 3 months.
  • This slow cooker chickpea & kale soup is a great option for a nourishing and comforting meal that can be made with minimal effort.

Benefits of Making Slow Cooker Chickpea & Kale Soup

Making slow cooker chickpea and kale soup is a great way to enjoy a comforting winter soup. It’s both nutritious and easy to prepare. This vegetarian slow cooker meals recipes is perfect for a busy day. It can be cooked while you are away, filling your home with a delicious aroma.

The benefits of making this soup are numerous. It is packed with protein and fiber from the chickpeas and kale. This makes it a hearty kale recipe that will keep you full and satisfied. Cooking a meal in a slow cooker is convenient and easy. It allows you to prepare a meal in advance and come home to a ready-to-eat soup.

Nutritional Value and Convenience

Some of the key benefits of this soup include:

  • High in protein and fiber
  • Low in calories and fat
  • Rich in vitamins and minerals, such as vitamin A and calcium
  • Convenient and easy to prepare
  • Cost-effective and budget-friendly

Overall, making slow cooker chickpea and kale soup is a great way to enjoy a delicious and nutritious meal. It’s perfect for a busy day. With its numerous benefits and ease of preparation, it’s a great addition to any meal plan.

Essential Kitchen Equipment

To make a tasty slow cooker chickpea and kale soup, you’ll need some key kitchen tools. The most important one is a slow cooker, perfect for meal prep. Choose a size based on how many servings you want. A 6-quart slow cooker is great for a big batch of soup.

You might also need extra tools and utensils to get your ingredients ready. A blender or immersion blender is handy for making the soup creamy. They’re also good for pureeing the soup for a smoother texture.

Don’t forget a cutting board, knife, and measuring cups. They help you chop the kale and measure spices. With these, you’re ready to make a delicious and healthy slow cooker chickpea and kale soup.

Other useful items include a can opener for the chickpeas and a grater for the garlic. They make preparing ingredients quick and easy. This makes cooking more fun and efficient.

Key Ingredients Overview

To make a tasty easy vegetarian soup, you’ll need some key ingredients. These include chickpeas, kale, and veggies like onions, carrots, and celery. For a healthy crockpot meal, use low-sodium broth and add your favorite spices.

A plant-based slow cooker dish is great for any day. The ingredients make a flavorful and nutritious soup. You can also add more spices to make it your own.

Here are some other ingredients you’ll need:
* 1 can of diced tomatoes
* 2 cans of garbanzo beans
* 1 bunch of Lacinato Kale
* 2 tbsp of fresh lemon juice
* Your favorite spices and seasonings

With these ingredients, you can make a delicious easy vegetarian soup. It’s perfect for a healthy crockpot meal or a plant-based slow cooker dish.

Preparing Your Ingredients

To make a delicious and healthy hearty soup with chickpeas and kale, start by preparing your ingredients. You can use canned chickpeas or cook them from scratch. For kale, remove the stems and chop the leaves to ensure they cook evenly. This meatless slow cooker recipe is not only easy to make but also packed with nutrients.

When preparing your ingredients, consider the following steps:

  • Chop the onions, carrots, and celery to add flavor to your nourishing slow cooker soup.
  • Sauté the aromatics in a little oil until they’re softened and fragrant.
  • Add the chickpeas, kale, and other ingredients to the slow cooker, making sure to follow the recommended quantities and cooking times.

A well-prepared hearty soup with chickpeas and kale can make a significant difference in the overall flavor and texture of your dish. By following these simple steps, you’ll be able to create a

Vegetarian Slow Cooker Meals Recipes​ - Chickpea & Kale Soup

Ingredient Quantity
Chickpeas 1 (15 oz) can
Kale 2 cups, chopped
Onions 1 medium, chopped
Carrots 2 medium, chopped
Celery 2 stalks, chopped

Building Layers of Flavor

Creating tasty simple vegan soups means adding layers of flavor. Start by sautéing onions, carrots, and celery. This adds a rich taste to your soup. Don’t forget to add spices like cumin and paprika for extra flavor.

To make your soups nutrient-dense, use a mix of veggies. Kale and carrots are great choices because they’re full of vitamins and minerals. A squeeze of lemon juice can also enhance the taste. For an easy vegan soup recipe, try using canned chickpeas and diced tomatoes. They save time and effort.

Here are some tips to build layers of flavor in your soup:

  • Sauté aromatics like onions, carrots, and celery
  • Add spices and seasonings like cumin and paprika
  • Use a variety of vegetables like kale and carrots
  • Add a splash of lemon juice for extra flavor

Follow these tips to make a delicious and satisfying simple vegan soup. It will be full of flavor and nutrients. Don’t be afraid to try different spices and seasonings to find what you like best.

Step-by-Step Cooking Instructions

To make a tasty healthy crockpot soup, start by sautéing onions, carrots, and celery. This step adds a deep flavor to your vegetarian slow cooker meals recipes. Then, add chickpeas and broth to the slow cooker. Cook on low for 6-8 hours. Add kale in the last 30 minutes to keep its nutrients.

For a hearty soup with chickpeas, slow cooking is key. It lets the flavors blend perfectly. Use a slow cooker to make it easy. Just put all the ingredients in and let it cook for you. Here’s how to do it:

  1. Sauté the aromatics in a pan until they are tender.
  2. Add the chickpeas, broth, and spices to the slow cooker.
  3. Cook on low for 6-8 hours or high for 4-5 hours.
  4. Add the kale in the last 30 minutes of cooking.
  5. Season with salt, pepper, and lemon juice to taste.

healthy crockpot soup

Follow these easy steps to make a delicious and healthy healthy crockpot soup. It’s perfect for a vegetarian slow cooker meal. The hearty soup with chickpeas is great for any day, whether it’s a weeknight dinner or a weekend lunch.

Nutritional Benefits and Dietary Information

The chickpea and kale soup is a top pick for vegan slow cooker recipes. It’s packed with protein and fiber. Chickpeas offer about 14.5 grams of protein per 1-cup serving. This makes it a great plant-based dinner idea for boosting protein.

This soup is full of nutrients, making it a fantastic choice for easy crockpot meals. Kale adds vitamins and minerals like vitamin A and potassium. Chickpeas bring fiber and protein. Together, they create a nutritious and satisfying meal that fits many diets.

The soup’s key benefits include:
* High protein from chickpeas
* Rich in fiber from chickpeas and kale
* Low in calories, high in vitamins and minerals
* Can be made vegan or gluten-free

This chickpea and kale soup is perfect for those seeking healthy, tasty plant-based dinner ideas. It’s easy to make in a slow cooker. Its nutritional value and flexibility make it a great choice for any meal plan.

Customization Options and Variations

Slow cooker comfort food is all about making it your own. You can add spices and seasonings to change the taste of your slow cooker chickpea and kale soup. Try cumin, paprika, or Italian seasonings for a unique flavor. This way, you can enjoy many different tastes in your vegan soups.

Customizing your soup is easy. You can add quinoa or sweet potatoes to make it more filling. You can also try different proteins like chickpeas or tofu to boost the nutrition. Here are some ideas to get you started:

  • Add a can of diced tomatoes for extra flavor and nutrients
  • Mix in some chopped bell peppers or carrots for added crunch and vitamins
  • Use different types of broth, such as vegetable or mushroom broth, to change the flavor profile
  • Experiment with various spices and seasonings, such as cumin or smoked paprika, to give your soup a unique taste

Remember, the secret to great slow cooker comfort food is to experiment. Find the combinations that you love. With a bit of creativity, you can make many delicious vegan soups that are both healthy and tasty.

slow cooker comfort food

By trying out these ideas, you can elevate your slow cooker chickpea and kale soup. Whether you like simple vegan soups or more complex ones, the slow cooker is perfect. It helps you make nutritious soups for any time.

Customization Option Description
Add quinoa or sweet potatoes Makes the soup more filling and nutrient-dense
Use different spices and seasonings Gives the soup a unique flavor and aroma
Add a can of diced tomatoes Increases the flavor and nutrient content of the soup

Troubleshooting Common Issues

When you make an easy vegan soup, you might run into some problems. But don’t worry, fixing these issues is simple. For instance, if your soup is too thin, just add some cornstarch or flour to thicken it.

Here are some common issues and their solutions:

  • Texture problems: adjust cooking time or add thickening agents
  • Seasoning adjustments: add more salt, pepper, or lemon juice to taste
  • Cooking time modifications: adjust cooking time or temperature as needed

By following these tips, your vegan soup will be a hit. Whether it’s a healthy crockpot meal or a plant-based slow cooker dish, practice makes perfect. You’ll get the hang of it in no time.

Storage and Reheating Guidelines

Storing and reheating your slow cooker meal prep is key for food safety and quality. For a vegan slow cooker soup recipe like the chickpea and kale soup, store it in the fridge for up to 5 days. Or freeze it for up to 3 months.

To reheat, use the microwave or stovetop. Make sure the soup reaches 165°F for safety. Freezing individual servings is also a great meal prep option.

Here are some tips for storing and reheating your soup:

  • Let the soup cool completely before refrigerating or freezing it.
  • Use airtight containers to store the soup in the refrigerator or freezer.
  • Label the containers with the date and contents.
  • When reheating, make sure to stir the soup occasionally to avoid scorching.

slow cooker meal prep

By following these guidelines, you can enjoy your slow cooker meal prep for longer. This includes one-pot soup recipes like the vegan slow cooker soup recipe. You’ll keep its quality and safety intact.

Meal Prep and Batch Cooking Tips

Meal prep and batch cooking are great for saving time. They help you have a healthy meal ready, even when you’re busy. Try portioning out individual servings and freezing them. This way, you can enjoy a nutritious meal on any day.

This vegetarian slow cooker meal is perfect for batch cooking. You can easily make more or less, depending on your needs. Just portion out the soup into containers or freezer bags. Make sure to label and date them so you can easily find what you have in the freezer.

Portioning and Freezing Methods

Here are some tips for portioning and freezing your hearty soup with chickpeas:

  • Use airtight containers or freezer bags to prevent freezer burn and keep your soup fresh.
  • Portion out individual servings, such as 1-2 cups per serving, to make it easy to thaw and reheat only what you need.
  • Label and date each container or bag so you can easily keep track of what you have in the freezer.
  • Consider freezing the soup in ice cube trays for a convenient and easy-to-use format.

By following these tips, you can enjoy a healthy and delicious vegetarian slow cooker meal. This hearty soup with chickpeas is full of protein and fiber. It’s a great choice for a healthy crockpot meal that will keep you full and satisfied.

Portion Size Calories Protein Fiber
1 cup 188 12g 5g
2 cups 376 24g 10g

Serving Suggestions and Pairings

There are many ways to serve your slow cooker comfort food. You can pair it with crusty bread or a fresh salad. This adds texture and complements the soup’s flavors, making it a complete meal.

For a more filling meal, try adding quinoa or roasted vegetables. These are not only tasty but also packed with nutrients. If you’re looking for something lighter, serve it with whole grain crackers or a green salad.

When it comes to garnishes, you have many choices. A squeeze of fresh lemon juice, some chopped herbs, or a dollop of yogurt can enhance the flavor. These not only add taste but also make your soup look appealing. With these ideas, you can make mealtime more exciting and satisfying.

Complementary Side Dishes

  • Crusty bread
  • Fresh salad
  • Quinoa
  • Roasted vegetables

Exploring these serving suggestions can help you find the best way to enjoy your slow cooker comfort food. Whether you like simple vegan soups or heartier options, there’s something for everyone.

Making Your Soup More Substantial

To make your hearty soup with chickpeas and kale more filling, try adding chickpeas or tofu for protein. You can also add quinoa or sweet potatoes for complex carbs. This will boost the calorie count and make you feel fuller.

A meatless slow cooker recipe like this can be tailored to your diet. Adding olive oil or avocado increases the calorie density. Serving it with bread or a salad can also make it more satisfying.

Here are some ways to make your nourishing slow cooker soup more filling:

  • Adding other protein sources like beans or lentils
  • Incorporating complex carbohydrates like brown rice or whole wheat bread
  • Using a variety of vegetables to increase the fiber content of the soup

With a few tweaks, your hearty soup with chickpeas and kale can become a more satisfying meal. Try different ingredients and combinations to find the perfect mix of taste and nutrition.

Health Benefits of Regular Consumption

Adding vegan slow cooker recipes to your diet can greatly improve your health. Plant-based meals, like slow cooker chickpea and kale soup, are full of nutrients. They support your digestive health and immune system. Plus, they’re easy to make and taste great.

The mix of chickpeas and kale in this soup is very beneficial. Chickpeas are high in protein and fiber, while kale is rich in vitamins A, C, and K. Eating this soup often can help lower cholesterol and reduce heart disease risk. It can also help prevent cancer. Making this soup a regular part of your meals is a big step towards a healthier life.

Some of the key benefits of regular consumption include:

  • Improved digestive health due to the high fiber content of chickpeas and kale
  • Boosted immune system function from the vitamins and minerals in kale
  • Increased satiety and weight management from the fiber and protein in chickpeas

By choosing vegan slow cooker recipes and plant-based meals, you’re moving towards a healthier lifestyle. This slow cooker chickpea and kale soup is a great example. It’s easy to make and packed with nutrients. So, why not try it and see the positive changes for yourself?

Time-Saving Preparation Hacks

Preparing a tasty and healthy crockpot meal like slow cooker chickpea and kale soup can be time-consuming. But, with a few simple tricks, you can make a nutritious and easy vegan soup without spending hours in the kitchen. Using pre-chopped ingredients from the supermarket is a big time-saver. It lets you focus on other things while you cook.

Another great hack is to cook the soup ahead of time with a slow cooker timer. You can prep the ingredients in the morning and set the timer. When you get home, you’ll have a ready-to-eat plant-based slow cooker dish. You can also chop veggies or cook chickpeas ahead of time and store them in the fridge or freezer. This is super helpful on busy weeknights when you need a quick, healthy meal.

Other hacks include using a slow cooker with a sauté function to brown ingredients before cooking. Also, making a big batch of soup to freeze for later is a great idea. By using these hacks, you can enjoy a healthy and delicious easy vegan soup, like slow cooker chickpea and kale soup, without spending too much time cooking. With a bit of planning and creativity, you can make a plant-based slow cooker dish that’s both nutritious and easy to make.

Here are some more tips to save time when making a healthy crockpot meal:

  • Use a slow cooker with a timer to cook the soup while you are away
  • Prepare the ingredients in advance and store them in the refrigerator or freezer
  • Use pre-chopped ingredients to reduce preparation time
  • Cook a large batch of soup and freeze it for later use

Conclusion

A slow cooker chickpea and kale soup is a great choice for a nutrient-dense meal. It’s easy to make and full of health benefits. The chickpeas provide protein, while the kale adds vitamins.

This slow cooker comfort food is perfect for any time. It’s great for busy weeknights or relaxing weekends. You can change the flavors to suit your taste and needs.

So, why not try this delicious and healthy soup? Your body and taste buds will love it.

FAQ

What are the key ingredients needed for a slow cooker chickpea and kale soup?

To make a slow cooker chickpea and kale soup, you’ll need chickpeas, kale, and veggies like onions, carrots, and celery. You’ll also need broth. These ingredients make a healthy and tasty soup. You can add spices and seasonings to make it your own.

What are the benefits of making a slow cooker chickpea and kale soup?

This soup is packed with protein and fiber from chickpeas and kale. It’s also low in calories and full of vitamins and minerals. Cooking it in a slow cooker is easy and convenient. You can prepare it ahead of time and come home to a ready meal.

What type of slow cooker should I use for this recipe?

Choose a 6-quart slow cooker for a big batch of soup. You might need a blender or immersion blender for a creamy texture.

How do I prepare the ingredients for the slow cooker chickpea and kale soup?

Start by preparing your ingredients. You can cook chickpeas from scratch or use canned ones. Kale should be cleaned and chopped. Onions, carrots, and celery can be sautéed for extra flavor.

How do I build layers of flavor in the slow cooker chickpea and kale soup?

To add flavor, sauté onions, carrots, and celery. Add spices like cumin and paprika. Use different veggies like kale and carrots. A good broth and lemon juice can also enhance the taste.

What are the step-by-step instructions for cooking a slow cooker chickpea and kale soup?

First, sauté the aromatics. Then, add chickpeas and broth. Cook on low for 6-8 hours. Add kale in the last 30 minutes. Season with salt, pepper, and lemon juice.

What are the health benefits of a slow cooker chickpea and kale soup?

This soup is nutritious and healthy. It’s rich in protein and fiber from chickpeas and kale. It’s low in calories and full of vitamins and minerals. You can make it vegan or gluten-free too.

How can I customize and vary the slow cooker chickpea and kale soup?

You can spice it up with cumin and paprika. Try adding quinoa or sweet potatoes for different flavors. Adding chickpeas or tofu makes it more filling.

How do I troubleshoot common issues with the slow cooker chickpea and kale soup?

For texture problems, adjust cooking time or add cornstarch. For flavor, add more salt, pepper, or lemon juice. Adjust cooking time or temperature as needed.

How can I store and reheat the slow cooker chickpea and kale soup?

Store it in the fridge for up to 5 days or freeze for 3 months. Reheat to 165°F for safety. You can microwave or heat it on the stovetop.

How can I meal prep and batch cook the slow cooker chickpea and kale soup?

Portion it into individual servings and freeze for later. Use airtight containers or freezer bags. Label and date them for easy identification.

How can I make the slow cooker chickpea and kale soup more substantial?

Add protein like chickpeas or tofu, or complex carbs like quinoa or sweet potatoes. Healthy fats like olive oil or avocado make it more filling. Serve with bread or salad for extra flavor.

What are the time-saving preparation hacks for the slow cooker chickpea and kale soup?

Use pre-chopped ingredients and cook it in advance. A slow cooker with a timer can save time. Prepare ingredients like chopping veggies or cooking chickpeas ahead of time.

Warm & Comforting Roasted Carrot & Red Pepper Soup


Carrot & Red Pepper Soup

Ever thought about making a tasty and healthy meal? Roasted carrot and red pepper soup is a favorite for many. It’s great for a chilly winter day. You can make it with simple ingredients and basic cooking steps.

The Perfect Bowl of Roasted Carrot & Red Pepper Soup

To start, you need to know the basics of making this soup. You’ll use carrots and red peppers and follow a simple recipe. This way, you’ll enjoy a warm and comforting bowl of soup anytime.

Key Takeaways

  • Roasted carrot and red pepper soup is a healthy and delicious meal option.
  • This soup can be made using simple ingredients and easy soup recipes.
  • It’s perfect for a cold winter’s day and can be served as a comforting bowl of homemade soup.
  • The recipe requires basic cooking techniques and ingredients, such as carrots, red peppers, and olive oil.
  • You can customize the recipe to suit your taste preferences and dietary needs.
  • Roasted carrot and red pepper soup is a popular choice among healthy soup ideas and homemade soup recipes.

The Perfect Bowl of Roasted Carrot & Red Pepper Soup

Exploring vegetarian soup recipe options, you’ll find roasted carrot and red pepper soup stands out. It’s not just tasty but also simple to make. You can tweak the recipe to suit your taste.

Making this soup at home lets you control the ingredients and seasonings. With a roasted vegetable soup like this, you can try different spices and herbs. Adding smoked paprika or fresh thyme can create a unique taste.

Here are some tips for making this soup:

  • Choose high-quality carrots and red peppers for the best flavor.
  • Feel free to experiment with spices and herbs to find your favorite mix.
  • Adding cooked cannellini beans or diced fennel can enhance the soup’s texture and flavor.

By following these tips and using a simple, vegetarian soup recipe, you can make a delicious roasted carrot and red pepper soup. It’s perfect for any time, whether you need a quick lunch or a cozy dinner.

Essential Kitchen Equipment for Your Soup

When making soup, the right kitchen equipment is key. For a tasty roasted carrot and red pepper soup, you’ll need a few essential tools. These include a blender, a soup pot, and a roasting pan, among others.

Here are some must-have kitchen tools:

  • Blender: For pureeing the soup to your liking
  • Soup pot: For simmering the soup and mixing all ingredients
  • Roasting pan: For roasting carrots and red peppers to enhance their sweetness
  • Immersion blender: For blending the soup in the pot, if you prefer
  • Measuring cups and spoons: For precise ingredient measurements

Having the right kitchen equipment makes soup making easier and more fun. It ensures your soup turns out delicious and healthy. With these essential tools, you’re ready to make a tasty roasted carrot and red pepper soup.

Selecting the Perfect Ingredients

When making a tasty carrot and red pepper soup, the ingredients matter a lot. You want to pick the best carrots, red peppers, and other veggies. For a veggie soup, add colorful bell peppers, onions, and garlic.

Look for firm, straight carrots with a bright orange color. Choose glossy, deep red peppers for the soup. Add healthy extras like celery, potatoes, and herbs like parsley or cilantro.

Key ingredients include vegetable broth, olive oil, and spices like cumin and coriander. These add depth and warmth, making the soup comforting. With the right mix of ingredients, you’ll have a delicious, nutritious soup for any time.

Here are some tips for picking the best ingredients:

  • Choose fresh, seasonal produce for the best taste and texture.
  • Use organic or local ingredients to support sustainable farming.
  • Experiment with spices and herbs to find your favorite mix.

Preparation and Roasting Techniques

To get the perfect roasted carrot and red pepper soup, mastering roasting techniques is key. Start by peeling and chopping carrots and red peppers into even pieces for even roasting. Remember to preheat your oven to 425˚F to enhance the vegetables’ natural sweetness.

In soup preparation, it’s all about balancing flavors and textures. Mix roasted veggies with aromatic spices for a rich, creamy soup. Use coconut oil for roasting and lime juice for extra taste.

Here are some more roasting techniques to try:

  • Roast the vegetables in the oven for 30 minutes, or until they’re tender and lightly caramelized.
  • Use a variety of spices, such as ground cumin and coriander, to add depth and warmth to the soup.
  • Don’t be afraid to experiment with different soup preparation methods, such as blending the soup for a creamy texture or adding a swirl of coconut milk for extra richness.

roasting techniques

Step-by-Step Cooking Instructions

To make a delicious and comforting bowl of roasted carrot and red pepper soup, follow these easy soup recipe steps. Start by preheating your oven to 425°F. While the oven is heating up, prepare the vegetables by chopping 3 pounds of medium-sized carrots and 2 red peppers.

Next, place the chopped carrots and red peppers on a baking sheet. Drizzle with 2 tablespoons of butter, and roast in the oven for 30-40 minutes, or until the vegetables are tender. This soup cooking instructions step is key for bringing out the natural sweetness of the carrots and red peppers.

After roasting the vegetables, let them cool down. Then, peel the red peppers and chop them into smaller pieces. Now, you can start blending the soup using a blender or food processor. Add 4 cups of vegetable broth, 1/2 cup of coconut milk, and 1 tablespoon of apple cider vinegar. This step-by-step guide will help you create a smooth and creamy soup.

Season the soup with salt, pepper, and your favorite spices, such as nutmeg and cinnamon. Serve the soup hot, garnished with fresh herbs, such as basil or thyme. With these easy soup recipe steps, you can enjoy a delicious and comforting bowl of roasted carrot and red pepper soup.

Mastering the Perfect Soup Consistency

To make a perfect soup, focus on the consistency and seasoning. The right consistency is key. You can change the soup’s thickness by adding water or reducing liquid.

Seasoning is all about balance. Add salt, herbs, or lemon juice to enhance the flavor. The goal is to make a soup that you love.

soup consistency

  • Blend the soup to your liking with a blender or immersion blender.
  • Use a roux or slurry to thicken it, if needed.
  • Try different seasoning combinations to find the perfect flavor.

Follow these tips and practice making soup. Soon, you’ll create delicious, satisfying soups every time.

Nutritional Benefits and Dietary Information

Enjoying roasted carrot and red pepper soup is not just tasty. It’s also good for you. This healthy soup is full of vitamins and minerals. It’s a great choice for a balanced diet.

Each serving has only 171 calories. It’s a guilt-free option for lunch or dinner.

The dietary information for this soup is impressive. It has 3.4 grams of protein, 22.3 grams of carbs, and 7.9 grams of fat. It’s also high in fiber, with 7 grams per serving. This helps with digestion.

The celery and other veggies make the soup refreshing and hydrating.

Some of the key nutritional benefits of this soup include:

  • High in vitamin A, with 26,503 IU per serving
  • Good source of vitamin C, with 29 mg per serving
  • Rich in potassium, with 659 mg per serving
  • Low in sodium, with 1306 mg per serving

This roasted carrot and red pepper soup is both nutritious and delicious. It’s a great choice for a healthy diet. With its many nutritional benefits and low calorie count, it’s perfect for those seeking a healthy soup option.

Storage and Reheating Guidelines

After making your tasty roasted carrot and red pepper soup, it’s key to store and reheat it right. This keeps your soup fresh and safe to eat. You can keep it in the fridge for up to 5 days or freeze it for 3 months.

When reheating, use the stovetop or microwave. This stops bacteria from growing. Here are some important tips:

  • Heat your soup to 165°F (74°C) to ensure it’s safe to eat.
  • Check the soup’s temperature with a thermometer, mainly when using the microwave.
  • Don’t overheat your soup to save its flavor and nutrients.

Freezing your soup can also extend its life. Use airtight containers or freezer bags to avoid freezer burn. These tips help you enjoy your soup longer while keeping it safe and tasty.

soup storage tips

Storage Method Duration
Fridge Up to 5 days
Freezer Up to 3 months

Creative Serving Suggestions

Presenting your roasted carrot and red pepper soup can really enhance the dining experience. A few creative ideas can turn a simple meal into a feast for the eyes and taste buds. Try adding a swirl of cream or some chopped fresh herbs like parsley or chives. This adds color and freshness.

For a heartier meal, pair the soup with crusty bread or a green salad. You can also add cooked chicken or shrimp to make it more filling. The goal is to have fun and find the perfect way to serve it. Other ideas include serving it in a bread bowl or topping it with sour cream and paprika.

Here are some more ideas for presenting your soup:

  • Use garnishes like chopped herbs, grated cheese, or paprika to add color and texture.
  • Serve it in a unique bowl, like a hollowed-out pumpkin or mug, for a whimsical touch.
  • Add a side dish, like a salad or bread, to complement the soup and add variety.

Being creative with your serving ideas can make your roasted carrot and red pepper soup unforgettable. Whether it’s the main course or a side, the right presentation can elevate the dining experience.

Seasonal Variations and Adaptations

As you enjoy your roasted carrot and red pepper soup, think about changing it up with the seasons. You can use different ingredients and spices that are in season. This keeps your dish fresh and exciting all year.

In summer, add fresh and light ingredients for a cool twist. Try herbs like basil or cilantro. Grilled corn or zucchini can also add sweetness and texture.

Summer Version

For a summer version of your soup, use fresh ingredients. Here are some ideas:

  • Dice bell peppers or zucchini for extra flavor and nutrients.
  • Add fresh herbs like parsley or dill for a bright taste.
  • Use a light broth, like vegetable or chicken, to make it less rich.

Winter Modifications

In winter, make your soup heartier and more comforting. Here’s how:

  • Add diced potatoes or parsnips for thickness and warmth.
  • Use warm spices like cumin or paprika for a cozy flavor.
  • Try a rich broth, like beef or mushroom, for depth.

By changing your soup with the seasons, you can enjoy it all year. Whether you like a light summer soup or a warm winter one, you can adapt this recipe to your liking.

winter soup

Troubleshooting Common Issues

When you make roasted carrot and red pepper soup, you might run into some common problems. These can mess with the soup’s texture, taste, and quality. It’s key to fix these issues to make sure your soup is tasty and fulfilling.

First, figure out what’s causing the problem. If your soup is too thick, adding a bit more water or broth can help. If it’s too thin, simmer it for a few more minutes to thicken it. Flavor adjustments can be made by adding more spices, herbs, or seasonings.

Some common mistakes to avoid include overcooking the veggies, which can make them mushy. Check the veggies often while they roast and take them out when they’re tender but crisp. Also, don’t use too little liquid, as this can make the soup thick and chunky. Use the right amount of water or broth and adjust the seasoning as needed.

By following these tips and avoiding common mistakes, you can make a delicious roasted carrot and red pepper soup. Always taste and adjust the seasoning as you go. Don’t be afraid to try different spices and herbs to find the perfect flavor. With practice and patience, you’ll become a pro at making this soup and enjoy it all year round.

Conclusion

Preparing a delicious roasted carrot and red pepper soup at home is easy and rewarding. This soup not only warms the soul but also gives you important nutrients. The roasted carrots add a rich flavor, while the red peppers bring a vibrant color and sweetness.

Looking for a cozy bowl on a cold day or a healthy meal? This recipe is perfect. It’s easy to follow and you can change it up to fit your taste. So, get your ingredients ready, turn on the oven, and enjoy the smell of your homemade soup.

FAQ

What is the origin of roasted carrot and red pepper soup?

Roasted carrot and red pepper soup comes from many places around the world. It’s loved for its creamy texture and strong flavors.

Why is this recipe a good option for making at home?

Making this soup at home lets you tailor it to your taste and needs. You can also pick the freshest ingredients.

What essential kitchen equipment is needed to make this soup?

You’ll need a blender, a pot, and a roasting pan to make this soup. Using the right tools makes a big difference.

How do I choose the best ingredients for this soup?

Choose the best carrots, red peppers, and veggies for great flavor and texture. Pick the right spices to match the veggies’ sweetness.

What preparation and roasting techniques are important for this recipe?

Peeling and chopping the veggies right, and roasting them well, are key. These steps affect the soup’s taste and texture.

How do I make roasted carrot and red pepper soup step-by-step?

First, prepare the veggies. Then roast them. Blend them into a smooth soup. Follow this guide for success.

How can I achieve the perfect soup consistency?

Adjust the soup’s thickness and taste to get it just right. You might need to blend more or add ingredients.

What are the nutritional benefits of roasted carrot and red pepper soup?

This soup is packed with vitamins, minerals, and antioxidants. It’s good for your health, helping with weight and overall well-being.

How should I store and reheat my roasted carrot and red pepper soup?

Store and reheat the soup right to keep it fresh and safe. Follow these tips for the best results.

How can I serve roasted carrot and red pepper soup in a creative way?

Serve the soup with creative garnishes and toppings. This makes the meal memorable and fun.

How can I adapt this recipe for different seasons and occasions?

You can change the soup for any season or event. Add new ingredients or spices to match the weather and mood.

What are some common issues I might encounter when making this soup, and how can I troubleshoot them?

You might face texture or flavor issues. This section helps you solve these problems for a great soup.

Zucchini, Basil & White Bean Soup: A Nourishing Recipe


Bean Soup

Looking for a healthy soup that’s easy to make and full of nutrients? Zucchini, basil, and white bean soup is a fantastic choice. It’s delicious, nutritious, and can be tailored to your liking. This vegetarian soup is a great way to add flavor and health to your meals.

Introduction to Zucchini, Basil & White Bean Soup

This soup is perfect for summer, ready in about 40 minutes for 4 servings. Each serving has about 218 calories, making it a low-calorie choice. It has 5 grams of fat, with 1 gram of saturated and 3 grams of unsaturated fat.

Key Takeaways

  • Zucchini, basil, and white bean soup is a healthy and easy-to-prepare meal
  • The recipe yields 4 servings, each containing approximately 218 calories
  • The soup can be stored in the fridge for up to 5 days or frozen for up to 3 months
  • The recommended quantity of zucchini used is 450 grams (1 lb), typically 2-3 medium zucchinis
  • The soup is a great option for those looking for a low-calorie and nutritious meal
  • Zucchini, basil, and white bean soup is a versatile recipe that can be customized to suit various tastes

The Benefits of Zucchini, Basil & White Bean Soup

This soup is not just tasty; it’s also packed with nutrients. It’s a great choice for anyone looking to add more health to their diet. The mix of zucchini, basil, and white beans makes it a perfect, easy, and affordable option.

This soup is great for hot weather because it’s light and refreshing. It’s made with ingredients that are not only good for you but also easy to find. This makes it a quick and simple meal to prepare.

Nutritional Value

Zucchini adds fiber and vitamins to the soup, while white beans bring protein and fiber. Basil adds flavor and antioxidants. Together, they make a healthy and tasty soup.

Seasonal Benefits

This soup is perfect for summer because it uses fresh zucchini and basil. Using seasonal ingredients makes the soup flavorful and affordable. These ingredients are often cheaper and more available when they’re in season.

Budget-Friendly Advantages

This soup is also very budget-friendly. The ingredients are affordable, and the recipe makes a lot of soup. It’s great for meal prep or feeding a big family. It’s a cost-effective way to enjoy a nutritious and flavorful meal.

In summary, this zucchini, basil, and white bean soup is a fantastic choice. It’s healthy, easy to make, and won’t break the bank. Its nutritional value, seasonal benefits, and affordability make it a must-have in your kitchen.

Nutrient Amount per serving
Calories 398.3 kcal
Protein 18.3 g
Fat 11.4 g
Carbohydrates 58.4 g
Fiber 13.8 g

Essential Ingredients for Your Soup

To make a tasty and comforting meal, using fresh ingredients is key. For a healthy soup like zucchini, basil, and white bean, you need zucchini, basil, white beans, garlic, and vegetable broth. These ingredients add flavor and nutrition, making it a great choice for a fresh soup.

When picking your ingredients, look for quality and freshness. Fresh basil brings a bright taste, while garlic adds depth. Using fresh ingredients makes your soup more flavorful and nutritious, ideal for a cozy meal.

Here is a list of the essential ingredients you’ll need:

  • Zucchini
  • Fresh basil
  • White beans
  • Garlic
  • Vegetable broth

These ingredients help you make a delicious and healthy soup. You’ll enjoy a meal that’s both tasty and good for you.

fresh ingredients soup

You can also add your own touches to the soup. Try adding spinach or kale for more nutrition. With these ingredients and a few tweaks, you can make a healthy and comforting meal.

Kitchen Tools and Equipment Needed

To make a tasty zucchini, basil, and white bean soup, you’ll need some basic tools. The right tools make cooking easier and more fun. For zucchini recipes, a big pot is key for sautéing and simmering. You’ll also need a cutting board and knife to chop the zucchini, basil, and veggies.

For basil soup, using fresh, high-quality ingredients is important. A large pot with a heavy bottom is best for even heat. A blender or immersion blender helps puree the soup to your liking. For white bean soup, a slow cooker or pressure cooker is great for cooking beans and veggies.

kitchen tools for easy to make soup

Optional tools can make your soup even better. A food processor for chopping, a garlic press for garlic flavor, and a lemon juicer for fresh lemon juice are great. With these tools, you’re ready to make a delicious zucchini, basil, and white bean soup.

Here are some basic utensils you’ll need for the soup:

  • Large pot
  • Cutting board
  • Knife
  • Measuring cups and spoons

And here are some optional equipment that can enhance the results:

  • Immersion blender
  • Food processor
  • Garlic press
  • Lemon juicer

Preparing Your Fresh Ingredients

To make a tasty plant-based soup, start by preparing your ingredients. Wash, chop, and sauté zucchini, basil, and garlic to enhance their flavors. For a soup with zucchini, you’ll need 2 cups of zucchini, cut into half-moon slices. Also, use 1/2 cup of chopped onion and 1 tsp each of dried basil, dried marjoram (or oregano), ground fennel, and minced garlic.

Preparing these ingredients is easy to make and quick. Just chop the onion and garlic, and slice the zucchini into half-moon shapes. Then, sauté them in oil to release their flavors. This step is key to a delicious plant-based soup.

Here are some tips for preparing your ingredients:

  • Wash all the ingredients thoroughly before chopping or slicing them.
  • Chop the onion and garlic finely to release their flavors.
  • Slice the zucchini into half-moon shapes for even cooking.

By following these steps, you’ll be able to prepare your ingredients for a delicious soup with zucchini. This easy to make soup is great for a quick, healthy meal. It’s packed with nutrients and is simple to prepare, making it a perfect choice for a plant-based soup.

Step-by-Step Cooking Instructions

To make a tasty zucchini white bean soup, start by heating 2 tablespoons of olive oil in a large pot. Add 1 small, finely diced onion, 2 large, diced carrots, and 2 stalks of diced celery. Cook until the vegetables are tender.

Then, add 2 cloves of minced garlic and cook for another minute. Next, add 2 medium, diced zucchinis, 15 ounces of fire-roasted diced tomatoes, 2 tablespoons of tomato paste, and 4 cups of chicken or vegetable stock. Bring the mixture to a boil, then reduce the heat and let it simmer for 20-25 minutes.

Add 15 ounces of cannellini beans, 2 tablespoons of Tuscan seasoning, salt, black pepper, and red pepper flakes. Let it simmer for an additional 10-15 minutes or until the soup has reached the desired consistency.

For a zucchini soup recipe with a creamy texture, add some coconut milk or heavy cream towards the end of the cooking time. Stir in 2 cups of chopped baby spinach and let it cook until wilted. Serve the basil white bean soup hot, garnished with some chopped fresh basil and a sprinkle of parmesan cheese.

zucchini white bean soup

Initial Preparation

  • Chop the onion, carrots, and celery
  • Mince the garlic
  • Dice the zucchinis

Cooking Process

  1. Heat the olive oil in a large pot
  2. Add the chopped onion, carrots, and celery and cook until tender
  3. Add the minced garlic and cook for an additional minute

Final Seasoning

Season the soup with salt, black pepper, and red pepper flakes to taste. You can also add some chopped fresh basil for extra flavor.

Customizing Your Soup’s Consistency

The consistency of your soup is key to a comforting meal. You can adjust the broth or cream to your liking. This makes your white bean soup recipe just right for you.

For a lighter soup, add more broth. For a creamier soup, add more cream. This flexibility lets you make your zucchini basil soup exactly as you want it. The goal is to find a balance that’s both flavorful and satisfying.

comforting soup

Here are some tips for adjusting your soup’s consistency:
* Add more broth for a lighter soup
* Add more cream for a richer soup
* Try different broth to cream ratios to find your favorite

Customizing your soup’s consistency makes it more enjoyable. Whether you like it light or rich, your zucchini basil soup will be delicious. So, experiment and find the perfect balance for your white bean soup recipe.

Flavor Variations and Additions

Exploring vegetable soup recipe opens up a world of flavors and health benefits. You can tweak your soup to match your taste with simple changes. Making healthy soup recipes lets you tailor them to your liking.

Start by trying different herbs and spices. Swap basil for parsley or cilantro for a new taste. Adding carrots, celery, or spinach boosts your soup’s nutrition.

Herb Substitutions

  • Parsley: adds a fresh, green flavor
  • Cilantro: provides a citrusy, herbal taste
  • Dill: offers a bright, refreshing flavor

Vegetable Options

  • Carrots: add natural sweetness and crunch
  • Celery: provides a fresh, herbal flavor
  • Spinach: increases the nutrient density and adds a boost of iron

Protein Alternatives

  • White beans: a great source of plant-based protein and fiber
  • Chickpeas: add protein, fiber, and a nutty flavor
  • Tofu: provides a versatile and protein-rich option

By adding these variations, you can make a vegetable soup recipe that’s both tasty and healthy. Don’t be afraid to mix and match to find the perfect flavor and nutrition for your healthy soup recipes.

Ingredient Quantity Nutritional Value
White beans 1 1/2 cups 18g protein, 10g fiber
Carrots 3 large 2g protein, 3g fiber
Spinach 5 ounces 3g protein, 4g fiber

Storage and Reheating Guidelines

When storing and reheating your zucchini, basil, and white bean soup, remember a few key points. This comfort food stays fresh and tasty for up to 5 days in the fridge. You can also freeze it for up to 3 months, ideal for using seasonal ingredients at their best.

To reheat, add a bit of broth or water and stir every 30 seconds in the microwave. Or, reheat on the stovetop over low heat, stirring now and then. This keeps the flavors and textures of your easy soup recipes intact, making it a quick and comforting meal.

Here are some extra tips for storing and reheating your soup:

  • Leave an inch of space at the top of each jar for expansion when freezing
  • Stir individual portions every 30 seconds when reheating in the microwave
  • Add a splash of broth or water as needed when reheating

By following these simple guidelines, you can enjoy your zucchini, basil, and white bean soup all year. It’s perfect for using up seasonal ingredients and providing comfort food. Whether you need a quick and easy soup recipe or a hearty meal, this soup will be a hit.

Serving Suggestions and Pairings

When serving your zucchini, basil, and white bean soup, think about pairings to make it special. This soup is creamy and full of fresh tastes. It’s great with many delicious soup ideas. Try it with crusty bread, like sourdough or baguette, for a nice match.

For a lighter choice, pair it with a fresh salad or roasted veggies like carrots or asparagus. Adding crunchy croutons on top is also a good idea. For something more filling, grilled chicken or fish with warm bread is perfect. The goal is to enhance the soup’s flavors without overwhelming them.

Here are some ideas for serving your soup:

  • Grate some Parmesan cheese on top for extra taste
  • Use a dollop of sour cream or yogurt for creaminess
  • Add chopped fresh herbs like parsley or basil for a fresh flavor

With these serving suggestions, your zucchini, basil, and white bean soup will be unforgettable. Its rich flavors and many pairing options make it a favorite among delicious soup ideas.

Pairing Options Description
Crusty Bread Complements the flavors of the zucchini recipes
Fresh Salad Provides a light and refreshing contrast
Roasted Vegetables Adds a pop of color and flavor

Troubleshooting Common Issues

When making healthy soup recipes, you might face some problems. Texture issues, like it being too thick or too thin, are common. To fix this, you can change the liquid amount or add a thickener.

Seasoning problems, like it being too bland or too salty, can also happen. To solve this, add more herbs or spices, or adjust the salt.

Some tips for fixing easy soup recipes include using seasonal ingredients. Fresh zucchini and basil can greatly improve the soup’s taste and smell. Also, pay attention to cooking time and temperature to avoid texture and seasoning problems.

  • Check the recipe for any errors or omissions
  • Adjust the amount of liquid or thickening agent to achieve the desired texture
  • Add more herbs or spices to taste
  • Use seasonal ingredients to ensure the best flavor and texture

Texture Problems

Texture issues can be fixed by changing the liquid amount or adding a thickener. For example, add more broth or water to thin it out. Or, make a slurry from flour or cornstarch to thicken it.

Seasoning Adjustments

Seasoning can be adjusted by adding more herbs or spices. You can also tweak the salt or acidity to balance the flavors. Remember to taste the soup often and adjust the seasoning as needed for the perfect taste.

Conclusion

Zucchini, basil, and white bean soup is a true comfort food. It combines delicious flavors with great nutrition. This dish is perfect if you’re looking for a tasty delicious soup idea or want to try more zucchini recipes.

Follow the easy steps to make a savory, satisfying soup. Customize it to your liking. Enjoy the comforting aroma, creamy texture, and the burst of flavors. This soup will become a favorite in your home.

FAQ

What are the benefits of zucchini, basil, and white bean soup?

This soup is full of vitamins, minerals, and fiber. It’s also a smart choice for your wallet and fits well with the season.

What ingredients are needed to make this soup?

You’ll need zucchini, fresh basil, white beans, vegetable broth, and some spices.

What kitchen tools and equipment are required to make this soup?

You’ll need basic tools like a cutting board, knife, and pot. You might also use an immersion blender for the perfect texture.

How do I prepare the fresh ingredients for the soup?

Make sure to wash, chop, and sauté the ingredients well. This brings out their best flavors.

What are the steps to cook the zucchini, basil, and white bean soup?

First, prepare the ingredients. Then, simmer them together. Finish with the right seasoning for the best taste.

How can I customize the consistency of the soup?

Change the soup’s thickness by adding more or less broth. Or, use an immersion blender for your preferred texture.

What flavor variations and additions can I make to the soup?

Try different herbs, vegetables, or proteins to make the soup your own.

How should I store and reheat the leftover soup?

You can refrigerate or freeze the soup. Reheat it on the stovetop or in the microwave.

What are some serving suggestions and pairings for this soup?

Serve the soup with crusty bread. Add extra basil, croutons, or a drizzle of olive oil for extra flavor.

How can I troubleshoot any issues with the soup’s texture or seasoning?

If the soup is off, try adjusting the consistency or adding more seasoning. This should fix any problems.

No-Knead Bread: Effortless Artisanal Loaf in Minutes


No-Knead Bread

Can you make delicious homemade no-knead bread with just a few minutes of effort? Yes, you can! Easy no-knead bread recipes have made it simple to bake at home. You’ll get a crunchy crust and a soft inside.

With an easy no-knead bread recipe, you can get professional results quickly. No need to spend hours in the kitchen. You can make loaves that are as good as those from local bakeries. Whether you’re new to baking or experienced, no-knead bread is fun to explore.

Key Takeaways

  • You can create delicious no-knead bread with minimal effort, using a simple no-knead bread recipe.
  • No-knead bread recipes typically require just a few minutes of active preparation time.
  • Homemade no-knead bread can be made with basic ingredients, including bread flour, yeast, salt, and water.
  • The ideal dough rising temperature for no-knead bread is between 25 – 30°C (77 – 86°F).
  • No-knead bread can be baked in a Dutch oven, yielding a crispy crust and fluffy interior.
  • Cooked no-knead bread stays fresh for 2 days and can be frozen for up to 3 months.

The Revolutionary No-Knead Bread Method

The no-knead bread method has become very popular in recent years. Its history is quite fascinating. This method makes baking at home simple and effortless, allowing you to create artisanal loaves easily. It’s great for those who want to bake without spending hours in the kitchen.

Jim Lahey is credited with popularizing this method in the early 2000s. His approach involves mixing the dough and letting it rest for a long time. This results in a crispy crust and a chewy interior. The benefits of no-knead baking include ease of preparation, flexibility with ingredients, and delicious results. You can also try different no-knead bread variations to create unique flavors and textures.

Some of the key benefits of the no-knead bread method include:

  • Easy to prepare: The no-knead bread method requires minimal effort and time.
  • Flexible ingredients: You can experiment with different types of flour, yeast, and other ingredients to create unique flavor profiles.
  • Delicious results: The no-knead bread method produces a crispy crust and a chewy interior, making it perfect for sandwiches, toast, and other bread-based dishes.

https://www.youtube.com/watch?v=3xtj9X1jDc0

Essential Equipment for Perfect No-Knead Bread

To make perfect no-knead bread, you need the right tools. You’ll need a Dutch oven, bread stone, and baking sheet. These tools help make a crispy crust and a well-cooked inside.

A Dutch oven is a must-have for baking no-knead bread at home. It creates a steamy environment for a crispy crust. Preheat the Dutch oven to 500°F for 45 minutes before baking.

After putting the dough in, lower the temperature to 450°F for 25 minutes. Then, bake for an extra 15 to 20 minutes without the lid.

You also need a bread stone to improve the crust. A baking sheet is key for shaping and letting the dough rise. When picking your tools, think about the material and size. A bigger Dutch oven or bread stone is better for making more bread.

  • Dutch oven: Preheating and baking the bread
  • Bread stone: Enhancing the crust
  • Baking sheet: Shaping and rising the dough

Investing in the right tools, like a Dutch oven, bread stone, and baking sheet, will help you make delicious bread at home.

Understanding Your Ingredients

When making no-knead bread, the quality of your ingredients matters a lot. You need to pick the right flour, yeast, and water temperature for the best results. You’ll also need flour, yeast, water, salt, and sometimes sugar or nuts.

The flour you choose can change your bread’s texture and taste. You can use all-purpose flour, bread flour, or whole wheat flour. The yeast you pick is key for making the dough rise. You can use active dry yeast or instant yeast, depending on what you like. The water’s temperature is also important for activating the yeast and making a smooth dough.

Flour Types and Effects

Different flours can make your no-knead bread turn out differently. All-purpose flour makes a lighter, airier bread. Bread flour makes a denser, chewier bread. Whole wheat flour adds a nutty flavor and a coarser texture.

Yeast Selection Guide

Choosing the right yeast is important for your no-knead bread. Active dry yeast needs to be rehydrated before use. Instant yeast can be added directly to the dry ingredients.

Water Temperature Matters

The water’s temperature is key for activating the yeast and making a smooth dough. The best temperature is between 105-110°F (40-43°C). Water that’s too hot or too cold can affect your bread’s rise and texture.

Salt and Additional Ingredients

Salt is essential in no-knead bread, helping control the yeast and adding flavor. You can also add sugar, nuts, or seeds for different tastes. The key is to experiment and find what you like best.

no-knead bread ingredients

Understanding your ingredients can help you make a delicious and unique loaf. Choose the right flour, yeast, and water temperature for the best results.

Ingredient Function
Flour Provides structure and texture
Yeast Helps the dough rise
Water Hydrates the dough and activates the yeast
Salt Controls the yeast and adds flavor

The Basic No-Knead Bread Recipe

To make a tasty basic no-knead bread recipe, you need just 4 things: flour, yeast, salt, and water. This easy no-knead bread recipe is great for beginners. It’s simple and needs only a few ingredients. You’ll need 3 cups of flour, 1.5 teaspoons of salt, 0.5 teaspoons of yeast, and 1.5 cups of water at room temperature.

Preparing this simple no-knead bread recipe takes about 5 minutes. Then, let it rest for 12-18 hours at room temperature. Baking takes around 40 minutes. Bake in a 6-quart Dutch Oven at 450 degrees Fahrenheit.

Here’s a quick summary of the recipe:

  • 3 cups all-purpose flour
  • 1.5 teaspoons salt
  • 0.5 teaspoons instant yeast
  • 1.5 cups room temperature water

basic no-knead bread recipe

This basic no-knead bread recipe is perfect for beginners. It’s easy to make and tastes amazing. Try this easy no-knead bread recipe today and enjoy homemade bread!

Mastering the Long Fermentation Process

To make the perfect loaf, you must grasp the long fermentation process. This step lets the dough rest and rise for 12 to 18 hours. Yeast breaks down sugars, making the dough rise. Keeping the temperature right is key for the dough’s texture.

Getting the timing right is also important. The best temperature for fermentation is about 72 degrees F. Let the dough rest in a cool, draft-free spot. Watch for bubbles and a puffed look to know it’s ready.

Here are some key factors to consider when mastering the long fermentation process:

  • Temperature control: Keep the dough at a consistent temperature between 68-72 degrees F.
  • Timing fermentation: Allow the dough to ferment for at least 12 hours, but no more than 18 hours.
  • Visual cues: Look for bubbles on the surface and a slightly puffed texture to determine if the dough is ready.

long fermentation process

Mastering the long fermentation process lets you make delicious, authentic artisanal bread. Keep an eye on temperature, timing, and visual cues for perfect dough.

Factor Ideal Condition
Temperature 68-72 degrees F
Timing 12-18 hours
Visual Cues Bubbles on surface, slightly puffed texture

Shaping Techniques for Beautiful Loaves

Shaping techniques are key to making no-knead bread look great. The right way to shape can give you a smooth crust and a nice look. The boule, a French term for round bread, is a popular choice.

To shape a boule, use a banneton or a bowl. These tools help you get the right shape. Dough weights vary by basket size. An 8-inch basket holds 500 to 650 grams, a 10-inch holds 700 to 1000 grams, and a 12-inch holds 1100 to 1300 grams.

Here are some tips for shaping no-knead bread:

  • Use a banneton or a bowl to help create the desired shape
  • Make sure the dough is smooth and elastic at the end of bulk fermentation
  • Achieve a tight outer skin by shaping the dough tightly
  • Use a bench scraper to help form a tight skin on the dough when shaping small buns or rolls

no-knead bread shaping

Shaping no-knead bread takes practice, but with the right techniques, you can make stunning loaves. The right shaping can greatly improve your bread’s look. Whether you’re making a boule, batard, or baguette, the right technique will impress everyone.

Creating the Perfect Crust

To get a perfect crust, you need to think about a few things. These include steam baking, scoring patterns, and keeping the right temperature. A great crust can really elevate the taste of your bread. So, it’s worth putting in the effort to get it just right.

Steam Baking Methods

Steam baking is key for a crispy, golden crust. It makes the crust both crunchy and full of flavor. You can use a steam injector or a Dutch oven with a lid to achieve this.

Scoring Patterns

Scoring patterns also play a big role in your bread’s crust. Different patterns can change the texture and look of your bread. Try out different designs to see what you like best. You might start with a simple cross or try something more complex.

Temperature Control

Keeping the right temperature is vital for a perfect crust. The best baking temperature is between 425°F and 475°F. Make sure your oven is at the right temperature before you start. A thermometer can help you check the oven’s temperature and adjust it if needed.

Here’s a quick rundown of what you need for a perfect crust:

  • Steam baking methods: use a steam injector or a Dutch oven with a lid
  • Scoring patterns: experiment with different patterns to find the one that works best for you
  • Temperature control: ensure that your oven is at the correct temperature before baking

Troubleshooting Common Issues

When making no-knead bread, you might run into some common problems. Troubleshooting common issues is key to getting that perfect crust and crumb. One big issue is overproofing, which can make the bread fall flat or feel dense.

To steer clear of no-knead bread problems, keep an eye on how the dough ferments. Common mistakes like old yeast, wrong water temperature, or mixing too much can ruin your loaf.

Here are some tips for troubleshooting common issues:

  • Make sure your yeast is fresh to help it ferment well.
  • Use water between 105°F and 115°F to wake up the yeast.
  • Don’t overmix the dough to prevent a dense, tough crumb.

By following these tips and watching out for common mistakes, you can dodge no-knead bread problems. Aim for a delicious, crusty loaf. Always check on the dough’s fermentation and tweak the recipe if needed for the best outcome.

Creative Variations for Your No-Knead Bread

Once you get the hang of making no-knead bread, you can try new things. You can mix in whole wheat flour for up to 25% of the all-purpose flour. This makes your bread healthier and gives it a richer taste.

Adding seeds or nuts like pumpkin, sesame, or walnuts can make your bread crunchy and flavorful. You can also spice things up by adding dried herbs, spices, or cheese. For instance, adding dried rosemary and olive oil can give your bread a Mediterranean flair.

Here are some tips for trying new things:

  • Start with small changes and see how they affect the final product
  • Keep track of your ingredients and proportions so you can repeat your successes
  • Don’t be afraid to try new and unusual ingredients to create unique flavor combinations

Exploring different variations can make your no-knead bread-making even more exciting. You can play with whole wheat, seeds, nuts, or spices. The possibilities are endless, and the fun is just starting.

Conclusion: Your Journey to Artisanal Bread Making

As you finish your no-knead bread-making journey, think about how proud you must feel. You’ve learned to make delicious bread, just like the pros. This is thanks to the tips and techniques from this article.

Sharing your homemade bread with others is truly special. The smell of fresh bread in your kitchen makes everyone happy. Your skills have grown, and you’re now excited to try new flavors and textures.

The journey of making no-knead bread is just as important as the bread itself. It’s about the joy of making something good with your own hands. Keep improving your skills and trying new recipes. There’s always more to learn and enjoy.

So, keep baking and learning. Your journey as an artisanal bread maker is just starting. There are many tasty adventures ahead of you.

FAQ

What is no-knead bread and what are its benefits?

No-knead bread is a simple way to make delicious loaves at home. It’s easy to prepare and requires little time. You can get a crispy crust and chewy interior with just a bit of effort.

What is the history and science behind the no-knead bread method?

No-knead bread comes from old bread-making ways. It’s now a favorite for home bakers. The method uses a long fermentation to build the dough’s texture.

What essential equipment is needed for baking no-knead bread?

You’ll need a Dutch oven, a bread stone, and baking sheets. These tools help make the bread crusty and the inside just right.

How do I choose the right ingredients for no-knead bread?

Choosing the right flour, yeast, water, and salt is key. Different flours and yeast types affect the bread’s taste. Water temperature also matters.

What is the basic no-knead bread recipe?

The basic recipe is simple. It needs just a few ingredients and little time. Using the right techniques and tools makes great loaves at home.

How do I master the long fermentation process for no-knead bread?

Mastering fermentation is key for perfect no-knead bread. Control the temperature and timing. Watch for visual signs that the dough is ready.

What shaping techniques should I use for beautiful no-knead bread loaves?

Shaping techniques greatly affect the loaf’s look. Use a banneton or bowl for a smooth crust. These methods make your bread look stunning.

How can I create the perfect crust on my no-knead bread?

For a perfect crust, try steam baking and scoring. Control the baking temperature too. These steps make a crispy, golden crust.

What common issues might I encounter when making no-knead bread, and how can I troubleshoot them?

Issues like overproofing and underproofing can happen. Knowing how to fix these problems ensures great results every time.

What creative variations can I explore with no-knead bread?

No-knead bread is great for trying new things. You can add whole wheat, seeds, nuts, or flavors. Experimenting leads to unique and tasty loaves.

Delicious Garlic Roasted Mushroom & Thyme Soup


Garlic Roasted Mushroom & Thyme Soup

Thinking about making garlic-roasted mushroom & thyme soup? You might wonder why it’s so special. Can roasted garlic, fresh thyme, and wild mushrooms make a soup unforgettable? Yes, they do. Together, they create a cozy, flavorful soup.

To make this soup, you need fresh ingredients like mushrooms, garlic, and thyme. Add heavy cream for a rich, creamy texture. This soup is perfect for any time you want something comforting or creamy.

Key Takeaways

  • You can create a delicious garlic-roasted mushroom & thyme soup using fresh ingredients like mushrooms, garlic, and thyme.
  • The combination of roasted garlic and heavy cream adds a rich and creamy texture to the soup.
  • Using 2 lbs of mixed wild mushrooms and 4 cloves of garlic can create a truly unforgettable roasted garlic soup experience.
  • Garlic-roasted mushroom & thyme soup is a perfect dish for any occasion, whether you’re in the mood for a comforting mushroom thyme soup or a creamy roasted garlic soup.
  • The soup contains approximately 316 calories per serving, making it a relatively healthy option.
  • You can store leftover soup in the refrigerator for up to 2 days, but freezing is not recommended.

Understanding the Magic of Garlic Roasted Mushroom & Thyme Soup

Exploring savory mushroom soup reveals a rich history and health perks. Garlic, thyme, and mushrooms blend for a gourmet soup. Heavy cream makes it a creamy, indulgent treat.

Mushroom soups have ancient roots, with mushrooms being a key ingredient across cultures. From shiitake‘s earthy taste to oyster mushrooms’ delicacy, each adds a special touch. The garlic thyme soup recipe showcases how these flavors come together beautifully.

History of Mushroom Soups in Culinary Tradition

Mushroom soups are a cornerstone in French, Spanish, and Polish cuisines. Wild mushrooms like cremini and shiitake bring unmatched flavor. The garlic thyme soup recipe is a prime example of gourmet mushroom soup.

Health Benefits of Key Ingredients

Garlic, thyme, and mushrooms are packed with health benefits. Garlic fights bacteria, thyme is full of antioxidants, and shiitake mushrooms boost the immune system. Together, they make a healthy, savory soup.

Why This Recipe Works

The mix of roasted garlic, thyme, and mushrooms makes a rich, creamy soup. Heavy cream adds a luxurious feel, making it perfect for any event. This soup’s history and health benefits make it a beloved dish.

Essential Equipment for Perfect Soup Making

To make the best mushroom soup, you need the right tools. A big pot is key for cooking and simmering. For a smooth garlic thyme soup, get a good blender and immersion blender. They make your soup creamy and smooth.

For a homemade soup, having the right tools is important. Here are some must-haves:

  • Large pot: for sautéing and simmering
  • Blender: for pureeing the soup to a smooth consistency
  • Immersion blender: for blending the soup right in the pot

With these tools, you’re ready to make a tasty garlic thyme soup. Remember, quality ingredients and the right tools are key. You’ll make a mushroom soup that will wow everyone.

Selecting Your Ingredients

When making a delicious winter soup, like a rustic mushroom soup, the ingredients matter a lot. You want your soup to be tasty and healthy. So, picking the right ingredients is key.

Mushrooms are a big part of a great vegetarian soup. For a hearty soup, mix cremini, shiitake, and oyster mushrooms. These mushrooms make your soup rich and perfect for a cold night.

Choosing between fresh and dried herbs also affects your soup’s taste. Fresh herbs like thyme add a bright flavor. Dried herbs give a milder, earthier taste. A mix of both can make your soup balanced and comforting.

Garlic and heavy cream can also make your soup taste better. Make sure to pick fresh and high-quality ingredients. This way, you’ll have a tasty and comforting soup for a cold night.

Here are some tips for picking ingredients for your rustic mushroom soup:

  • Choose fresh and high-quality mushrooms
  • Use a mix of fresh and dried herbs
  • Pick the best garlic and heavy cream

By following these tips, you’ll make a delicious winter soup. It will become a favorite dinner for you and your family.

Preparation Techniques for Maximum Flavor

To make a tasty and healthy soup like garlic-roasted mushroom and thyme soup, focus on the right preparation. Roasting garlic is key. It makes the garlic sweet and flavorful. This soup combines roasted garlic, sautéed mushrooms, and herbs for a rich taste.

Sautéing mushrooms is vital in this recipe. It releases their earthy flavors and aromas. This makes the soup complex and engaging. With these techniques and the right ingredients, you get a healthy and delicious soup.

mushroom soup recipe

To boost your soup’s flavor, use top-notch ingredients. Choose fresh wild mushrooms and homemade stock. Try different herbs and spices to match your taste. These steps help make a mouth-watering mushroom soup that you’ll love.

Here are some key preparation techniques to keep in mind:

  • Roast garlic to bring out its natural sweetness and depth of flavor
  • Sauté mushrooms to release their earthy flavors and aromas
  • Use high-quality ingredients, such as fresh wild mushrooms and homemade stock
  • Experiment with different herbs and spices to find the perfect balance of flavors

Mastering the Art of Roasting Garlic

Roasting garlic is a key to making a delicious homemade soup, like a thyme flavored soup. It’s an easy process that takes patience but adds a deep, rich flavor. To get it right, you need to know about temperature and timing.

Preparing ingredients is a big part of making a great soup. For roasting garlic, preheat your oven to 375°F. Cut the top off a whole head of garlic, drizzle with olive oil, and wrap it in foil. Roasting garlic takes about 45 minutes to 1 hour. It’s done when it’s tender and can be mashed easily.

  • Use high-quality garlic for the best flavor.
  • Monitor the temperature and timing to avoid over-roasting.
  • Let the garlic cool before squeezing it out of its skin.

Adding roasted garlic to your homemade soup makes it truly comforting and delicious. Whether it’s a thyme flavored soup or another type, the secret to a great soup is in the details. Mastering roasted garlic is a big step towards making an unforgettable easy soup recipe.

Step-by-Step Cooking Process

To make a tasty mushroom and garlic soup, follow a clear cooking process. Start by preparing the base, then add roasted elements. Finish with blending and adding final touches for a smooth texture. A good garlic soup recipe will help you make a flavorful homemade mushroom soup.

Begin by sautéing onions and garlic in butter until they’re soft and smell great. Then, add your mixed mushrooms. Cook them until they’re tender and lightly browned.

Key Ingredients and Cooking Times

Here are the key ingredients and cooking times for a delicious soup:

  • 1.5 lbs mixed wild mushrooms
  • 5 cups chicken broth
  • ½ cup heavy cream
  • ¼ cup white wine
  • 4 cloves of garlic
  • 2 tablespoons flour
  • 4 tablespoons unsalted butter

Remember, simmer for 15 minutes, sauté shallots for 4 minutes, and sauté garlic for 2 minutes.

hearty soup

By following this process and using the right ingredients, you’ll make a delicious mushroom and garlic soup. It’s perfect for warming up on a cold day or impressing guests at a dinner party.

Texture and Consistency Tips

Making a tasty,  flavorful soup recipe like mushroom thyme soup needs the right texture and consistency. To get it just right, balance your ingredients and cooking methods. Heavy cream and roasted garlic are key for a rich, creamy soup.

For the perfect consistency, use the right mix of ingredients and cook it for the right time. For example, in how to make mushroom thyme soup, mix sautéed mushrooms, onions, and garlic with vegetable stock and cream. This makes the soup smooth and creamy. You can also blend it for a finer texture.

  • Use a mix of mushroom types for depth and complexity.
  • Avoid overcooking to prevent a thick, sticky soup.
  • Add a bit of flour to thicken if needed.
  • Try different spices and herbs for extra flavor.

Follow these tips and use the right ingredients and methods. You’ll make a delicious flavorful soup recipe that everyone will love.

Flavor Enhancement Strategies

Creating a tasty easy mushroom soup recipe is all about flavor. You can make your vegetarian mushroom soup even better by mixing different ingredients and techniques. Adding cream can make it creamy, while fresh herbs can make it healthy.

Here are some tips to boost your soup’s flavor:

  • Choose the best ingredients, like fresh mushrooms and spices, for a deep flavor.
  • Adjust the taste with salt, lemon juice, or herbs to get it just right.
  • Try new seasonings like smoked paprika or thyme to add more layers to your soup.

With these strategies, you can make a delicious, easy mushroom soup. It can be creamy or healthy, depending on what you like. The secret is balancing flavors and using top-notch ingredients.

easy mushroom soup recipe

Serving Suggestions and Garnishing Ideas

When serving your garlic thyme soup, aim to enhance its rich flavors. Pair it with crusty bread or a side salad for a complete meal. This flavorful mushroom soup is a treat.

This hearty mushroom soup is ideal for a chilly winter evening. Warm bread or roasted vegetables alongside make it a cozy meal. For a fancy touch, add a drizzle of cream or fresh thyme on top.

Here are some ideas to serve and garnish your garlic thyme soup:

  • Serve with a side of crusty bread or a green salad
  • Add a drizzle of cream or a sprinkle of fresh thyme to the top of the soup
  • Pair with a dry white wine for a more adult meal
  • Consider adding some roasted vegetables or a side of roasted potatoes to round out the meal

A mushroom soup with roasted garlic adds depth and richness. Serving it with the right sides makes it unforgettable. These ideas will elevate your garlic thyme soup to a memorable dish.

Storage and Reheating Guidelines

You can store your garlic-roasted mushroom & thyme soup in a few ways. You can keep it in the fridge for a few days or freeze it for up to 3 months. If you freeze it, thaw it in the fridge overnight or at room temperature until it’s soft.

To reheat your soup, just warm it up on the stovetop until it simmers. This keeps the flavor and texture good. You can also use the microwave, but don’t overheat it to keep it creamy.

Here are some tips for storing and reheating your mushroom thyme soup:

  • Store the soup in a tightly sealed container to prevent spoilage.
  • Reheat the soup gently to prevent it from boiling over.
  • Use a high-quality container that can withstand freezing and reheating.

By following these tips, you can enjoy your homemade garlic soup for days. It’s perfect for a quick lunch or a dinner party. Your garlic-roasted mushroom & thyme soup will be a big hit.

Garlic Roasted Mushroom Soup with Thyme

Always check the soup for spoilage before reheating. Make sure it reaches 165°F (74°C) to keep it safe to eat.

Storage Method Storage Duration
Refrigeration 3-4 days
Freezing up to 3 months

Troubleshooting Common Issues

When making a savory mushroom soup, like a garlic thyme soup, you might run into some problems. To make sure your soup is creamy and tasty, like a creamy garlic thyme soup, knowing how to fix common issues is key.

A common problem is getting the right consistency. If your soup is too thin, you can reduce it on the stove or add a cornstarch and water slurry. If it’s too thick, adding a bit more broth or water can help.

Adjusting flavors is also important. If your soup lacks depth, adding more garlic or thyme might help. Remember, the secret to a great mushroom soup is finding the right balance of flavors and textures. So, feel free to experiment and adjust to your liking.

  • Check the seasoning: Sometimes, a soup just needs a bit more salt or pepper to bring out the flavors.
  • Adjust the creaminess: If your creamy garlic thyme soup isn’t creamy enough, you can add more heavy cream or try a different type of milk.
  • Experiment with spices: Adding a pinch of nutmeg or a sprinkle of paprika can elevate your savory mushroom soup to the next level.

By following these tips, you’ll be on your way to making a delicious and satisfying savory mushroom soup. It’s sure to impress even the most discerning palate.

Conclusion

Making the garlic roasted mushroom and thyme soup is a mix of fresh ingredients, careful prep, and cooking skill. The secret is roasting garlic to get its deep flavor. Also, blending the soup well makes it smooth and tasty.

With the steps we’ve shown, you can make this best mushroom soup recipe at home. It’s a comforting and vegetarian soup that will please your taste buds. The key is using good ingredients and paying attention to every step.

So, get ready to make this homemade soup recipe. Put on your apron and let the smell of this garlic roasted mushroom and thyme soup fill your kitchen. It’s a chance to share a special meal with your family. Bon appétit!

FAQ

What is garlic roasted mushroom and thyme soup?

This soup is a mix of earthy mushrooms, roasted garlic, and fresh thyme. It’s savory and full of flavor.

Why is using fresh ingredients important for this soup?

Fresh ingredients like mushrooms, garlic, and thyme make the soup cozy and flavorful. High-quality ingredients bring out the best taste.

What is the history of mushroom soups in culinary tradition?

Mushroom soups have a long history in many cultures. They’ve evolved over time, staying popular and versatile.

What are the health benefits of the key ingredients in this soup?

Garlic and thyme in the soup offer health benefits. They’re nutritious and may have therapeutic effects, making the soup healthy and tasty.

Why does this garlic-roasted mushroom and thyme soup recipe work?

The recipe’s mix of roasted garlic, mushrooms, and thyme creates a balanced flavor. It’s the science behind the recipe that makes it delicious.

What essential equipment is needed for making the perfect garlic-roasted mushroom and thyme soup?

You’ll need a large pot, a blender, and an immersion blender for the soup. The right tools help achieve the perfect texture and consistency.

How do I select the best ingredients for this soup?

Choose the right mushrooms, herbs, and other ingredients for the best flavor. Fresh thyme and roasted garlic are key to a great soup.

What are the key preparation techniques for maximum flavor in this soup?

Roasting garlic, sautéing mushrooms, and blending the soup are key steps. These methods create a rich and creamy texture.

How do I master the art of roasting garlic?

Roasting garlic is essential for the soup. Follow temperature and timing guidelines for perfectly roasted garlic.

What is the step-by-step cooking process for this soup?

The process includes preparing the base, adding roasted elements, and blending for a smooth texture. A detailed guide ensures the best results.

How do I achieve the perfect texture and consistency in this soup?

Use heavy cream and roasted garlic for the right texture. Blending and simmering are key techniques for a delicious soup.

How can I enhance the flavors in this soup?

Follow seasoning guidelines and balance the flavors for a better taste. High-quality ingredients and techniques enhance the soup’s flavor.

What are some serving suggestions and garnishing ideas for this soup?

Serve with crusty bread and salad, and pair with dry white wine. Serving suggestions and garnishes make the meal enjoyable.

How should I store and reheat the garlic-roasted mushroom and thyme soup?

Store in the fridge or freezer and reheat slowly to keep the flavor and texture. Proper storage and reheating methods are important.

How can I troubleshoot common issues that may arise when making this soup?

Troubleshoot texture or flavor issues with tips from web sources. Adjust consistency and flavor with garlic or thyme.