Welcome To Soup Meets Bowl - The Best Soup Recipes & More

Warm Up With Our Latest Soup Recipes

Bake Authentic Finnish Pulla at Home


Finnish Pulla

What makes traditional Finnish Pulla so special? It’s a sweet bread that’s a big deal in Scandinavian baking and Finnish pastry traditions. As you learn about Finnish Pulla, you’ll see its deep history and cultural importance in Finland. It’s a bread that every bread lover should try.

Introduction to Finnish Pulla

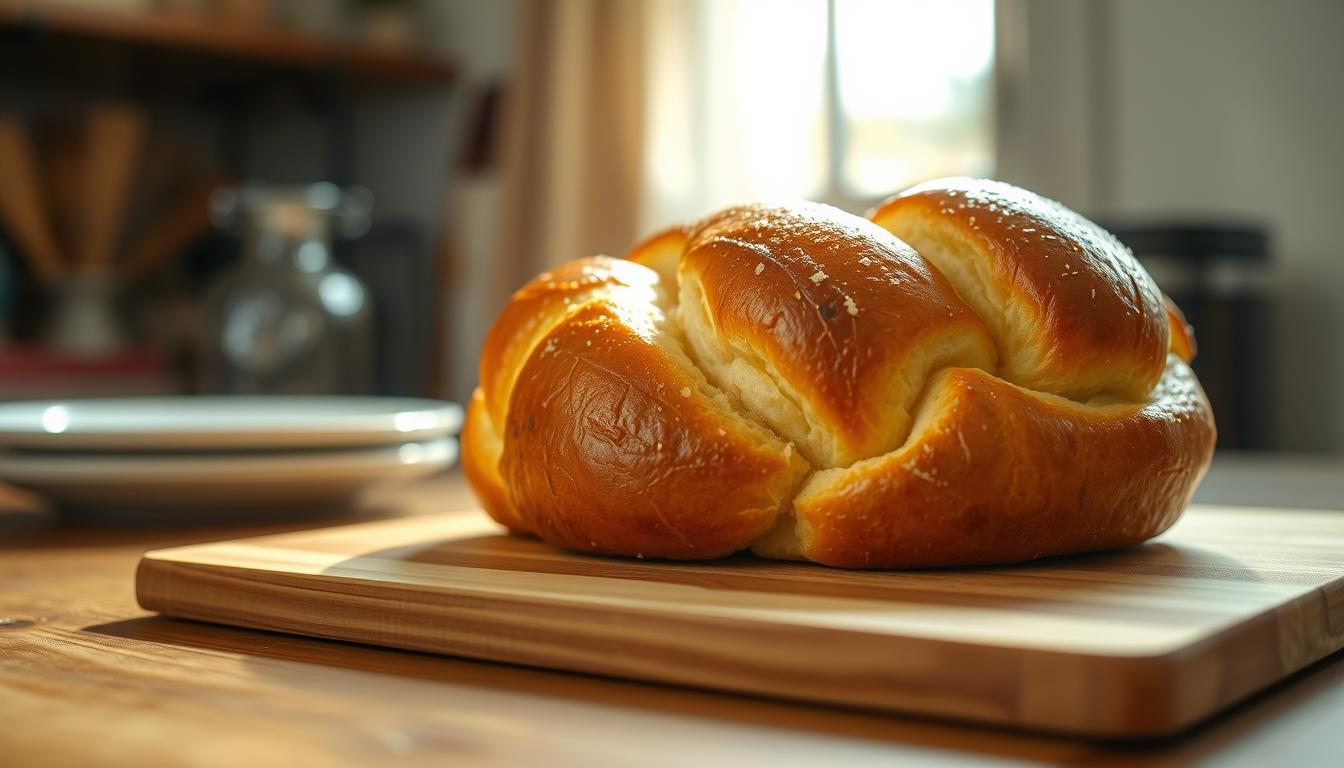
Finnish Pulla is a traditional sweet bread loved in Finland. It’s known for its buttery taste and cardamom smell. It’s often braided and enjoyed as a Finnish pastry. To make it at home, you’ll need to know about Scandinavian baking. This includes using ground cardamom, all-purpose flour, and active dry yeast.

Key Takeaways

  • Traditional Finnish Pulla is a sweet bread recipe that requires 14-20 cardamom pods or 2-3 teaspoons of ground cardamom.
  • The recipe involves 2 cups of whole milk, soy milk, or half and half, and 3 teaspoons of active dry yeast.
  • Finnish Pulla is a staple in Finnish cuisine, with a rich history and cultural significance in Finnish society.
  • To bake authentic Finnish Pulla, you will need to understand the essential ingredients, equipment, and techniques involved in Scandinavian baking.
  • The baking process involves rising the dough for approximately 3 hours, with 30 minutes of hands-on time, and baking at 375°F for 30-50 minutes.
  • Finnish Pulla can be served as a traditional Finnish bread, Finnish pastry, or sweet bread recipe, and is often enjoyed with a cup of coffee or tea.

The Cultural Significance of Finnish Pulla

Finnish pulla is a key part of Nordic cuisine, loved for more than just its taste. It’s a tradition enjoyed on special days like birthdays and weddings. Try it with coffee or tea, just like the Finns do.

Pulla’s history in Finland goes back to the 17th century. It’s a sweet bread that shows Finnish culture and tradition. Pulla is a favorite at Finnish weddings and with friends over coffee.

Exploring Finnish pulla reveals its deep role in Finnish society. It’s a treat with a sweet, cardamom flavor and soft texture. No wonder it’s loved in Finland and worldwide.

Some key aspects of Finnish pulla include:

  • Rich history in Finnish society
  • Traditional serving customs
  • Modern role in Nordic cuisine
  • Delicious flavor and texture

As you explore Finnish pulla, you’ll see it’s a Nordic gem. Its unique taste and cultural importance make it a must-try. So, why not try it and enjoy the taste of Finnish pulla?

Essential Ingredients for Perfect Finnish Pulla

To make a delicious homemade pulla recipe, you need the right ingredients. You’ll need flour, sugar, eggs, butter, and cardamom. These will help you make a sweet and flavorful sweet cardamom bread for any occasion.

Here are the key ingredients you’ll need:

  • 5 ¾ to 6 cups of all-purpose flour
  • ½ cup plus 1 teaspoon of granulated sugar
  • 2 ¼ teaspoons of active dry yeast
  • 1 ½ teaspoons of ground cardamom
  • 1 ½ teaspoons of kosher salt
  • 4 large eggs
  • ½ cup of unsalted butter, melted

When making finnish pulla, use high-quality ingredients for the best flavor and texture. Use fresh yeast and the right flour for a delicious and authentic sweet cardamom bread.

By using these ingredients and following a traditional homemade pulla recipe, you can make a delicious Finnish Pulla. It’s perfect for serving to your family and friends.

Understanding Cardamom: The Signature Spice

Cardamom is key in Finnish Pulla, and using top-quality cardamom is vital for the right taste in your cardamom bread. Its unique herbal warmth makes green cardamom essential in many Finnish dishes, like yeast bread and cardamom bread recipe. It’s important to pick the right type, as green cardamom has a distinct flavor.

To make the most of your cardamom, grinding it right is key. Cardamom’s essential oils are mainly in the seeds, and they lose strength fast after grinding. So, grind the seeds just before adding them to your cardamom bread recipe. Also, knowing how to measure and store cardamom helps keep its flavor and aroma.

cardamom bread

Some important facts about cardamom include its high price, second only to saffron and vanilla. It’s also used in spice blends like garam masala and masala chai. By learning how to choose, grind, and store cardamom, you’ll make tasty cardamom bread and other Finnish treats.

Required Equipment and Tools

To bake authentic Finnish Pulla, you need the right tools. A stand mixer is key for mixing and kneading the dough. A dough hook attachment is also needed for kneading the dough to the perfect consistency. You’ll also need a baking sheet for baking the Pulla.

For scandinavian pastries like Finnish Pulla, the right tools are essential. A pastry brush is useful for applying egg wash to the Pulla before baking. This gives it a golden brown color. You’ll also need a digital thermometer to check the bread’s internal temperature. It should reach 200°F to be fully baked.

When making finnish cinnamon rolls, a rolling pin is necessary for rolling out the dough. A sharp knife or pastry cutter is also needed for cutting the dough into strips for braiding. With these tools, you’ll be able to create delicious Finnish Pulla and other scandinavian pastries with ease.

Other useful tools for baking Finnish Pulla include a measuring cup, a whisk, and a rubber spatula. These tools help you accurately measure ingredients, mix the dough, and scrape the sides of the bowl. With the right equipment and tools, you’ll be well on your way to creating delicious Finnish Pulla and other scandinavian pastries.

Mastering the Pulla Dough

To make great pulla dough, you must know how to activate yeast, knead, and create the right rising conditions. When baking finnish pulla, aim for a dough that’s soft and elastic. This is done by using the right yeast, sugar, and flour amounts, and kneading for the correct time.

In nordic bread making, the quality of your ingredients matters a lot. High-quality flour, yeast, and sugar will make your finnish dessert bread taste better. Finnish pulla recipes usually include flour, sugar, yeast, eggs, and cardamom. Knead the dough for about 10 minutes until it’s smooth and elastic.

Here are some tips for mastering the pulla dough:

  • Use the right amount of yeast to ensure proper activation
  • Knead the dough for the right amount of time to achieve the perfect texture
  • Let the dough rise in a warm, draft-free place to ensure optimal rising conditions

finnish pulla dough

By following these tips and using the right ingredients, you can make a delicious finnish pulla for any event. Whether you’re new to baking or experienced, mastering the pulla dough is key. It will help you create a tasty nordic bread that will wow your loved ones.

Traditional Finnish Pulla Braiding Methods

When it comes to finnish pulla, braiding is key. There are many methods to choose from, each with its own charm. First, divide the dough into three equal parts.

In finnish baking traditions, the three-strand braid is a favorite. It’s made by crossing the strands over each other, creating a braid. You can also make a crown-shaped pulla by coiling the strands into a circle.

finnish pulla braiding methods

Another way is to shape each strand into a roll and place them side by side. The goal is to make a beautiful and tasty finnish pulla that shows off your skills in finnish baking traditions.

With practice, you’ll get better at these traditional braiding methods. Your finnish pulla will impress everyone. So, don’t be shy to try new things. It’s all part of the fun of baking finnish pulla with a traditional recipe.

Step-by-Step Baking Process

To make the perfect finnish pulla, follow a detailed baking process. This traditional sweet bread from finland needs careful steps, from mixing to baking. First, preheat your oven to 375°F. Then, get your homemade pulla recipe ready for baking.

When your dough is ready, shape it into your preferred form, like a braid or loaf. Put the dough on a baking sheet covered with parchment paper. Make sure there’s enough space for it to expand evenly. Bake the finnish pulla for 20-25 minutes, until it’s lightly golden.

Here are some important steps to remember:

  • Preheat the oven to the correct temperature (375°F) for the best results.
  • Use a pizza pan or baking sheet that’s at least 14 inches in diameter to fit the dough.
  • Bake the homemade pulla recipe for the suggested time, until it’s golden brown.

finnish pulla baking process

By following these steps and using the right ingredients, you’ll make a delicious and authentic sweet bread from finland. Keep an eye on the baking time and temperature for the perfect finnish pulla every time.

Creating the Perfect Egg Wash

To get the golden brown color and shiny look of Finnish Pulla, a great egg wash is key. This Nordic pastry’s look is greatly improved by the egg wash. For a true Finnish coffee bread, how and when you apply the egg wash matters a lot.

The egg wash is made of 1 egg and 2 teaspoons of water, beaten lightly. Apply it just before baking for the best shine. You can also try pearl sugar for more texture and taste.

Here are some tips for the perfect egg wash:

  • Use room temperature eggs for a smoother mix
  • Adjust the water to get the right consistency
  • Spread the egg wash evenly over the Finnish coffee bread

Mastering the egg wash will elevate your Finnish Pulla. It will have a stunning glaze that will wow everyone. The egg wash is vital for this beloved Finnish coffee bread, whether you’re making it traditionally or trying new flavors.

Common Troubleshooting Tips

When making Finnish pulla, knowing common problems is key. Yeast is a big deal. If it’s not right, your Finnish baking recipes might not work. Make sure you use the right amount and mix it in warm water, not hot.

Another issue is overmixing the dough. This makes Scandinavian pastry dense and tough. Mix just until it’s shaggy, then let it rest and rise. Watch the temperature and rising time closely, as they affect the result.

Here are some more tips to help you:

  • Check your oven temperature to ensure it’s at the correct level (350ºF) for baking Finnish pulla.
  • Don’t overbake, as this can cause the Scandinavian pastries to dry out.
  • Use the right amount of sugar, as too little can affect the yeast’s ability to activate.

Follow these tips and be aware of common problems. You’ll make delicious Finnish pulla that will wow everyone. Making Scandinavian pastries takes time and patience. Stay calm and keep practicing.

Variations of Traditional Finnish Pulla

Exploring Finnish pulla, you’ll find many variations to enjoy. From cinnamon to seasonal twists, there’s something for everyone. You can mix and match flavors to make your own special pulla.

Finnish pulla is very versatile. You can add spices, nuts, or dried fruits for unique tastes. For example, add cinnamon for a warm flavor. Just use a teaspoon of ground cinnamon in the dough.

Seasonal pulla is another fun way to try new things. In winter, dried cranberries or cherries add a festive touch. In summer, fresh berries or citrus zest make it refreshing. You can always go back to the classic recipe and try new flavors.

Popular pulla variations include korvapuusti (cinnamon rolls) and voisilmäpulla (butter-eye-bun). There’s also bostonkakku (pulla-cake). These show the wide range of pulla forms and flavors. Whether you like traditional or adventurous, there’s a pulla for you.

Storage and Freshness Guidelines

To keep your finnish pulla fresh, it’s key to store it right. You can keep it at room temperature or freeze it. For room temperature storage, use an airtight container to avoid drying out.

Here are some tips for storing finnish pulla:

  • Store at room temperature for up to 3 days in an airtight container
  • Freeze for up to one month before baking
  • Thaw frozen finnish pulla at room temperature or in the refrigerator before serving

Follow these guidelines to enjoy your finnish pulla longer. Always check for spoilage before eating. Proper storage keeps your pulla fresh and tasty for a while.

Serving Suggestions and Pairings

There are many ways to serve finnish pulla. This traditional finnish coffee bread is a favorite in finnish cuisine. It goes well with sweet and savory toppings. Enjoy it with coffee or tea, or use it for sandwiches and snacks.

Here are some popular ways to serve finnish pulla:

  • Top it with butter, jam, or honey for a sweet treat
  • Use it as a base for sandwiches, such as smoked salmon or ham and cheese
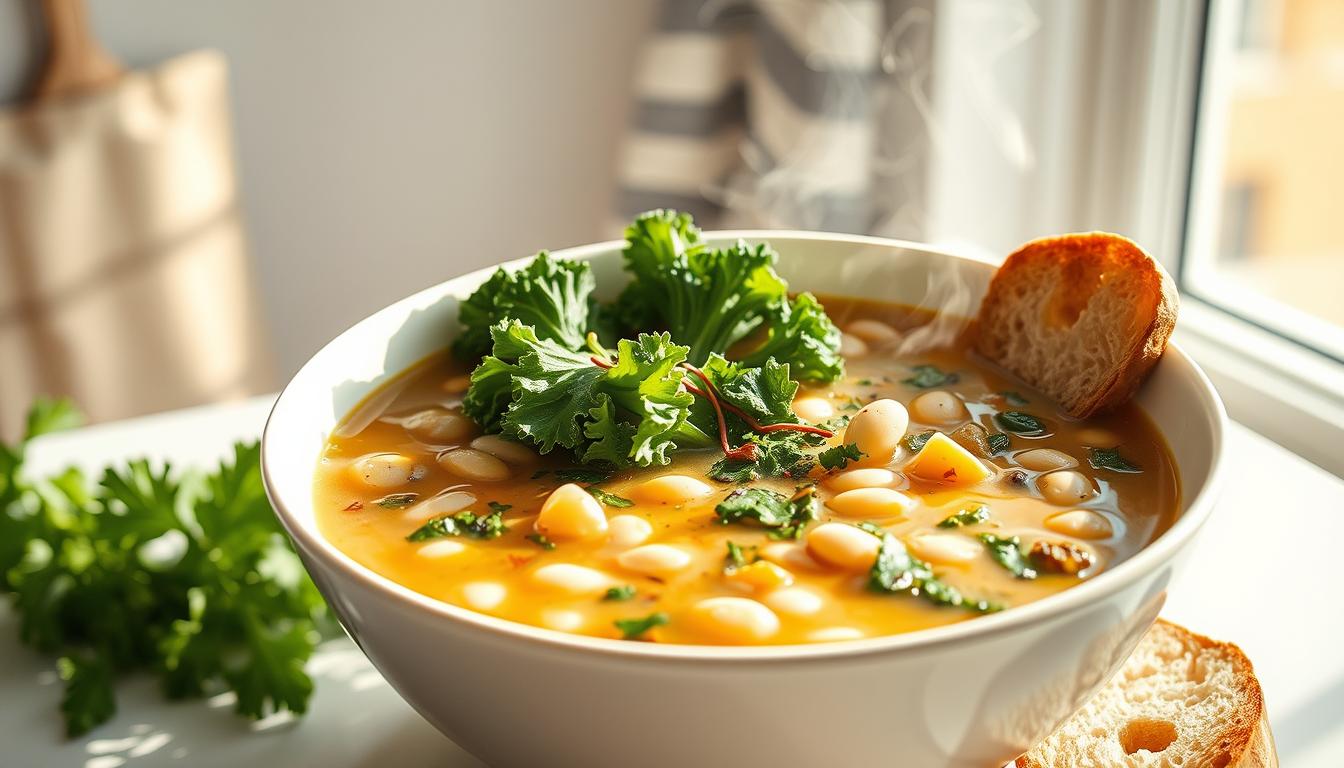
  • Serve it alongside a bowl of soup or salad for a satisfying meal
  • Enjoy it with a cup of coffee or tea, either on its own or with a variety of toppings

Finnish pulla is perfect for any time of day. It’s great for breakfast, a snack, or dessert. Its rich, buttery flavor and soft texture make it a favorite in finnish cuisine.

Conclusion

Finnish Pulla is more than a tasty sweet bread. It’s a beloved tradition that shapes Finnish culture. Its rich history and comforting flavors make it a key part of Scandinavian baking.

Enjoying a Pulla with your morning coffee or sharing it with loved ones brings people together. It fills us with warmth and a sense of belonging. By making Pulla, you keep this tradition alive and add Finnish charm to your day.

Keep exploring with Finnish Pulla baking. Try new recipes, adapt them for the seasons, and enjoy every bite. Now, you can bring Finnish flavors into your kitchen and share this special tradition with others.

FAQ

What is Finnish Pulla?

Finnish Pulla is a traditional sweet bread from Finland. It’s known for its rich flavor and soft texture. Cardamom is a key spice in Finnish Pulla.

What is the cultural significance of Finnish Pulla?

Finnish Pulla is more than a sweet bread. It’s a symbol of Finnish culture and tradition. It’s often enjoyed with coffee or tea, making it a favorite in Finnish bakeries and cafes.

What are the essential ingredients for baking authentic Finnish Pulla?

To bake authentic Finnish Pulla, you need the right ingredients. This includes flour, sugar, eggs, butter, and cardamom. It’s important to measure and mix these ingredients correctly to get the perfect dough.

How do I use cardamom in Finnish Pulla?

Cardamom is essential in Finnish Pulla. Knowing how to select, grind, measure, and store it is key. Different types of cardamom offer unique flavors.

What equipment and tools do I need to bake Finnish Pulla?

To bake Finnish Pulla, you’ll need specific equipment. This includes a stand mixer, a dough hook, and a baking sheet. Using these tools correctly is important for perfect Pulla.

How do I master the Pulla dough?

Mastering the Pulla dough requires proper yeast activation and kneading. You also need to create the right rising conditions. Handling the dough correctly is key to achieving the perfect texture.

How do I braid Finnish Pulla?

Braiding is a key part of Finnish Pulla. There are several traditional methods, like the basic three-strand braid and crown-shaped Pulla. Follow step-by-step instructions to braid like a pro.

How do I create the perfect egg wash for Finnish Pulla?

The egg wash gives Finnish Pulla its golden brown color and shiny finish. Timing and application of the egg wash, along with pearl sugar, are important for the desired result.

What are some common troubleshooting tips for Finnish Pulla?

Troubleshooting tips for Finnish Pulla include checking yeast, temperature, and rising time. Tips on fixing common problems like overmixing and underbaking are also helpful.

What are the different variations of traditional Finnish Pulla?

There are several variations of Finnish Pulla, including a cinnamon-enhanced version and seasonal adaptations. Trying different flavors and ingredients can add a personal touch to traditional Finnish Pulla.

How do I store and maintain the freshness of Finnish Pulla?

Storing and maintaining Finnish Pulla’s freshness is important. This includes storing it at room temperature and freezing instructions. Tips on thawing frozen Pulla and keeping it fresh for longer are also helpful.

What are some serving suggestions and pairings for Finnish Pulla?

Finnish Pulla can be enjoyed in many ways. It pairs well with coffee, tea, and sweet or savory toppings. Serving suggestions and pairings can help you enjoy Pulla daily and on special occasions.

Cozy Moroccan Chickpea & Tomato Soup


Moroccan-Spiced Chickpea & Tomato Soup

Have you ever wondered what makes Moroccan chickpea & tomato soup so special? It’s known for its rich flavors and hearty ingredients. This dish has become a favorite in many homes. But what makes a great Moroccan chickpea & tomato soup stand out?

Is it the quality of the ingredients, the cooking technique, or something else? Exploring healthy dinner ideas and easy soup recipes reveals the answer. It’s all about finding the perfect mix of flavors and textures.

Introduction to Moroccan Chickpea & Tomato Soup

This soup is a delightful mix of Mediterranean tastes, with sweet tomatoes and warm spices. It’s a healthy and easy dinner choice. You can use different ingredients to match your preferences.

With just 15 minutes of prep and 25 minutes of cooking, you can enjoy a warm bowl of soup quickly.

Key Takeaways

  • You can make a delicious Moroccan chickpea & tomato soup with various ingredients, like chickpeas, tomatoes, and spices.
  • This vegetarian soup is a healthy dinner option, with a good mix of protein, fiber, and carbs.
  • The quality of ingredients and cooking technique greatly affect the soup’s taste.
  • You can adjust the soup to your liking, with options like goat cheese or different spices.
  • This easy recipe is perfect for a weeknight dinner, ready in just 40 minutes.
  • The soup is naturally gluten-free, vegan, and allergy-friendly, making it great for those with dietary needs.

Understanding the Rich Heritage of Moroccan Soups

Exploring north african cuisine, you find that homemade soup is key to its culture. Moroccan soups are famous for their deep flavors and smells. They often include chickpeas, a plant-based protein, showing their cultural value.

The history of Moroccan soup making is shaped by many influences. Ras el hanout, a spice mix with up to 30 spices, and harira soup, with tomatoes, lentils, and chickpeas, each have their own story. These dishes reflect Morocco’s rich history and love for sharing meals.

  • Traditional cooking methods, such as steaming and stewing, which help to preserve the flavors and nutrients of the ingredients.
  • The use of aromatic spices, like cumin, turmeric, and cinnamon, which add depth and warmth to the soups.
  • The importance of communal dining, where meals are often served in a salon marocain, highlighting the culture of sharing and togetherness.

Learning about Moroccan soups lets you see the depth and variety of north african cuisine. Homemade soup is a big part of bringing people together. Whether you’re trying a soup with plant-based protein or exploring Moroccan spices, you’ll enjoy a world of tastes and smells.

Essential Ingredients for Your Moroccan-Spiced Chickpea & Tomato Soup

To make a true Moroccan-Spiced Chickpea & Tomato Soup, you need certain ingredients. These include chickpeas, tomatoes, onions, garlic, and spices. Together, they make a tasty and filling vegetarian soup for any time.

Here are the main ingredients you’ll need:

  • 1 tablespoon olive oil
  • 1 small white onion
  • 1 large carrot
  • 4 cloves garlic
  • 2 (15-ounce) cans chickpeas
  • 1 (15-ounce) can fire-roasted diced tomatoes
  • 3 tablespoons tomato paste
  • 1 teaspoon ground cumin
  • 1/2 teaspoon ground cinnamon
  • 1/2 teaspoon ground ginger
  • Pinch of crushed red pepper flakes

These ingredients will make a flavorful chickpea stew. It’s filled with the warm spices and rich tastes of Morocco. This vegetarian soup is great for dinner or a special event.

You can also add garnishes like fresh cilantro, lemon wedges, and crusty bread. This moroccan recipes inspired soup will quickly become a favorite at home.

Kitchen Equipment and Tools You’ll Need

To make a tasty easy soup recipe like Moroccan Chickpea & Tomato Soup, you need the right tools. These tools help you prepare and cook the ingredients well. This way, your chickpea soup will be both flavorful and healthy.

A healthy soup recipe like this one needs basic cookware. You’ll need a large pot, a saucepan, and a cutting board. Also, measuring tools like a measuring cup and spoons are important. For extra moroccan flavors, consider getting a spice grinder or a mortar and pestle.

Here are some key equipment and tools you’ll need:

  • Large pot (at least 4-quart capacity)
  • Saucepan
  • Cutting board
  • Measuring cups and spoons
  • Spice grinder or mortar and pestle (optional)

With these tools and equipment, you’re ready to make a delicious and nutritious chickpea soup. Always use fresh and high-quality ingredients. This ensures the best taste and texture.

Preparing Your Spice Blend

To make a tasty chickpea soup, you need a special spice blend. This blend brings the true taste of middle eastern flavors to your easy soup recipe. Start by getting spices like cumin, coriander, and paprika, key in Moroccan cooking.

When mixing your spice blend, think about the spice ratio. Aim for at least 3 spices for flavor. Start with 1 teaspoon of ground cumin, 1 teaspoon of paprika, and 1/2 teaspoon of ground coriander. You can tweak these amounts to match your taste. Add a pinch of cayenne pepper for an extra zing.

chickpea soup spices

To make your spice blend more aromatic, add 2 tablespoons of chopped coriander root and stem. This will add a fresh, herbal taste to your chickpea soup. Mix well and store in an airtight container to keep the flavors and aromas.

Creating a great plant-based meal is all about balancing flavors. Feel free to play with the spice blend until it’s just right. With this mix, you’ll have a delicious, authentic middle eastern flavors inspired chickpea soup. It’s perfect for a quick and easy soup recipe.

Choosing and Preparing Your Chickpeas

Choosing the right chickpeas is key to a tasty Moroccan dish. You can pick between dried or canned chickpeas. Dried chickpeas give a richer flavor, perfect for a comforting soup. Canned chickpeas are quicker, ideal for a fast meal.

Soaking and cooking methods differ based on the chickpea type. Dried chickpeas need soaking overnight and cooking for 25 minutes. Canned chickpeas are ready to use, saving time. Roasting them with olive oil and spices adds extra flavor.

  • Use a pressure cooker to reduce cooking time for dried chickpeas
  • Soak your chickpeas in advance to reduce cooking time
  • Choose canned chickpeas for a quick and easy option

By following these tips and picking the right chickpeas, you can make a delicious Moroccan dish. It’s perfect for any time.

Step-by-Step Cooking Instructions

To make a tasty and healthy Moroccan Chickpea & Tomato Soup, follow these steps. Start by sautéing the onions and garlic until they’re soft. This should take about 8 minutes. It makes the broth flavorful, which is key for a good soup.

Then, add the spices and chickpeas to the pot. Stir well to mix them. You can use dried or canned chickpeas. If using dried, soak them overnight and cook until tender. This makes the soup more nutritious and filling.

Next, add vegetable stock and water to the pot. Bring it to a simmer. Let it cook for 10 minutes. This lets the flavors blend and the soup thicken a bit. It’s a delicious, easy meal for a weeknight dinner.

Here’s a summary of the cooking times and yields:

  • Prep Time: 45 minutes
  • Cook Time: 1 hour 30 minutes
  • Total Time: 2 hours 15 minutes
  • Yield: 6 servings

healthy recipe

The result is a healthy recipe full of nutrients and flavor. With 330 kcal per serving, it’s a nutritious and easy meal. The flavorful broth and tender chickpeas make it a satisfying choice for any time.

Mastering the Perfect Soup Consistency

Getting the right consistency is key in a tasty Moroccan Chickpea & Tomato Soup. This vegetarian soup is a favorite in North Africa. To get it just right, you need to know how to change its thickness.

It’s important to balance the liquid in your soup. You can add more or less to change its thickness. For a creamier soup, add more full-fat coconut milk. For a lighter soup, add more vegetable or chicken stock.

Thickness Adjustments

To change your soup’s thickness, you have a few options. Adding a bit more olive oil can thin it out. You can also add cornstarch or flour to thicken it. Or, simmer it longer to reduce the liquid and thicken the soup.

Troubleshooting Common Issues

If your soup is too thick or too thin, don’t worry. For a thick soup, add more liquid like stock or water. For a thin soup, simmer it longer or add more cornstarch or flour. With these tips, you can get your soup just right and enjoy a delicious meal.

Nutritional Benefits and Dietary Considerations

Enjoying Moroccan Chickpea & Tomato Soup is not just tasty. It’s also good for you. This healthy soup recipe is full of protein, fiber, and vitamins. It’s a perfect comfort food that’s also nutritious. With about 235 calories per serving, it’s a guilt-free meal or snack option.

The mix of chickpeas, tomatoes, and spinach makes it a plant-based soup full of nutrients. Chickpeas are a nutritional powerhouse, with about 15 grams of protein and 12 grams of dietary fiber per cooked cup. Spinach adds iron and vitamins, while tomatoes boost vitamin C.

Moroccan Chickpea Soup

  • High in protein and fiber
  • Low in calories and fat
  • Rich in vitamins and minerals, including vitamin C and potassium
  • Good source of antioxidants and anti-inflammatory compounds

If you’re after a comfort food that’s also healthy or a plant-based soup full of nutrients, this is it. Moroccan Chickpea & Tomato Soup is a flavorful choice. It’s great for any meal or snack.

Serving Suggestions and Accompaniments

When serving your Moroccan Chickpea & Tomato Soup, you have many options. You can pair it with traditional Moroccan sides like couscous or bread. These choices enhance the moroccan flavors of the soup.

For a healthy soup recipe, try it with mixed greens or a simple salad. Adding crusty bread, quinoa, or brown rice makes the meal more filling. The soup recipe is flexible, letting you find your favorite pairings.

Modern options include roasted vegetables or grilled chicken or fish with the soup. You can also add moroccan flavors with preserved lemons or olives.

These sides can make your easy meal more satisfying and filling.

Storage and Reheating Guidelines

After making your tasty plant-based meal, like the Moroccan Chickpea & Tomato Soup, it’s key to store and reheat it right. This keeps its flavor and nutrients intact. You can keep this easy soup in the fridge for 5-7 days or freeze it for 6 months. It’s great for a quick, healthy meal.

To store, let the soup cool down first. Then, put it in an airtight container. When you reheat, you can microwave it or simmer it on the stovetop. Make sure it heats up to 165°F (74°C) for safety.

Here are some reheating tips:

  • Reheat the soup in short intervals, stirring now and then, to avoid burning.
  • If the soup is too thick, add a bit of water or vegetable broth.
  • Season with more middle eastern flavors, like cumin or paprika, to your liking.

chickpea soup storage

By following these guidelines, you can enjoy your Moroccan Chickpea & Tomato Soup for days. It’s perfect for a weeknight dinner or a weekend lunch. Its middle eastern flavors will take you on a culinary journey.

Recipe Variations and Adaptations

Exploring Moroccan cuisine opens up a world of possibilities. You can tweak recipes to fit your taste and dietary needs. The Moroccan Chickpea & Tomato Soup is a perfect example. It’s a versatile dish that can be made your own.

Want to add a twist? Try adding small chunks of boneless lamb for a meaty touch. Or, swap out lentils for a different texture and taste. Don’t be afraid to play with spices like cumin or paprika. A squeeze of lemon can also brighten up the flavors.

Need a gluten-free version? Use rice noodles instead of vermicelli and skip the flour. This makes the soup a great choice for those with dietary restrictions. It’s a hearty, comforting dish that everyone can enjoy.

Get creative with ingredients to make a Moroccan dish that’s all your own. Whether you’re craving a cozy soup or a nutritious meal, the Moroccan Chickpea & Tomato Soup is a versatile choice. It’s perfect for anyone looking to explore Moroccan cuisine.

Conclusion

Moroccan Chickpea & Tomato Soup is a tasty and healthy recipe. It combines flavors and textures in a perfect way. This soup is also easy to make and can be enjoyed anytime.

This soup recipe is great for a cozy dinner or a healthy lunch. The mix of tender chickpeas, juicy tomatoes, and spices is amazing. It offers a satisfying and flavorful experience.

Exploring Morocco’s rich food culture is exciting. We hope this Chickpea & Tomato Soup has inspired you. Try more healthy and easy recipes. Enjoy the delicious flavors of North Africa in every bite.

FAQ

What are the essential ingredients for making Moroccan-Spiced Chickpea & Tomato Soup?

To make this soup, you need chickpeas, tomatoes, onions, and garlic. Also, spices like cumin, coriander, and paprika are key.

What kitchen equipment and tools are needed to make this soup?

You’ll need basic cookware and some optional tools. Measuring tools and utensils are also necessary for preparing the Moroccan Chickpea & Tomato Soup.

How do I prepare the spice blend for this soup?

Making a spice blend is important for the Moroccan Chickpea & Tomato Soup. Use spices like cumin, coriander, and paprika for a unique flavor.

Should I use dried or canned chickpeas for this recipe?

You can use either dried or canned chickpeas. There are methods for soaking and cooking them. Quick tips are available for easy preparation.

How do I achieve the perfect consistency for the Moroccan Chickpea & Tomato Soup?

Getting the right soup consistency is key. Adjust the liquid to change the thickness. Troubleshoot issues like too-thick or too-thin soup.

What are the nutritional benefits of Moroccan Chickpea & Tomato Soup?

This soup is nutritious and healthy. It’s high in protein and fiber, low in calories and fat. It’s also rich in vitamins and minerals.

What are some traditional and modern serving suggestions for this soup?

Serve the soup with sides like couscous, bread, salads, and sandwiches. This enhances the flavor and texture.

How do I properly store and reheat the Moroccan Chickpea & Tomato Soup?

Proper storage and reheating are important. Store it in the fridge or freezer. Reheat using methods like microwaving or simmering.

Can I adapt or vary the Moroccan Chickpea & Tomato Soup recipe?

Yes, you can modify the recipe to your liking. Add or substitute ingredients for a unique flavor.

Nourishing Cabbage, Kale & White Bean Detox Soup


Detox Soup

Are you thinking about adding a detox soup to your diet? You might wonder if a simple soup can really boost your health. A mix of cabbage, kale, and white beans can make a tasty and healthy detox soup. This article will show you how to make a nourishing detox soup, whether you want to lose weight or just feel better.

Choosing the right ingredients is key for a healthy soup. A good detox soup should be full of vitamins, minerals, and antioxidants. Adding kale, cabbage, and white beans to your soup makes it a powerful health booster.

Key Takeaways

  • A detox soup can be a delicious and effective way to support your health goals
  • Cabbage, kale, and white beans are nutritious ingredients that can be used in a detox soup
  • A healthy soup recipe should focus on whole, nutrient-dense ingredients
  • Detox soups can be customized to suit your individual needs and preferences
  • Incorporating a detox soup into your diet can have a significant impact on your overall well-being

Understanding the Power of Detoxifying Ingredients

Choosing the right ingredients is key to making healthy soups. Ingredients like kale, cabbage, and white beans are full of nutrients. They help the body detox naturally. For instance, kale is rich in antioxidants and fiber, making it great for detox soups.

Cabbage is known for cleaning the GI tract and has anti-inflammatory effects. A well-made cabbage soup or kale soup can boost the body’s detox efforts. Adding detoxifying ingredients to your soups makes them both tasty and healthy. White bean soup, with its high protein and fiber, is also a great choice for a filling meal.

  • High antioxidant content
  • Rich in fiber and protein
  • Anti-inflammatory properties
  • Supports natural detoxification processes

By using these ingredients in your soups, you make a meal that’s good for you. You can enjoy a hearty cabbage soup, a fresh kale soup, or a cozy white bean soup. The choices are many, and the health benefits are clear.

Essential Kitchen Tools and Equipment

To make a tasty detox soup, you need the right tools and equipment. A good soup pot is key for simmering the ingredients. A blender is also essential for a creamy texture. Look for a high-speed blender that can handle hot liquids and tough ingredients.

You’ll also need a cutting board, chef’s knife, and measuring cups. These help you chop the cabbage and kale, and measure out the stock and spices. An immersion blender is handy for blending the soup in the pot, saving you from transferring it.

kitchen tools

For cooking, a stainless steel or enameled cast iron soup pot is ideal. These are durable, easy to clean, and can handle high heat. Choose a blender with a glass or stainless steel jug. These are non-reactive and easy to clean.

Here are some key kitchen tools and equipment to get you started:

  • Soup pot
  • Blender
  • Immersion blender
  • Cutting board
  • Chef’s knife
  • Measuring cups

With these essential tools and equipment, you’re ready to make a delicious detox soup. It will leave you feeling refreshed and revitalized.

Ingredients for Your Cabbage, Kale & White Bean Detox Soup

To make a tasty detox soup, you need the right ingredients. Freshness and quality are important. Choose organic kale, cabbage, and white beans when you can.

Here are the key ingredients for your cabbage soup recipe:

  • 1 tablespoon olive oil
  • 1 large onion, diced
  • 3 stalks celery, chopped
  • 4 medium carrots, peeled and chopped
  • 2 cloves garlic, minced
  • 2 cups chopped kale
  • 1 can white beans, drained

For a tasty vegetable soup with kale, add diced tomatoes, vegetable broth, and spices. Try different healthy soup recipes to find your favorite.

detox soup ingredients

Choose the best ingredients for your detox soup ingredients for a healthy meal. With these, you’ll make a delicious and nutritious cabbage soup recipe. It’s great for a healthy soup recipes option.

Ingredient Quantity
Olive Oil 1 tablespoon
Onion 1 large, diced
Celery 3 stalks, chopped
Carrots 4 medium, peeled and chopped
Garlic 2 cloves, minced
Kale 2 cups, chopped
White Beans 1 can, drained

Preparation and Cooking Methods

Choosing the right cooking methods is key to a great detox soup. Start by sautéing the veggies in olive oil before adding broth. This step brings out the veggies’ natural sweetness, essential for a tasty detox soup. You can cook your soup on the stovetop, in an Instant Pot, or Slow Cooker.

Good soup starts with proper ingredient prep. Use a mix of 9 cups of veggies to 34 cups of liquid, including broth and water. This mix makes a hearty, nutritious soup.

detox soup recipe

Prep time is about 10 minutes, and cooking takes 45 minutes. This means your soup is ready in 55 minutes. Add spices like turmeric, salt, and red pepper flakes for extra flavor. These steps help you make a tasty, healthy detox soup any time of year.

Using the right cooking methods and prep techniques offers many benefits. You get better flavor, more nutrition, and it’s quicker to make. By doing this, you can enjoy a delicious detox soup anytime.

Step-by-Step Soup Making Process

To start making soup, using a bouquet garni is key to add flavor. This method is a vital part of cooking that makes your detox soup better. First, chop the onion, carrots, and celery, which takes about 10 minutes. Then, sauté them in olive oil for 3-5 minutes to enhance their taste.

After that, add the diced tomatoes, vegetable broth, and spices. Let the soup simmer for about 10 minutes, until the veggies are soft. To make it creamy, blend half of the soup and mix it back in. This step makes your detox soup smooth and rich.

Remember, using different cooking methods like sautéing and simmering is important. Also, season the soup with salt and pepper to taste. You can add more spices or herbs to boost the flavor. By following these steps, you’ll make a tasty and healthy detox soup.

Maximizing Nutritional Benefits

To get the most from your detox soup, add a squeeze of fresh lemon juice. This simple act boosts nutrient absorption. Every ingredient in detox soup matters, making smart choices key to a nutritious meal.

Focus on adding cabbage, kale, and white beans to your soup. These are packed with vitamins, minerals, and antioxidants. They not only flavor and texture your soup but also offer health benefits. For instance, cabbage is full of dietary fiber and vitamins C, K, E, and A.

Here are some tips to boost your detox soup’s nutrition:

  • Use a variety of colorful vegetables to increase the antioxidant content of your soup
  • Include lean protein sources like beans or lentils to support overall health
  • Add healthy fats like coconut milk or avocado to enhance nutrient absorption

detox soup benefits

By following these tips and using nutrient-rich ingredients, you can make a healthy and tasty meal. Always pick fresh, organic ingredients. Also, drink plenty of water to help with hydration and detox.

Storage and Meal Prep Guidelines

Proper storage is key to keeping your detox soup fresh and nutritious. You can store it in the fridge for up to 5 days. This makes it perfect for meal prep. Freezing it in portions lets you enjoy it whenever you like.

Meal prep with detox soup is a great way to stay healthy. Just thaw what you need in the fridge or reheat it in the microwave. This way, you always have a nutritious meal ready.

To reheat, use the microwave or stove. In the microwave, heat on high for 2 minutes, stirring often. On the stove, heat over low, stirring often, until warm. These tips help you enjoy your soup while keeping its health benefits.

Proper storage and meal prep offer many benefits:

  • Convenience: Easy to grab and go with pre-portioned servings.
  • Nutrient retention: Freezing and reheating right keeps nutrients in.
  • Time-saving: Prep healthy meals ahead of time to save time during the week.

Recipe Variations and Adaptations

Exploring detox soup recipes opens up a world of possibilities. You can make your own version by trying out different ingredients and flavors. For example, adding more crushed red pepper flakes or finely-diced jalapeños can give your soup a spicy kick. This is perfect for those who love a bit of heat in their meals.

This detox soup recipe is very flexible. You can use leftover veggies and adjust the spice to your taste. Adding different beans, like kidney or northern beans, can boost the protein and flavor. This makes it great for anyone looking to customize their soup to fit their dietary needs.

There are many ways to change up your detox soup. You can try different cooking methods, like stovetop, Instant Pot, or Crock-Pot, to alter the texture and taste. Mixing in various veggies, such as more carrots, celery, or spinach, can also create a new and tasty soup. These options let you make a detox soup that’s both healthy and tailored to your liking.

Looking for something spicy or a low-sodium option? The choices for variations are endless. With a bit of creativity and experimentation, you can craft a detox soup that’s both nourishing and delicious. It’s a fantastic addition to your collection of healthy soups.

Serving Suggestions and Pairings

When serving your detox soup, think about a few serving suggestions. You can have it as a main dish with bread or a salad. This makes for a complete and healthy meal. You can also add your favorite ingredients to make it even better.

Pairing your detox soup with whole grain bread or a green salad is a good idea. It adds crunch and fiber to your meal. Adding lean protein like grilled chicken or fish can also make it more filling.

Other serving suggestions include starting with the soup or using it as a base for other soups. You can also add a swirl of cream or herbs for extra flavor and texture. The most important thing is to find the detox soup recipe that you enjoy the most.

Here are some more serving suggestions to try:
* Serve with whole grain crackers or croutons
* Add lean protein like grilled chicken or fish
* Use it as a base for other soups or stews
* Try different pairings like a swirl of cream or herbs

Conclusion: Making the Most of Your Detox Soup Journey

Start your detox soup journey with the cabbage, kale, and white bean detox soup. It’s not just tasty; it’s also great for your body. This healthy soup recipe helps your body detox naturally.

This detox soup can do wonders for you. It boosts digestion and energy. Cabbage fights cancer, and kale is full of antioxidants. This makes the soup a superfood for your health.

Pay attention to how your body reacts. Try different amounts and make the soup your own. With a bit of creativity, you’ll get the most out of your detox soup journey. Enjoy the journey to better health with this delicious soup.

FAQ

What are the benefits of cabbage in detox soups?

Cabbage is full of fiber, antioxidants, and anti-inflammatory compounds. It helps remove toxins and supports gut health.

How does kale contribute to the nutritional profile of the detox soup?

Kale is a superfood with vitamins A, C, and K, and fiber. It boosts the body’s detox processes.

What are the benefits of incorporating white beans into the detox soup?

White beans offer protein, fiber, and complex carbs. They make the soup filling and give lasting energy.

What kitchen tools and equipment are essential for making the cabbage, kale, and white bean detox soup?

You’ll need a large soup pot, blender or immersion blender, cutting board, and sharp knife. These tools help prepare and cook the soup smoothly.

How can I maximize the nutritional benefits of the detox soup?

Use fresh, high-quality ingredients. Add nutrient-rich garnishes like avocado or nuts. Try roasting vegetables for better flavor and nutrition.

What are some tips for storing and reheating the detox soup?

Cool the soup, then store it in airtight containers or freezer bags. It lasts 5 days in the fridge or 3 months in the freezer. Reheat it on the stovetop, microwave, or oven, stirring often.

Can I customize the detox soup recipe to suit my dietary needs or preferences?

Yes! You can change the recipe to fit your diet. Try different veggies, spices, or add chickpeas or lentils. Find the version that meets your taste and health goals.

Refreshing Chilled Watermelon & Basil Soup


Chilled Watermelon & Basil Soup (Summer)

Looking for a cool summer recipe to beat the heat? Chilled watermelon & basil soup is perfect for hot days. It’s tasty and full of nutrients. Making it is simple and fun.

Introduction to Chilled Watermelon & Basil Soup

Try a new summer treat with chilled watermelon & basil soup. It’s quick to make and serves 6 people. Each serving has 140 kcal, with 9g of fat and 12g of carbs. It’s a healthy choice for any meal.

Key Takeaways

  • Chilled watermelon & basil soup is a refreshing summer recipe perfect for hot summer days.
  • This refreshing summer soup is packed with nutrients, including vitamin A, vitamin C, and potassium.
  • With a total preparation time of 20 minutes, this recipe is quick and easy to make.
  • Each serving contains 140 kcal, making it a healthy and nutritious option.
  • You can customize this recipe with various toppings, such as diced cucumber, Roma tomatoes, and medium bell pepper strips.
  • Chilled watermelon & basil soup is perfect for any occasion, whether it’s a summer party or a quick lunch.

Understanding the Appeal of Cold Soups in Summer

Cold soups are a great way to cool down in the summer. They are light and refreshing, unlike heavy meals. A bowl of easy chilled soup can be just what you need to beat the heat. Watermelon gazpacho is a favorite, mixing watermelon’s sweetness with gazpacho’s tanginess.

Restaurants are now serving cold soup recipes to help people stay cool. You can find everything from traditional gazpacho to unique options like watermelon gazpacho. Some common ingredients include:

  • Watermelon
  • Cucumbers
  • Tomatoes
  • Herbs like basil and mint

Cold soups are not only tasty but also good for you. They can be made with fruits, vegetables, and herbs. This makes them a great way to get your daily nutrients. Whether you need a light lunch or a cool snack, cold soup is a perfect choice.

Essential Ingredients for Chilled Watermelon & Basil Soup

To make a cool basil watermelon soup, you need a few key things. It’s great for hot days and is light and refreshing. You’ll need seedless watermelon, fresh basil, olive oil, garlic, and lime juice.

You can also add jalapeño, honey, and mint for extra flavor. These ingredients make your basil watermelon soup unique and tasty. It’s perfect for any summer event.

Here’s what you’ll need:

  • 6 cups of cold seedless watermelon
  • 1/4 cup of fresh basil leaves
  • 2 tablespoons of olive oil
  • 1 clove of garlic, minced
  • Juice of 1 lime

basil watermelon soup

These ingredients will help you make a delicious basil watermelon soup. It’s great for summer entertaining. Your guests will love its refreshing taste and light feel.

Kitchen Equipment You’ll Need

To make a tasty chilled watermelon & basil soup, you’ll need some key kitchen tools. As you start this summer recipe, having the right equipment is important. A blender or food processor is a must for pureeing the soup. You’ll also need a large bowl and spoon for mixing and chilling.

Experts say a blender or food processor is key for watermelon gazpacho, a similar soup. These tools help puree the watermelon, basil, and other ingredients. This makes the soup smooth and creamy.

chilled watermelon & basil soup equipment

Essential Tools

  • Blender or food processor
  • Large bowl
  • Spoon

Optional Equipment for Professional Results

For professional results, consider a hand blender or an ice cream maker. These tools can make the soup even smoother. They help create a refined and creamy chilled watermelon & basil soup, perfect for summer.

Step-by-Step Preparation Guide

To make a tasty watermelon gazpacho, start by picking a ripe watermelon. Remove the rind and seeds to get a smooth soup. Then, add fresh herbs like basil and mint to the mix.

Let’s get into the steps for your watermelon gazpacho. Blend the watermelon, tomato, and olive oil until smooth. This makes your soup creamy and easy to enjoy.

Selecting and Preparing the Watermelon

Look for a watermelon that’s heavy and has a yellow spot on the bottom. This means it’s ripe and ready. Cut it into cubes and remove any seeds or rind.

Handling Fresh Herbs

Fresh herbs like basil and mint add a bright flavor to your gazpacho. Just chop them up and add them to the soup. You can also try parsley or cilantro for a different taste.

Blending Techniques

To get a smooth texture, blend the watermelon, tomato, and olive oil together. Adding a bit of water helps the blending and makes the soup creamy.

Chilling Methods

After blending, pour the soup into a bowl and chill it in the fridge. You can also add ice cubes to speed up the cooling. This makes your gazpacho a refreshing treat for hot days.

Flavor Enhancement Tips and Variations

When serving a summer entertaining dish like basil watermelon soup, you want it to be refreshing and flavorful. Adding a little honey and lime zest can enhance the taste. This mix of sweet and tangy complements the watermelon and basil perfectly.

Try adding different spices and herbs to change the flavor of your basil watermelon soup. Fresh mint or a pinch of jalapeño can give it a unique twist. You can also use different melons, like cantaloupe or honeydew, to alter the taste.

basil watermelon soup

Here are some tips to enhance the flavor:
* Squeeze fresh lime juice to highlight the watermelon and basil’s flavors.
* Use olive oil and balsamic vinegar as a dressing for depth and richness.
* Experiment with sweeteners like agave nectar or maple syrup to find your favorite.

Nutritional Benefits and Dietary Information

Enjoying chilled watermelon & basil soup is not just tasty. It’s also good for you. Watermelon, the key ingredient, is mostly water. This makes it perfect for hot summer days. Plus, it has only 40 calories per cup, so you can indulge without guilt.

This soup has 107 calories per serving. It includes 19g of carbs, 2g of protein, and 4g of fat. It’s also full of fiber, with 2g per serving. You’ll find vitamins A and C, calcium, iron, and 185mg of potassium in each serving. This makes it great for keeping your electrolytes balanced.

chilled watermelon & basil soup

  • Low calorie count: only 107 calories per serving
  • High water content: over 90% water
  • Rich in vitamins and minerals: vitamin A, vitamin C, calcium, and iron
  • Good source of fiber: 2g per serving

Chilled watermelon & basil soup is a healthy and tasty choice for summer. It’s low in calories, high in water, and full of nutrients. It’s perfect for a light lunch or a comforting dinner. This refreshing soup is sure to satisfy your taste buds.

Perfect Pairings and Serving Suggestions

When serving chilled watermelon and basil soup, choose dishes that match its refreshing taste. It’s great as a starter or light lunch with crusty bread or a green salad. This adds a nice contrast to the cool soup.

A watermelon gazpacho pairs well with many dishes. For a heartier meal, try it with grilled chicken or fish and roasted veggies. This adds protein and fiber, making the meal more filling.

Here are some great pairing ideas for your cold soup recipe:

  • A simple green salad with a light vinaigrette
  • Grilled cheese sandwiches or paninis
  • Roasted vegetable wraps or flatbreads
  • Fresh fruit or cut veggies with hummus

When pairing, garnish with fresh herbs or cheese for elegance. Serve it chilled to enhance the watermelon and basil flavors.

Follow these tips for a refreshing meal perfect for warm weather. Get creative with your watermelon gazpacho and enjoy great flavor and texture combinations!

Make-Ahead and Storage Guidelines

Preparing a light summer meal like basil watermelon soup is easier when you plan ahead. This refreshing summer entertaining dish can be made up to 24 hours in advance. This way, you can prepare it ahead of time and store it in the fridge until serving.

To keep the soup fresh, store it in an airtight container in the fridge. This prevents spoilage and keeps the flavors fresh. When you’re ready to serve, just stir the soup well and adjust the seasoning if needed. You can also freeze the soup for up to 3 months, perfect for meal prep or big gatherings.

Here are some key storage guidelines to keep in mind:

  • Refrigerate the soup in an airtight container for up to 24 hours
  • Freeze the soup in a freezer-safe container or plastic bag for up to 3 months
  • Store the soup in the refrigerator at a temperature of 40°F (4°C) or below

By following these make-ahead and storage guidelines, you can enjoy your basil watermelon soup at its best. Whether it’s a light summer meal or a refreshing summer entertaining dish, it’s always a hit. So, prepare ahead of time and enjoy a delicious and healthy soup whenever you need it.

Entertaining with Summer Soups

Are you planning a summer party? Think about serving chilled watermelon & basil soup. It’s not just tasty but also simple to serve and customize. Its refreshing taste makes it perfect for a summer event.

Get creative with how you present the soup. Serve it in unique jars or glasses for a cool look. Add fresh herbs or a dollop of sour cream for extra color and taste.

Presentation Tips

  • Use fresh herbs as garnishes to add a touch of elegance
  • Serve the soup in individual jars or glasses for a unique presentation
  • Consider adding a dollop of sour cream or a sprinkle of paprika for extra flavor and color

Scaling the Recipe for Parties

To make more soup for a big group, just multiply the ingredients. You’ll get 8 cups, enough for 8 people. Plus, you can make it ahead and keep it in the fridge for up to 4 days.

With these tips, your chilled watermelon & basil soup will be a hit. It’s refreshing, easy to make, and can be customized. It’s perfect for any summer party.

Yield Servings Prep Time Total Time
8 cups 8 servings 10 minutes 2 hours 10 minutes

Conclusion: Mastering Your Chilled Watermelon & Basil Soup

Learning to make watermelon gazpacho or easy chilled soup is simpler than you might think. Just a few ingredients and basic tools are needed. You can whip up a refreshing cold soup recipe for a hot summer day. This vibrant and tasty Chilled Watermelon & Basil Soup will wow your guests, no matter your cooking level.

The secret to a great dish is finding the right mix of sweet watermelon, fragrant basil, and a hint of acidity. Follow the guide and tips to make a soup that looks good and tastes amazing. It’s also healthy and can be enjoyed by many, making it perfect for summer gatherings.

So, dive into the world of Chilled Watermelon & Basil Soup. Enjoy the vibrant colors, the cool taste, and the fresh summer flavors in every spoonful.

FAQ

What is Chilled Watermelon & Basil Soup?

Chilled Watermelon & Basil Soup is a cool summer dish. It’s made with watermelon, basil, and other ingredients. It’s great for hot days as a starter or light lunch.

Why are cold soups appealing in the summer?

Cold soups are refreshing in summer. They help cool down and keep you hydrated. This makes them perfect for hot weather.

What are the essential ingredients in Chilled Watermelon & Basil Soup?

You need watermelon, basil, olive oil, garlic, and lime juice for the soup. You can also add jalapeño, honey, and mint for extra flavor.

What kitchen equipment is needed to make Chilled Watermelon & Basil Soup?

You’ll need a blender or food processor. Also, a large bowl and spoon for mixing. Optional tools include a hand blender or ice cream maker for a smoother soup.

How do you prepare Chilled Watermelon & Basil Soup?

First, pick and prepare the watermelon. Then, handle the fresh herbs. Blend the ingredients and chill the soup in the fridge until it’s ready to serve.

Can you enhance the flavor of Chilled Watermelon & Basil Soup?

Yes, you can. Try adding honey and lime zest for a sweet and tangy taste. Or, add jalapeño or cilantro for a unique flavor.

What are the nutritional benefits of Chilled Watermelon & Basil Soup?

The soup is full of nutrients. Watermelon is rich in vitamin C and lycopene. It’s also low in calories and fat, making it a healthy choice.

How can Chilled Watermelon & Basil Soup be served and paired?

Serve it as a starter or light lunch. Pair it with crusty bread or a green salad. Garnish with fresh herbs, sour cream, or hemp seeds for elegance.

Can Chilled Watermelon & Basil Soup be made in advance?

Yes, you can make it ahead. Store it in the fridge for up to 24 hours. Just stir it well before serving.

How can Chilled Watermelon & Basil Soup be served for summer entertaining?

It’s great for summer parties or barbecues. Serve it in jars or glasses with fresh herbs or sour cream. It’s easy to make in large quantities.

Bake the Best Portuguese Sweet Bread at Home


Portuguese Sweet Bread

What makes Portuguese sweet bread so special, and how can you make it at home? This bread is known for its sweet, light, and fluffy texture. It’s perfect as is or buttered and grilled. As you start baking, you’ll learn the secrets to making authentic Portuguese sweet bread. It will impress your family and friends.

Introduction to Portuguese Sweet Bread

First, let’s learn about traditional Portuguese pastry and the key ingredients. With practice and patience, you can make homemade Portuguese bread that’s just as good as the bakery’s. This guide will help you make the perfect Portuguese sweet bread, whether you’re a pro or a beginner.

Key Takeaways

  • Portuguese sweet bread is a traditional bread that is sweet, light, and fluffy
  • The recipe requires active dry yeast, warm water, and a combination of sugar, butter, and eggs
  • The dough should be smooth, silky, and slightly tacky after mixing
  • The baking temperature and time are key to getting the right texture and flavor
  • With a total time of 3 hours and 30 minutes, you can make 16 servings of delicious Portuguese sweet bread
  • Each serving contains approximately 300 kcal, making it a satisfying treat for any occasion

The Rich History of Portuguese Sweet Bread

Portuguese sweet bread, a key part of Portuguese cuisine, has a long and interesting history. It started in Portugal and was introduced to Hawaii by Portuguese immigrants. They worked in the sugar cane fields. The bread changed over time, using local ingredients and tastes.

Exploring traditional Portuguese bread reveals many sweet breads with their own stories. From Portugal’s classic sweet bread history to Hawaii’s modern twists, it’s loved worldwide.

The story of Portuguese sweet bread shows how food can unite people and cross cultures. Enjoying it in a Portuguese bakery or a Hawaiian restaurant is always a treat. It’s sure to please your taste buds and make you want more.

Essential Ingredients for Authentic Portuguese Sweet Bread

To make authentic Portuguese sweet bread, you need the right ingredients. You’ll need yeast, flour, sugar, milk, eggs, and butter. These ingredients will give your bread the flavor and texture of traditional Portuguese sweet bread.

Choosing high-quality ingredients is key for homemade bread. For Portuguese sweet bread, use bread flour or all-purpose flour. The sugar content is also important, as it affects the bread’s sweetness and texture.

Here is a list of the essential ingredients you will need:

  • 1/2 cup milk
  • 4 tablespoons butter
  • 1/3 cup granulated sugar
  • 3 1/4 cups bread flour
  • 1 tablespoon instant yeast
  • 2 large eggs and 1 egg yolk

These ingredients will help you make a delicious and authentic Portuguese sweet bread. Use high-quality ingredients and follow the traditional recipe for the best results.

By using these traditional ingredients and following the recipe, you’ll make a delicious homemade bread. It’s perfect for any occasion.

Ingredient Quantity
Milk 1/2 cup
Butter 4 tablespoons
Granulated sugar 1/3 cup
Bread flour 3 1/4 cups
Instant yeast 1 tablespoon
Eggs 2 large eggs and 1 egg yolk

Kitchen Tools and Equipment You’ll Need

To make Portuguese sweet bread, you need the right tools and equipment. A well-stocked kitchen is key. You’ll need a stand mixer, pastry brush, and an 8-inch cake pan. These tools are essential for any serious baker.

Other basic tools include measuring cups and spoons, a kitchen scale, and a silicone spatula. They help with measuring, mixing, and shaping the dough. A cooling rack and pastry brush are also useful for cooling and glazing the bread.

kitchen tools

Optional tools like a dough hook or bread stone can enhance your bread’s crust. But, you can make great Portuguese sweet bread without them. With the right tools, you’re ready to bake delicious homemade bread.

Here are some essential kitchen tools and equipment to get you started:

  • Stand mixer
  • Pastry brush
  • 8-inch cake pan
  • Measuring cups and spoons
  • Kitchen scale
  • Silicone spatula

Understanding the Perfect Sweet Bread Dough

To make delicious Portuguese sweet bread, knowing the perfect dough is key. The dough should feel smooth and slightly sticky. This comes from mixing ingredients right and kneading for the right time. Good dough quality is vital for the right texture and taste.

When making the dough, think about the ingredients and kneading. Mix them to get a dough that’s smooth and elastic. Knead for 10-15 minutes to activate yeast and get the right texture. This way, you’ll make a perfect sweet bread dough.

Some bakers, like Mary G. Silva, make big batches for their family and community. Others, like Zelia Amaral, make smaller batches but focus on quality. The secret to perfect dough is in preparation and kneading. Master these steps for a delicious Portuguese sweet bread.

In bread making, dough quality makes a big difference. Knowing the perfect dough and following the right steps can make a great Portuguese sweet bread. Whether you’re experienced or new, focus on dough quality and detail for success.

Traditional Portuguese Sweet Bread Recipe

To make a delicious Portuguese sweet bread, you need to follow a traditional recipe. It includes yeast, flour, sugar, milk, eggs, and butter. This homemade bread recipe is easy to follow but requires patience and practice to get it right.

The ingredients for this Portuguese sweet bread recipe are simple. You’ll need 9 cups of all-purpose flour, 1 1/2 cups of sugar, 2 teaspoons of salt, 2 tablespoons of yeast, 1 cup of milk, 8 tablespoons of butter, and 6 eggs. Don’t forget 1 egg for the egg glaze.

Here’s how to make this traditional bread:

  • Mix the ingredients together in the right proportions
  • Knead the dough for the right amount of time
  • Proof the dough until it has doubled in size

By following this homemade bread recipe, you can make a delicious and authentic Portuguese sweet bread. It’s perfect for serving to your family and friends.

Portuguese sweet bread recipe

Mastering the Kneading Technique

To make your dough develop gluten, you need to get good at kneading. This step is key for making sweet breads chewy. You can knead with a stand mixer or by hand, taking 10 to 20 minutes.

Kneading is important in bread making. It spreads yeast evenly for even fermentation. A kneaded dough is smooth and elastic, perfect for Portuguese sweet bread. It’s all about developing gluten for the right texture.

Some, like Richard Bertinet, suggest a kneading method of turning and slapping. This works well for slack dough. Others, like Ken Forkish, prefer hand-mixing and folding. The aim is to get a dough that’s smooth and elastic, ready for fermentation.

kneading technique

When kneading, be gentle to keep the gluten structure intact. Cut and fold the dough to keep it even. As you knead, the dough will become elastic and cohesive. With time, you’ll get better at kneading and your bread will turn out great.

The Art of Shaping Your Sweet Bread

Shaping your Portuguese sweet bread is key in bread making. With practice, you can make stunning and tasty sweet bread. Start by gently deflating the dough and shaping it into your preferred form. You can make a classic round loaf, individual rolls, or even fancy patterns.

When it comes to sweet bread shaping, you can get creative. Try braiding or twisting for a unique look. Or stick to a classic round loaf or rolls for a traditional feel. Make sure the dough has room to rise and expand while baking.

Some popular decorative bread designs include:

  • Braided loaves
  • Twisted rolls
  • Flower-shaped bread

These designs can make your sweet bread stand out. They’re great for special occasions or as gifts. With patience and practice, you can become a pro at bread making. Your sweet bread will be the talk of the town.

sweet bread shaping

Baking Temperature and Timing Tips

Getting the right texture and flavor in bread baking is key. The baking temperature and time are very important. For Portuguese sweet bread, bake at 350°F for 25 to 35 minutes. Adjust the time based on your bread’s size and shape.

Make sure your bread’s internal temperature hits 190°F for the best result. Check for burning after 30 minutes. If the top browns too fast, cover it with foil loosely. The dough needs 1.5 to 2 hours to double in size. After dividing, let it rest for about 1 hour.

Here are some key tips for bread baking success:

  • Preheat your oven to the correct baking temperature (350°F) before placing your bread inside.
  • Keep an eye on the baking time, as it may vary depending on the size and shape of your bread.
  • Check the internal temperature of your bread to ensure it reaches 190°F for proper doneness.

Follow these tips and adjust the baking temperature and time as needed. You’ll get the perfect texture and flavor in your Portuguese sweet bread. Stay attentive during baking, and enjoy a delicious, freshly baked loaf.

Regional Variations and Flavor Adaptations

Exploring Portuguese sweet bread reveals a variety of regional flavors. Each area in Portugal, from the mainland to the Azores, has its own bread style. These styles show the country’s rich cultural heritage.

The Azores-style sweet bread is known for its light texture and gentle sweetness. It’s made with flour, sugar, eggs, and milk. Baked in a wood-fired oven, it gets a crispy crust and a soft inside.

On the other hand, mainland Portugal sweet bread is denser and sweeter. It’s made with flour, sugar, eggs, and butter. Baked in a regular oven, it has a crispy crust and a soft inside.

Some popular regional variations and flavor adaptations of Portuguese sweet bread include:

  • Azores-style sweet bread with a lighter, airier texture and subtle sweetness
  • Mainland Portugal-style sweet bread with a denser, more richly flavored texture and deeper color
  • Modern interpretations of traditional recipes, such as the use of new ingredients and flavor combinations

These variations and adaptations show the diversity and creativity of Portuguese sweet bread. They offer many options for those looking to try something new. Whether you prefer traditional or adventurous flavors, there’s a Portuguese sweet bread for you.

Common Mistakes to Avoid

Making Portuguese sweet bread can be tricky. Knowing common mistakes helps you make a better bread. Avoiding these mistakes ensures your bread tastes great and is authentic. Mistakes include problems with the dough, issues with baking, and how you store it.

To avoid these mistakes, consider these tips:

  • Dough problems: overmixing, underproofing, or using incorrect yeast temperature can lead to a dense or flat bread.
  • Baking issues: overbaking or underbaking can result in a bread that is too dark or too pale.
  • Storage errors: storing the bread in a humid environment or not sealing it properly can cause it to become stale or moldy.

Knowing these common mistakes helps you make a delicious Portuguese sweet bread. Use the right ingredients, follow the recipe well, and store the bread right. This way, you can enjoy it for a longer time.

Mistake Effect Prevention
Dough problems Dense or flat bread Use correct yeast temperature, avoid overmixing
Baking issues Overcooked or undercooked bread Follow recipe instructions, check bread regularly
Storage errors Stale or moldy bread Store in airtight container, keep in cool dry place

Serving and Storage Recommendations

There are a few ways to serve your Portuguese sweet bread. You can enjoy it at room temperature or toasted, whichever you like. For storage recommendations, keep it in an airtight container at room temperature for up to 3 days.

If you want to store it longer, freeze the bread for up to 2 months. Then, thaw it at room temperature when you’re ready to eat it. Here are some tips for storing and serving your Portuguese sweet bread:

  • Store the bread in an airtight container to keep it fresh
  • Freeze the bread for up to 2 months for longer-term storage
  • Thaw the bread at room temperature when you’re ready to serve it
  • Serve the bread at room temperature or toasted, depending on your preference

By following these serving recommendations and storage recommendations, you can enjoy your Portuguese sweet bread for a longer period. This way, you can keep its freshness and flavor.

Pairing Your Portuguese Sweet Bread

Enjoying your freshly baked Portuguese sweet bread is even better with the right sides. You can try different pairings to find your favorite. Classic choices like butter or jam are great because they match the bread’s sweetness. For something new, try cheese or charcuterie for a unique twist.

Finding the right bread pairing can make both the bread and its side taste better. You might like pairing sweet bread with strong cheeses or cured meats. Or, you could try honey or Nutella for a sweet treat. Here are some ideas to get you started:

  • Cheese and charcuterie board
  • Fresh fruit platter
  • Nutella or honey spread
  • Butter or jam

Remember, the secret to a great pairing is to mix flavors and textures well. Feel free to experiment and find your top picks. With a bit of trial and error, you’ll soon enjoy your Portuguese sweet bread with the perfect sides.

Exploring different pairings can make your Portuguese sweet bread even more special. Whether you like traditional or modern sides, there’s something out there for you. So, be creative and discover your favorite way to enjoy this tasty bread.

Conclusion

Making Portuguese sweet bread at home is a fun and tasty journey. It takes patience and practice. With the right bread making skills, you can make authentic Portuguese sweet bread that everyone will love.

This guide has given you the tools to bake the perfect loaf. Whether you’re new to baking or have experience, you’ll find helpful tips here. Enjoy the journey of making a true taste of Portugal in your kitchen.

FAQ

What is the history of Portuguese sweet bread?

Portuguese sweet bread has a long and interesting history. It started in Portugal, where it was a common bread in homes. Portuguese immigrants brought it to Hawaii, where it changed to fit local tastes.

What are the essential ingredients for authentic Portuguese sweet bread?

To make real Portuguese sweet bread, you need yeast, flour, sugar, milk, eggs, and butter. These ingredients will give your bread the traditional taste and texture.

What kitchen tools and equipment are needed to make Portuguese sweet bread?

You’ll need a stand mixer, a pastry brush, and an 8-inch cake pan. You might also want a dough hook or a bread stone for easier preparation and baking.

How do you achieve the perfect sweet bread dough for Portuguese sweet bread?

The dough should be smooth and slightly sticky. Mix the ingredients right and knead for the correct time to get this texture.

What is the traditional Portuguese sweet bread recipe?

The classic recipe includes yeast, flour, sugar, milk, eggs, and butter. Mix them well, knead the dough, and let it proof until it doubles in size.

How do you properly knead the dough for Portuguese sweet bread?

Kneading develops the flour’s gluten, making the bread chewy. Use a stand mixer or knead by hand to get the right texture.

How do you shape Portuguese sweet bread?

Shaping the bread is an art that needs patience and practice. You can make a round loaf, rolls, or patterns. Use a gentle touch and your imagination.

What is the proper baking temperature and time for Portuguese sweet bread?

Bake at 350°F for 25-35 minutes. Adjust the time based on your bread’s size and shape.

What are the common mistakes to avoid when making Portuguese sweet bread?

Avoid overmixing or underproofing the dough, and don’t over- or underbake. Also, store the bread in a dry place to avoid moisture issues.

How should you serve and store Portuguese sweet bread?

Serve at room temperature or toasted. Store in an airtight container for up to 3 days. Freeze for up to 2 months and thaw at room temperature.

Delicious Spiced Cauliflower & Chickpea Soup


Spiced Cauliflower Soup

Looking for a healthy and easy soup to warm you up? Try the spiced cauliflower and chickpea soup. It’s a tasty vegetarian option for any time of year. This homemade soup is comforting and quick to make, perfect for a nutritious meal.

This soup is not only tasty but also full of nutrients. It’s great for those who want a healthy comfort food. Whether you want something light or hearty, this soup will hit the spot.

Key Takeaways

  • You can make a delicious and healthy spiced cauliflower soup at home with just a few ingredients.
  • This vegetarian soup idea is perfect for any season and can be customized to suit your taste preferences.
  • The combination of cauliflower and chickpeas provides a boost of vitamins, minerals, and fiber, making it an excellent option for a healthy and nutritious meal.
  • You can serve this homemade soup as a comfort food or a light and refreshing meal, depending on your mood and preferences.
  • This easy soup recipe is also a great option for those seeking healthy soup recipes that are easy to make and require minimal ingredients.
  • The soup can be made vegan by substituting dairy products with dairy-free alternatives, making it a great option for those with dietary restrictions.

The Benefits of Spiced Cauliflower & Chickpea Soup

Exploring flavorful meals might lead you to a nutrient-rich dish. Spiced cauliflower and chickpea soup is a great find. It’s not just tasty but also full of good stuff, making it a top pick for healthy soup ideas.

This soup is a nutritional powerhouse. It has just the right amount of calories, making it a great choice for a healthy soup. It’s filling and packed with nutrients. Here are some of the key ones:

  • Protein: 4g per serving
  • Fiber: 3g per serving
  • Vitamin A: 255 IU per serving
  • Vitamin C: 4mg per serving

This soup is great for any time of year. It’s perfect for a cozy meal in winter or a light snack in summer. It’s a versatile choice.

Essential Ingredients for Your Soup

To make a tasty and healthy easy vegetarian soup, you’ll need some key ingredients. For a homemade soup with chickpeas, start with 1 head of cauliflower, 1 can of chickpeas, and 5 cloves of garlic. These will give your soup a great flavor. Don’t forget to add some extra-virgin olive oil, salt, and paprika for extra taste.

A flavorful cauliflower soup needs some important ingredients. You’ll need 4 cups of vegetable broth and 1 cup of water. You can also add Yukon gold potatoes and heavy cream for creaminess. For a vegan option, use coconut milk or soy milk instead of heavy cream. With these ingredients, you can create a delicious and easy vegetarian soup for any season.

Here is a list of the essential ingredients you will need:

  • 1 head of cauliflower
  • 1 can of chickpeas
  • 5 cloves of garlic
  • 4 cups of vegetable broth
  • 1 cup of water
  • 2 medium Yukon gold potatoes
  • 1/2 cup of heavy cream (or substitute with coconut milk or soy milk)
  • Salt and paprika to taste

With these ingredients, you can make a delicious and nutritious easy vegetarian soup. The mix of cauliflower, chickpeas, and vegetable broth creates a flavorful and healthy homemade soup. You can also adjust the recipe to fit your taste and dietary needs.

Kitchen Equipment You’ll Need

To make a tasty plant-based soup, you’ll need some key kitchen tools. A big pot is essential for simmering the soup. You’ll also need a blender to puree it to the right consistency. These tools ensure your soup is smooth and creamy.

Having the right kitchen tools is important for cooking a great plant-based soup. You should get a high-quality large pot that can hold at least 3 cups of liquid. Also, a blender that can handle hot ingredients is a must. Don’t forget a cutting board, knife, and spoon for stirring.

kitchen equipment for plant-based soup

Essential Tools

  • Large pot
  • Blender
  • Cutting board
  • Knife
  • Spoon

Optional Equipment for Enhanced Results

While not essential, some extra tools can make your soup even better. An immersion blender can puree the soup right in the pot. This saves you from transferring it to a blender. A food processor is also handy for quickly chopping ingredients.

Preparing Your Ingredients

To make a delicious healthy cauliflower soup, start by roasting the cauliflower and chickpeas. This step brings out their natural flavors. The recipe from Orchids + Sweet Tea emphasizes the importance of roasting before adding them to the soup.

Here are the ingredients you will need:

  • 1 head of cauliflower (approximately 4-5 cups total)
  • 1 can of chickpeas (15-ounce), rinsed and drained
  • 5 garlic cloves
  • 1 tsp of ground cumin
  • 1/2 tsp of salt
  • 1/8 tsp of paprika

With your ingredients ready, you can start cooking your vegetarian soup. You can also tweak the recipe to make a homemade chickpea soup. Just adjust the chickpeas and cauliflower amounts. Use high-quality ingredients and follow the recipe closely for the best taste.

Spiced Cauliflower Soup

Mastering the Spice Blend

To make a flavorful soup, mastering the spice blend is key. A delicious vegan soup needs the right spices to enhance its taste. The recipe from Floating Kitchen uses cumin, paprika, and garlic powder for this.

There are many spice blends to choose from. You might like curry powder, garam masala, or smoked paprika. You can also make your own mix by adding or removing spices. For example, cayenne pepper adds a kick, while thyme and rosemary add depth.

Traditional Spice Combinations

  • Cumin, paprika, and garlic powder
  • Curry powder, garam masala, and turmeric
  • Smoked paprika, cumin, and coriander

Customizing Your Spice Mix

To make your spice mix unique, start with a base and adjust it to your liking. Try different spice ratios to find the perfect flavor. For instance, more cumin gives a earthy taste, while more paprika adds smokiness.

flavorful soup recipe

Storage and Shelf Life of Spices

Keeping spices fresh is important for their flavor and aroma. Store them in a cool, dry place, away from sunlight and moisture. Freezing spices can also help preserve their taste and smell for longer.

Spice Shelf Life
Cumin 6 months
Paprika 12 months
Garlic Powder 12 months

Step-by-Step Cooking Instructions

To make a delicious and healthy soup, start by sautéing onion and garlic in olive oil for 5 to 7 minutes. Then, add the chickpeas and cook for another 5 minutes. Next, add the cauliflower and vegetable broth, and let it simmer.

The soup needs to simmer for 20 to 25 minutes, until the veggies are tender. You can also roast the cauliflower in the oven at 400 degrees F for 25-30 minutes before adding it. This step adds a richer flavor and a cozy fall feel.

Here’s a summary of the cooking instructions in a step-by-step format:

  1. Sauté the onion and garlic in olive oil for 5 to 7 minutes.
  2. Add the chickpeas and cook for an additional 5 minutes.
  3. Add the cauliflower and vegetable broth, and bring the mixture to a simmer.
  4. Simmer the soup for 20 to 25 minutes, or until the vegetables are tender.

By following these steps, you’ll create a delicious and healthy fall soup. This recipe is not only tasty but also packed with nutrients. It’s a great option for a cozy fall soup.

cozy fall soup recipe

Nutrient Amount per serving
Calories 485 kcal
Carbohydrates 68 g
Protein 22 g
Fat 16 g

This cozy fall soup recipe is a great choice for a healthy and delicious meal. Its rich flavor and nutritious ingredients make it perfect for a cozy fall evening.

Tips for Achieving the Perfect Texture

Texture is key in a tasty and warming soup, like vegan or gluten-free options. To get it just right, focus on blending and adjusting the soup’s consistency. For a creamy feel, blend the soup until it’s smooth and creamy, as Orchids + Sweet Tea suggests.

Getting the right texture in your soup might take some practice. But with a few tips, you can make a soup that’s both delicious and comforting. Try using an immersion blender to mix the soup in the pot, or move it to a blender for an even smoother finish.

  • Blending the soup until it’s smooth and creamy
  • Adjusting the consistency to your liking, whether that’s thicker or thinner
  • Adding ingredients such as tahini or chickpeas to enhance the texture and creaminess of the soup

By trying out different blending methods and adjusting the soup’s consistency, you can make a soup that’s perfect for any time. Whether it’s vegan or gluten-free, your soup will be a hit.

Serving Suggestions and Garnishes

When serving your healthy soup, aim for a look that’s both appealing and flavorful. For a vegetarian soup, try it with crusty bread or a green salad. This makes a great weeknight dinner or weekend lunch, enhanced by simple garnishes.

Here are some side dish ideas:

  • A simple green salad with a light vinaigrette
  • A side of warm, crusty bread for dipping into the soup
  • A small serving of roasted vegetables, such as asparagus or Brussels sprouts

To enhance presentation, add chopped fresh parsley or a dollop of yogurt. Serving in a beautiful bowl with lemon slices or herbs is also a good idea. Have fun and make it your own!

Storage and Reheating Guidelines | Spiced Cauliflower Soup

Storing your homemade soup right is key to keeping it fresh and tasty. You can keep your hearty soup in an airtight container in the fridge for up to 4 days. If you want to keep it longer, freezing is a good option for about a month. This way, you can enjoy your soup whenever you like, without worrying about it spoiling.

To reheat your soup, just simmer it for 2-3 minutes until it’s hot. You can also use the microwave, but stir it every 30 seconds to heat evenly. If you froze the soup, thaw it in the fridge overnight before reheating. For a quick warm-up, try using a thermos to keep your soup warm for hours.

  • Always use airtight containers to prevent contamination and spoilage.
  • Label and date your containers so you can easily keep track of how long they’ve been stored.
  • Consider portioning out individual servings of soup before freezing, making it easier to reheat only what you need.

By following these tips, you can enjoy your homemade soup for longer. It keeps its nutritional value and taste. Whether you’re craving a comforting bowl of soup or a quick meal, your homemade soup will always satisfy.

Dietary Modifications and Variations

Healthy soup ideas should consider everyone’s dietary needs. For soups like spiced cauliflower and chickpea, you can make changes. Use gluten-free spices and ingredients for those who need it, as suggested by Orchids + Sweet Tea. This way, you can enjoy a tasty and healthy soup with chickpeas.

To make soups lower in sodium, use less salt or add herbs and spices. If you prefer less heat, you can reduce or remove red pepper flakes. Here are some tips for changing the recipe:

  • Use gluten-free spices and ingredients for a gluten-free option
  • Reduce salt content for a low-sodium alternative
  • Adjust spice levels to suit your taste preferences

These changes let you make healthy soups for different diets. Whether you want easy vegetarian soups or homemade ones with chickpeas, these tips help.

Dietary Modification Description
Gluten-Free Use gluten-free spices and ingredients
Low-Sodium Reduce salt content or substitute with herbs and spices
Spice Level Adjustment Reduce or omit red pepper flakes for a milder taste

Conclusion

As you finish this delicious plant-based soup, we hope you enjoyed its warmth and flavors. The mix of spices, tender cauliflower, and hearty chickpeas makes a vegetable soup recipe that’s both tasty and healthy. This soup is great for any meal, whether it’s a cozy day or a healthy choice for your week.

This recipe is perfect because you can make it your own. Try new spice blends, change the thickness, and add different garnishes. Cooking is all about having fun and making dishes your own.

Thanks for joining us on this tasty adventure. We hope this spiced cauliflower and chickpea soup will be a favorite in your kitchen. Enjoy every delicious bite!

FAQ

What are the benefits of spiced cauliflower and chickpea soup?

This soup is full of nutrients and offers many health benefits. It’s rich in protein and fiber, making it a filling meal. The mix of cauliflower and chickpeas also adds antioxidants, vitamins, and minerals for better health.

What are the essential ingredients needed for this recipe?

The key ingredients are cauliflower, chickpeas, garlic, and spices like cumin, paprika, and garlic powder.

What kitchen equipment is required to make this soup?

You’ll need a large pot and a blender. Optional tools include a roasting sheet for the cauliflower and chickpeas.

How do I prepare the ingredients for the soup?

To start, roast the cauliflower and chickpeas. Then, chop the garlic and gather your spices. The web source has detailed steps for each step.

How do I achieve the perfect texture for the soup?

To get the right texture, blend the soup until it’s smooth. Adjust the thickness by adding more or less broth.

What are some serving suggestions and garnishes for this soup?

Try serving it with crusty bread or a green salad. You can also top it with roasted chickpeas, fresh herbs, or olive oil.

How do I store and reheat the leftover soup?

Store it in an airtight container in the fridge for up to 3 days. Reheat it on the stovetop or in the microwave until warm.

Can I make dietary modifications to this recipe?

Yes, you can make it gluten-free or low-sodium. You can also adjust the spice level to your liking.