Welcome To Soup Meets Bowl - The Best Soup Recipes & More

Warm Up With Our Latest Soup Recipes

Zucchini & Basil Soup: Nourishing and Flavorful


Zucchini & Basil Soup

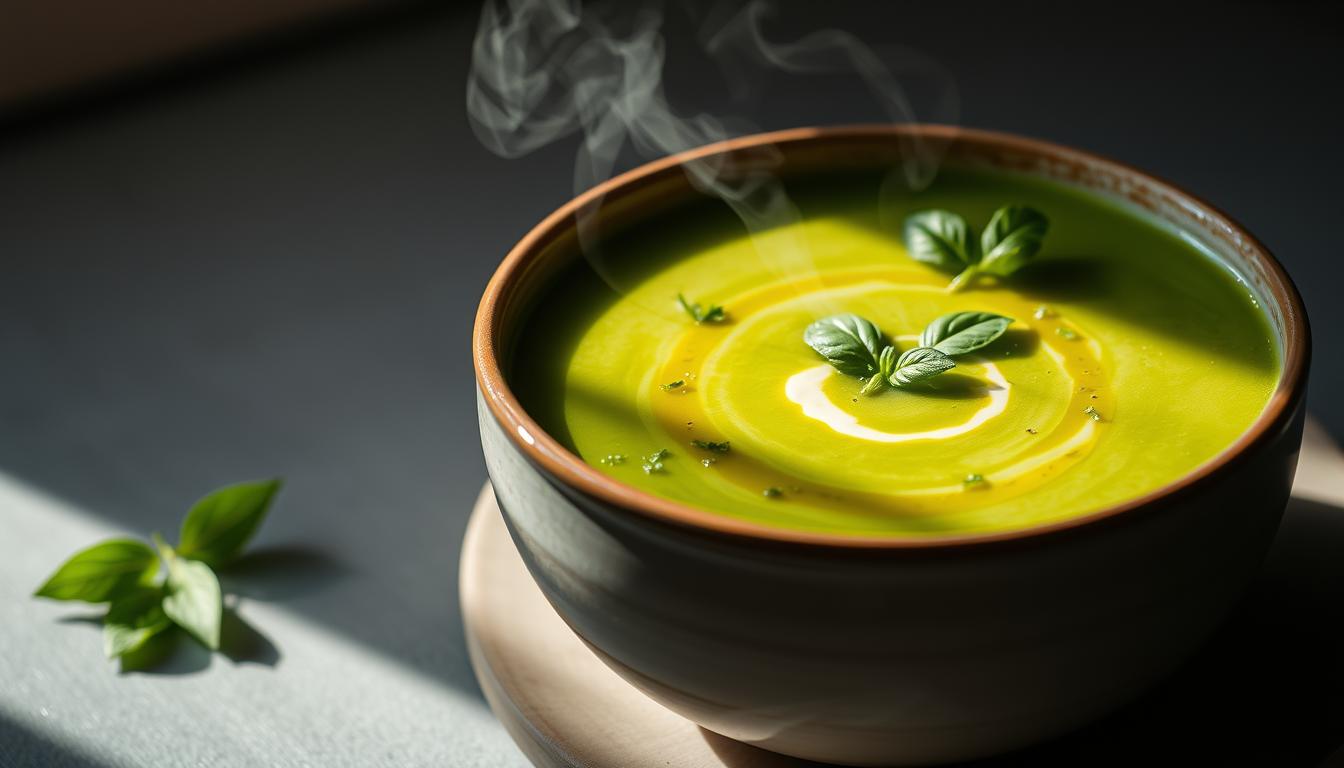
Thinking about a healthy soup? Zucchini & basil soup is a top pick for a light, nutritious meal. It’s creamy and packed with antioxidants, making it a great choice for a tasty, wholesome option. You can whip it up in 26 minutes, with only 10 minutes of prep and 16 minutes of cooking. It serves 4 as a starter or side.

Zucchini & basil soup stands out with its unique flavors and nutrients. It has a 4.6 out of 5 rating from 26 reviews, proving it’s a favorite. Whether you’re craving a comforting meal or a new vegetarian soup, this is a great pick.

Key Takeaways

  • You can make zucchini & basil soup in just 26 minutes, making it a quick and easy option for a weeknight meal.
  • This healthy soup recipe serves 4 as a starter or side, making it perfect for a small gathering or a family dinner.
  • Zucchini basil soup has a review rating of 4.6 out of 5 from 26 reviews, ensuring that you’re getting a tried-and-true recipe.
  • This vegetarian soup is packed with nutrients and antioxidants, making it a great choice for a healthy and nourishing meal.
  • You can customize your zucchini & basil soup with optional garnishes like plain yogurt, sour cream, or parmesan cheese.
  • This homemade soup can be made with just a few simple ingredients, including zucchini, basil, and chicken broth.

Understanding the Magic of Zucchini & Basil Soup

Exploring easy soup recipes often leads to the classic zucchini and basil mix. This combo is a favorite for summer soup ideas. The creamy zucchini and the fresh basil make a taste that’s hard to forget. It’s perfect for those seeking fresh basil recipes or a cozy bowl of garden-fresh soups.

The soup’s success comes from its perfect mix of flavors and textures. Zucchini’s smoothness meets basil’s bright taste. This mix is why easy soup recipes like this are loved by many. Plus, it’s packed with vitamins, minerals, and antioxidants.

  • High levels of vitamins and minerals
  • Antioxidant-rich properties
  • Low calorie count, making it a great option for those looking for easy soup recipes that are also healthy

Essential Ingredients for the Perfect Soup

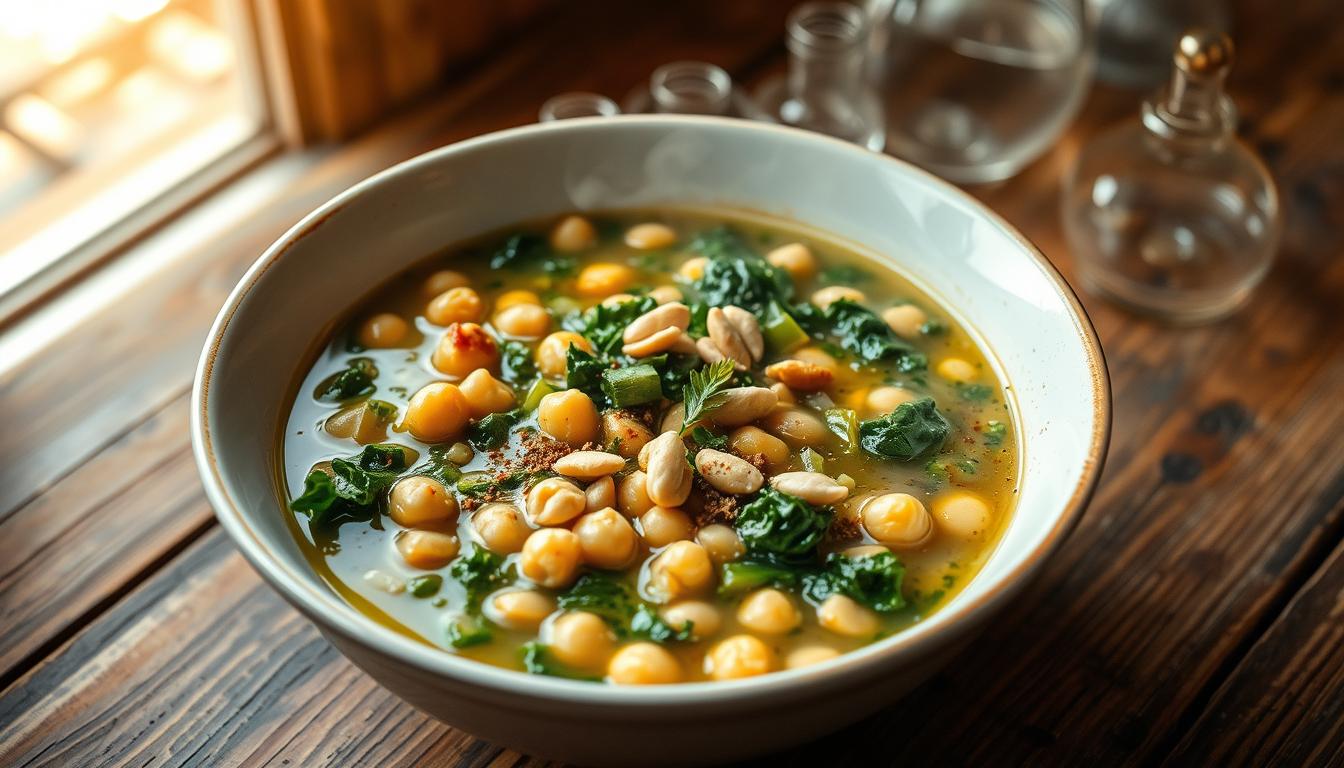
To make a tasty and healthy healthy soup recipe, choose the freshest ingredients. For a classic summer soup like zucchini and basil, the ingredients’ quality matters a lot. You’ll need about 9 cups of diced zucchini, which is 5-6 zucchinis, 2 cups of diced white onions, and 1 cup of packed fresh herb soup leaves like basil.

For an easy homemade soup, use simple, wholesome ingredients. This recipe calls for 4 cups of vegetable broth, 8 cloves of minced garlic, and 2 tablespoons of olive oil. These ingredients help make a tasty and refreshing soup, great for any time. Adding hemp seeds and leeks can also boost nutrition and flavor in your healthy soup recipe.

  • 5-6 zucchinis
  • 2 cups of diced white onions
  • 1 cup of packed fresh basil leaves
  • 4 cups of vegetable broth
  • 8 cloves of minced garlic
  • 2 tablespoons of olive oil

With these ingredients, you can whip up a delicious and nourishing summer soup perfect for warm weather. The mix of fresh herbs and wholesome ingredients makes this easy homemade soup a quick and healthy meal choice.

Kitchen Equipment You’ll Need

To make a tasty homemade soup like zucchini or basil soup, you need some basic kitchen tools. The right equipment helps you make a smooth, creamy soup. When you’re making a fresh basil recipe, a blender or food processor is key to puree the ingredients.

You’ll also need a pot, cutting board, and utensils like a spatula and spoon. Using a handheld mixer or immersion blender can make cooking faster. This way, you can enjoy your soup sooner.

Here’s a list of the basic tools you’ll need:

  • Blender or food processor
  • Pot
  • Cutting board
  • Utensils (spatula, spoon, etc.)

Optional tools that can improve your results include:

  • Handheld mixer or immersion blender
  • Food processor

With the right kitchen tools, you can make many delicious soups. This includes zucchini and basil soups. You’ll also enjoy the fresh taste of a basil recipe.

Preparing Your Fresh Ingredients

To make a tasty and healthy easy zucchini soup recipe, start by preparing your ingredients well. This means picking and cleaning the zucchini, handling the fresh basil, and getting ready any extra veggies. These steps will help you create a healthy basil soup that’s great for any time.

Choose smaller, denser zucchinis for the best taste. You’ll need about 1.5 pounds for this homemade zucchini soup recipe. For the fresh basil, you’ll need about 2 cups packed, which is roughly 2 ounces. Be gentle when handling the basil leaves to avoid bruising them.

Here are some extra tips for getting your ingredients ready:

  • Use 2 tablespoons of olive oil to sauté the garlic and onions.
  • Add 4 cups of vegetable broth for a flavorful and nutritious soup.
  • Use 1 cup of packed fresh basil leaves for a flavorful basil soup.

easy zucchini soup recipe

By following these easy steps and using fresh, quality ingredients, you’ll make a delicious and nourishing easy zucchini soup recipe. It’s perfect for any occasion. Whether you’re after a healthy basil soup or a homemade zucchini soup, this recipe will impress.

Step-by-Step Cooking Method

To make a tasty vegetarian zucchini soup, start by sautéing ingredients in a pot. This step brings out the flavors and makes a rich base. Use onions, garlic, and fresh basil to add depth and complexity.

After sautéing, add the zucchini soup recipe ingredients. This includes zucchini, broth, and spices. Bring it to a boil, then simmer until the zucchini is tender.

For a creamy basil soup, add heavy cream or half-and-half. This makes it rich and creamy. Or, use a low-fat broth and minimal cream for a lighter version.

When making a healthy soup, use fresh ingredients and less cream and salt. Add lots of spices and herbs for flavor. Follow these tips and a simple zucchini soup recipe to make a delicious, nutritious meal.

Creating the Perfect Consistency

To get the perfect consistency in your zucchini soup, focus on blending and adjusting textures. You want the flavors to be balanced and the texture smooth and creamy. Zucchini and basil soup is great for trying out different textures, making a delicious and healthy meal.

Understanding the role of fresh basil and zucchini is key. Use high-quality ingredients and adjust basil to your liking. The amount of zucchini also affects the soup’s texture and taste.

zucchini soup consistency

Blending Techniques

When blending your zucchini and basil soup, remember a few tips. You can use an immersion blender in the pot or a blender for a smoother soup. But be careful not to over-blend, as it can make the soup too thin.

Texture Adjustments

To change the soup’s texture, add more or less of certain ingredients. For a thicker soup, add more zucchini or less stock. For a thinner soup, add more stock or use less zucchini. Trying different ingredient ratios helps you find the perfect consistency.

Seasoning and Flavor Enhancement

To make a tasty and healthy soup, like this easy homemade soup, focus on seasoning and flavor. Start by adding salt, pepper, and other seasonings to enhance the flavors. For a summer soup, like zucchini and basil, fresh herbs add brightness and depth.

Seasoning is key. Use real stock for the best flavor and health benefits. Try different herbs and spices to find your favorite mix. For example, parmesan cheese adds a savory and nutty taste.

Here are some tips for seasoning and flavor enhancement:

  • Use fresh and high-quality ingredients
  • Experiment with different herbs and spices
  • Add a squeeze of lemon juice for brightness
  • Use a variety of seasonings, such as salt, pepper, and garlic powder

By following these tips, you can make a healthy and delicious soup. It’s perfect for any time of year. Whether it’s a light summer soup or a hearty winter soup, the secret is in the seasoning and flavor. So, don’t be afraid to try new things and find your perfect mix.

Serving Suggestions and Garnishes

When serving your zucchini & basil soup, aim for a look that’s as good as it tastes. Pair it with whole grain bread or a fresh salad for a complete meal. This soup is ideal for a light meal and is perfect for family gatherings.

Enhance your dish with parmesan cheese, sour cream, or fresh basil. Grilled panini or cheddar croutons add a nice crunch. For a cool twist, serve in small cups with paprika or zucchini slices.

zucchini & basil soup

  • Serving it as a starter or appetizer at a dinner party
  • Packing it in a thermos for a healthy lunch on-the-go
  • Using it as a base for other soups, such as adding some cooked chicken or beans for added protein

Be creative with your serving ideas and garnishes to elevate your zucchini & basil soup. It’s a nourishing and tasty dish that will impress your loved ones.

Storage and Reheating Guidelines

Enjoying your favorite soups, like zucchini and basil, all week is easy with the right storage and reheating. This is key for soups with fresh basil and garden-fresh ingredients. Keep your soup in the fridge at 40 degrees Fahrenheit or below to stay fresh.

Soups can last up to three days in the fridge, but some can last a week. Chicken soup lasts three to five days, and creamy soups last about three days. Soups with cream or milk, like chowders and bisques, might get grainy when frozen.

Here are some tips for reheating your soup:

  • Reheat the soup to a boil for three minutes to eliminate harmful bacteria.
  • Simmer the soup gently for an additional three minutes after boiling to ensure safety.
  • Use a microwave, stovetop, or steamer to reheat the soup, with reheating times varying from 2-3 minutes in the microwave to 5-10 minutes on the stovetop.

By following these guidelines, you can enjoy your favorite soups all week. This includes summer soups and fresh basil recipes, keeping their flavor and nutrients intact.

Reheating Method Reheating Time
Microwave 2-3 minutes
Stovetop 5-10 minutes
Steamer 10-15 minutes

Seasonal Variations and Adaptations

Zucchini and basil soup is a versatile dish for any season. You can make a unique and delicious soup for any time of year. For a summer soup, add fresh herbs like parsley or dill for a refreshing twist.

Using seasonal ingredients is key to a great fresh herb soup. It makes your soup full of flavor and helps reduce food waste. In the US, 25% to 50% of food is wasted. Seasonal ingredients help reduce this waste and make a healthy soup.

Make your easy homemade soup special by trying different spices and cooking methods. Add olive oil or coconut milk for a creamy base. This is great for a summer soup, where a light texture is perfect. With these tips, you can enjoy a delicious and healthy soup all year.

FAQ

Q: What is zucchini soup?

A: Zucchini soup is a delicious and nutritious soup made with zucchini as the main ingredient. It can be prepared in various ways, including creamy, vegetable-based, and flavorful options.

Q: What are the health benefits of zucchini soup?

A: Zucchini soup is packed with nutrients, including vitamins, minerals, and antioxidants. It is low in calories and rich in fiber, making it a great choice for those looking to maintain a healthy diet.

Q: How can I make a creamy zucchini soup?

A: To make a creamy zucchini soup, you can use ingredients like coconut milk, Greek yogurt, or heavy cream. These ingredients will add a rich and velvety texture to the soup.

Q: What are some flavorful zucchini soup recipes I can try?

A: There are many flavorful zucchini soup recipes to explore. You can add herbs and spices like basil, garlic, and cumin to create a delicious and aromatic soup. You can also experiment with different vegetables and seasonings to find your favorite combination.

Q: How can I make a healthy zucchini soup?

A: To make a healthy zucchini soup, you can use vegetable broth instead of cream or coconut milk. You can also add other vegetables like carrots, celery, and spinach to increase the nutritional value of the soup.

Q: What are some easy zucchini soup recipes I can try?

A: If you’re short on time, there are many easy zucchini soup recipes you can try. These recipes often require minimal ingredients and can be prepared in just a few minutes. You can find simple recipes online or in cookbooks.

Q: How can I make a homemade zucchini soup?

A: Making a homemade zucchini soup is a great way to enjoy the fresh flavors of zucchini. You can choose your favorite ingredients and seasonings to create a soup that suits your taste preferences. It’s a fun and rewarding process that allows you to customize the flavors to your liking.

Q: What are some vegetarian zucchini soup recipes I can try?

A: If you follow a vegetarian diet, there are plenty of zucchini soup recipes that are suitable for you. These recipes often feature a variety of vegetables and can be seasoned with herbs and spices to enhance the flavors. You can find vegetarian zucchini soup recipes online or in vegetarian cookbooks.

Q: How can I make a creamy basil zucchini soup?

A: To make a creamy basil zucchini soup, you can combine zucchini, basil, and a creamy base like coconut milk or Greek yogurt. This combination creates a delicious and creamy soup with a hint of basil flavor.

Q: What are some other healthy soup options I can try?

A: In addition to zucchini soup, there are many other healthy soup options you can explore. Some popular choices include vegetable soups, lentil soups, and soups made with lean proteins like chicken or turkey. These soups offer a variety of flavors and can be a nutritious addition to your diet.

FAQ

What are the key ingredients in zucchini & basil soup?

The main ingredients are fresh zucchini, basil, leeks, garlic, and hemp seeds. Using high-quality ingredients is key for a great taste.

What kitchen equipment is needed to make this soup?

You’ll need a blender, a pot, and a cutting board. You can also use a handheld mixer or food processor for better results.

How do I prepare the fresh ingredients for the soup?

Start by picking and cleaning the zucchini. Then, handle the fresh basil carefully. Prepare any extra veggies as needed.

What is the step-by-step process for cooking the zucchini basil soup?

First, sauté the ingredients. Then, blend the soup. Lastly, season it to your liking.

How do I achieve the perfect consistency for the soup?

To get a smooth soup, focus on blending techniques and adjusting the texture.

How can I enhance the flavor of the zucchini & basil soup?

Season the soup with salt, pepper, and other spices to boost the flavor.

How should I serve zucchini & basil soup?

Serve with side dishes that complement the soup. Add toppings for extra flavor. Make it look appealing.

How do I store and reheat the leftover soup?

Store it properly to keep the soup fresh. Follow the reheating instructions to preserve its taste and quality.

Can I adapt this soup for different seasons?

Yes, you can change it up by using different ingredients and spices. This way, you can enjoy it all year round.

Bake Up a Batch of Classic Banana Bread


Banana Bread

What makes the perfect banana bread recipe? How can you make a homemade banana bread that’s truly special? Banana bread is loved for its moist texture and sweet taste. To make the best banana bread, use overripe bananas. Adding nuts or chocolate chips can also enhance the flavor and texture.

A simple banana bread recipe can be ready in under an hour. This makes it ideal for a quick breakfast or snack.

Key Takeaways

  • Use overripe bananas for the best flavor and texture in your banana bread
  • Add nuts or chocolate chips to the recipe for extra flavor and texture
  • A simple easy banana bread recipe can be made in under an hour
  • Consider using a non-stick loaf pan for easy removal and cleanup
  • Store your banana bread at room temperature or in the refrigerator for up to 5 days

By following these tips and using a classic banana bread recipe, you can create a delicious homemade banana bread. It’s perfect for any occasion. Banana bread is a great choice for a quick breakfast, snack, or dessert. Its rich, moist texture and sweet flavor are sure to please. So why not try baking a batch of classic banana bread today?

The History of Banana Bread in American Kitchens

Banana bread has been a favorite in American kitchens for many years. It started during the Great Depression. Over time, banana bread variations and gluten-free banana bread have become popular. These changes help meet different dietary needs.

The story of banana bread is linked to bananas becoming more common in the US. Refrigeration in the early 1900s made bananas easier to get. During the Great Depression, people used overripe bananas to make moist banana bread.

Now, banana bread is loved by many in the US. It’s easy to make and can be made healthier. Recipes often use more banana and sweeteners like brown sugar and honey. This makes a moist banana bread that’s tasty and good for you.

Essential Ingredients for Perfect Banana Bread

To make a delicious healthy banana bread, you need the right ingredients. The basics include mashed bananas, flour, sugar, eggs, and melted butter. Adding nuts or chocolate chips gives it extra flavor and texture, perfect for banana nut bread fans.

Choosing the best ingredients is key. Use fresh bananas and real butter for a rich taste. For a healthier best banana bread recipe, try whole wheat flour and nuts.

Don’t forget eggs, sugar, and spices. The right mix makes your banana bread moist and tasty. Whether it’s classic or banana nut bread, quality ingredients and a good recipe are essential.

Choosing and Preparing Your Bananas

Choosing the right bananas is key to making a tasty classic banana bread. Overripe bananas are best because they’re sweeter and more moist. Check if your bananas are ready by looking at their peel. It should be black or have black/brown streaks.

If your bananas aren’t ripe yet, you can speed up the process. Place them in a brown paper bag with fruits like apples or pears. This helps them ripen faster.

For quicker ripening, bake unpeeled bananas at 300°F (150°C) for 15-20 minutes. Or, let them sit at room temperature for a few days to a week. Once ripe, they’re perfect for making a moist banana bread with walnuts or a tasty banana bread loaf.

To get your bananas ready, just mash them and mix them into your recipe. You can also freeze overripe bananas for later. Use them in smoothies, pancakes, or banana bread. Thaw frozen bananas in the microwave for a few minutes before using. With these tips, you’ll make a delicious and moist classic banana bread that everyone will love.

Required Kitchen Equipment and Tools

To bake a tasty vegan banana bread, chocolate chip banana bread, or simple banana bread, you need the right tools. A set of measuring cups and spoons is key for accurate baking. Most sets include a tablespoon, teaspoon, ½ teaspoon, and ¼ teaspoon.

Measuring cup sets usually have sizes like 1 cup, ½ cup, ⅓ cup, and ¼ cup. A standard loaf pan for banana bread is 8 ½ x 4 ½ inches, making a classic dome shape. You can find a loaf pan starting at $10.

A hand mixer is essential for mixing dough and batters fast and well. A rubber spatula is also vital for scraping and folding ingredients. It’s useful in many baking tasks.

You’ll also need a wire rack for cooling, a rolling pin for dough, and kitchen shears for cutting herbs and parchment paper. Parchment paper is good for easy cleanup and preventing sticking in pans. For a vegan banana bread recipe using six whole bananas per loaf, a good set of mixing bowls is necessary.

banana bread equipment

Choosing the right equipment is important. For example, the OXO Good Grips Silicone Everyday Spatula costs $12 and is great for scraping. The GIR Premium Stainless Steel Whisk is $13 and perfect for mixing batters. With the right tools, you’ll make a delicious chocolate chip banana bread or simple banana bread that will wow everyone.

Step-by-Step Classic Banana Bread Recipe

To make a tasty classic banana bread, start by mixing the wet ingredients. You’ll need to mash ripe bananas and mix them with sugar, eggs, and melted butter. Adding nuts can give your banana bread extra flavor and texture.

Then, mix the dry ingredients like flour, baking soda, and salt. After mixing the wet and dry ingredients, combine them. You can add optional ingredients like chocolate chips or chopped nuts. This recipe is also great for making banana bread muffins, perfect for a quick breakfast or snack.

Now, let’s look at the ingredients and steps for this quick banana bread recipe:

  • 1 1/2 cups mashed ripe bananas
  • 1 cup sugar
  • 1/2 cup melted butter
  • 2 large eggs
  • 2 cups all-purpose flour
  • 1 teaspoon baking soda
  • 1/2 teaspoon salt
  • Optional: nuts, chocolate chips, or other mix-ins

By following this easy recipe, you can make a delicious and moist classic banana bread. It’s perfect for any time. Whether you like a traditional loaf or banana bread muffins, this recipe will be a hit.

Common Banana Bread Mistakes to Avoid

When baking quick banana bread, it’s key to steer clear of common mistakes. Using bananas that are not ripe enough, mixing the batter too much, and not greasing the loaf pan well are common errors. To get the best results, use bananas that are overripe. They add more sugar and moisture, making the bread sweeter and more flavorful.

Don’t overmix the batter. This can make the bread chewy or rubbery. Also, make sure to grease the loaf pan well to prevent the bread from sticking. Using the right size loaf pan, like an 8½ x 4½ inches pan, is important for the bread’s texture and baking time. These tips are essential for making top banana bread recipes.

easy banana bread recipe​

Other mistakes to avoid include adding too much flour, which can make the bread dry and crumbly. Also, don’t skip letting the bread cool completely on a cooling rack. This can cause the bottom to become soggy. By following these tips and using a reliable homemade banana bread recipe, you can make a delicious and moist quick banana bread for any occasion.

Here are some additional tips to keep in mind:

  • Use room-temperature eggs for better emulsification
  • Avoid overripe bananas, as they can produce a heavy and damp center
  • Don’t overbake, as it can result in a dry and flavorless bread

By avoiding these common mistakes and following these tips, you can create a delicious and moist homemade banana bread that’s sure to please.

Tips for Making Moist Banana Bread

To make moist banana bread, start with the right ingredients. Greek yogurt or sour cream add moisture. Try a banana nut bread recipe for extra flavor and texture from walnuts.

The ripeness of bananas is key. Overripe bananas make the bread more moist and flavorful. Freezing and thawing bananas can also enhance their sweetness.

Here are more tips for moist banana bread:
* Mix sugar and honey for a richer taste.
* Add vanilla extract for extra flavor.
* Use cake flour for a lighter texture.
* Avoid overmixing to prevent a dense bread.
* Try a recipe with mayonnaise or sour cream for extra moisture.

Ingredient Quantity
Flour 1 1/2 cups
Sugar 3/4 cup
Butter 1/2 cup
Walnuts 1/2 cup

Follow these tips and use the right ingredients for a delicious, moist banana bread. It’s perfect for any occasion.

Popular Banana Bread Variations

Exploring homemadeanny banana bread opens up a world of flavors. You can mix and match ingredients for new tastes. Try banana nut bread with walnuts or pecans for a twist. Or, add chocolate chips or dried fruit for a sweet surprise.

For a healthier option, use vegetable oil instead of butter. Adding chia seeds boosts the fiber content. These changes make your banana bread even better.

Other fun variations include blueberry and cranberry banana bread. You can also make gluten-free banana bread. Mini loaves or mug cakes are great for a quick treat. The secret to great banana bread is using ripe bananas and mixing just right.

banana bread variations

  • Banana nut bread with chopped walnuts or pecans
  • Blueberry banana bread with fresh or frozen blueberries
  • No butter banana bread using vegetable oil
  • Gluten-free banana bread made with almond flour

These ideas are just the beginning. Get creative and make your own easy banana bread recipe. You’ll find the best banana bread that you love.

Making Your Banana Bread Healthier

Looking to make banana bread healthier? Start by cutting down on sugar. Try honey or maple syrup for sweetness. You can also use gluten-free flours like almond or coconut for a nutty twist.

For a vegan banana bread, use flaxseed or chia seeds instead of eggs. This makes your bread healthier and more inclusive. A few tweaks can turn your banana bread into a treat for all.

Other ways to boost your banana bread include using whole wheat flour and adding nuts or seeds. Try coconut or olive oil for extra moisture and flavor. Experimenting with ingredients can lead to a healthier, tastier banana bread.

Here are some benefits of making a healthier banana bread:

  • Lower sugar content
  • Gluten-free options
  • Vegan substitutions
  • Higher nutrient content
  • Delicious and moist texture

Serving Suggestions and Pairings

There are many tasty ways to serve banana bread. You can enjoy it warm with butter or cream cheese. Or, use it for French toast. Pairing it with coffee or tea makes for a quick breakfast.

Banana bread is very versatile. You can make desserts like muffins or bread pudding. Quick banana bread recipes are great for healthier options. Adding nuts, chocolate chips, or dried fruit makes it even sweeter.

Here are some ideas to try:
* Serve banana bread with ice cream or whipped cream
* Use it as French toast with maple syrup and fruit
* Enjoy it with coffee or tea
* Create a parfait with yogurt, granola, and fruit
* Crumble it into ice cream or yogurt for a snack

banana bread muffins

These ideas let you enjoy banana bread in many ways. Whether for breakfast or dessert, it’s always a hit. So, get creative and find your favorite way to enjoy banana bread!

Storing and Freezing Your Banana Bread

After baking a tasty homemade banana bread, it’s key to store it right. This keeps it fresh and flavorful. Whether you’re making an easy banana bread or a banana nut bread, storing and freezing are important steps. You can store it at room temperature, in the fridge, or freeze it.

A banana bread wrapped well can stay fresh for up to four days at room temperature. After four days, it might get dry but is safe to eat. For longer storage, the fridge can keep it fresh for up to a week. Freezing is the best choice for longer storage. Frozen banana bread can last up to three months. Just thaw and serve when you’re ready.

Freezing requires wrapping your banana bread tightly in aluminum foil or plastic wrap. This stops oxygen from getting in. You can also slice it before freezing for easier thawing and serving. To thaw, leave it at room temperature for a few hours or in the fridge overnight. For quicker thawing, use the microwave or an air fryer.

Some tips for storing and freezing banana bread include:

  • Wrap your banana bread tightly to prevent air from reaching it.
  • Store your banana bread in an airtight container to maintain freshness.
  • Label and date your frozen banana bread so you can easily keep track of how long it’s been stored.
  • Consider slicing your banana bread before freezing for easier thawing and serving.

By following these tips, you can enjoy your homemade banana bread longer. Whether it’s an easy banana bread or a banana nut bread, proper storage and freezing keep it fresh and flavorful.

Troubleshooting Common Baking Issues

When baking a classic banana bread, you might face some common problems. These can affect how your banana bread with walnuts turns out. One big issue is overmixing the batter, which makes the loaf dense and tough.

Using bananas that are not ripe enough is another problem. This can make your banana bread lack flavor and moisture. To fix this, use bananas that are almost black. Also, make sure to grease the loaf pan well to prevent the bread from sticking.

banana bread loaf

To solve these issues, check your recipe and how you mix the ingredients. Use the right amounts, like 115 grams of butter, 200 grams of sugar, and 2 large eggs. Also, watch the baking time and temperature. A classic banana bread needs about 60 minutes to bake at 350 ºF in a 9″x5″ loaf pan.

Some common problems and their solutions include:

  • Underbaked bread: increase baking time or check oven temperature
  • Overly brown bread: reduce oven temperature or use a lighter-colored pan
  • Dry bread: check flour measurement or avoid overmixing

By knowing these common baking issues and how to prevent them, you can make a delicious banana bread with walnuts. It will be perfect for any occasion.

Seasonal Adaptations for Your Banana Bread

Exploring banana bread reveals the joy of seasonal twists. For a fall taste, add cinnamon or nutmeg to your simple banana bread. This makes your bread warm and aromatic, ideal for autumn.

Try adding pumpkin puree to your vegan banana bread for moisture and flavor. It’s a tasty twist on the classic. You can also mix in chocolate chip banana bread for a heavenly combo.

Seasonal changes open up endless possibilities. Mix in ginger or cardamom for a unique taste. Or, add dried fruits like cranberries or cherries for sweetness and texture.

  • Adding a hint of citrus, such as lemon or orange zest, to your banana bread for a bright and refreshing flavor
  • Using different types of milk, such as almond or soy milk, to create a vegan banana bread that’s perfect for those with dietary restrictions
  • Incorporating nuts, such as walnuts or pecans, into your chocolate chip banana bread for added texture and flavor

Remember, the secret to great seasonal banana bread is to experiment and enjoy. Don’t hesitate to try new ingredients and flavors. This way, you can make a simple banana bread recipe that’s uniquely yours.

Conclusion: Mastering Your Banana Bread Journey

Making the perfect banana bread is a journey of trial and patience. As you get better at baking, focus on finding the right mix of moistness and flavor. With time, you’ll create homemade banana bread that’s as good as any bakery’s.

Feel free to try out different easy banana bread recipe versions. Add your own special touches to the ingredients and baking methods. This way, you’ll find your own unique banana bread recipe. Enjoy the journey and the joy of baking a delicious loaf at home.

FAQ

What is the importance of using overripe bananas for banana bread?

Overripe bananas are key for the best banana bread. They turn from starch to sugar, adding sweetness and moisture.

What are the benefits of adding nuts or chocolate chips to banana bread?

Nuts like walnuts or pecans add a nice crunch and flavor. Chocolate chips make the bread indulgent and delicious.

How long does it take to make the banana bread recipe provided?

The recipe is quick, ready in under an hour. It’s perfect for a homemade breakfast or snack.

What is the history of banana bread in American kitchens?

Banana bread became popular during the Great Depression. It’s now a classic, loved for its ease and versatility.

Why is banana bread a great option for those with dietary restrictions?

The web source has a gluten-free banana bread recipe. It’s great for those with gluten intolerance.

What are the essential ingredients needed to make perfect banana bread?

You’ll need fresh bananas, real butter, and quality flour. The web source offers tips for substituting ingredients for different diets.

How do you choose and prepare the right bananas for baking?

Choose bananas with brown spots for the best bread. The web source gives tips on ripening and mashing bananas.

What kitchen equipment and tools are needed to make banana bread?

You’ll need a loaf pan, mixing bowls, and a mixer. The web source suggests substitutes for different kitchens.

What are the key steps in the classic banana bread recipe?

The web source guides you through mixing, combining, and folding the batter. It’s a step-by-step guide.

What are some common mistakes to avoid when making banana bread?

Avoid overmixing, use the right bananas, and grease the pan well. The web source helps you avoid these mistakes.

How can you make your banana bread extra moist?

Use sour cream or applesauce for moisture. Proper storage and reheating also help keep it moist.

What are some popular variations of banana bread?

You can add nuts, chocolate chips, or spices. The web source offers tips for finding your favorite flavor.

How can you make banana bread healthier?

Reduce sugar, use gluten-free flour, or try vegan substitutions. The web source has a recipe for a healthier banana bread.

What are some delicious ways to serve and pair banana bread?

Serve it warm with nut butters, fruit, or coffee. The web source suggests ways to enjoy your banana bread.

How can you properly store and freeze banana bread?

Store it at room temperature or freeze it properly. The web source shares tips for keeping your bread fresh.

Spicy Thai Peanut & Sweet Potato Soup – Flavorful Recipe


Spicy Thai Peanut & Sweet Potato Soup

Are you ready to try spicy Thai peanut & sweet potato soup? It’s a mix of sweet potatoes, coconut milk, and Thai red curry paste. This recipe is not only tasty but also healthy. You can make it in just 15 minutes to prep and 20 minutes to cook.

Key Takeaways

  • You can make spicy Thai peanut & sweet potato soup in an Instant Pot in about 3 minutes on high pressure with a quick release.
  • The recipe yields 4-6 servings and can be frozen for meal prep, with a cooking time of 8 minutes on high pressure from frozen in an Instant Pot.
  • The dish is vegan, gluten-free, and refined sugar-free, making it an excellent option for those with dietary restrictions.
  • You can customize the spice level of the sweet potato soup to your liking by adjusting the amount of red curry paste used.
  • The recipe can be bulked up by serving over rice or quinoa and suggests adding cooked chicken for those who want to include meat in their Thai soup recipe.
  • The spicy Thai peanut & sweet potato soup is a perfect blend of sweet and spicy flavors, making it a great choice for a comforting and healthy meal.
  • The dish is easy to make and requires minimal ingredients, including 3 large sweet potatoes, one 14-ounce can of fire-roasted tomatoes, and one 14-ounce can of light coconut milk.

Understanding the Magic of Spicy Thai Peanut & Sweet Potato Soup

Exploring thai peanut soup opens up a world of flavors. It’s a mix of spices, peanuts, and sweet potatoes. This homemade thai soup is both comforting and exciting. It suits those who love spicy food or prefer something milder.

The story of Thai peanut soups starts with West African Peanut Soup. It’s been adapted with Thai spices. This comforting soup recipe uses Thai spices, peanuts, and coconut milk. It’s creamy and nutty, great for a cold night.

Origins of Thai Peanut Soups

Thai peanut soups have a rich history. They come from the trade between Thailand and West Africa. Peanuts in Thai food show the cultural exchange between these places. Today, Thai peanut soup is loved worldwide.

What Makes This Soup Special

This homemade Thai soup is special because of its flavors. Peanuts add spice and nuttiness. Coconut milk makes it creamy. Thai spices bring bold flavors together.

Key Flavor Profiles

The soup’s flavors are spicy, nutty, creamy, and bold. These mix perfectly. It’s a comforting yet exciting soup.

If you want a comforting soup recipe or something new, try this thai peanut soup. Its rich flavors make it a must-try for Thai cuisine fans.

Ingredient Quantity
Peanut butter ½ cup
Roasted red peppers 12 ounces (1 jar)
Sweet potato 9-10 ounces (1 large)

Essential Ingredients for Your Thai-Inspired Soup

To make a real Thai soup, you need the right stuff. For a vegan soup, use plant-based broth and non-dairy milk. Having the right ingredients is key for a tasty and healthy soup.

Important ingredients include sweet potatoes, peanuts, coconut milk, and Thai red curry paste. These give the soup its flavor and texture. You’ll also need onions, garlic, spices, and herbs for more depth.

Here are some must-haves to start:

  • 1 large sweet potato, peeled and chopped into 1 ½ inch pieces
  • 1 can of coconut milk (400 mL or 14 oz)
  • 3 tablespoons of Thai red curry paste
  • 1 cup of chopped onion
  • 1 large clove of garlic, minced
  • ⅓ cup of natural peanut butter

With these, you’re ready to make a tasty Thai soup. You can choose from spicy to creamy. So, get creative and enjoy making your own soup!

Kitchen Tools and Equipment Needed

To make a tasty Spicy Thai Peanut & Sweet Potato Soup, you’ll need some basic tools. A large pot is key for cooking the sweet potatoes and other ingredients. A blender or immersion blender will help you get a smooth texture. For a Thai-inspired soup, a mortar and pestle are important for pounding aromatics and getting flavors.

Optional tools include a slow cooker for cooking the soup longer and storage containers for leftovers. The right equipment makes a big difference in cooking a delicious soup. With the right tools, you can make a tasty soup for any occasion.

Here are some key kitchen tools and equipment you’ll need for this Thai-inspired soup recipe:

  • Large pot
  • Blender or immersion blender
  • Mortar and pestle
  • Slow cooker (optional)
  • Storage containers (optional)

Having these tools and equipment will help you make a delicious and easy soup. This Thai-inspired soup recipe is perfect for a quick meal or a flavorful dish. Its rich and creamy texture makes it great for any time of year.

Preparing Your Sweet Potatoes and Aromatics

To make a tasty sweet potato soup, start by getting your sweet potatoes and aromatics ready. This step is key to unlocking the flavors in your peanut soup. Peel and cube 3 large sweet potatoes or use 1 pound, as you like.

Heat 2 tablespoons of olive oil in a pan over medium heat. Add 2 cups of chopped yellow onion and sauté until it smells good. You can also add 4 cloves of minced garlic and 1 1/2 inches of peeled and diced ginger for extra flavor. Once the onions are clear, add the sweet potatoes and cook for about 5 minutes, stirring now and then.

Now, let’s look at the main ingredients and how much you need:

  • 3 large sweet potatoes, peeled and cubed
  • 2 cups of chopped yellow onion
  • 4 cloves of garlic, minced
  • 1 1/2 inches of ginger, peeled and diced
  • 2 tablespoons of olive oil

easy sweet potato soup

Remember to simmer the sweet potatoes for at least 30 minutes, or until they’re soft. You can add more water or broth if you want a thinner soup. With these easy steps, you’ll make a delicious and flavorful Thai soup that everyone will love.

The Art of Building Thai Flavor Layers

Creating a dairy-free soup recipe starts with building Thai flavor layers. This means mixing different ingredients for a balanced taste. You’ll use Thai red curry paste and coconut milk as the base for your soup.

Sweet potatoes and peanuts are key for balancing flavors. The sweetness of sweet potatoes complements the spiciness of the curry paste. Adding peanut butter makes the soup creamy and nutty.

Here are some key ingredients for your healthy soup with sweet potatoes:

  • 2 medium onions, diced
  • 3 cloves of garlic, sliced
  • 6 to eight cups of meat, vegetable, or other add-ins
  • 1 1/2 pounds of raw, boneless chicken (optional)
  • 8 cups of water or chicken stock, preferably homemade

Adding kale or green cabbage can make your soup even better. They add freshness. With these ingredients and a little creativity, you’ll make a delicious, healthy soup for any time.

Ingredient Quantity
Thai red curry paste 2 tablespoons
Coconut milk 1 can
Sweet potatoes 2 medium
Peanut butter 2 tablespoons

Step-by-Step Cooking Process

To make the tasty peanut sweet potato soup, start by sautéing carrots and onions in oil for 2 minutes. Add garlic for another minute. Then, add sweet potatoes and spices and cook for 2 minutes more. This spicy soup is a vegetarian soup that you can adjust to your liking.

Next, pour in the chicken stock and let it boil. Then, lower the heat and simmer for 15 to 20 minutes. This will make the sweet potatoes and carrots tender. You can also add coconut milk for an extra 3-5 minutes. This peanut sweet potato soup is great hot or cold.

Here’s a quick guide to cooking it:

  • Sauté the aromatics in oil for 2 minutes.
  • Add garlic and cook for an additional minute.
  • Add the sweet potatoes and spices, and cook for 2 minutes.
  • Add the chicken stock and bring to a boil.
  • Reduce the heat and let it simmer for 15-20 minutes.
  • Add coconut milk and let it simmer for an additional 3-5 minutes.

peanut ​sweet potato soup​

This vegetarian soup is a tasty and healthy choice for a spicy soup. It makes 6 servings, perfect for sharing with family and friends.

Customizing Your Soup’s Spice Level

When making the spicy Thai peanut & sweet potato soup, you can adjust the heat to your liking. This recipe is all about finding the right balance. You can choose from a mild and creamy version to a bold and spicy one.

To start, you can use 3 tablespoons of Thai red curry paste for a spicy soup. Or, use 1 tablespoon for a milder taste. You can also add diced jalapenos or serrano peppers for more heat. For a milder soup, reduce the curry paste or skip the spicy ingredients.

Mild to Wild Options

Here are some ways to adjust your soup’s spice level:

  • Use 1-2 teaspoons of sriracha sauce for an extra spicy kick
  • Add 1/4 teaspoon of cayenne pepper for a mild heat
  • Omit the seeds and membranes of the jalapenos for a milder flavor
  • Use coconut milk or cream to balance out the heat

Traditional Thai Spice Additions

In traditional Thai cooking, spices and herbs add depth. For this soup, try adding lemongrass, galangal, or kaffir lime leaves. These will give your soup a more authentic Thai taste. The key is to experiment and find the perfect balance of flavors for you.

Nutritional Benefits and Dietary Considerations

The Spicy Thai Peanut & Sweet Potato Soup is a great choice for a nutritious dinner. It’s not just tasty, but also packed with health benefits. Its spicy peanut flavor makes it a perfect choice for a healthy, flavorful meal.

This soup is high in protein, with about 5-6 grams per serving. It’s great for vegetarians and vegans. It also has lots of vitamins A and C, and minerals like potassium and iron.

This soup can be made gluten-free and vegan. Just swap the chicken broth for vegetable broth and use vegan peanut butter. Here are some key nutritional benefits:

  • Calories per serving: 357 kcal
  • Carbohydrates per serving: 42 g
  • Protein per serving: 5 g
  • Total fat per serving: 21 g
  • Sodium per serving: 1013 mg

nutritious dinner recipe

In summary, the Spicy Thai Peanut & Sweet Potato Soup is a healthy and delicious option for dinner. Its spicy flavor and high nutritional value make it a great choice for a vegetarian thai soup.

Serving Suggestions and Garnishes

Serving your Spicy Thai Peanut & Sweet Potato Soup is fun. You can add peanuts, cilantro, and lime wedges for extra flavor and texture. It’s great for any meal, whether it’s a weeknight dinner or a special event.

For a full meal, pair the soup with brown rice, white rice, quinoa, vegan naan, or flatbread. You can also adjust the soup to your liking, adding more spice or sweetness. Here are some serving ideas:

  • Brown rice
  • White rice
  • Quinoa
  • Vegan naan
  • Flatbread

Try garnishing with chopped cilantro, peanuts, red chili flakes, or hot sauce. It’s all about finding the right mix for you. This coconut milk soup is creamy and delicious, making it a favorite.

Looking for something spicy or mild? This Thai-inspired soup recipe is perfect. It’s quick to make, ready in under an hour. So, why not try it and enjoy Thai flavors at home?

Conclusion: Mastering Your Thai Peanut Sweet Potato Soup

Now you know how to make a tasty spicy Thai peanut & sweet potato soup. Use fresh, high-quality ingredients and stick to the recipe for true Thai taste. This soup is perfect for a cozy meal or for trying something new.

Every spoonful is a mix of sweet, savory, and spicy. Plus, it’s packed with nutrients from sweet potatoes and peanut butter. So, get cooking and enjoy every bite!

FAQ

What is Spicy Thai Peanut & Sweet Potato Soup?

This soup is a mix of sweet and spicy flavors. It uses sweet potatoes, peanuts, and Thai spices. It’s creamy and has a strong, aromatic broth.

What are the origins of Thai peanut soups?

Thai peanut soups started from West African Peanut Soup. They’ve been changed to include Thai spices. The soup has a spicy, nutty taste from peanuts, a creamy feel from coconut milk, and bold Thai spice flavors.

What are the essential ingredients for making this soup?

You’ll need sweet potatoes, peanuts, coconut milk, and Thai red curry paste. These give the soup its taste and texture.

What kitchen tools and equipment are needed to make this soup?

You’ll need a big pot, a blender, and containers to store it. An immersion blender and slow cooker are nice but not essential.

How do I prepare the sweet potatoes and aromatics for the soup?

Peel and cube the sweet potatoes. Sauté onions and garlic until they smell good.

How do I build the Thai flavor layers for the soup?

Start with Thai red curry paste and coconut milk for the spice base. Add sweet potatoes and peanuts for sweetness and heat. Mix in peanut butter for creaminess and nutty taste.

Can I customize the spice level of the soup?

Yes, you can make it mild or spicy. Use Thai red curry paste to adjust the heat.

What are the nutritional benefits and dietary considerations of this soup?

This soup is packed with protein, vitamins, and minerals. It’s healthy and can be made vegan or gluten-free.

How do I serve and garnish the soup?

Serve it with garnishes like peanuts, cilantro, and lime wedges. They add flavor and texture.

Nourishing Mediterranean Chickpea & Kale Soup


Mediterranean Chickpea & Kale Soup

Looking for a quick and healthy meal? Try the Mediterranean Chickpea & Kale Soup. It’s a tasty, meatless option that’s packed with nutrients. Adding this soup to your weekly meals is a great way to eat well.

Key Takeaways

  • A mediterranean chickpea & kale soup is a great option for a meatless meal, providing a good source of protein and fiber.
  • This healthy soup recipe can be prepared in approximately 35 minutes, making it a convenient option for a weeknight dinner.
  • The soup is made with nutritious ingredients, including chickpeas, kale, and vegetables, making it an excellent choice for a balanced diet.
  • You can customize the recipe to suit your taste preferences by adding or substituting ingredients, such as spices and herbs.
  • This vegetarian soup can be stored in the refrigerator for up to 3 days or frozen for up to 3 weeks, making it a great option for meal prep.

Understanding the Mediterranean Chickpea Kale Soup Tradition

Mediterranean cuisine is famous for its rich flavors and healthy ingredients. Chickpea soup is a key part of this tradition. It combines chickpeas and kale, making a delicious and nutritious vegetarian tradition.

This soup has been enjoyed in the Mediterranean for centuries. Its popularity has grown worldwide. It’s a favorite among locals and visitors.

The chickpea soup is not just for soups. It’s also used in stews and salads. But the chickpea soup remains a top choice. Kale adds more nutrition and flavor, making it a healthy and tasty kale soup.

Some key facts about the Mediterranean Chickpea & Kale Soup include:

  • It is a part of the Mediterranean vegetarian tradition
  • It is made with chickpeas, kale, and a variety of spices and herbs
  • It is a healthy and nutritious option, with a balance of protein, fiber, and vitamins
  • It can be served as a main course or as a side dish

The Mediterranean Chickpea & Kale Soup is great for a healthy meal. It has about 170 calories per serving. It’s a good choice for those watching their weight.

The soup has a good mix of carbs, protein, and fat. It’s a nutritious option for anyone.

Health Benefits and Nutritional Value

Before diving into this tasty Mediterranean chickpea and kale soup, let’s look at its health perks. This healthy soup recipe is full of nutritious ingredients. It’s perfect for those following a vegetarian nutrition plan.

One serving of this soup has about 314 calories. It has 14 grams of protein, 48 grams of carbs, and 9 grams of fat. It’s also high in fiber, with 13 grams per serving. Plus, it’s loaded with vitamins and minerals like vitamin A, vitamin C, calcium, and iron.

The following table highlights the nutritional information per serving:

Nutrient Amount per serving
Calories 314 kcal
Protein 14 g
Carbohydrates 48 g
Fat 9 g
Fiber 13 g
Vitamin A 9501 IU
Vitamin C 27 mg
Calcium 165 mg
Iron 6 mg

This healthy soup recipe is not just tasty but also very nutritious. It’s great for those on a vegetarian nutrition plan. With its rich nutrients and health benefits, it’s a fantastic choice for a balanced diet.

Essential Ingredients for Your Mediterranean Soup

To make a true Mediterranean chickpea and kale soup, pick the right ingredients. Chickpeas, kale, and Mediterranean herbs and spices are key. They add flavor and health benefits.

For chickpeas, use canned ones for ease or cook dried ones as directed. Choose fresh kale, remove stems, and chop it. Mediterranean spices like smoked paprika, cumin, and kosher salt bring out the soup’s taste.

Key Ingredients at a Glance

  • 2 (15-ounce) cans of chickpeas
  • 4 cups of chopped kale
  • 1 teaspoon of smoked paprika
  • 1/2 teaspoon of ground cumin
  • 1/2 teaspoon of kosher salt

You can also add onions, garlic, and bell peppers for more flavor. For a gluten-free and vegan soup, use the right broth and ingredients.

With these ingredients and a bit of thought, you can make a tasty and healthy Mediterranean chickpea and kale soup. It’s all about using the best vegetarian ingredients and spices.

Kitchen Tools and Equipment Needed

To make Mediterranean chickpea and kale soup, you’ll need some kitchen tools and cooking gear. A Dutch oven or large pot is key for even heat and to hold all the ingredients. An immersion blender helps puree the soup, making it smooth and creamy.

You’ll also need other tools, like:

  • A cutting board for chopping veggies
  • A knife for chopping and mincing
  • A measuring cup for precise measurements
  • A wooden spoon for stirring and mixing
  • Soup equipment, like a ladle and bowls

Having the right tools makes cooking easier and faster. The quality of your equipment also matters. Good quality pots and sharp knives can really improve your soup-making experience.

kitchen tools - Chickpea Kale Soup

With the right tools and equipment, you can make a tasty and healthy Mediterranean chickpea and kale soup. It’s perfect for any time.

Kitchen Tool Description
Cutting Board For chopping vegetables
Knife For chopping and mincing
Measuring Cup For accurate measurements
Wooden Spoon For stirring and mixing
Soup Equipment For serving and enjoying the soup

Preparation Steps before Cooking

To start making your Mediterranean chickpea and kale soup, follow some key steps. First, soak and prepare the chickpeas. Then, wash and chop the vegetables. Lastly, measure and organize all your ingredients. This makes cooking smooth and efficient.

Soaking the chickpeas is a must. It makes them tender and ready for cooking. Also, washing and chopping the kale and onions helps keep you organized while cooking.

Don’t forget to measure and organize your ingredients. This means getting the right amount of olive oil, garlic, and spices. Also, arrange the chickpeas, vegetables, and broth. By following these steps, you’ll make a tasty and healthy Mediterranean chickpea and kale soup.

Some important ingredients for the soup are:

  • Chickpeas
  • Kale
  • Onions
  • Garlic
  • Olive oil
  • Spices and herbs

By following these simple steps, you’ll make a delicious and healthy Mediterranean chickpea and kale soup.

Step-by-Step Cooking Instructions

To make the Mediterranean chickpea and kale soup, start by sautéing onions and garlic in olive oil. This step is key in vegetarian cooking as it enhances the flavors. Once the onions are soft, add the chickpeas, veggies, and herbs, and stir well.

Then, add the vegetable stock and bring it to a boil. Lower the heat and let it simmer for 20-25 minutes. This soup recipe is flexible, and you can tweak the cooking instructions to your liking.

While the soup cooks, get the kale ready by washing and chopping it. Add the kale to the pot and cook for 5 more minutes, until it’s soft. Season the soup with salt, pepper, and a squeeze of lemon juice.

Serve the soup hot, topped with parsley and a dollop of yogurt if you like. This vegetarian cooking recipe yields about 12 cups. It can be stored in the fridge for up to 3 days or frozen for 3 months. Follow these cooking instructions to enjoy a tasty and healthy soup recipe for any time.

Seasoning Tips for Authentic Mediterranean Flavor

To get the real Mediterranean taste in your chickpea and kale soup, you need the right seasoning tips. The secret to a great Mediterranean soup is mixing spices and herbs. Use cumin, coriander, and turmeric for a unique and tasty flavor.

Seasoning is all about finding the right balance. Your soup should have just the right amount of salt and a bit of acid. Start with a tablespoon of fine sea salt and a squeeze of fresh lemon juice. This will enhance the flavors and add a bright touch to the soup.

Here are some more seasoning tips to keep in mind:

  • Use high-quality olive oil to add depth and richness to the soup
  • Add a pinch of saffron for a subtle earthy flavor
  • Use fresh herbs like rosemary, sage, or thyme to add a bright and refreshing flavor

By following these seasoning tips, you’ll make a delicious and authentic Mediterranean chickpea and kale soup. It will be full of flavor and nutrients. Don’t be afraid to try different spice combinations and seasoning tips to find the perfect flavor for you.

Ingredient Quantity
Salt 1 tablespoon
Lemon juice 1 squeeze
Olive oil 2 tablespoons

Storage and Reheating Guidelines

Proper storage and reheating are key to keeping your Mediterranean chickpea and kale soup tasty and healthy. Let the soup cool down to room temperature before refrigerating or freezing it.

For the fridge, use an airtight container and keep it for up to 3 days. Freezing it? It’s good for up to 3 months. When reheating, use the stovetop or microwave carefully to avoid burning or underheating.

Here are some tips for soup storage and reheating:

  • Refrigerate the soup in an airtight container for up to 3 days.
  • Freeze the soup for up to 3 months.
  • Reheat the soup on the stovetop or in the microwave, following reheating instructions.

By following these guidelines, you can enjoy your soup while keeping its nutritional value and taste. Always check the soup’s temperature before eating to ensure it’s safe.

soup storage guidelines

Storage Method Storage Time Reheating Instructions
Refrigeration Up to 3 days Stovetop or microwave
Freezing Up to 3 months Stovetop or microwave

By following these tips, you can enjoy your delicious and nutritious Mediterranean chickpea and kale soup while keeping it safe and tasty.

Serving Suggestions and Pairings

There are many ways to serve your Mediterranean chickpea and kale soup. You can add a side of bread, like whole grain or pita, for dipping. Or, a green salad with a light dressing can offer a cool contrast to the warm soup.

For pairing options, a wine that matches the soup’s herbal notes is great. Try a dry white wine, like Sauvignon Blanc or Pinot Grigio, for its citrusy taste. If you like red, a light-bodied Pinot Noir or Grenache can add a fruity touch.

Some top wine pairing picks for this soup are:

  • Lustau Oloroso Emperatriz, a 15-year-old sherry with nutty, caramel flavors
  • Pinot Grigio, a crisp and citrusy white wine from Italy
  • Spanish Rioja, a medium-bodied red wine with moderate acidity and tannins

Your choice of serving suggestions and pairing options depends on what you like. Don’t be afraid to try different combinations to find the best match for your soup.

Wine Pairing Suggestions
Sauvignon Blanc Salad, bread, or crackers
Pinot Noir Grilled meats, roasted vegetables, or whole grain bread
Lustau Oloroso Emperatriz Nuts, dried fruits, or cheese

Dietary Modifications and Variations

Exploring Mediterranean chickpea and kale soup opens up possibilities for dietary changes. This soup can be tailored to fit various needs, including vegetarian variations and gluten-free options.

This soup’s flexibility is a big plus. You can change it up by swapping beans or veggies or adding spices. It’s perfect for those who want to tweak their meals.

For a vegetarian twist, try adding roasted veggies like sweet potatoes or Brussels sprouts. You can also use tofu or tempeh for protein. Don’t forget to add a squeeze of lemon or some red pepper flakes for extra flavor.

dietary modifications

To make the soup more filling, add some crusty bread or a side salad. It’s a quick, customizable meal that’s both healthy and delicious. This Mediterranean chickpea and kale soup is ideal for anyone looking to improve their diet.

Conclusion

The Mediterranean chickpea and kale soup is a true culinary gem. It blends ancient traditions with modern nutritional insights. This soup nourishes your body and delights your palate with vibrant Mediterranean flavors.

From the earthy chickpeas to the nutrient-rich kale, every spoonful celebrates the region’s rich gastronomic heritage. Whether you’re looking to improve your heart health, boost your digestion, or enjoy a comforting meal, this soup is perfect. It’s versatile, so feel free to add your favorite Mediterranean herbs and spices.

Exploring Mediterranean cuisine is just starting. This soup is just the beginning. The region’s culinary traditions offer endless ways to nourish your body and soul. So, embrace the conclusion, summary, and final thoughts of this delightful recipe. Let it inspire you to continue discovering the wonders of the Mediterranean way of life.

FAQ

What is Mediterranean chickpea and kale soup?

Mediterranean chickpea and kale soup is a healthy, vegetarian dish. It combines chickpeas, kale, and Mediterranean herbs and spices. This creates a hearty, flavorful soup.

What are the health benefits of this soup?

This soup is full of nutrients. Chickpeas offer protein, fiber, and complex carbs. Kale is rich in vitamins, minerals, and antioxidants. The Mediterranean herbs and spices add anti-inflammatory benefits.

What are the key ingredients needed to make this soup?

You’ll need chickpeas, kale, onions, garlic, diced tomatoes, and Mediterranean herbs like cumin and oregano. Adding carrots or bell peppers can boost the flavor and nutrition.

How do I prepare and cook the soup?

Start by soaking and cooking the chickpeas. Then, wash and chop the kale and other veggies. Sauté the aromatics, add the chickpeas and kale, and simmer until the flavors mix well. Seasoning with Mediterranean herbs is key for the authentic taste.

Can I make any dietary modifications to the recipe?

Yes, you can modify the soup for different diets. Make it vegan by skipping dairy, or gluten-free by using gluten-free broth. You can also reduce sodium by using less salt or low-sodium ingredients.

Cozy Slow Cooker Cabbage & Sausage Soup Recipe


Slow Cooker Cabbage & Sausage Soup

Are you ready to warm up with a delicious slow cooker cabbage and sausage soup? It serves 4 to 6 people and is perfect for a chilly day. The soup has a rich broth, tender cabbage, and savory sausage. It’s a family favorite that’s easy to make.

This homemade soup recipe is not only delicious but also easy to make. It requires just a few ingredients like baby potatoes, a yellow onion, ½ head of chopped cabbage, and 14 oz. of smoked sausage. With a total cost of about $7.70, it’s a budget-friendly meal.

Introduction to Slow Cooker Cabbage and Sausage Soup

Wondering what makes this slow cooker cabbage and sausage soup special? It’s a perfect blend of flavors and textures. This soup will become a staple in your household.

Key Takeaways

  • Slow cooker cabbage and sausage soup is a hearty and comforting meal perfect for chilly days.
  • This easy slow cooker recipe serves approximately 4 to 6 people and can be made with minimal preparation.
  • The recipe includes a variety of ingredients, including baby potatoes, yellow onion, chopped cabbage, and smoked sausage.
  • The total estimated cost of ingredients is approximately $7.70, making it an affordable option for a delicious homemade soup.
  • This homemade soup recipe is perfect for busy weeknights and can be customized to suit your tastes.
  • With its rich and flavorful broth, tender cabbage, and savory sausage, this slow cooker cabbage and sausage soup is sure to become a family favorite.

Understanding the Magic of Slow Cooker Cabbage & Sausage Soup

Exploring slow cooker recipes, you’ll find the history of cabbage soup in American cuisine is rich. This hearty dish has been a favorite in many American homes for centuries. It comes from European immigrants.

The slow cooker makes cabbage soup tender and flavorful. It’s a big plus for cooking this dish.

One of the best slow cooker benefits is how easy it is to use. Just add all the ingredients and let it cook. This makes a delicious and satisfying meal. In American cuisine, slow cookers are great for cabbage soup. They make cooking easy and hands-off.

  • Cabbage soup has been a staple in American cuisine for centuries
  • Slow cookers are a popular choice for cooking cabbage soup due to their convenience and ability to tenderize ingredients
  • The dish can be modified to suit different tastes and dietary preferences, making it a versatile option for many households

Essential Ingredients for Your Soup

Preparing a tasty slow cooker cabbage and sausage soup requires the right slow cooker ingredients. You’ll need sausage, cabbage, and various vegetables like carrots, onions, and bell peppers.

First, pick a sausage that goes well with the cabbage and vegetables. Andouille sausage is a great choice because it brings a deep, savory taste. Chop the cabbage and vegetables into small pieces for easy cooking in the slow cooker.

Along with the sausage and cabbage, add carrots, onions, and bell peppers to the slow cooker. These vegetables add sweetness, texture, and flavor. With the right mix of slow cooker ingredients, you’ll get a comforting soup perfect for any season.

Choosing the Right Equipment

Having the right kitchen tools and equipment is key to a delicious meal. Choosing the right slow cooker size is critical for perfect soup. A 6-8 quart slow cooker is best, as it cooks evenly and keeps ingredients from crowding.

These make preparing ingredients easier and faster. An immersion blender can also improve the soup’s texture and flavor.

Other tools to consider include measuring cups and spoons, a can opener, and utensils like a spatula and tongs. With these tools, you’re ready to make a tasty slow cooker cabbage and sausage soup. The right slow cooker and tools ensure a meal that everyone will love.

Preparation Steps Before Cooking

Before you start cooking, it’s key to prepare your ingredients. This means browning sausage to add a rich flavor to the soup. Use a skillet to brown the sausage, then set it aside. Next, chop onions and cabbage to ensure they cook evenly.

Getting all your ingredients ready is a big part of slow cooker preparation. You’ll need to measure out chicken broth, water, and spices. Also, prepare your potatoes and beans as the recipe says.

Here’s a quick list of what you’ll need to prepare:

  • 1 small onion, diced
  • 2 cups of chopped cabbage
  • 12 ounces of small potatoes, cut in half
  • 7 ounces of kielbasa, cut into half moons

slow cooker preparation

By following these steps, you’ll make a delicious slow cooker soup. Brown your sausage and chop your vegetables before cooking. This will ensure the best flavor and texture.

Ingredient Quantity
Chicken broth 6 cups
Water 2 cups
Chopped rosemary 1 teaspoon

How to Cut and Prepare Your Cabbage

Preparing cabbage for your slow cooker soup is key. You need to cut it into thin, even pieces for even cooking. Use a sharp knife or mandoline slicer for this. To save time, cut the cabbage on a cutting board to avoid mess.

There are many ways to cut cabbage, like shredding, chopping, or slicing. Choose the method that fits your recipe best. For a rustic texture, chop it into big pieces. For a smoother texture, shred or slice it.

  • Use a food processor to shred or chop the cabbage quickly and efficiently
  • Cut the cabbage in a controlled environment to prevent mess and waste
  • Use a sharp knife or mandoline slicer to ensure even and thin cuts

By following these tips and choosing the right preparation methods, your cabbage will be perfect for your slow cooker soup.

Selecting and Preparing the Perfect Sausage

Choosing the right sausage is key to a tasty cabbage and sausage soup. Your sausage selection greatly affects the soup’s flavor. Opt for a smoked sausage for a richer taste.

There are different ways to prepare your sausage. You can brown it in a pan or slice it. Browning adds flavor and texture. Slicing helps it cook evenly and fast.

Here are some tips for picking and preparing your sausage:

  • Look for a sausage with quality ingredients and balanced spices.
  • Think about the sausage type, like smoked sausage or andouille, and how it will flavor your soup.
  • Choose the best preparation methods to enhance your sausage’s taste and texture.

Cabbage & Sausage Soup Recipe
 selection

For sausage selection, you have many options. You can pick smoked sausage, andouille, or chorizo. The goal is to find a sausage that complements your soup’s other ingredients. It should add depth and complexity to the flavor.

Step-by-Step Cooking Instructions

To make the perfect slow cooker cabbage and sausage soup, follow these slow cooker instructions. First, prepare your ingredients. Then, arrange them in the right layer order in the slow cooker. The timing and temperature will vary based on your slow cooker and cooking time.

Usually, cook the soup on low for 7-8 hours or on high for 4-5 hours. It’s important to place the sausage and cabbage at the bottom. Then, add the vegetables and other ingredients on top.

Here are some key points to consider when cooking your soup:

  • Prep time: 10 minutes
  • Cook time: 4 hours on high or 7 hours on low
  • Total time: 4 hours and 10 minutes
  • Servings: 5-8

Adjust the timing and temperature based on your slow cooker and the number of servings. By following these slow cooker instructions and focusing on the layer order, you’ll get a tasty and filling slow cooker cabbage and sausage soup.

Customizing Your Soup’s Flavor Profile

As you make your Cozy Slow Cooker Cabbage & Sausage Soup, you can change the flavor to your liking. You can try different seasonings and adjust the spice level. The secret to a great taste is finding the right mix of ingredients.

Exploring Seasoning Options

Seasonings can really change how your soup tastes. You might add salt, pepper, and herbs like thyme or rosemary for a savory taste. For a stronger flavor, garlic powder or onion powder can work well. It’s all about what you like, so don’t be afraid to try new things.

Adjusting Spice Level

Changing the spice level can make your soup even better. If you like it milder, use less spice. For a spicy kick, add red pepper flakes or hot sauce. It’s all about what you enjoy, so adjust it to your taste.

By tweaking your soup’s flavor, you can make it your own. Whether you like it mild or spicy, you have lots of choices. So, experiment with different seasonings and spice levels to find your favorite.

Seasoning Options Spice Level Adjustments
Salt, pepper, thyme, rosemary Red pepper flakes, hot sauce
Garlic powder, onion powder Mild, medium, hot

Storage and Reheating Guidelines

Storing and reheating your slow-cooked cabbage and sausage soup right is key. You can keep it in an airtight container in the fridge for up to three days. If you need it longer, freezing it for up to three months at 0 degrees Fahrenheit is a good option.

To reheat safely, use the microwave or the stovetop. But, make sure it reaches a minimum of 165°F. An instant-read thermometer can help check this. Also, leave about an inch of space at the top of the container when freezing to allow for expansion.

Here are some tips to remember:

  • Always use an airtight container to store the soup.
  • Label the container with the date and contents.
  • Reheat the soup to an internal temperature of 165°F.
  • Use a slow cooker that is at least half full to heat evenly.

By following these storage guidelines and reheating instructions, you can enjoy your delicious slow-cooked cabbage and sausage soup safely.

Serving Suggestions and Pairings

Once your Slow Cooker Cabbage & Sausage Soup is ready, think about what to serve with it. It goes well with crusty bread or cornbread. Pair it with a green salad or roasted veggies for a complete meal.

For a special touch, add fresh herbs, shredded cheese, or croutons. They add flavor and texture.

Choosing the right drink can make your meal even better. A dry white wine or a bold red wine can enhance the soup’s taste. For something lighter, try Sauvignon Blanc or Pinot Grigio.

If you prefer something richer, Cabernet Sauvignon or Malbec works well. These wines complement the sausage and cabbage nicely.

How you serve and pair your soup is up to you. The important thing is to enjoy the comforting flavors. Savor every bite!

FAQ

What is the slow cooker cabbage and sausage soup?

This soup is a hearty, comforting meal for cold days. It has a rich broth, tender cabbage, and savory sausage. It’s a favorite among families.

What are the key ingredients in this soup?

The soup needs sausage, cabbage, and veggies like carrots and onions. Sausage adds a rich flavor. Cabbage makes the soup tender and slightly sweet.

What equipment is needed to make this soup?

You’ll need a slow cooker and basic tools like a cutting board and knife. The slow cooker’s size and settings depend on serving size and cooking time. An immersion blender can also improve the soup’s texture and taste.

How do I prepare the cabbage and sausage before cooking?

Brown the sausage for a rich flavor. Cut the cabbage into thin pieces for even cooking. Using a food processor can speed up prep work.

How do I customize the flavor of the soup?

Adjust the seasoning with salt, pepper, and herbs. Add red pepper flakes or hot sauce for spice. Try different regional flavors to find your favorite.

How should I store and reheat the leftover soup?

Store the soup in an airtight container in the fridge or freezer. Reheat by microwaving or simmering on the stovetop. Adjust heat and time as needed.

What are some serving suggestions and pairing ideas for this soup?

Serve with breads like crusty bread or cornbread, and sides like salad or roasted veggies. Garnish with herbs or croutons for color and flavor. Pair with dry white or rich red wine for a better dining experience.

Bake the Best Babka: A Step-by-Step Guide


Babka

What makes a babka truly exceptional? How can you create the best babka recipes at home? Babka has a rich history and is loved by people of all ages. This guide will help you make a delicious and authentic babka bread, whether traditional or modern.

Key Takeaways

  • Learn the basics of babka ingredients and equipment needed to get started
  • Understand the importance of yeast and temperature control in babka making
  • Discover various filling options, including classic chocolate and traditional cinnamon
  • Master the art of shaping and twisting your babka for a beautiful presentation
  • Get tips on storing and serving your babka to maintain its freshness and flavor

Follow this step-by-step guide to create the best babka recipes. Impress your friends and family with your skills. We’ll cover traditional recipes and modern variations to make you a babka-baking expert.

The Rich History of Jewish Babka

Exploring jewish babka reveals a long history. This sweet bread comes from Eastern European traditions. The name “babka” means “grandmother” in Polish, showing its roots in family baking.

Originally, babka was made with leftover challah dough. It was filled with fruits, nuts, or chocolate and baked in a wooden oven. Today, it has changed, with new flavors and ingredients added. In the U.S., it often includes chocolate and cinnamon, making it a favorite treat.

Babka is more than just a dessert; it’s a part of Jewish traditions. It’s served at holidays and weddings, symbolizing love and family. Discovering jewish babka opens up a world of stories and traditions, making it a true treasure.

Some interesting facts about babka are:

  • It comes from Eastern European Jewish communities.
  • It has evolved from traditional challah dough to a modern sweet bread.
  • It holds a special place in Jewish traditions and celebrations.

Essential Equipment for Perfect Babka

To bake the best babka, you need some key equipment. You’ll need a standing mixer, a dough hook, a pastry brush, and a baking sheet. A standing mixer helps mix and knead the dough. A dough hook is essential for kneading it right.

A pastry brush is used to apply egg wash, making the babka golden brown. You’ll also need a baking sheet, lined with parchment paper to prevent sticking. The right tools ensure your babka is perfect and delicious.

Other important tools include a measuring cup, a whisk, and a rubber spatula. These help measure ingredients, mix the dough, and scrape the bowl. With the right equipment, your babka will always be a hit.

Having the right equipment is as important as a good recipe for babka. With the right tools and practice, you can make a delicious, authentic babka. So, why not try making one and impress your loved ones?

Understanding Babka Ingredients

To bake the best babka, knowing each ingredient’s role is key. The quality of these ingredients greatly affects the taste and texture of your babka. Choose high-quality flour, yeast, sugar, eggs, and butter for a delicious result.

The main ingredients are flour, yeast, sugar, eggs, and butter. Flour gives structure, yeast makes it rise, sugar adds sweetness, eggs bring moisture, and butter enhances flavor. Using top-notch ingredients ensures your babka will be tasty and authentic.

Here are some key points to consider when selecting babka ingredients:

  • Flour: Use high-quality flour, such as King Arthur, for the best results.
  • Yeast: Choose active dry yeast for the best rise.
  • Sugar: Use fine sugar for the best flavor.
  • Eggs: Use large eggs for the best moisture and richness.
  • Butter: Use unsalted butter for the best flavor.

By understanding each ingredient’s role and choosing high-quality ones, you’ll bake the best babka. Always look for the best ingredients in your babka recipe.

Mastering the Babka Dough

To make the best babka, mastering the dough is key. You need the right flour, yeast, and sugar for a smooth texture. The recipe calls for all-purpose flour, granulated sugar, and active dry yeast.

Mix and knead the dough until it’s just right. Then, let it rise to the perfect level. This is the secret to a great babka.

Expert bakers say not to overmix or undermix the dough. This can make the babka dense or tough. With practice, you’ll get it right every time. A good recipe makes two large loaves, baked at 300°F for 50 to 60 minutes.

The dough should be shaped into a 9″ x 18″ rectangle. Roll it into logs about 10″ long after filling. The filling can be sugar, cocoa, and mini chocolate chips.

To get the best babka, follow a trusted recipe. Don’t be afraid to try new fillings and toppings. This way, you’ll make a delicious, authentic babka that will wow everyone.

The Art of Babka Filling

Creating the perfect babka starts with the filling. You can pick from chocolate, cinnamon, or even fruit and nut fillings. The goal is to find a filling that matches the dough’s flavor and adds extra deliciousness.

A chocolate babka is a favorite, with melted chocolate, sugar, and heavy cream. Its rich texture goes well with the dough’s softness. For a spicier taste, try a cinnamon babka. It’s made with cinnamon, sugar, and butter, giving a sweet and comforting flavor.

Some favorite fillings for babka include:

  • Classic chocolate filling
  • Traditional cinnamon blend
  • Fruit fillings, such as raspberry or strawberry
  • Nut fillings, such as walnut or pecan

You can also try modern fillings like nuts, seeds, or savory ingredients. The choice depends on what you like. With so many options, you’re bound to find a babka filling you’ll love.

Filling Option Ingredients Taste
Classic Chocolate Melted chocolate, sugar, heavy cream Rich, velvety
Traditional Cinnamon Cinnamon, sugar, butter Warm, spicy
Fruit Filling Fresh or frozen fruit, sugar Sweet, tangy

Shaping and Twisting Techniques

Learning how to shape and twist a babka is key to making a stunning dessert. With practice, you can get good at shaping and twisting your babka. These techniques involve making the dough into a ball or log, then braiding or spiraling it.

Understanding babka shaping is important. There are different ways and tools to get the right shape. The traditional method involves braiding the dough, but Martha Stewart’s way twists it without cutting.

Here are some tips for mastering babka shaping and twisting:

  • Use a 9×5 inch loaf pan to shape your babka, as it provides the perfect size and shape.
  • Roll the dough very thinly to create many layers of dough and filling.
  • Use a gentle twisting motion to avoid tearing the dough.

babka shaping

By following these tips and practicing, you’ll make a beautiful and tasty babka. Be patient and gentle with the dough. It’s delicate and can tear easily. With time, you’ll get better at shaping and twisting, and your babka will wow everyone.

Loaf Pan Size Dough Weight Filling Weight
8×5 inch 250-350 grams 3/4-1 cup
9×5 inch 400-450 grams 1 cup
Tube Pan (9 or 10 inch) 800-900 grams 2-2.5 cups

Proofing and Baking Your Babka

Now that you’ve shaped and twisted your babka, it’s time for babka proofing and babka baking. These steps are key to getting the perfect texture and flavor. Start by letting your babka proof in a warm, draft-free spot. This could be a proofing cabinet or a warm oven with the light on.

The proofing time is about 1 – 1½ hours. Your babka should double in size during this time.

After proofing, it’s time to bake. Preheat your oven to 350°F (176°C). Place your babka in a 9×5″ loaf pan or on a sheet pan. Baking time varies based on size and shape, but it’s usually 40-45 minutes. Make sure to rotate the loaf pan halfway through for even baking.

Here are some important tips for babka baking:

  • Use a thermometer to check your oven’s temperature.
  • Avoid overmixing the dough to prevent a dense babka.
  • Choose a babka recipe with all-purpose flour, whole milk, and unsalted butter for a tender crumb.
  • Don’t overbake to avoid drying out the babka.

By following these tips and using a quality babka recipe, you’ll make a delicious, authentic babka. Be patient and gentle when handling the dough. This helps keep the delicate layers and texture of your babka intact.

Troubleshooting Common Babka Problems

As you bake babkas, you might face some common issues. These can affect how good your babka tastes and looks. We’ll look at some babka problems and how to fix them. Knowing the causes helps you solve these problems and make your babka delicious and pretty.

Some babka problems include dough issues like overmixing or undermixing. This can make your babka dense or tough. You might also struggle with filling and swirling, which can mess up your babka’s look and feel. Baking problems, like overbaking or underbaking, can also make your babka dry or dense. To fix these, you need to find the cause and use babka solutions like changing how you mix, adjust your filling, or bake it for the right time.

babka problems

Learning to fix babka problems makes your baking better. With time and effort, you’ll get good at solving these issues. This way, you can make babkas that are not only tasty but also look amazing. Your friends and family will love them.

Popular Babka Variations

Babka offers endless possibilities. You can try different babka variations to match your taste. From chocolate to cinnamon and fruit, each has its own flavor and texture. With a simple babka recipe, you can make a delicious babka that will wow your loved ones.

Some favorites include chocolate babka with cherries, cinnamon with streusel, and fruit with spice. You can also try Toblerone or caramelized white chocolate. The Polish Easter babka, with golden raisins and dried fruit, is another special option.

Here are some popular babka variations to consider:

  • Chocolate babka with melted chocolate and heavy cream
  • Cinnamon babka with cinnamon and sugar
  • Fruit babka with fresh or dried fruit and a hint of spice
  • Polish Easter babka with golden raisins and dried fruit
  • Nutella babka with an entire jar of Nutella

With so many babka variations to choose from, you’re bound to find one you love. Whether you’re into classic chocolate or something unique, there’s a delicious babka for everyone. So, experiment with different babka recipe and discover your favorite babka variations.

Storage and Serving Tips

Keeping your babka fresh is key. Store it in an airtight container at room temperature. Make sure it’s away from sunlight and moisture. This helps keep the babka’s quality and texture.

To serve your babka, reheat it in the oven or microwave. This brings out the flavor and texture. You can top it with cream cheese, butter, or jam. Here are some tips:

  • Store the babka in an airtight container to maintain freshness
  • Reheat the babka in the oven or microwave for a crispy crust and soft interior
  • Serve the babka with your choice of toppings, such as cream cheese or jam

Follow these tips for storing and serving your babka. This way, you can enjoy it for days. Always handle it gently and keep it in a cool, dry place.

babka storage tips

Making Ahead and Freezing Instructions

Want to make babka ahead of time? You can prepare the dough and keep it in the fridge or freezer. Then, bake it when you’re ready. This method lets you enjoy babka whenever you like, keeping it fresh and flavorful.

To freeze your babka, wrap it well in plastic wrap or foil. Store it in the freezer. When you’re ready, thaw and reheat it as instructed. This way, you can enjoy your babka at any time, keeping its quality and taste.

Here are some tips for making and freezing babka:
* Prepare the dough ahead and store it in the fridge or freezer.
* Freeze the babka after baking and thaw when you’re ready to serve.
* Follow the babka instructions for thawing and reheating.
* Use the right storage containers and wrapping materials to keep it fresh and flavorful.

By following these tips and using the right techniques, you can enjoy your babka anytime. With practice, you’ll become a pro at making babka. And you’ll get to enjoy this delicious treat whenever you want.

Conclusion: Your Journey to Babka Mastery

Your journey to mastering babka has been both tasty and fulfilling. You’ve learned about its rich history and cultural importance. You’ve also mastered the complex techniques needed to bake a perfect loaf.

Whether you were new to baking or already skilled, this guide has helped you. Now, you can make delicious, authentic babka that will wow everyone. It’s perfect for impressing your friends and family.

Babka mastery is a journey, not just a goal. With each loaf you bake, you’ll get better and appreciate babka making more. Keep experimenting, trying new fillings and techniques.

Don’t be scared to face challenges and learn from them. The more you bake, the closer you’ll get to making the perfect babka. It will show off the flavors and traditions of this beloved pastry.

So, bake your best babka and enjoy the fruits of your labor. Share your creations with loved ones and become a true babka-baking master. Happy baking!

FAQ

What is the history and cultural significance of babka?

Babka comes from Eastern European Jewish communities. The name “babka” means “grandmother” in Polish. It was a bread filled with fruits, nuts, or chocolate, baked in a wooden oven.Over time, it became a sweet bread for holidays and weddings. Now, people of all cultures enjoy babka in restaurants and bakeries.

What equipment is needed to bake perfect babka?

You’ll need a standing mixer, a dough hook, a pastry brush, and a baking sheet. A standing mixer mixes and kneads the dough. A dough hook is for kneading.A pastry brush applies egg wash, and a baking sheet is for baking.

What are the key ingredients used in babka?

Babka’s main ingredients are flour, yeast, sugar, eggs, and butter. Flour gives structure and texture. Yeast makes it rise.Sugar adds sweetness, eggs provide moisture, and butter adds flavor. Using high-quality ingredients is key for a delicious babka.

How do you master the babka dough?

Mastering the dough is key for perfect babka. The dough should be smooth and elastic, slightly sticky. Use the right flour, yeast, and sugar.Mix and knead to the right consistency. Let it rise properly. Avoid overmixing or undermixing to prevent a dense or tough babka.

What are some common babka problems and how do you fix them?

Common problems include dough issues, filling and swirling challenges, and baking and texture fixes. Dough issues can make the babka dense or tough.Filling and swirling problems can lead to uneven distribution or poor swirling. Baking and texture issues can make the babka dry or dense. Identify the cause and fix it to solve these problems.

What are some popular babka variations?

Popular variations include chocolate, cinnamon, and fruit babka. Each has its own flavor and texture. Chocolate babka uses melted chocolate and heavy cream.Cinnamon babka is traditional, with cinnamon and sugar. Fruit babka is modern, with fresh or dried fruit and spice.

How do you store and serve babka?

Store babka in an airtight container at room temperature. Keep it away from sunlight and moisture. Reheat in the oven or microwave.Serve with toppings like cream cheese, butter, or jam. Simply slice and serve with your choice of toppings.

Can you make babka ahead of time or freeze it?

Yes, making ahead and freezing are great options. The dough can be made ahead and stored in the refrigerator or freezer. Bake when ready.The babka can be frozen after baking. Thaw and reheat when you’re ready. To freeze, wrap tightly in plastic wrap or aluminum foil.