Welcome To Soup Meets Bowl - The Best Soup Recipes & More

Warm Up With Our Latest Soup Recipes

Roasted Chestnut & Parsnip Soup: Cozy Winter Delight


Roasted Chestnut & Parsnip Soup (Winter)

Winter brings cold temperatures, making us crave warm, comforting foods. Roasted chestnut & parsnip soup is perfect for these days. Chestnuts have about 170 calories per 100 grams, while parsnips are lower in calories. This makes the soup a great choice for a chilly day.

But why is this soup so special for winter? And how can you make a delicious homemade chestnut soup with these ingredients?

Key Takeaways

  • Roasted chestnut & parsnip soup is a delicious and comforting winter dish.
  • Chestnuts are high in calories and carbohydrates, while parsnips are a lower-calorie alternative.
  • This winter soup recipe can be made with ingredients like chestnuts, parsnips, onions, garlic, and vegetable broth.
  • A typical serving of soup may contain around 300-400 calories, depending on additional ingredients.
  • Roasted chestnut and parsnip soup can be a great option for a balanced meal, providing protein, fiber, and other essential nutrients.
  • You can make a homemade chestnut soup using roasted chestnuts, parsnips, and other ingredients, and customize it to your taste preferences.
  • Chestnut and parsnip soup is a popular winter soup recipe that can be made with a variety of ingredients and spices.

The Magic of Winter Comfort Soups

As winter comes, our bodies seek comforting winter soups for warmth and nutrition. Roasted vegetable soup is a favorite and easy to make. It uses seasonal ingredients. Let’s dive into the charm of winter comfort soups and why they’re key in our winter diet.

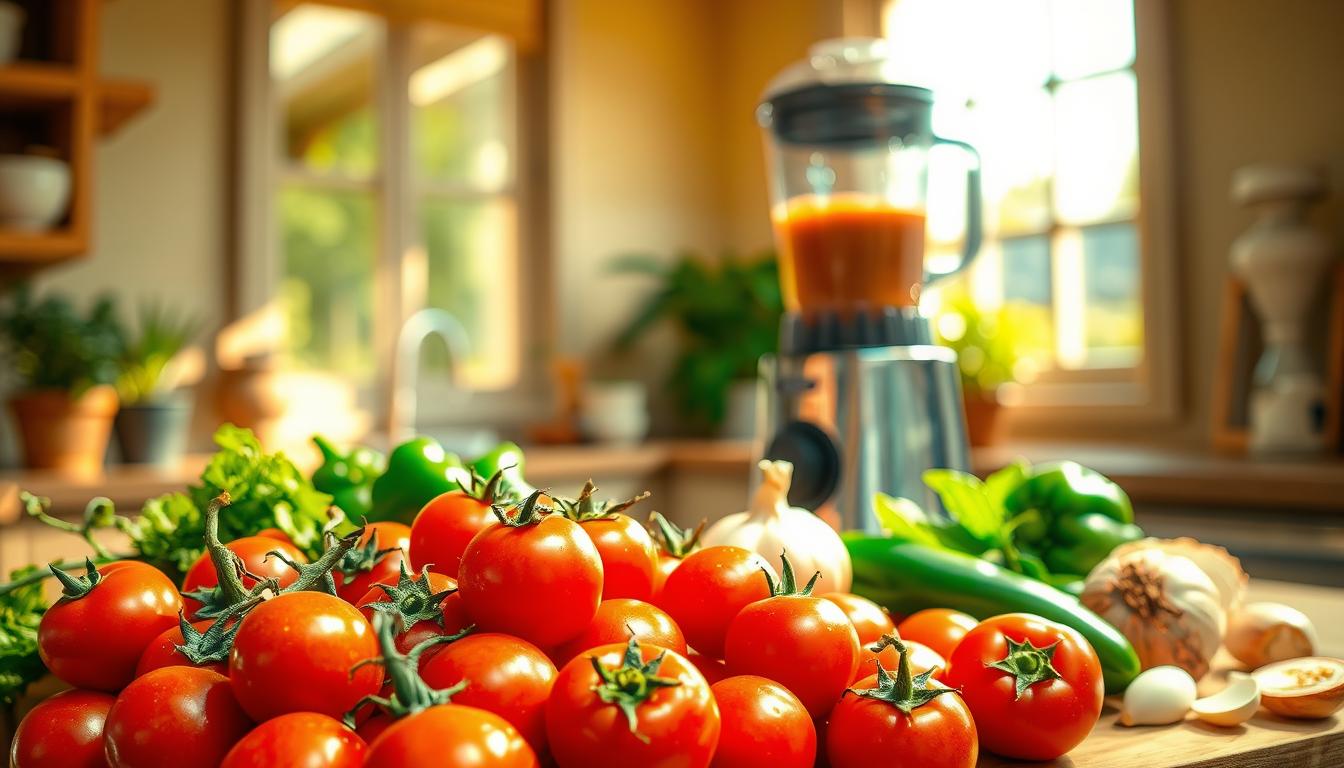
Winter is ideal for trying seasonal soup ideas with root veggies like parsnips, chestnuts, and sweet potatoes. These are tasty and full of nutrients, making them great for a healthy, comforting winter soup. Some top picks include roasted vegetable soup, creamy tomato soup, and butternut squash soup.

For a tasty and easy soup recipe, choose top-notch ingredients and roast the veggies well. Roasting enhances their natural sweetness, perfect for comforting winter soups. To make a great winter soup, use a mix of spices and herbs, like thyme and rosemary. Adding a bit of cream or coconut milk also boosts creaminess.

Winter comfort soups are not just yummy; they’re also good for you. Many seasonal soup ideas are rich in fiber, vitamins, and minerals. Ingredients like chestnuts and parsnips are full of antioxidants and have anti-inflammatory effects. They’re excellent in a roasted vegetable soup.

Essential Ingredients for Your Roasted Chestnut & Parsnip Soup

To make a tasty roasted chestnut soup, you’ll need a few key ingredients. You’ll need chestnuts, parsnips, onions, garlic, and vegetable broth. The parsnip soup recipe requires 600 grams of parsnips, or about 1.32 pounds. Also, 400 grams of cooked and peeled chestnuts, or about 0.88 pounds, are needed.

Other important items for your homemade soups include 2-3 tablespoons of butter, 1/3 cup of shredded parmesan cheese, and 1-1.5 tablespoons of fresh rosemary. These ingredients will boost the flavor of your seasonal soups and make them more enjoyable.

When picking ingredients for your roasted chestnut and parsnip soup, choose the freshest and best quality. This will make your soup not only delicious but also healthy and nutritious.

Kitchen Equipment You’ll Need

To make and serve your roasted parsnip and chestnut soup, you’ll need some basic kitchen tools. These items will help you create a tasty and hearty soup, perfect for winter. Having the right tools is key to making seasonal comfort food.

A roasting pan is essential for roasting chestnuts and parsnips to perfection. You’ll also need a blender, like the Vitamix Professional 750 Series Blender. It has a ‘Hot Soup’ function that heats your soup using the blades’ friction. This is great for bringing out the flavors in your soup.

You’ll also need storage containers and serving dishes. These are useful for storing your soup in the fridge or freezer, or when serving it to guests. Other important tools include a cutting board, knife, and measuring cups and spoons.

Here are the main tools you’ll need for your roasted chestnut and parsnip soup:

  • Roasting pan
  • Blender (such as the Vitamix Professional 750 Series Blender)
  • Storage containers
  • Serving ware
  • Cutting board
  • Knife
  • Measuring cups and spoons

Preparing Your Chestnuts and Parsnips

To make a delicious, hearty winter soup, start by preparing your chestnuts and parsnips. This step is key to unlocking the flavors of these roasted vegetables. Chestnuts are available in fall and winter, and they keep well when roasted and sealed.

For this winter soup recipe, you’ll need 15 to 16 oz of roasted chestnuts and 12 oz of parsnips. To roast the parsnips, heat your oven to 400° Fahrenheit. Cook them for 20 to 25 minutes until they’re tender. This process enhances their natural sweetness, adding flavor to your delicious winter dishes.

Here are some tips for preparing your chestnuts and parsnips:

  • Choose fresh and firm chestnuts and parsnips for the best flavor.
  • Roast the parsnips in the oven with some olive oil and seasoning to bring out their natural sweetness.
  • Peel the chestnuts after roasting to remove the skin and make them easier to blend into the soup.

roasted vegetables

By following these steps, you can create a delicious and comforting hearty winter soup. It’s perfect for the cold winter months. The roasted chestnuts and parsnips will make your winter soup recipe a hit with family and friends.

The Art of Roasting Your Vegetables

Roasting your vegetables is key to making a cozy winter soup, like homemade chestnut parsnip soup. To get it right, focus on the temperature and timing. A good roast brings out the best in your ingredients.

A nourishing winter meal starts with the right roasting techniques. Here are some tips to help you get it just right:

  • Preheat your oven to the perfect roasting temperature, usually around 230°C (gas mark 8) for initial roasting.
  • Use the right amount of stock, such as 1 litre of chicken or vegetable stock, to add moisture and flavor to your soup.
  • Don’t overcook your vegetables; 60-75 minutes is usually sufficient for caramelized fennel and onion soup.

By following these tips, you can create a delicious and comforting seasonal soup that’s perfect for the winter months. Remember to use fresh, seasonal ingredients and not to be afraid to experiment with new flavors and ingredients.

Creating Your Soup Base

To make a delicious soup for cold weather, start with a rich base. This is where your roasted chestnut and parsnip soup comes alive. High-quality vegetable broth is key, as it’s the base of your easy winter soup.

When making your base, sauté onions, garlic, and a pinch of salt. This brings out the flavors. Add olive oil for better aroma and texture. Stir your parsnip soup recipe often to avoid sticking.

Here are some essential tips for your soup base:

  • Use a ratio of 500- 700 mL of water for the right thickness
  • Add a teaspoon of garam masala for spice
  • Simmer for 20-25 minutes, until the parsnips are tender

Remember, the secret to a great soup is balancing flavors and textures. With patience and practice, you’ll enjoy a warm, comforting bowl of soup soon.

Blending and Seasoning Techniques

As you work on your roasted chestnut & parsnip soup, blending and seasoning are key. Getting the right consistency is important for hearty soups. Use an immersion blender or a regular blender to puree it to your liking.

For a tasty winter recipe, balance the flavors well. Add salt, pepper, and fresh herbs to enhance the taste. A splash of cream or sour cream can make it creamy and rich, perfect for hearty soups.

  • Choose fresh veggies and aromatic spices for the best taste.
  • Experiment with seasonings to find your favorite mix.
  • Add a squeeze of lemon juice to balance the soup’s richness.

By mastering blending and seasoning, you’ll make a delicious, comforting soup. It’s ideal for winter and a great addition to your seasonal comfort food collection.

Storage and Reheating Guidelines

Enjoying your favorite winter dishes, like homemade soups, is best with the right storage and reheating. This is true for soups like roasted chestnut and parsnip soup. They’re perfect for warming up on cold days. To keep your soup tasting great, follow some easy tips.

First, let’s look at how to store your soup. You can keep it in an airtight container in the fridge for up to 5 days. Or, freeze it for up to 3 months. When freezing, leave some space for the soup to expand. This stops the container from bursting.

Proper Storage Methods

  • Store in an airtight container
  • Refrigerate for up to 5 days
  • Freeze for up to 3 months

Reheating Without Losing Flavor

To reheat your soup without losing its taste, use low heat. You can also add cream or coconut milk for extra flavor. Stir often while reheating to avoid burning.

comforting winter dishes

By following these easy storage and reheating tips, you can enjoy your winter dishes all year. Whether you crave a seasonal soup or a warm bowl of roasted chestnut and parsnip soup, these methods will keep it delicious.

Storage Method Duration
Refrigerate Up to 5 days
Freeze Up to 3 months

Serving Suggestions and Garnishing Ideas

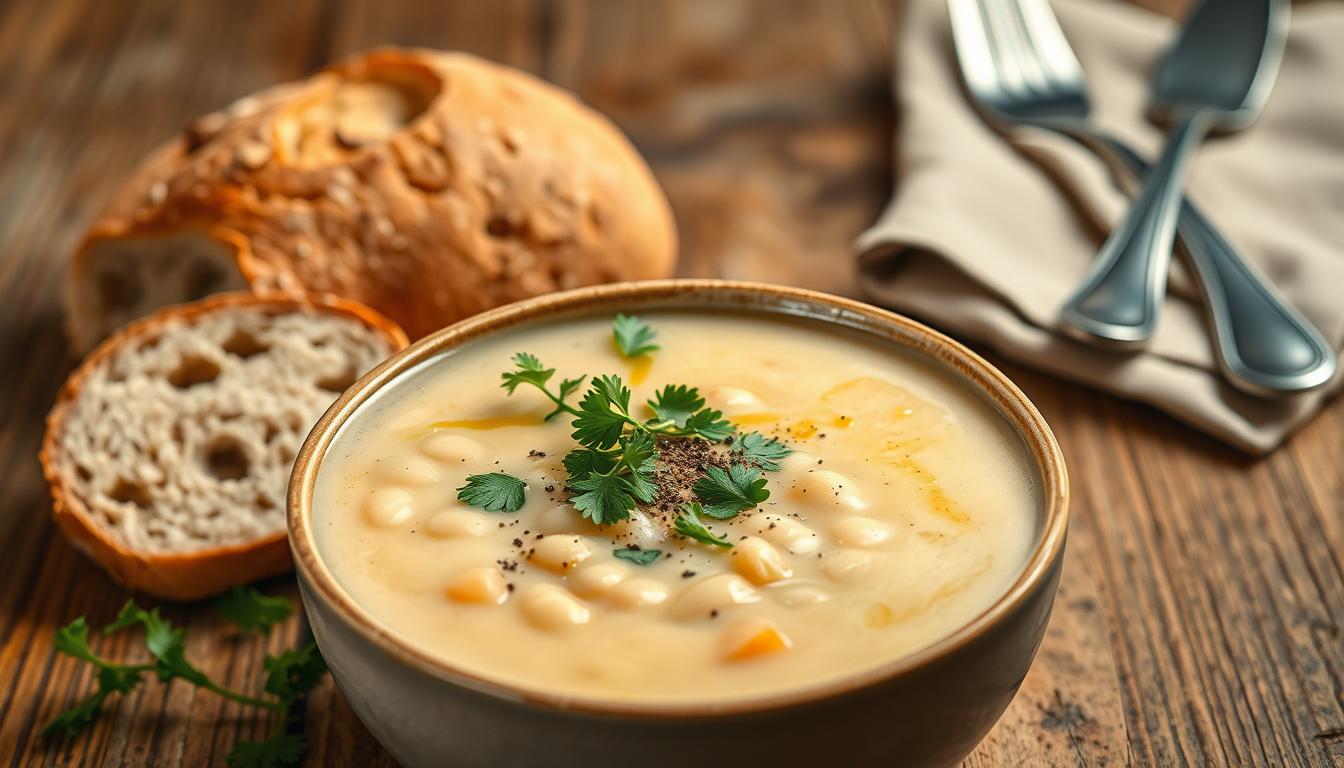
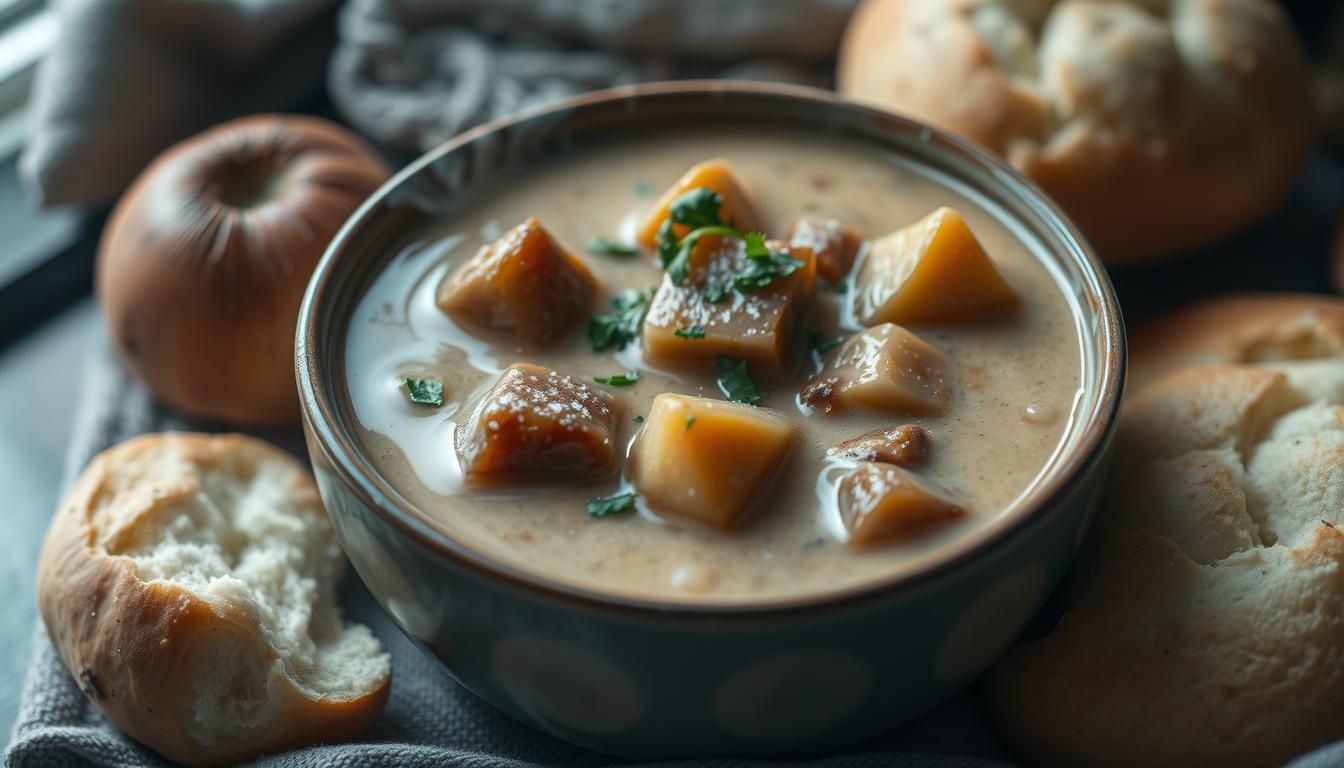
Serving your roasted chestnut & parsnip soup in a way that looks good can make it even better. Try serving it in bowls and add fresh herbs like parsley or thyme for color and freshness. A side of crusty bread can also make the meal more comforting and satisfying.

For a fancy touch, garnish with paprika or a dollop of sour cream. Keep the garnishes simple so the soup’s flavors can stand out. These ideas will help you make a dish that looks and tastes great, impressing everyone at the table.

Here are some more ways to serve your homemade chestnut soup:

  • Serving the soup as a starter or main course
  • Pairing the soup with a side salad or sandwich
  • Using the soup as a base for other winter soup recipes

Try out different ways to serve and garnish your roasted chestnut & parsnip soup. It’s a great way to enjoy a comforting meal or a healthy option. This soup is sure to become a favorite in your home.

Conclusion: Mastering Your Winter Soup Game

As you finish making the perfect roasted chestnut & parsnip soup, remember it’s a skill for winter. With the right ingredients and techniques, you can make a homemade chestnut soup that warms everyone’s hearts and bellies.

When making your winter soup recipes, use fresh chestnut and parsnip soup ingredients. Also, take time to roast and blend your vegetables well. These tips will help you become great at making delicious roasted chestnut & parsnip soup for all to enjoy.

parsnip and chestnut soup​

  • Customizing the ingredients to your taste preferences
  • Controlling the amount of salt and sugar that goes into your soup
  • Experimenting with different spices and seasonings to create unique flavor profiles

Mastering the art of chestnut and parsnip soup means enjoying warm, comforting bowls all winter. Share this joy with friends and family. So, get creative with your winter soup recipes and happy cooking!

Final Thoughts and Recommendations

As we wrap up our journey with roasted chestnut and parsnip soup, we invite you to explore more comforting winter soups. Try out roasted vegetable soup and seasonal soup ideas. There are many easy soup recipes to enjoy during the cold months.

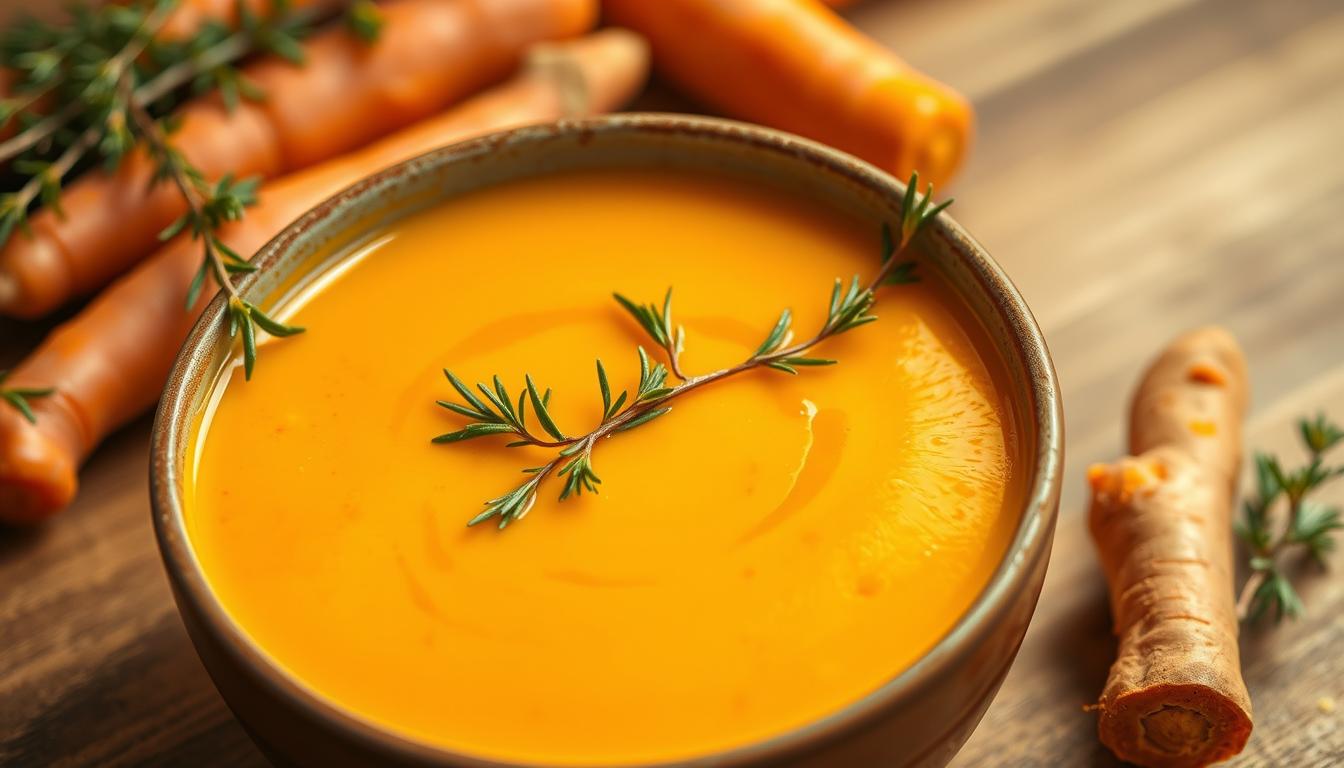
Don’t just stick to chestnuts and parsnips. Try butternut squash, carrots, or lentils too. Root vegetables and legumes offer endless options for comforting winter soups that are both healthy and delicious.

The fun of making soup is in the journey. Enjoy chopping, roasting, and simmering. Let the smells of your kitchen fill the air. With a bit of creativity and the right seasonal soup ideas, you’ll become a pro at the winter soup game. Bon appétit!

FAQ

What are the key ingredients in a roasted chestnut and parsnip soup?

The main ingredients for a tasty roasted chestnut and parsnip soup are chestnuts, parsnips, onions, garlic, and top-notch vegetable broth.

Why are chestnuts and parsnips the perfect partners for a cozy winter soup?

Chestnuts and parsnips are great for winter soups. They’re full of fiber, vitamins, and minerals. Their flavors mix well, making a rich, savory soup.

What kitchen equipment is needed to make this soup?

You’ll need a roasting pan, a blender, and containers to store your roasted chestnut and parsnip soup.

How do you properly roast the chestnuts and parsnips for this soup?

Roasting chestnuts and parsnips is key for the best flavor and texture. Watch the temperature, timing, and signs of roasting for great results.

How do you blend and season the soup to get the desired consistency and flavor?

Blending the soup right and seasoning it with the right spices are key. This makes your roasted chestnut and parsnip soup delicious and balanced.

How should you store and reheat the soup to maintain its flavor and texture?

Storing and reheating the soup correctly is vital. Follow the right steps to keep your roasted chestnut and parsnip soup tasty.

What are some serving suggestions and garnishing ideas for this soup?

To serve your roasted chestnut and parsnip soup, garnish it with fresh herbs, crusty bread, or other toppings. This will make the experience better.

Naan Bread: Soft, Fluffy, and Irresistible


easy naan bread recipe​

What makes naan, a traditional Indian bread, so irresistible? Is it the soft and fluffy texture, or how it pairs with curries? Naan has become a favorite in many places, known for its unique texture and versatility. You can make your own easy naan bread recipe, and it’s worth exploring its popularity.

Exploring naan, you’ll learn the art of making perfect naan. You’ll discover the ingredients, tools, and techniques needed. Whether you’re starting from scratch or improving your recipe, the process is rewarding and delicious. Naan is also low in calories, making it a great meal addition. You can keep it at room temperature for a few days or freeze it for later.

Key Takeaways

  • You can make homemade naan using a simple naan recipe.
  • Naan bread is a traditional Indian bread known for its soft and fluffy texture.
  • The calories per serving of naan are relatively low, making it a great addition to your meals.
  • You can store naan bread at room temperature for about 3 days or freeze it for 2 to 3 weeks.
  • Naan is a versatile bread that can be used to scoop up dishes or served with various curries.
  • Making naan from scratch requires some practice, but the process is rewarding and delicious.

Understanding Traditional Naan: A Brief History

Exploring naan’s rich history and cultural importance is key. Traditional naan, a type of Indian flatbread, has been a staple for centuries. Its recipe has changed, but the core ingredients and methods stay the same. Tandoori naan, cooked in a tandoor oven, is a classic example.

The origins of naan go back to ancient India, where it was cooked in tandoor ovens. The traditional recipe uses flour, yeast, and water to make a soft dough. This dough is then cooked in a tandoor oven, giving it a unique char and smokiness.

Naan has a big role in Indian cuisine, for special occasions and daily meals. Its cultural importance goes beyond taste, as it symbolizes hospitality and generosity. Whether you’re making a traditional naan or trying new variations, knowing its history is essential.

Essential Ingredients for Perfect Naan

To make perfect naan, you need the right naan ingredients. You’ll need flour, yeast, yogurt, and water. Each ingredient plays a key role in making naan soft and fluffy.

Yeast is important for fermentation. It makes the naan dough rise and gives it a light texture.

The type of flour used matters a lot. It affects the naan’s texture and taste. Choose a good quality all-purpose flour for the best results.

The amount of yogurt used also matters. Too little makes the naan dense, and too much makes it too soft.

naan ingredients

Other important naan ingredients include salt, sugar, and ghee or butter. These add flavor and make the naan more delicious. By using the right ingredients and following the right steps, you can make perfect naan.

Here are some key points to keep in mind when selecting naan ingredients:

  • Use high-quality all-purpose flour with the right protein content
  • Choose the right type of yeast for fermentation
  • Use the right amount of yogurt for flavor and texture
  • Add salt, sugar, and ghee or butter to enhance flavor and texture

Kitchen Tools and Equipment You’ll Need

To make delicious naan, you’ll need the right kitchen tools and equipment. A tandoor oven is traditional for cooking naan at high temperatures. But, not everyone has access to one. A cast iron skillet is a good substitute.

When choosing a cast iron skillet, look for one that is heavy and has a thick bottom. This helps to distribute heat evenly.

You’ll also need some essential naan utensils. These include a rolling pin, known as a belan, and a pastry brush. The belan is used to roll out the naan dough. The pastry brush is used to apply ghee or oil to the naan before cooking. You’ll also need a spatula to flip the naan while it’s cooking.

Some other useful tools to have when making naan include a stand mixer, a measuring cup, and a digital scale. A stand mixer can be used to mix and knead the naan dough. A measuring cup and digital scale can be used to accurately measure out the ingredients. With the right kitchen tools and equipment, you’ll be able to make delicious naan at home.

naan equipment

Here are some key points to consider when choosing your naan equipment:

  • Invest in a good quality cast iron skillet or tandoor oven
  • Choose a belan that is comfortable to use and easy to clean
  • Select a pastry brush that is heat resistant and easy to clean
  • Consider investing in a stand mixer and digital scale for accurate measurements

By following these tips and using the right naan equipment, you’ll be able to make delicious naan at home. Whether you’re a beginner or an experienced cook, the right tools and equipment will help you to achieve perfect results every time.

Making the Perfect Naan Dough

To make a tasty naan dough, you need the right ingredients and techniques. A traditional recipe includes 2 cups of flour, ½ teaspoon of baking powder, and ¼ teaspoon of baking soda. It also has ½ teaspoon of salt, 2 teaspoons of sugar, ½ cup of yogurt, and ¼ cup of lukewarm milk.

For homemade naan, you can use yeast dough. This dough needs 2 hours to rise and double in size. When making naan dough, knead it for about 10 minutes until it’s smooth and elastic. Adding oil or melted butter can enhance the flavor.

Divide the dough into small balls and roll each one to 8 to 9 inches long and 5 to 6 inches wide. For yeast dough, use ¾ teaspoon of instant yeast and let it rest for 1 to 2 hours.

Here are some key ingredients and tips for making your naan dough:

  • 2 cups of all-purpose flour
  • ½ teaspoon of baking powder
  • ¼ teaspoon of baking soda
  • ½ teaspoon of salt
  • 2 teaspoons of sugar
  • ½ cup of yogurt
  • ¼ cup of lukewarm milk
  • 2 tablespoons of oil or melted butter
  • ¾ teaspoon of instant yeast (for yeast dough)

By following these tips and using the right ingredients, you can make delicious homemade naan bread. Remember to let the dough rest for the recommended time. Don’t overwork the dough when kneading. With practice, you’ll soon be making perfect naan dough and enjoying freshly baked naan bread.

Step-by-Step Naan Preparation Guide

To start making naan, it’s key to mix and knead the dough well. This step develops the gluten, making your naan soft and fluffy. Begin by mixing 2 cups of flour, 1 teaspoon of salt, and 1 teaspoon of instant yeast in a big bowl. Add 1 cup of liquid, like Greek yogurt and water, to make a smooth dough.

After mixing, knead the dough. You can do this by hand or with a stand mixer. Knead for 5-7 minutes until it’s smooth and elastic. Then, put the dough in a greased bowl, cover it, and let it rise in a warm place for about 1 hour and 15 minutes. This step is important for making the dough double in size and giving your naan a light texture.

Next, divide the dough into 4 equal parts and shape each into a ball. Use a rolling pin to flatten each ball into an 8- or 9-inch round. Heat a non-stick skillet or tava over medium heat. Cook the naan for 1-2 minutes on each side until it’s golden and puffed. Brush with melted butter and serve hot.

easy naan bread recipe​

  • Mix the dough ingredients together
  • Knead the dough for 5-7 minutes
  • Let the dough rise for 1 hour and 15 minutes
  • Divide the dough into 4 equal portions
  • Shape each portion into a ball and flatten into a round
  • Cook the naan in a skillet or tava for 1-2 minutes on each side

By following these steps, you can make delicious naan bread at home. You’ll learn how to prepare, cook, and shape naan perfectly, ensuring it rises well.

Popular Naan Variations and Flavors

Exploring naan reveals a wide range of flavors and types. You can find everything from classic garlic naan to spicy keema naan. Each type offers a unique taste and texture.

Some popular naan variations include:

  • Garlic naan, known for its strong aroma and strong flavor, perfect for pairing with creamy curries
  • Butter naan, a classic favorite, often served at weddings and special occasions
  • Cheese naan, a delicious and savory option, great for those who love cheese
  • Keema naan, a spicy and flavorful variation, filled with minced meat and spices

These variations show the rich diversity of naan. Whether you prefer something classic or adventurous, there’s a naan for you.

With so many options, you’re bound to find a new favorite. So, why not try something new today and explore the wonderful world of naan?

Naan Variation Description
Garlic Naan A classic favorite, known for its strong aroma and strong flavor
Butter Naan A rich and savory option, often served at weddings and special occasions
Cheese Naan A delicious and savory option, great for those who love cheese
Keema Naan A spicy and flavorful variation, filled with minced meat and spices

Troubleshooting Common Naan Problems

When making naan, you might face issues like dough that doesn’t rise or bread that’s too dense. To solve these naan problems, it’s key to know the causes and use the right naan troubleshooting methods. Overmixing the dough can make naan dense and tough. To fix this, mix the ingredients just until they combine, then rest the dough for a few minutes.

Another issue is underproofing or overproofing the dough. Underproofed dough won’t rise right, while overproofed dough might collapse. To get it just right, let the dough rise in a warm, draft-free spot for 1-2 hours, or until it doubles in size. You can also use naan tips like checking the dough’s temperature and adjusting the proofing time.

Here are some more naan troubleshooting tips to help you fix common problems:

  • Check the yeast: Make sure the yeast is active and not expired, as this can affect the dough’s rise.
  • Adjust the temperature: Ensure the water and environment are at the right temperature for yeast activation and dough proofing.
  • Don’t overwork the dough: Mix and knead the dough just until it comes together, and avoid overmixing.

By using these naan tips and troubleshooting methods, you can solve common naan problems and make soft, fluffy, and tasty naan bread. Remember to be patient and adjust your techniques as needed to get the perfect naan.

Storing and Reheating Your Naan

Learning to make perfect naan is just the start. Knowing how to store and reheat it is key. This keeps it soft, fluffy, and full of flavor. These tips will help your homemade naan stay delicious for longer.

Mastering Naan Storage

For a short time, keep naan at room temperature in a breathable bag for up to 3 days. For longer, refrigerate it for up to 2 weeks. To freeze, wrap it tightly in plastic or foil for up to 6 months.

Reviving Stored Naan

Ready to enjoy your naan? There are several ways to reheat it. For the microwave, place it on a damp paper towel and heat for 10 seconds. To crisp it, pan-fry for 1-2 minutes each side.

The oven method involves wrapping naan in foil. Bake at 300-350°F for up to 10 minutes until warm.

By following these simple tips, you can enjoy your homemade naan for days. Whether you’re storing, reheating, or freezing, your naan will stay delicious.

FAQ

What is Naan bread?

Naan is a soft, fluffy Indian flatbread loved worldwide. It’s known for its unique texture and versatility. This makes it a great side dish for many meals.

What is the history of Naan bread?

Naan comes from ancient Indian cuisine, baked in tandoor ovens. It’s a big part of Indian culture, enjoyed at special and everyday meals.

What are the essential ingredients for making Naan bread?

Naan dough needs flour, yeast, yogurt, water, and salt. The right mix and technique are key for a soft, fluffy texture.

What equipment do I need to make Naan bread?

You can use a tandoor oven, a cast-iron skillet, or a baking sheet. You’ll also need a rolling pin, baking sheet, and pastry brush for toppings or butter.

How do I make the perfect Naan dough?

To make Naan dough, mix ingredients, knead, and let it rest. Use the right flour and yeast and give it enough time to rest for a light texture.

What are some popular Naan variations and flavors?

Naan comes in flavors like garlic, butter, cheese, and keema. Each flavor offers a unique taste and texture, letting you explore and find your favorite.

How can I troubleshoot common Naan problems?

If your dough doesn’t rise or your Naan is too dense, this section has solutions. It offers tips to help you make perfect Naan every time.

How do I store, reheat, and freeze Naan bread?

Storing, reheating, and freezing Naan right keeps it fresh. This section guides you on how to keep your Naan soft and ready to eat whenever you want.

Refreshing Summer Gazpacho with Fresh Tomatoes


Summer Gazpacho with Fresh Tomatoes

Looking for a cool summer soup? Gazpacho is a great choice for hot days. It’s a cold tomato soup from Spain that’s tasty, healthy, and refreshing. Made with fresh tomatoes, cucumbers, and bell peppers, it’s perfect for beating the heat.

Preparing gazpacho takes about 15 minutes. This makes it a quick and easy option for a refreshing summer soup.

Want to know more about gazpacho? It’s a dish that’s best enjoyed in summer. In this article, we’ll dive into the history and ingredients of gazpacho. We’ll also give you a step-by-step guide to making the perfect gazpacho.

Whether you’re searching for a gazpacho recipe or tips for a refreshing summer soup, you’re in the right place.

Key Takeaways

  • You can prepare a gazpacho recipe in approximately 15 minutes.
  • Gazpacho is a traditional Spanish dish made with fresh tomatoes, cucumbers, and bell peppers.
  • The typical fresh tomato season aligns with summer months, making it the prime time for gazpacho.
  • A gazpacho recipe can be served as a refreshing summer soup or a cold tomato soup.
  • You can store leftover gazpacho in the refrigerator for up to 3 days or frozen for up to 3 months.
  • Gazpacho is a healthy and refreshing option for a summer soup, with a caloric content per serving of 47 kcal.

Understanding the Origins of Spanish Gazpacho

Gazpacho, a traditional Spanish dish, comes from Andalusia, Spain. Over time, its recipe has changed, leading to many gazpacho types. It’s a key part of Andalusian food, with families enjoying it every summer morning.

The main ingredients are oil, garlic, and bread. For the traditional Andalusian version, you’ll need ripe tomatoes, green pepper, and cucumber. People adjust the amounts to their liking. Some gazpachos, like Salmorejo, use a lot of tomatoes and bread, making it thick.

Here are some key facts about gazpacho:

  • Gazpacho is made with fresh veggies like tomatoes, peppers, cucumbers, onions, and garlic.
  • Tomatoes are the main ingredient, followed by peppers and olive oil.
  • The first gazpacho recipes were from the 16th century.

Gazpacho is perfect for hot summer days. It’s best served very cold, after chilling for at least 120 minutes. You can add finely chopped veggies like tomatoes, onions, peppers, and cucumbers.

In conclusion, gazpacho highlights the adaptability of Andalusian cuisine. Its rich history and cultural importance make it a must-try for authentic Spanish flavors.

Essential Ingredients for Perfect Summer Gazpacho with Fresh Tomatoes

To make a delicious summer gazpacho, you need the right gazpacho ingredients. The soup’s base is fresh tomatoes, which add a sweet and tangy taste. You also need cucumbers and bell peppers for a cool, crunchy texture.

Here are the essential ingredients you’ll need:

  • 2 ½ pounds of ripe fresh tomatoes
  • 1 medium cucumber, peeled and cut into 1-inch pieces
  • 1 red bell pepper, contributing to the overall flavor profile
  • 6 cloves of garlic, smashed and peeled
  • ¼ cup of garlic croutons or an equivalent amount of cubed rustic bread

These ingredients will help you make a perfect summer gazpacho. It’s full of flavor and refreshing. You can also add other ingredients like onions, celery, and parsley to customize it.

Selecting and Preparing Your Tomatoes

To make delicious gazpacho, picking the right tomato varieties is key. You’ll want to use a mix of Roma, cherry, and beefsteak tomatoes. Look for tomatoes that are ripe and bursting with flavor.

For preparation techniques, coring and chopping the tomatoes is important. Use a sharp knife to do this. Then, blend them in a food processor until smooth.

Here are some tips for selecting and preparing your tomatoes:

  • Choose ripe tomatoes with a deep red color and a slight give when touched
  • Use a variety of tomato varieties to add depth and complexity to the gazpacho
  • Core and chop the tomatoes before pureeing them to release their natural sweetness
  • Use a food processor to puree the tomatoes to the desired consistency

By following these tips and using the right tomato varieties, ripeness guidelines, and preparation techniques, you can make a tasty gazpacho. It’s perfect for hot summer days.

Supporting Vegetables and Aromatics

Supporting vegetables and aromatics are key to a tasty gazpacho. Cucumbers and bell peppers add texture and flavor. When picking cucumbers, peel them to stop browning. Choose ones with lots of water for more liquid.

For gazpacho, use green and red bell peppers. Canned fire-roasted red peppers add a smoky taste. Try different cucumbers like English or pickling cucumbers. Here’s how to prep them:

  • Peel and chop the cucumbers into small pieces to add to the gazpacho.
  • Seed and chop the bell peppers into small pieces to add to the gazpiao.
  • Use a variety of aromatics such as garlic, onion, and herbs to add depth and flavor to the gazpacho.

Adding these supporting vegetables and aromatics makes your gazpacho refreshing and delicious. It’s great for hot summer days.
gazpacho with supporting vegetables and aromatics

Equipment Needed for Gazpacho Preparation

To make gazpacho, you’ll need some key tools. A blender or food processor is a must for blending the ingredients. Look for a device that can handle big amounts of veggies and liquids well.

You’ll also need a large bowl, a cutting board, and knives for chopping. A strainer or sieve helps get rid of extra liquid from the gazpacho.

There are also optional tools for adjusting the gazpacho’s texture. A food mill can take out tomato seeds and skins for a smoother soup. Or, use a blender on high speed to get the perfect consistency.

Essential Tools

  • Blender or food processor
  • Large bowl
  • Cutting board
  • Set of knives
  • Strainer or sieve

Optional Equipment for Texture Control

  • Food mill
  • High-speed blender

With the right gazpacho equipment, like a blender or food processor, you can whip up a tasty gazpacho. It’s great for cooling down on hot summer days.

Step-by-Step Preparation Method

To start making gazpacho, gather all the ingredients. You’ll need fresh tomatoes, red onion, cucumber, bell pepper, and celery. It’s important to use the best ingredients for a great taste.

Peel and chop the tomatoes, removing seeds and excess liquid. This helps keep the gazpacho from being too watery. Then, chop the other vegetables and add them to a large bowl.

Blend the ingredients together. Put the chopped veggies, tomato juice, red wine vinegar, olive oil, and lemon juice in a blender. Blend until smooth but slightly chunky. Adjust the blending time to get the right consistency.

For a more detailed guide, follow this step-by-step process:

  • Blend the ingredients on low speed for 10 seconds
  • Stop the blender and scrape down the sides
  • Blend on high speed for 20 seconds
  • Taste and adjust the seasoning as needed

After blending, pour the gazpacho into a large bowl. Refrigerate it for at least 30 minutes. This step helps the flavors mix well.

When ready to serve, stir the gazpacho well. Taste it again to adjust the seasoning. Serve chilled, garnished with herbs and sour cream if you like.

Achieving the Perfect Gazpacho Texture

To make a tasty and cool gazpacho, getting the right texture is key. The texture comes from how you blend and strain the ingredients. You can puree everything in a blender or food processor for a smooth texture. Or, you can keep some veggie chunks for a coarser feel.

It’s important to get the right mix of liquid and solid when blending. If it’s too thick, add a bit of water or tomato juice. If it’s too thin, add more veggies or bread to thicken it. You can also strain it through a fine-mesh sieve or cheesecloth for a smoother texture.

  • Adding a little olive oil to enhance the flavor and texture
  • Using a hand blender to puree the ingredients right in the bowl
  • Letting the gazpacho chill in the refrigerator for at least 2 hours to allow the flavors to meld together

By trying out these tips and experimenting with blending and straining, you can get the gazpacho texture you like best.

Chilling and Serving Temperature Guidelines

Serving gazpacho at the right temperature is key to a great experience. Let it chill in the fridge for at least 30 minutes. This allows the flavors to blend, making the soup taste even better.

The best serving temperature for gazpacho is ice-cold. This makes it even more refreshing. Store it in an airtight container in the fridge. Gazpacho can be made up to 3 days in advance, perfect for meal prep or parties.

Here are some tips to keep gazpacho cold and refreshing:

  • Use a thermally insulated container to store the gazpacho
  • Add ice cubes if serving a large amount
  • Stir the gazpacho occasionally to avoid ice crystals

By following these guidelines, you’ll enjoy a cool and tasty soup. The right temperature and chilling are essential for the best flavor and texture. Gazpacho is a light and refreshing meal perfect for hot summer days.

gazpacho temperature

Creative Garnishing Ideas

When you’re ready to serve your gazpacho, think about the garnishes you can add. Traditional toppings like paprika or sour cream bring a classic touch. But, you can also try modern options like olive oil or fresh herbs like parsley or cilantro.

Popular garnishes include homemade croutons, made by frying bread cubes in olive oil until they’re crispy. You can also use store-bought croutons or toasted nuts for crunch. For something more, try diced ham, chopped hard-boiled eggs, or grated cheese.

Here are some ideas for gazpacho garnishes:

  • Chopped fresh herbs like parsley, cilantro, or dill
  • Homemade croutons or store-bought croutons
  • Toasted almonds or pumpkin seeds
  • Diced ham or chopped cooked bacon
  • Grated cheese, such as Manchego or Parmesan
  • A drizzle of olive oil or a dollop of sour cream

Don’t just stick to traditional toppings. Try modern garnishes like sumac or truffle oil. The goal is to mix flavors and textures that enhance the gazpacho without overwhelming it. With a bit of creativity, your gazpacho can become a feast for the eyes and taste buds.

Garnish Description
Homemade croutons Crunchy bread cubes fried in olive oil
Chopped fresh herbs Adding a fresh and fragrant flavor
Toasted almonds Crunchy and nutty, perfect for gazpacho

Storage and Make-Ahead Tips

Keeping your gazpacho fresh is key. Use airtight containers to store it. This keeps air out and the soup fresh. You can keep gazpacho in the fridge for 4-5 days. For longer, freeze it in airtight containers or bags.

Preparing gazpacho ahead of time is smart. You can store it in the fridge or freezer. Just thaw it when you’re ready to eat. Remember to use fresh ingredients and adjust the seasoning.

gazpacho storage

Proper Storage Containers

  • Airtight containers: These are ideal for gazpacho storage, as they prevent air from entering and spoiling the soup.
  • Freezer bags: These are great for storing gazpacho in the freezer, as they can be labeled and dated for easy identification.
  • Glass jars: These are a good option for storing gazpacho in the refrigerator, as they are non-reactive and can be sealed tightly.

Maximum Storage Duration

Gazpacho stays fresh in the fridge for 4-5 days. For longer, freeze it. Frozen gazpacho lasts 3-4 months. Just thaw it or stir it well when you’re ready to eat.

Common Gazpacho Variations

Gazpacho is a versatile soup with many gazpacho variations. You can use different tomatoes, peppers, and spices. For instance, red, yellow, and green bell peppers add flavor and texture.

Other ingredients like onions, garlic, scallions, peeled cucumbers, and seedless watermelon can also be used. You can even add different types of bread, such as country bread or artisan loaf, to thicken it.

Here are some popular gazpacho variations:

  • Traditional gazpacho: made with tomatoes, peppers, and bread
  • Almond gazpacho: made with almonds, garlic, and grapes
  • Melon gazpacho: made with melons, cucumbers, and mint

These are just a few examples of the many common variations of gazpacho. Its rich history and cultural significance make it a dish to enjoy in many ways.

Conclusion: Mastering Your Summer Gazpacho

Making the perfect summer gazpacho with fresh tomatoes is an art. It takes practice and attention to detail. By choosing the best produce and following the right steps, you can make a refreshing, top-notch gazpacho at home.

The secret to mastering gazpacho is to be creative. Try new vegetables and garnishes to make each batch unique. With creativity and quality ingredients, you’ll wow your loved ones all summer.

FAQ

What is the history of gazpacho?

Gazpacho comes from Andalusia, Spain. Over time, its recipe has changed. Now, there are many gazpacho types.

What are the essential ingredients for making perfect summer gazpacho with fresh tomatoes?

To make great summer gazpacho, you need fresh tomatoes, cucumbers, bell peppers, garlic, and bread.

How do I select and prepare the right tomatoes for gazpacho?

Choosing the right tomatoes is key for tasty gazpacho. Use Roma, cherry, and beefsteak tomatoes. Make sure they’re ripe and prepared right for the best texture.

What other vegetables and aromatics are used in gazpacho?

Gazpacho also includes cucumbers, bell peppers, and garlic, along with tomatoes.

What equipment is needed for gazpacho preparation?

You’ll need a blender or food processor for gazpacho. You might also use strainers and sieves for texture.

How do I achieve the perfect gazpacho texture?

For a great gazpacho, blend well and strain if needed. Adjust the consistency to your taste.

What are the guidelines for chilling and serving gazpacho?

Chilling gazpacho is important. Serve it chilled for the best flavor and refreshment.

How can I garnish my gazpacho?

Garnish gazpacho with various ingredients. This adds flavor, texture, and looks, from traditional to modern.

How can I store and make-ahead my gazpacho?

You can store gazpacho in the fridge or freezer. Use the right containers and follow storage times to keep it fresh.

What are the common variations of gazpacho?

Gazpacho can be made in many ways. This includes different ingredients and methods, leading to various flavors and styles.

Tasty Simple Garlic & White Bean Soup – Healthy And Satisfying


Simple Garlic & White Bean Soup

What makes simple garlic & white bean soup so comforting? Is it the rich garlic flavor, the creamy white beans, or how easy it is to make? You can whip up this healthy white bean soup in just 10 minutes of prep and 20 minutes of cooking. It’s a perfect meal for any day, packed with flavor and health benefits.

Key Takeaways

  • You can prepare a simple garlic & white bean soup in just 10 minutes and cook it in 20 minutes.
  • This easy garlic soup recipe serves 6 people and has approximately 203 calories per serving.
  • The soup is rich in fiber, with 8 grams per serving, and has a good amount of protein, with 11 grams per serving.
  • You can store the soup in the refrigerator for up to 3 days or freeze it for up to 3 months.
  • The recipe uses 9 ingredients, including 12 garlic cloves, 2 cups of cooking stock or water, and 1 pound of dried white beans.
  • The soup is a great source of essential vitamins and minerals, including vitamin A, vitamin C, calcium, and iron.

Why Simple Garlic & White Bean Soup Should Be Your Next Comfort Meal

Thinking about your next comfort meal? A vegetarian garlic soup is a delicious and healthy choice. It’s not just tasty but also full of nutrients that boost your immune system. As winter gets closer, a warm bowl of quick garlic and bean soup will keep you cozy.

Making a homemade garlic bean soup is perfect for a weeknight dinner. It’s quick to prepare and won’t break the bank. You’ll need garlic, white beans, and veggies, all easy to find at your local store.

This soup is super versatile. You can freeze it for later or add your favorite spices. Whether you want something light or hearty, a vegetarian garlic soup fits the bill.

Here are some perks of making a homemade garlic bean soup:

  • It’s a great way to get your daily dose of veggies and protein
  • It’s easy to customize to your taste
  • It’s a budget-friendly option for a weeknight dinner
  • It’s a healthy and nutritious comfort meal

Essential Ingredients for Your Garlic and White Bean Soup

To make a tasty garlic soup, you need a few key ingredients. The main parts are a simple mirepoix (onions, carrots, and celery), dried white beans, fresh herbs, garlic, and olive oil. These mix together to make a flavorful garlic white bean soup that’s sure to delight.

Garlic is a key ingredient, adding a rich, savory taste. You’ll also need fresh herbs for brightness and depth. The white beans are the main attraction, giving a creamy texture and protein boost. With these, you can make a delicious garlic and white bean soup that’s both comforting and fulfilling.

Here’s a list of what you’ll need:

  • 1 cup of dried white beans
  • 4 cloves of garlic
  • 2 tablespoons of olive oil
  • 1 onion, chopped
  • 2 carrots, chopped
  • 2 stalks of celery, chopped
  • 4 cups of vegetable broth
  • Salt and pepper to taste

With these ingredients, you can make a comforting garlic soup for any time. It’s perfect for a quick meal or a hearty soup. So, try it out and enjoy a warm, flavorful garlic white bean soup that will become a favorite.

Kitchen Tools and Equipment Needed

To make a tasty easy soup recipe like garlic and white bean soup, you need basic kitchen tools. You probably already have most of them. With a few simple tools, you can make a healthy meal perfect for any weeknight.

A large pot is key for this vegetarian soup. It lets you sauté and then simmer the soup. You’ll also need a cutting board, knife, and spoon for prep. A can opener is needed for the canned white beans.

Optional equipment can make the soup even better. A blender or immersion blender can puree the soup for a creamy feel. A slow cooker is also great for cooking the ingredients slowly.

Tools like a garlic press, lemon juicer, and olive oil dispenser can be helpful. They make cooking easier and more efficient. This lets you focus on making a delicious, healthy meal.

Preparing Your Ingredients

To make a tasty homemade soup, start by preparing your ingredients well. This is key to getting the best flavors in your quick soup recipe. Begin by sautéing garlic with olive oil, then add onions, carrots, and celery. This sets the stage for a rich, savory garlic infused soup.

When working with garlic, use 2 cloves or ½ to 1 teaspoon of garlic powder. This adds a deep, aromatic taste to your soup. For the beans, you can choose canned or dried Great Northern beans. If using dried beans, soak them overnight to cut down cooking time.

  • Chop the onions, carrots, and celery into small pieces to ensure they cook evenly.
  • Use 2 cups of kale, or substitute with baby spinach or cabbage, and add it to the pot in the last 5 minutes of cooking.
  • Sauté the vegetables in olive oil for 2-3 minutes to bring out their natural flavors.

By following these simple steps, you’ll create a delicious and satisfying homemade soup. It’s perfect for any occasion. Whether you’re after a quick soup recipe or a hearty garlic infused soup, this recipe will impress.

Step-by-Step Cooking Instructions

To make a tasty bean soup recipe, start by sautéing the mirepoix. Then, add the garlic, beans, and broth. This garlic and white bean soup is a great comfort food recipe that’s easy and satisfying.

The cooking process is simple and quick, taking under 30 minutes. Sauté the shallots and garlic for 3 minutes. Next, add the beans, broth, and spices. Let it simmer for 10-15 minutes until the flavors blend and the beans are tender.

Here are the basic steps to follow:

  • Sauté the mirepoix and garlic
  • Add the beans, broth, and spices
  • Simmer the soup until the flavors have melded together

With these simple steps, you can make a delicious and comforting bean soup recipe. It’s perfect for a cold winter’s night. This garlic and white bean soup is a fun and easy comfort food recipe to make.

Creating the Perfect Soup Base

To make a tasty one-pot soup recipe, start with a strong base. A good soup needs a balanced base that mixes the flavors of its ingredients. For a quick soup, choose top-notch ingredients to boost the taste and texture.

This healthy vegetarian soup is great for a weeknight dinner. It cooks in under 30 minutes, so you can enjoy a healthy meal fast. It makes 4 servings, perfect for family dinners or meal prep.

one-pot soup recipe

  • Low calorie count: only 326 calories per serving
  • High in dietary fiber: 13.4g per serving
  • Good source of protein: 19.7g per serving

Follow these easy steps and pick the right ingredients for a tasty soup base. Whether it’s a quick soup or a healthy vegetarian soup, remember to try new ingredients and spices. This way, you can make the recipe your own and enjoy making a delicious one-pot soup recipe.

Customization Options and Variations

Garlic and white bean soup is a comfort food that you can customize to your liking. You can try different ingredients to make it your own. For example, using black beans instead of white beans makes a tasty change.

This soup can fit into many diets, like vegetarian and vegan ones. To make it plant-based, swap bacon or ham with smoked tofu or tempeh. You can also adjust the spice level by adding more or less chili flakes.

  • Adding other vegetables, such as diced carrots or zucchini, to increase the nutrient density of the soup
  • Using different types of broth, such as chicken or vegetable broth, to change the flavor profile
  • Adding a squeeze of fresh lemon juice for a burst of citrus flavor

By trying out these variations, you can make a garlic and white bean soup that’s just right for you. Whether you want a hearty soup or a light one, this recipe can be adjusted to fit your mood.

Storage and Reheating Guidelines

You can store your quick vegetarian soup in a few ways. Keep it in the fridge for up to five days or freeze it for up to three months. This is perfect for meal prep or making a big batch of healthy garlic soup to enjoy all week.

To reheat your creamy white bean soup, just put it in a pot on the stovetop over medium heat. You can also reheat it in the microwave for 1-2 minutes. If it’s frozen, thaw it overnight in the fridge before reheating.

Here are some tips for storing and reheating your soup:

  • Let the soup cool completely before storing it in the refrigerator or freezer.
  • Use airtight containers to store the soup and keep it fresh.
  • Label the containers with the date and contents so you can easily keep track of how long it’s been stored.
  • Reheat the soup to an internal temperature of 165°F to ensure food safety.

white bean soup

By following these guidelines, you can enjoy your delicious and healthy garlic soup all week. Whether you’re in the mood for a quick vegetarian soup or a creamy white bean soup, it’s ready in no time.

Serving Suggestions and Pairings

There are many ways to serve your homemade garlic soup. You can pair it with bread, salads, or roasted veggies. For a white bean soup, try it with whole grain bread or a green salad.

Some great bread choices include Garlic and Herb Pull-apart biscuits, Toasted French bread, and Focaccia. You might also like it with Kale salad or Italian pasta salad for a fuller meal. For a lighter choice, try it with crackers or breadsticks.

You can also serve the soup with roasted veggies like acorn squash, brussels sprouts, or root vegetables. For a classic choice, pair it with collard greens or butter rice. With these options, you can make a meal that’s both filling and tasty.

Troubleshooting Common Issues

When making easy garlic soup, you might face some common problems. These can change how your homemade garlic and white bean soup tastes and feels. It’s key to spot and fix these issues quickly to make a tasty garlic soup.

One issue is the gas from the beans. Research shows canned beans might cause less gas than dried ones. For instance, a study found canned Goya pinto beans had about 20% less gas than dried Jack Rabbit beans. Rinsing the beans can also cut down on gas.

To tackle other common problems, here are some tips:

  • Choose the right beans: Pinto beans are great for easy garlic soup. They’re easy to find and taste mild.
  • Soak the beans: Soaking beans for 8 hours before cooking can shorten cooking time and ease digestion.
  • Season right: The right amount of garlic and spices can boost your homemade garlic and white bean soup’s flavor.

By using these tips, you can make a tasty and fulfilling easy garlic soup. Always pick fresh ingredients and cook with love. With a bit of practice, you’ll get better at making delicious garlic soup.

easy garlic soup

Conclusion

This vegan white bean soup is not only tasty but also good for you. It combines creamy garlic bean soup with the health perks of garlic and white beans. This makes it a perfect comfort meal for any time of year.

With just a few steps, you can make this affordable and tasty soup at home. It’s great for anyone who wants a meatless meal or just a hearty soup. Try it out and enjoy!

FAQ

What are the health benefits of garlic and white beans in this soup?

Garlic fights inflammation and boosts your immune system. White beans are packed with protein, fiber, and nutrients. Together, they make a healthy, filling meal.

Is this soup suitable for any season?

Yes, this garlic and white bean soup is great for any time of year. It’s warm and comforting in cold weather. But it’s also refreshing in warmer months.

Are the ingredients for this soup budget-friendly?

Yes, making this soup is easy on your wallet. Garlic, white beans, and basic veggies are cheap and tasty. They come together to make a delicious meal.

What basic utensils are required to make this soup?

You’ll need a sharp knife, cutting board, large pot, and a spoon or spatula. A ladle is handy for serving.

What optional equipment can enhance the results of this soup?

Optional tools like an immersion blender or garlic press can improve the soup. A slow cooker or Instant Pot makes cooking easier.

How should the garlic be properly prepared for this soup?

For the best taste, mince or finely chop the garlic. This releases its oils and aromas, adding depth to the soup.

How should the white beans be prepared for this soup?

If using dried beans, soak them overnight or quick-soak them. This makes them tender and ready for the soup.

What are some tips for properly preparing the vegetables for this soup?

Chop the veggies into small, even pieces. This ensures they cook evenly and the soup has a consistent texture.

What is the ideal consistency for this garlic and white bean soup?

The soup should be creamy and smooth. Adjust the broth or blend it to get the right consistency.

How can this soup be customized to suit different dietary needs?

To make it vegetarian or vegan, use vegetable broth instead of chicken broth. Adjust the spice level with red pepper flakes.

How can this soup be stored and reheated?

Store it in the fridge for up to 5 days or freeze for 3 months. Reheat by warming it on the stovetop or in the microwave. Add broth or water if it’s too thick.

What are some recommended pairings and serving suggestions for this soup?

Serve it with crusty bread, a green salad, or roasted veggies. Add fresh herbs, Parmesan, or olive oil for extra flavor.

What are some common issues that may arise when making this soup, and how can they be addressed?

Issues like too thin or thick soup, or undercooked veggies can be fixed. Adjust the broth, simmer longer, or blend to thicken. Chop veggies evenly for even cooking.

Flavorful Carrot & Turmeric Anti-Inflammatory Soup


Anti Inflammatory Soup

Can a simple, delicious bowl of carrot & turmeric anti inflammatory soup really help reduce inflammation and improve your overall health? Chronic inflammation can lead to serious health issues like heart disease, diabetes, and joint pain. It’s important to add recipes that fight inflammation to your diet. This soup is full of nutrients and anti-inflammatory compounds, making it a great choice for a healthy diet.

Thinking about adding this carrot & turmeric anti inflammatory soup to your meals? It’s a great choice for your health. Its unique mix of ingredients supports your immune system and lowers the risk of chronic diseases. By adding this soup to your diet, you’re taking a step towards better health.

Key Takeaways

  • Chronic inflammation can lead to serious health issues, making it important to add anti-inflammatory foods to your diet.
  • This carrot & turmeric anti inflammatory soup is a tasty and healthy way to fight inflammation and boost your immune system.
  • The soup is naturally gluten-free, dairy-free, and vegan, making it good for many diets.
  • Adding this recipe to your meals can help lower the risk of chronic diseases.
  • The soup can be stored in the fridge for up to 5 days or frozen for up to 2 months, making it easy to include in your diet.
  • By adding this immune-boosting soup to your diet, you’re taking a proactive step towards better health and well-being.

Understanding the Power of Anti Inflammatory Foods

Exploring natural remedies shows how important anti-inflammatory foods are. They help reduce inflammation and improve health. Turmeric benefits stand out, with its strong antioxidants and anti-inflammatory effects helping the liver.

Making a homemade soup with turmeric and other anti-inflammatory foods is tasty and healthy. It only takes 15-20 minutes to make. This soup is full of health benefits.

Some great ingredients for your homemade soup are:

  • Turmeric, with its strong anti-inflammatory effects
  • Carrots, full of antioxidants and fiber
  • Ginger, which helps with inflammation and digestion

Adding these anti-inflammatory foods to your diet can greatly benefit your health. They help reduce inflammation, improve digestion, and make for a delicious meal. A homemade soup with these ingredients is a great choice.

Essential Ingredients for Your Healing Soup

To make a tasty and healthy soup, you need some key ingredients. These are important for making soups that fight inflammation. You’ll need fresh turmeric, carrots, and other veggies. Choose organic and fresh produce for the best taste and health benefits.

Other important ingredients include onions, garlic, and ginger. They add flavor and have anti-inflammatory properties. Adding coconut milk and olive oil can also boost your soup’s nutritional value.

Here are some tips for preparing your ingredients:

  • Choose fresh and organic produce whenever possible
  • Peel and chop your vegetables before adding them to the soup
  • Use a variety of spices and herbs to add flavor and anti-inflammatory properties

By following these tips and using the right ingredients, you can make a healthy soup. It will be delicious and offer many health benefits. Always use fresh and organic ingredients for the best taste and health benefits.

Anti Inflammatory Soup - healing soups

The Health Benefits of Carrot & Turmeric Anti Inflammatory Soup

This delicious and nutritious soup is packed with health benefits. It combines carrots, turmeric, and other ingredients for a powerful effect. It boosts your immune system, improves joint health, and aids digestion. It’s a great example of immune-boosting recipes you can easily add to your diet.

The turmeric in the soup fights inflammation, while carrots add antioxidants. Ginger and garlic add more health benefits, making it a healthy comfort food. It’s perfect for managing inflammation or just nourishing your body.

Some of the key benefits of this soup include:

  • Supporting immune system function
  • Improving joint health and reducing inflammation
  • Aiding in digestive system function and promoting overall well-being

This carrot and turmeric anti-inflammatory soup is a great addition to any meal. Try it and see the benefits of immune-boosting recipes and healthy comfort food for yourself?

inflammation relief

Kitchen Tools and Equipment Needed

To make an easy soup recipe like the carrot and turmeric anti-inflammatory soup, you need some basic kitchen tools. These tools help you prepare and cook the ingredients efficiently. This makes creating healing foods easier.

Some of the necessary tools and equipment include:

  • Large pot for sautéing and simmering the soup
  • Cutting board and knife for chopping the vegetables
  • Measuring cups and spoons for accurate ingredient measurement
  • Immersion blender or regular blender for pureeing the soup
  • Spatula and spoon for stirring and serving

When picking equipment, think about the material and how durable it is. For example, a stainless steel pot is great for cooking soups. It’s non-reactive and easy to clean.

kitchen tools and equipment

With the right kitchen tools and equipment, you can make delicious and nutritious healing foods. This includes easy soup recipes like the carrot and turmeric anti-inflammatory soup. These foods can help support your health and wellbeing.

Tool/Equipment Purpose
Large pot Sautéing and simmering the soup
Cutting board and knife Chopping the vegetables
Measuring cups and spoons Accurate ingredient measurement
Immersion blender or regular blender Pureeing the soup
Spatula and spoon Stirring and serving

Step-by-Step Preparation Guide

To make the carrot and turmeric anti-inflammatory soup, first gather all the ingredients. This superfood soup is full of nutrients and fights inflammation. It makes 4 servings and can be ready in under 30 minutes.

Start by cutting 4-5 medium-large carrots into 2″ chunks. You’ll also need 1 quart of vegetable broth, which you can adjust for the right consistency. Juice from 2 small oranges adds vitamin C, boosting the soup for inflammation for your immune system.

Next, heat 1 tablespoon of olive oil in a pot. Sauté the chopped carrots and onions until they’re tender. Then, add the vegetable broth, turmeric, and ginger, and bring to a boil. Lower the heat and simmer for 20 minutes, or until the carrots are tender.

After cooking, use an immersion blender to puree the soup until smooth. You can also add 1/2 cup of cashew cream or full-fat coconut milk for creaminess. This anti-inflammatory recipe is tasty and good for your health, making it a great meal choice.

Storage and Reheating Tips

After making your healthy soup, like the carrot and turmeric anti-inflammatory soup, it’s key to store and reheat it right. This keeps its nutrients and taste. It’s full of foods that fight inflammation, making it great for your meals.

To keep your soup fresh, put it in an airtight container in the fridge for up to 4 days. You can freeze it for up to 3 months. When you reheat it, do so gently to keep the nutrients and flavors. Here are some tips:

  • Reheat the soup over low heat, whisking constantly, to prevent scorching.
  • Add a splash of water or broth if the soup has thickened too much during storage.
  • Use a thermometer to ensure the soup reaches a safe internal temperature of at least 165°F (74°C).

By following these tips, you can enjoy your healthy soups, like the carrot and turmeric anti-inflammatory soup. They stay nutritious and tasty. This homemade soup is a great example of how to add anti-inflammatory foods to your diet.

Recipe Variations and Adaptations

This carrot and turmeric soup is a great base for many recipe variations. It’s packed with turmeric benefits and anti-inflammatory foods. You can easily change it to fit your dietary needs and tastes.

Try adding spices and herbs to boost the flavor and health benefits. Ginger, garlic, and cilantro are good choices. They add taste and extra health perks. You can also add chicken or tofu to make the soup more filling.

Here are tips for making the recipe fit different diets:

  • Vegan: Use vegan broth and plant-based proteins.
  • Gluten-free: Choose gluten-free spices and avoid gluten.
  • Paleo: Stick to whole, unprocessed foods and avoid grains and legumes.
  • Whole30: Focus on whole foods and avoid added sugars, dairy, and processed items.

This recipe is quick, cooking in under 30 minutes. Sautéing the veggies takes 6-7 minutes. Then, add more veggies and spices for 2-3 minutes. The soup simmers for 15-20 minutes until the veggies are tender.

Each serving has about 175 calories. It has 11g of fat, 16g of sugars, and 2.3g of protein. The fiber is around 8.4g per serving, making it nutritious and filling.

By trying different variations, you can enjoy the many benefits of this soup. It’s a versatile recipe for vegan, gluten-free, paleo, or Whole30 diets. It’s a great way to make a healthy and tasty meal that meets your dietary needs.

Serving Suggestions and Complementary Dishes

There are many ways to serve your carrot and turmeric soup. You can enjoy it as a healing soup on a chilly day. Or, treat it as a healthy comfort food to nourish your body. Adding a swirl of cream or fresh herbs like parsley or cilantro can make it more appealing.

For a fuller meal, try pairing your soup with immune-boosting recipes. A side salad or whole grain bread works well. The goal is to match dishes that enhance your soup’s flavors and textures. Here are some ideas:

  • Gluten-free bread, such as Schar, for a crunchy accompaniment
  • A side of roasted vegetables, such as carrots or sweet potatoes, for added fiber and nutrients
  • A simple green salad with a light vinaigrette, for a refreshing contrast to the rich soup

Creating a balanced meal is key. Pairing your healthy comfort food with the right dishes can make your meal satisfying and enjoyable.

So, don’t be afraid to try new things. Experiment with different serving ideas and dishes to find your favorite way to enjoy your carrot and turmeric soup. With a bit of practice, you’ll master making delicious, nutritious meals that make you feel great.

Complementary Dish Description
Gluten-free bread Crunchy accompaniment to soup
Roasted vegetables Added fiber and nutrients
Green salad Refreshing contrast to rich soup

Conclusion: Embracing the Healing Power of Homemade Soup

The carrot and turmeric anti-inflammatory soup is not just tasty. It’s also a strong ally in the battle against inflammation. It uses the natural goodness of turmeric and carrots to nourish your body and boost your health.

Adding this soup to your daily meals can bring many benefits. It can ease joint pain and make your immune system stronger. Its mix of anti-inflammatory effects and nutrients makes it a true health elixir.

Choosing homemade soup for your health is a simple yet powerful step. Making nourishing meals not only pleases your taste buds but also invests in your health for the long run. Let this carrot and turmeric soup be the first step towards a healthier, inflammation-free life.

FAQ

What is the carrot and turmeric anti-inflammatory soup?

This soup is a tasty and healthy mix of turmeric and carrots. It’s made at home and is full of ingredients that fight inflammation. It’s great for your health.

What are the benefits of the carrot and turmeric anti-inflammatory soup?

This soup boosts your immune system, helps your joints, and aids digestion. Turmeric and carrots in it are anti-inflammatory. They help reduce body inflammation.

What are the essential ingredients needed to make the carrot and turmeric anti-inflammatory soup?

You need fresh turmeric, carrots, onions, garlic, and vegetable broth. Also, add herbs and spices for flavor. Using fresh ingredients makes the soup better.

How do I prepare the carrot and turmeric anti-inflammatory soup?

First, chop and sauté the veggies like carrots and onions. Then, add turmeric and spices. Pour in vegetable broth and simmer until tender. Blend for a smooth soup.

How can I store and reheat the carrot and turmeric anti-inflammatory soup?

Store it in an airtight container in the fridge for 4-5 days. Reheat on the stovetop or microwave. Be careful not to overheat to keep nutrients and flavors.

Are there any recipe variations or adaptations for the carrot and turmeric anti-inflammatory soup?

Yes, you can change it up by adding spices, herbs, or other veggies. This way, you can make it your own.

How can I serve the carrot and turmeric anti-inflammatory soup?

Serve it alone for a comforting meal or with a salad, bread, or protein. Try garnishes like herbs, olive oil, or nuts for extra flavor and look.

Delicious Zucchini Bread Recipe – Moist & Flavorful


Zucchini Bread

What makes a perfect zucchini bread recipe? Is it the grated zucchini, the sugar, or the baking time? To make delicious zucchini bread, using the right ingredients and following a simple recipe is key. This recipe makes 2 loaves, ready in about 45 minutes to 1 hour.

It needs 2 cups of flour, 1 cup of light brown sugar, and ½ cup of granulated sugar. It’s a great treat for any time of the year.

This recipe is easy to make with common ingredients. It’s perfect for using up fresh zucchini. You can make it ahead for a quick snack or freeze it for up to 3 months.

With an average rating of 4.95 out of 5 from 2,529 votes, it’s a must-try for moist zucchini bread.

Key Takeaways

  • This zucchini bread recipe yields 2 loaves of moist and flavorful bread.
  • The recipe requires a total of 2 cups of flour and 1 and 1/2 cups of shredded zucchini.
  • The baking time is approximately 45 minutes to 1 hour, with an internal temperature of 205ºF or above indicating doneness.
  • The recipe can be frozen for up to 3 months and is perfect for using up garden-fresh zucchini.
  • This delicious zucchini bread recipe is easy to make and has an average rating of 4.95 out of 5 from 2,529 votes.
  • The recipe includes 1 cup of light brown sugar and ½ cup of granulated sugar, making it a perfect treat for any time of the year.
  • The zucchini flavor is nearly indiscernible, highlighting its role in maintaining moisture in the bread.

Why Zucchini Bread Is the Perfect Year-Round Treat

Zucchini bread is a tasty treat that’s good all year. It has nutritional benefits and is seasonally versatile. This makes it a favorite among many. Zucchini adds moisture without changing the taste, making it a healthy and tasty option.

It’s also great because of its storage and shelf life. You can make it in big batches and freeze it. This makes it perfect for meal prep or as a gift. Its long storage and shelf life means you can enjoy it all year.

The zucchini bread benefits include its moisture, healthy ingredients, and seasonal versatility. It’s a great choice for a healthy snack or dessert. With its nutritional benefits and storage and shelf life, it’s clear why it’s so popular.

tag for section
tags:

tag_for section
tags:

    When it comes to making the perfect zucchini bread, having the right ingredients is key. Let’s take a closer look at the essential ingredients you’ll need to create a moist and flavorful loaf.

    Essential Ingredients for Zucchini Bread

    Here are the must-have ingredients for a delicious zucchini bread:

    • Zucchini: Fresh and grated zucchini adds moisture and a subtle sweetness to the bread.
    • All-purpose flour: This type of flour provides structure and texture to the bread.
    • Baking powder: It helps the bread rise and gives it a light and fluffy texture.
    • Salt: A pinch of salt enhances the flavors and balances the sweetness of the bread.
    • Vegetable oil: It adds moisture and helps the bread stay moist and tender.
    • Granulated sugar: A small amount of sugar adds sweetness and helps the bread brown during baking.
    • Eggs: Eggs provide moisture, richness, and help bind the ingredients together.
    • Vanilla extract: It adds a hint of sweetness and a subtle vanilla flavor to the bread.

    These ingredients come together to create a delicious and moist zucchini bread that is perfect for any occasion.

    essential ingredients

    Perfect Zucchini Bread Recipe

    Now that you know the essential ingredients, it’s time to put them together in a recipe. Here’s a simple recipe for the perfect zucchini bread:

    1. Preheat your oven to 350°F (180°C) and grease a 9×5-inch loaf pan.
    2. In a large bowl, whisk together the grated zucchini, all-purpose flour, baking powder, salt, vegetable oil, granulated sugar, eggs, and vanilla extract.
    3. Stir until well combined and the batter is smooth.
    4. Pour the batter into the prepared loaf pan and smooth the top.
    5. Bake for 45-50 minutes or until a toothpick inserted in the center comes out clean.
    6. Remove the bread from the oven and let it cool in the pan for 10 minutes.
    7. Transfer the bread to a wire rack and let it cool completely before slicing.

    With these simple steps, you’ll have a delicious and moist zucchini bread that’s perfect for enjoying on its own or as a side dish.

    Kitchen Tools and Equipment Needed

    To make delicious zucchini bread, you’ll need the right kitchen tools and equipment. Having the necessary baking items can make a big difference in the outcome of your bread. A box grater is essential for shredding the zucchini, while a loaf pan is required for baking the bread. The loaf pan should be 9-by-5 inches in size to ensure the bread bakes evenly.

    In addition to these must-have baking items, there are some optional but helpful tools that can make the process easier. These include a mixer for creaming together the sugar and eggs, and a whisk for mixing the dry ingredients. A digital scale can also be useful for measuring the ingredients accurately.

    kitchen tools

    Some other kitchen tools and equipment that you may find useful when making zucchini bread include a measuring cups, a silicone spatula, and a wire rack for cooling the bread. By having these baking items and kitchen tools on hand, you’ll be well-equipped to make a delicious and moist zucchini bread. The right zucchini bread equipment can help you to achieve the perfect texture and flavor.

    Here are some of the key kitchen tools and equipment you’ll need:

    • Box grater
    • Loaf pan (9-by-5 inches)
    • Mixer (optional)
    • Whisk (optional)
    • Digital scale (optional)
    • Measuring cups
    • Silicone spatula
    • Wire rack

    By investing in these kitchen tools and baking items, you’ll be able to make a wide range of delicious breads, including zucchini bread. The right kitchen tools and equipment can make all the difference in the quality of your baked goods, so it’s worth taking the time to find the best ones for your needs.

    The Best Zucchini Bread Recipe: Step-by-Step Guide

    To make the best zucchini bread, follow this easy zucchini bread recipe and step-by-step guide. Start by preheating the oven to 350°F (177°C). Then, prepare the ingredients, including 1 and 1/2 cups (190 grams) of flour, 1/2 cup (120 ml) of oil, and 1 cup (125 grams) of shredded zucchini.

    The key to a moist and flavorful zucchini bread is to not overmix the batter. Mix the wet and dry ingredients separately and then gently fold them together. Add any optional ingredients, such as chopped walnuts or chocolate chips, and pour the batter into a greased loaf pan.

    Bake the zucchini bread for 45-60 minutes, or until a toothpick inserted into the center comes out clean. Remove the bread from the oven and let it cool in the pan for 15 minutes before transferring it to a wire rack to cool completely.

    easy zucchini bread recipe

    This best zucchini bread recipe yields a delicious and moist bread that is perfect for snacking or serving as a side dish. With its easy zucchini bread recipe and step-by-step guide, you’ll be able to make a delicious zucchini bread that everyone will love.

    Some tips to keep in mind when making this easy zucchini bread recipe include:

    • Use fresh and high-quality ingredients for the best flavor.
    • Don’t overmix the batter to ensure a tender crumb.
    • Let the bread cool completely before slicing and serving.

    Tips for Creating Moist and Flavorful Zucchini Bread

    To make a moist and tasty zucchini bread, follow some key tips. Start by grating and squeezing the zucchini to get rid of extra moisture. This step is key to avoiding a soggy texture.

    Controlling moisture is also important. Use the right amount of oil and butter. Adding both white and brown sugar can make the bread moister and tastier. Sour cream also helps keep the bread moist and flavorful.

    Proper Zucchini Preparation

    Grating and squeezing the zucchini is a simple trick to remove excess moisture. You can use a cheesecloth or a clean kitchen towel for this. Remember, zucchini is mostly water, which affects the bread’s moisture.

    Moisture Control Techniques

    Choosing the right amount of oil and butter is key to the bread’s moisture. A good recipe might use 1/2 cup of butter and 1/4 cup of oil. Adding sour cream can also boost moisture and taste.

    By using these tips, you can make a delicious, moist zucchini bread. Make sure to mix the dry and wet ingredients well. But don’t overmix the batter for the best results.

    Ingredient Quantity
    Zucchini 2 cups (12 ounces)
    Granulated Sugar 1 cup
    Brown Sugar 3/4 cup
    Butter 1/2 cup
    Oil 1/4 cup

    Popular Variations and Add-Ins

    Zucchini bread can be made in many ways, from sweet treats like chocolate chip zucchini bread to savory options with nuts and seeds. There are endless choices for add-ins, letting bakers try out different flavors and textures. Adding chopped walnuts or pecans gives a nice crunch and flavor contrast.

    For those who love sweets, chocolate chip zucchini bread is perfect. It mixes zucchini’s natural sweetness with chocolate chips for a moist, rich treat. Dried cranberries or cherries can also add a fruity twist to the recipe.

    Some popular zucchini bread variations include:

    • Chocolate chip zucchini bread
    • Nut and seed options, such as walnuts or pumpkin seeds
    • Gluten-free adaptations, using alternative flours like almond or coconut flour

    These variations help create a wide range of zucchini bread recipes. From classic to innovative, bakers can experiment with different add-ins and ingredients. This way, they can make unique and delicious zucchini bread that suits their taste.

    Variation Description
    Chocolate Chip Moist and decadent, with the added sweetness of chocolate chips
    Nut and Seed Crunchy and flavorful, with the added texture of nuts and seeds
    Gluten-Free Perfect Fritz those with dietary restrictions, using alternative flours

    tag for the section>
    [
    [Your content planning_process starts here:

    tag for the_key SEO keywords to be included in the sections before.

    [Your content planning_process starts here:

    tag for the_key SEO keywords to be included in the sections before.

    [Your content planning_process starts here:

    tag for the section>
    [
    [Your content planning_process starts here:

    tag for the_content>
    [
    [Your content planning_process starts here:

    Storage and Freezing Guidelines

    Keeping zucchini bread fresh and tasty is key. It’s important to store and freeze it right. You can keep it at room temperature for 2-3 days. Refrigeration can make it last up to a week.

    To freeze zucchini bread, follow these steps. Wrap the loaf in plastic wrap and put it in a resealable bag. This helps keep it fresh for up to 3 months. Remember, zucchini has a lot of water, so draining it before mixing is a must.

    Here are some tips for zucchini bread storage and freezing:

    • Store at room temperature for up to 2-3 days
    • Refrigerate for up to 1 week
    • Freeze for up to 3 months
    • Wrap the loaf in plastic wrap and place it in a resealable bag

    When you’re ready to eat your frozen zucchini bread, thaw it. You can thaw it at room temperature or in the microwave. Slices thaw in 30 minutes at room temperature or 20 seconds in the microwave. These tips help keep your zucchini bread fresh and tasty longer.

    Serving Suggestions and Pairings

    There are many ways to serve zucchini bread. For breakfast, try it with coffee or tea and hard-boiled eggs or a protein shake. This mix of flavors and textures makes for a great morning.

    For snacks, zucchini bread goes well with cream cheese or peanut butter. Add fresh fruit or nuts for a quick energy boost. Popular zucchini bread pairings include smoked salmon, roast beef, or turkey, adding a savory touch.

    Here are some more breakfast and snack ideas for zucchini bread:

    • Avocado toast with a slice of zucchini bread on the side
    • A breakfast sandwich with zucchini bread as the “bun”
    • Zucchini bread with yogurt and granola for a mid-morning snack

    Zucchini bread is perfect for any time of day. It’s great for a quick breakfast, a satisfying snack, or a tasty dessert. So, get creative with your zucchini bread pairings and enjoy!

    Pairing Idea Description
    Smoked Salmon A delicious and protein-rich pairing that’s perfect for breakfast or brunch
    Roast Beef A hearty and satisfying pairing that’s great for a quick lunch or snack
    Fresh Fruit A light and refreshing pairing that’s perfect for a healthy snack or dessert

    Conclusion: Mastering Your Homemade Zucchini Bread Journey

    [12 section>

    Final Thoughts and Recommendations

    As we wrap up our exploration of zucchini bread, let’s talk about baking it in muffin form. These individual treats are great for quick snacks or with your morning coffee. The third web source has a simple recipe for zucchini bread muffins that you can customize to your liking.

    For some last zucchini bread tips, make sure to grate your zucchini right. This helps avoid a soggy texture. Also, adding a sprinkle of oats or chopped walnuts on top adds a nice crunch. With these final thoughts and tips, you’re ready to bake the perfect, moist, and tasty zucchini bread.

    FAQ

    What are the key benefits of zucchini bread?

    Zucchini bread is moist and full of flavor. It’s great for using up fresh zucchini from your garden. It’s also easy to make and uses healthy ingredients.

    What are the essential ingredients needed for perfect zucchini bread?

    For perfect zucchini bread, you’ll need grated zucchini, flour, baking soda, and baking powder. Don’t forget sugar, eggs, oil or melted butter, and spices like cinnamon and vanilla extract. Using fresh ingredients is key for the best taste and texture.

    What kitchen tools and equipment are needed to make zucchini bread?

    You’ll need a box grater for zucchini, a loaf pan, and mixing bowls and a whisk. A food processor and stand mixer can make the process easier.

    What are some tips for creating moist and flavorful zucchini bread?

    To make moist and flavorful zucchini bread, grate and squeeze the zucchini properly. Avoid overmixing the batter. Using the right mixing methods helps too.

    What are some popular variations and add-ins for zucchini bread?

    Popular zucchini bread variations include chocolate chip and nut and seed options. Gluten-free versions are also popular. These add-ins enhance the bread’s flavor and texture.

    How should zucchini bread be stored and frozen?

    For up to 4 days, store zucchini bread at room temperature in an airtight container. For longer storage, freeze it for up to 3 months. Use proper thawing methods to keep it fresh.

    What are some serving suggestions and pairing ideas for zucchini bread?

    Zucchini bread is great for breakfast, snacks, or dessert. Enjoy it with coffee or tea. Try it with cream cheese, honey, or powdered sugar for extra flavor.