Welcome To Soup Meets Bowl - The Best Soup Recipes & More

Warm Up With Our Latest Soup Recipes

Butternut Squash & Apple Soup: Warm And Comforting


Butternut Squash & Apple Soup

Have you ever thought about why Butternut Squash & Apple Soup is so popular in the fall? It’s a mix of earthy squash, sweet apples, and fresh sage. This makes it perfect for cozy dinners or holiday meals. It’s also packed with nutrients, making it a great choice for your fall menu.

So, what makes Butternut Squash & Apple Soup stand out? It’s the roasted butternut squash, sautéed apples, and a touch of sage. This unique mix of flavors will have you coming back for more. It’s ideal for a comforting meal or as a starter for your holiday feast.

Key Takeaways

  • Butternut Squash & Apple Soup is a delicious and comforting fall soup idea
  • The soup is made with roasted butternut squash, sautéed apples, and fresh sage
  • It’s a great choice for cozy dinners or holiday gatherings
  • The soup can be stored in the refrigerator for up to 4 days or frozen for up to 3 months
  • Butternut Squash & Apple Soup is a nutritious and flavorful addition to your fall menu

The Perfect Marriage of Fall Flavors

As the seasons change, our taste buds start to crave warm, comforting flavors. Butternut squash and apple soup is a delicious and healthy choice for fall. The roasted squash and sweet apples mix with fresh sage for a perfect taste. This tradition is tasty and good for your health.

Fall flavors shine when you use ingredients that are in season. Butternut squash, apples, and sage are key for fall cooking. They’re easy to find at farmers’ markets or grocery stores. Adding onions, carrots, and celery brings more flavor and texture to the soup.

Seasonal cooking is not just about taste. It’s also good for your health. Foods like butternut squash and apples are full of vitamins and fiber. They help keep your immune system strong and provide essential nutrients.

Seasonal cooking also has other benefits. It supports local farmers and the local economy. It gives you fresh, flavorful ingredients. And it helps reduce food waste and supports sustainable agriculture.

Adding healthy soup recipes to your diet is a great way to enjoy fall. Butternut squash and apple soup is a perfect choice. Its earthy and sweet flavors will make it a favorite.

Health Benefits of Butternut Squash & Apple Soup

This nourishing soup is full of good stuff, making it a healthy meal choice. It has squash and apples, which give you complex carbs and important nutrients. You can make this healthy soup recipe in just 45 minutes of prep and 30 minutes of cooking.

This soup is good for you in many ways. Butternut squash has antioxidants that can help with inflammation and joint pain. It also has beta-carotene and vitamin A, which are great for your eyes and might help prevent macular degeneration. Plus, it has about 500 mg of potassium per cup, which can help lower blood pressure.

The main health benefits of this soup are:
* It’s full of antioxidants to fight inflammation
* It’s rich in beta-carotene and vitamin A for your eyes
* It’s a good source of potassium to help with blood pressure
* It has about 7 grams of dietary fiber per cup, which is good for your digestion

In summary, the Butternut Squash & Apple Soup is a tasty and healthy soup recipe. It’s perfect for a nourishing and seasonal soup option.

Essential Ingredients for Your Soup

Choosing the right ingredients is key to making tasty and easy soup recipes. For a vegetarian soup, use fresh, seasonal produce. Butternut squash and apples are great for a fall soup, adding to a hearty meal.

Start by picking a firm, unblemished butternut squash. You can use two small or one large squash. For apples, Granny Smith or Honeycrisp work well, balancing sweetness and tartness.

Key Ingredients to Consider

  • Butternut squash (2 small or 1 large)
  • Apples (Granny Smith or Honeycrisp)
  • Vegetable broth
  • Coconut milk (for a vegan version)
  • Spices (such as cinnamon, nutmeg, and ginger)

These ingredients make a delicious, easy soup perfect for fall. It’s great for vegetarians or anyone wanting a comforting meal. Prep time is 35 minutes, and cooking is 10-12 minutes. Soon, you’ll have a warm, comforting bowl of soup ready.

Kitchen Tools You’ll Need

Creating the perfect fall soup ideas starts with the right kitchen tools. Whether you’re a pro or new to cooking, these tools are key. They help make a delicious butternut squash and apple soup.

  • Large Soup Pot: A sturdy, large pot is essential for simmering your soup. Look for one with a heavy bottom to ensure even heating.
  • Baking Sheet: Use this to roast your butternut squash. A baking sheet with sides will prevent any drips or spills during roasting.
  • Immersion Blender: This tool is perfect for blending your soup to a smooth consistency without having to transfer it to a separate blender.
  • Airtight Containers: Once your soup is ready, store it in airtight containers to keep it fresh for up to 5 days in the refrigerator or up to 3 months in the freezer.

Remember to get your other essential kitchen tools. You’ll need a sharp knife for chopping and a cutting board for prepping. With these tools, you’re set to make this easy soup recipe and enjoy fall’s rich flavors.

Using these kitchen tools ensures your soup is perfect every time. They’re great for a cozy dinner or lunch on the go. Now, you’re ready to prepare your ingredients and cook the soup to perfection.

Step-by-Step Cooking Instructions

To make this tasty soup, follow some simple steps. First, heat your oven to 350°F. Then, roast the squash to bring out its sweetness. This step is key to the soup’s flavor.

After that, cook the veggies until they’re soft. Then, simmer them with stock and spices for 25 minutes. Follow the instructions carefully for the best taste. Blend the soup for a smooth texture and add milk for creaminess.

Here’s a breakdown of the cooking process:

  • Prep Time: 10 minutes
  • Cook Time: 25 minutes
  • Total Time: 35 minutes

Remember, use 3 parts butternut squash to 1 part apples. You can also add ginger or turmeric for extra flavor. These steps will help you make a delicious fall soup.

By following these steps and using the right ingredients, you’ll make a tasty fall soup. Try it out and see how much you enjoy it. Its creamy texture and sweet, savory flavors will make it a favorite.

Ingredient Quantity
Butternut Squash 6 cups
Apples 1 cup
Carrots 1 cup
Onion ½ cup

Adding Your Personal Touch

Exploring fall soup ideas is exciting. Seasonal soups capture the essence of the season. Start with a delicious butternut squash and apple soup. Then, add your personal touch to make it special.

Garnishing ideas can elevate your soup’s look and taste. Try adding a pinch of cinnamon or nutmeg for warmth. Use toasted pumpkin seeds for crunch or crème fraîche for elegance. These touches make your soup both tasty and beautiful.

Popular garnishing ideas include:

  • Toasted pumpkin seeds
  • Crème fraîche
  • Crispy sage leaves

These ingredients can make your soup unique. By trying different garnishes and seasonings, you can create a special version of your soup.

fall soup ideas

Creating a memorable seasonal soup is all about balance. Use your favorite garnishes and seasonings. This way, your butternut squash and apple soup will be a favorite in your fall soup ideas collection.

Common Cooking Challenges and Solutions

Creating fall soup ideas like butternut squash and apple soup can face challenges. Whether you’re new or experienced, common problems can pop up. Here’s how to overcome them.

Challenge 1: Unevenly Roasted Squash

Unevenly roasted squash might be due to not preheating the oven right. Always preheat before putting the squash in. This ensures even cooking. For the best results, cut the squash evenly and lay them flat on the baking sheet.

Challenge 2: Soup Too Thick

If your soup is too thick, just add a little stock or water. Start with one tablespoon at a time until it’s right. This trick keeps the flavor without changing it.

Challenge 3: Overly Sweet Soup

Too sweet soup? Add a bit of cinnamon or apple cider vinegar. It balances the flavors without making it too strong.

Challenge 4: Tough Apple Pieces

For tender apples, use Fuji or Gala. Or cook them for less time or add them late. This keeps their texture good.

By tackling these common problems, your soups will always be great. Remember, the more you practice, the better you’ll get. With these tips, you’ll make delicious fall soups in no time!

Storage and Reheating Tips

Keep enjoying your fall soup ideas even after the first time. Proper storage and reheating are key. These tips will help keep your soup’s flavor and texture just right.

Freezing Methods for Fall Soup Ideas

Freezing is a smart way to keep your soups fresh for up to 3 months. Here’s how to freeze them correctly:

  • Let the soup cool down to room temperature before freezing.
  • Put it in airtight containers or freezer-safe bags, leaving room for expansion.
  • Mark the date and freeze for up to 3 months.

Best Reheating Practices

Reheating your soups doesn’t have to be hard. Just follow these easy steps:

  • Store it in the fridge in an airtight container for up to 4 days.
  • Reheat it in a saucepan on low heat, stirring now and then.
  • If it gets too thick, add a bit of broth or water.

With these tips, you can enjoy your soups all season. Meal prep or freeze for later, and your soups will stay tasty and healthy.

Fall soup storage tips

Serving Suggestions and Pairings

Make your butternut squash and apple soup special with great serving ideas. This soup is perfect with many foods, making it a complete meal. Try it with sourdough bread or cornbread for a filling choice. Or, pair it with a seasonal salad for a lighter option.

This fall soup is great for any meal, from a cozy lunch to a festive dinner. It’s perfect with sandwiches for a satisfying meal. Also, try it with autumn salads for a burst of flavor.

The butternut squash and apple soup goes well with many proteins like pork, chicken, beef, and seafood. It’s great as a starter or side dish. Don’t forget to add garnishes and toppings like croutons, sautéed mushrooms, or cream for extra flavor and texture.

Authentic Irish Soda Bread Recipe: Easy & Delicious


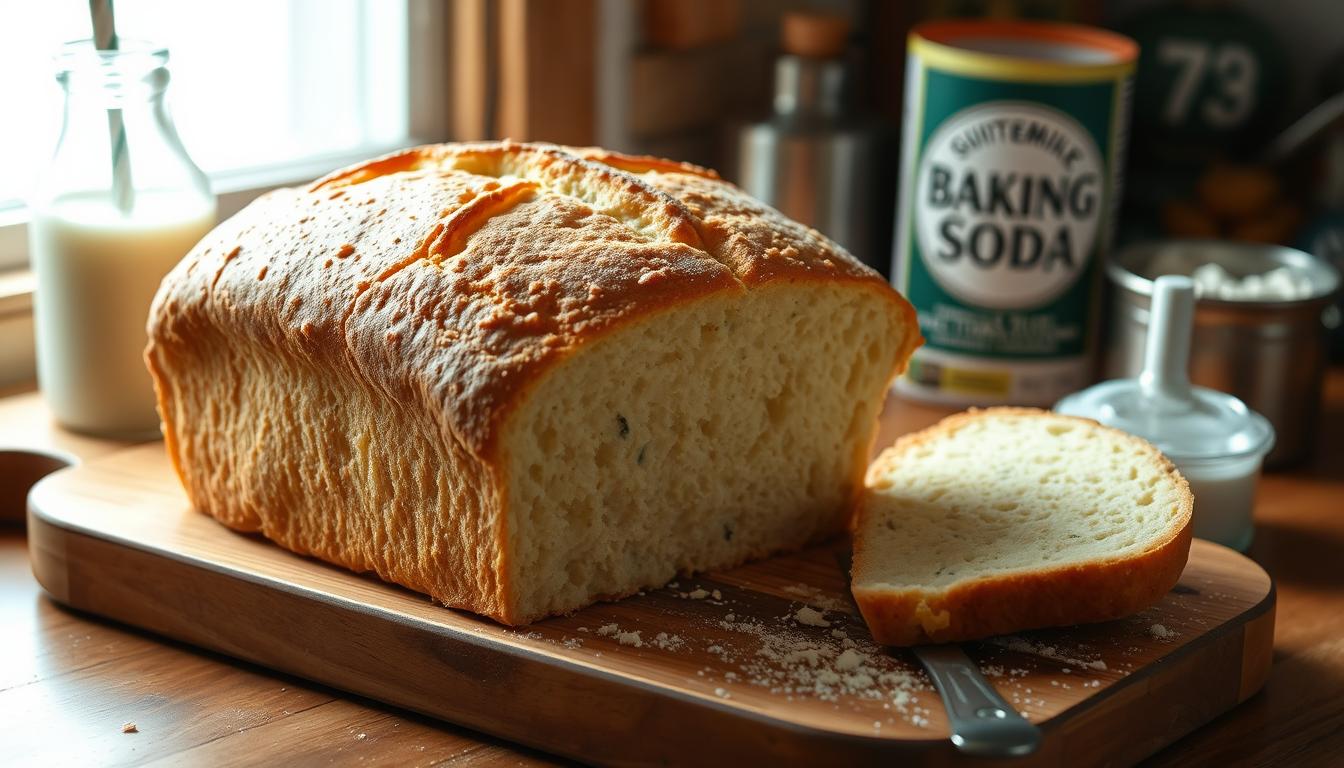
soda bread recipe​

What makes a true Irish soda bread recipe? How can you make this tasty bread at home? Irish soda bread is loved for its history and taste. It’s also easy to make, perfect for anyone wanting to try it.

Key Takeaways

  • You can make an authentic Irish soda bread recipe at home with just a few ingredients, including an easy Irish soda bread recipe.
  • A homemade Irish soda bread recipe typically includes flour, baking soda, salt, and buttermilk.
  • The bread can be prepared in about one hour, making it a great choice for a quick and easy homemade Irish soda bread.
  • Irish soda bread is best enjoyed the day it is made, but it can be stored at room temperature for up to 2 days or frozen for up to 3 months.
  • You can customize your Irish soda bread recipe by adding optional ingredients, such as raisins, to create a unique homemade Irish soda bread flavor.
  • A traditional Irish soda bread recipe yields approximately 10 servings, each with approximately 654 calories.
  • The Irish soda bread recipe is a great choice for those looking for a delicious and easy-to-make bread, and with an easy Irish soda bread recipe, you can make it at home.

The Rich History of Irish Soda Bread

Exploring the traditional Irish soda bread recipe is fascinating. It’s important to know the history behind this beloved bread. The story of Irish soda bread starts in 19th-century Ireland, where it became a staple in many homes.

In Irish households, fresh bread was a daily occurrence. The traditional Irish soda bread recipe was a favorite among locals. The introduction of baking soda in the 1830s made baking at home more affordable.

The traditional Irish soda bread recipe has three main ingredients: flour, buttermilk/soured milk, and baking soda. Buttermilk, which can be replaced with milk and vinegar, shows the importance of acidity in making bread. As you learn about the history of Irish soda bread, you’ll see its importance in Irish cuisine and culture.

Knowing the origins and cultural significance of Irish soda bread makes you appreciate the traditional recipe more. By exploring its history, you’ll understand the beloved bread’s place in Irish tradition better.

Essential Ingredients for Traditional Irish Soda Bread

To make a delicious traditional Irish soda bread, you need the right ingredients. You’ll need flour, baking soda, salt, and buttermilk. These ingredients create a chemical reaction that makes the bread light and airy.

The traditional recipe calls for 4 to 4 1/2 cups of all-purpose flour, 1 tablespoon of sugar, 1 teaspoon of salt, and 1 teaspoon of baking soda. You’ll also need 4 tablespoons of cubed and slightly softened butter, and 1 3/4 cups of buttermilk. Some recipes might include optional ingredients like 1 cup of currants or raisins, and 1 large egg, lightly beaten.

Here are the essential ingredients you’ll need:

  • 4 cups of all-purpose flour
  • 1 teaspoon of baking soda
  • 1 teaspoon of salt
  • 1 3/4 cups of buttermilk
  • 4 tablespoons of cubed and slightly softened butter

Using high-quality ingredients is key to making a delicious traditional Irish soda bread. With these ingredients, you can create a tasty bread that’s perfect for any meal.

Kitchen Tools and Equipment Needed

To bake delicious Irish soda bread, you’ll need the right tools and equipment. Having the right irish soda bread equipment can greatly improve your bread’s taste. The good news is, you don’t need any special irish soda bread tools to start.

You’ll need a large mixing bowl, measuring cups, and a baking sheet. A whisk, a wooden spoon, and a sharp knife are also necessary for shaping the dough. For better results, consider a stand mixer or a pastry blender. These tools can make mixing and kneading easier, leading to a lighter, fluffier texture.

Here’s a list of the essential kitchen tools and equipment you’ll need:

  • Mixing bowl
  • Measuring cups
  • Baking sheet
  • Whisk
  • Wooden spoon
  • Sharp knife

Optional tools include:

  • Stand mixer
  • Pastry blender

With the right irish soda bread equipment and tools, you’re ready to bake delicious Irish soda bread. Choose high-quality tools that will last. Don’t be afraid to try new ingredients and techniques to make your own unique recipes.

The Perfect Irish Soda Bread Recipe

To make a tasty irish soda bread recipe, just follow a few easy steps. It takes about 10 minutes to prepare and 50-55 minutes to cook. In total, it’s about 1 hour and 5 minutes from start to finish, making 12 slices per loaf.

For this homemade irish soda bread recipe, you’ll need a few ingredients. You’ll need 4 cups of all-purpose flour, 1/4 cup of granulated sugar, and 1 teaspoon of sea salt. Also, 1 teaspoon of baking soda, 6 tablespoons of cold unsalted butter, and 1 3/4 cups of cold low-fat buttermilk are required. Don’t forget 1 large cold egg and 1 cup of raisins or dried cranberries, which are optional.

First, preheat your oven to 400°F (204°C). In a big bowl, mix together the flour, sugar, salt, and baking soda. Then, add the cold butter and mix it into the dry ingredients until it looks like coarse crumbs. Make a hole in the middle and pour in the buttermilk. Mix until it forms a shaggy dough.

Turn the dough onto a floured surface and knead for 30 seconds. This makes the dough smooth and pliable. Shape it into a round loaf and put it on a baking sheet lined with parchment paper. Cut a deep cross on top and bake for 45-55 minutes. The bread should be golden brown and sound hollow when tapped.

Common Mistakes to Avoid

When baking Irish soda bread, it’s key to know the common mistakes. Overmixing the dough is a big one. It makes the bread tough and dense. To fix this, mix the ingredients just until they form a shaggy mass. Then, gently knead the dough a few times until it’s a cohesive ball.

Another mistake is using the wrong flour. Irish soda bread needs cake flour or pastry flour with 9% or lower protein. Using higher-protein flour can make the bread chewy or dense. By following these irish soda bread tips, you can make a delicious and authentic loaf.

Here are some more tips to remember:

  • Use fresh baking soda for the bread to rise right
  • Don’t overbake the bread – it should be golden brown and sound hollow when tapped on the bottom
  • Use a deep cross cut on the top of the dough to allow for even baking and steam escape

By avoiding these common mistakes and following these irish soda bread tips, you can make a delicious and authentic Irish soda bread. It’s perfect for serving to family and friends.

Mastering the Cross-Cut Technique

To get the perfect irish soda bread cross-cut, you need to know the traditional meaning. The cross-cut helps the bread expand without splitting and looks traditional. When baking irish soda bread, cut a cross into the dough before baking.

This step is key for a beautiful and tasty loaf of irish soda bread. Cutting a cross lets the bread expand evenly and look stunning. To master this, cut a deep cross into the dough but not too deep to harm the bread’s structure.

soda bread recipe​ - irish soda bread cross-cut

  • Use a sharp knife or razor blade to cut the cross, as a dull blade can tear the dough.
  • Cut the cross at a 45-degree angle to create a clean and even cut.
  • Make sure the cross is deep enough to allow the bread to expand, but not so deep that it compromises the structure of the bread.

By following these tips and practicing the irish soda bread technique, you’ll make a beautiful and delicious loaf. Use the right ingredients and techniques for the best results. Don’t be afraid to try new things to make your irish soda bread unique.

Baking Times and Temperature Guide

Temperature is key when baking irish soda bread. The best temperature is between 425°F to 450°F. Make sure to preheat your oven to the right temperature before baking.

The baking time for irish soda bread is usually 35-45 minutes. It’s important to watch the bread closely. Overcooking can make it dry and chalky. Undercooking can make it soggy and doughy.

Here are some tips for perfect irish soda bread:

  • Use a leave-in probe thermometer to ensure the internal temperature reaches 200-205°F.
  • Preheat your oven to 425°F before baking.
  • Bake the bread for 30 minutes covered, then 14 minutes uncovered.

By following these tips and using the right temperature, you’ll get a delicious, perfectly baked loaf of irish soda bread.

Traditional Variations and Regional Differences

Exploring Irish soda bread reveals a variety of irish soda bread variations. These show the country’s rich cultural heritage. Northern Irish soda bread, known as soda farls, differs from Southern round loaves with a ‘X’ on top.

The irish soda bread regional differences go beyond shape and ingredients. They also include the type of flour used. Northern Irish soda bread often uses soft wheat flour. In contrast, Southern regions might mix white and whole wheat flour.

Some popular irish soda bread variations include brown soda bread, golden soda bread, and spotted dog. Each has its own flavor and texture.

Some notable irish soda bread regional differences and variations include:

  • Brown soda bread: made with a blend of white and whole wheat flour
  • Golden soda bread: replaces some of the flour with yellow cornmeal
  • Spotted dog: includes raisins or currants for added sweetness
  • Soda scones: rolled out and cut into rounds for baking
  • Treacle bread: lightly sweetened with treacle and flavored with ground ginger

These irish soda bread variations and regional differences show the bread’s versatility. They also highlight the creativity of Irish bakers. Whether you prefer traditional or adventurous baking, there’s an irish soda bread variation for you to try.

Storage Tips and Shelf Life

Storing irish soda bread right is key to keeping it fresh. You want your bread to stay soft and tasty. Knowing how to store it is important.

Store your irish soda bread in an airtight container at room temperature for 3 days. If you want to keep it longer, slice it and freeze it for a month. This way, your bread stays fresh for a longer time.

irish soda bread storage

Short-term Storage

For short-term storage, keep the bread in a cool, dry spot. Use an airtight container to keep air out. You can also wrap it in plastic or foil to keep it fresh.

Freezing Methods

Freezing is great for keeping irish soda bread fresh longer. Just slice it, put it in a freezer-safe bag, and freeze. When you’re ready, thaw it at room temperature or reheat in the oven.

By following these tips, you can enjoy your irish soda bread for a longer time. Always check for mold or staleness before eating. Proper storage ensures your bread stays fresh and tasty.

Serving Suggestions and Pairings

Irish soda bread offers endless serving options. Enjoy it with a traditional Irish breakfast or as a base for snacks and meals. For a classic irish soda bread serving, pair it with strong cheeses like aged cheddar or Irish Cashel blue. Smoked salmon or trout also pair well, thanks to the bread’s slightly sour taste and dense texture.

Irish soda bread is also great for modern dishes. Use it to make croutons for salads or as a base for sandwiches and paninis. Its mild flavor and soft texture pair well with a variety of ingredients. Try it with meats, cheeses, vegetables, or spreads. Some favorites include:

  • Bitter Seville orange marmalade or blackcurrant jam
  • Chopped nuts or sunflower seeds, such as pumpkin seeds
  • Smoked meats, such as bacon or ham
  • Hearty soups, like Irish stew or creamy tomato soup

Looking for a traditional or modern take on Irish soda bread? The key is finding the right balance of flavors and textures. With its rich history and versatility, Irish soda bread is perfect for any meal or occasion. So, why not get creative and try some new irish soda bread pairings today?

Troubleshooting Your Irish Soda Bread

Baking Irish soda bread can sometimes lead to common problems. Irish soda bread troubleshooting helps solve these issues. A dense or heavy texture often comes from old or inactive baking soda.

To fix this, replace your baking soda every 6-12 months. Uneven texture can also happen if you overmix the dough. To avoid this, mix the ingredients just until they form a shaggy mass. Then, let the dough rest for a few minutes before kneading.

Here are some common irish soda bread problems and their solutions:

  • Dense or heavy texture: Check the expiration date of your baking soda and replace it if necessary.
  • Uneven texture: Avoid overmixing the dough and let it rest for a few minutes before kneading.
  • Lack of flavor: Use high-quality ingredients, such as fresh buttermilk and real salt, to give your bread a rich and tangy flavor.

Remember, practice makes perfect. Don’t get discouraged if your first loaf doesn’t turn out right. Keep trying, and you’ll soon bake like a pro. With patience and these tips, you’ll overcome common irish soda bread problems and enjoy a tasty homemade Irish soda bread.

Conclusion

Baking authentic Irish soda bread is a journey into the heart of Irish cuisine. You’ll learn about its rich history, key ingredients, and traditional methods. This will help you make a loaf that truly represents this Irish favorite.

The secret to success is using top-quality ingredients and following the recipe closely. Embrace the simplicity of this bread-making process.

Enjoy your homemade Irish soda bread with a stew, butter, or try new recipes. It’s sure to wow your loved ones. This bread shows Ireland’s lasting traditions. With practice, you’ll get it just right.

So, get your oven ready, collect your ingredients, and let the smell of fresh Irish soda bread fill your kitchen. It’s a warm and comforting treat. Enjoy the joy of making a piece of Irish culinary history in your home.

FAQ

What is the history and significance of Irish soda bread?

Irish soda bread started in 19th-century Ireland. It’s a big part of Irish food culture. Over time, it has become a favorite in Irish homes and traditions.

What are the essential ingredients for traditional Irish soda bread?

To make traditional Irish soda bread, you need flour, buttermilk, baking soda, and salt. Using high-quality ingredients is key for the right taste and texture.

What kitchen tools and equipment are needed to bake Irish soda bread?

You’ll need a mixing bowl, measuring cups, and a baking sheet to bake Irish soda bread. Tools like a stand mixer or pastry blender can also help.

How do I make the perfect Irish soda bread?

For the perfect Irish soda bread, follow a precise recipe. Mix the ingredients carefully and knead the dough right. These steps are important for the perfect texture and taste.

What common mistakes should I avoid when baking Irish soda bread?

Avoid overmixing the dough and using the wrong flour. Also, don’t forget to score the bread correctly. Knowing these mistakes can help you make a great loaf.

Why is the cross-cut technique important in Irish soda bread baking?

The cross-cut technique is important for its tradition and to improve the bread’s texture. Cutting the dough correctly can make the bread look and taste better.

What is the best baking time and temperature for Irish soda bread?

To bake Irish soda bread perfectly, prepare your oven well. Look for visual signs of doneness and cool the bread right. This ensures the best baking time and temperature.

Are there any traditional variations or regional differences in Irish soda bread recipes?

Yes, there are many traditional and regional Irish soda bread recipes. They use different flours, ingredients, and baking methods. Trying these variations can deepen your appreciation for this beloved bread.

How should I store and preserve Irish soda bread?

To keep Irish soda bread fresh, use the right storage methods. This includes short-term storage and freezing. Proper storage helps maintain the bread’s quality.

What are some serving suggestions and pairings for Irish soda bread?

Irish soda bread goes well with many traditional and modern dishes. Exploring different ways to serve it shows its versatility and appeal.

How can I troubleshoot common issues when baking Irish soda bread?

To fix common problems like dense bread or uneven texture, focus on using the right techniques and ingredients. Troubleshooting these issues can help you make the perfect Irish soda bread.

Hearty Slow Cooker Minestrone Soup


Slow Cooker Minestrone

What makes slow cooker minestrone soup the perfect comfort on a cold day? It’s the easy prep, the rich ingredients, and the slow cooker’s magic. This recipe is loved for its deep, satisfying taste. It’s a simple way to enjoy a warm, comforting meal.

Key Takeaways

  • Slow cooker minestrone soup is a classic, comforting dish perfect for chilly days.
  • This easy crockpot recipe allows for minimal effort and maximum flavor.
  • Hearty vegetable soup is a staple of Italian cuisine, made easy with a slow cooker.
  • Slow cooker minestrone is a great way to enjoy a healthy, satisfying meal.
  • This recipe is perfect for busy individuals who want a delicious meal without the hassle.
  • Slow cooker minestrone soup can be customized to suit your taste preferences.

Understanding the Magic of Slow Cooker Minestrone

Slow Cooker Minestrone is a favorite Italian dish loved around the world. It’s a hearty vegetable soup that started in Italy. Now, thanks to slow cookers, it’s easier to make and enjoy.

Slow cookers bring many benefits to minestrone. They make cooking hands-off, so you can do other things. They also mix flavors together, making the taste intense and rich. This is great for an Easy Crockpot Recipe like minestrone, ensuring all flavors are balanced and ingredients are tender.

  • Enhanced flavor development
  • Increased convenience
  • Improved texture and tenderness of ingredients

There are two main ways to make minestrone: stovetop or slow cooker. The Slow Cooking Benefits make slow cookers a top choice for a simple, tasty meal. Slow cooking turns a Hearty Vegetable Soup into a dish that will impress anyone.

Essential Ingredients for the Perfect Minestrone Soup

To make a tasty hearty vegetable soup, you need fresh, top-notch ingredients. A classic Vegetarian Minestrone Soup has many veggies like carrots, celery, and onions. It also has canned tomatoes and beans.

For a Healthy Slow Cooker Meal like minestrone, you’ll need:

  • Leafy greens, such as kale or spinach
  • Canned beans, like kidney or cannellini beans
  • Diced tomatoes and tomato paste
  • Vegetable broth and red wine (optional)
  • Herbs and spices, such as basil, oregano, and thyme

Choose fresh, in-season produce for the best taste and health benefits. You can also tweak the recipe to fit your likes and dietary needs.

Preparing Your Vegetables and Beans

To make a tasty Slow Cooker Minestrone, you need to prep your veggies and beans right. This step is key for the soup’s flavor and texture. Cutting veggies like carrots and zucchini into small pieces helps them cook evenly.

For a Hearty Vegetable Soup like Minestrone, Bean Preparation Tips are important. Soaking and cooking beans can take a lot of time. But, using a slow cooker makes it easier, and chopping veggies the night before saves time.

Here are some Bean Preparation Tips to keep in mind:

  • Soak the beans overnight to reduce cooking time
  • Use a slow cooker to cook the beans to perfection
  • Pre-chop vegetables the night before to save time and effort

By following these tips and using a slow cooker, you can make a delicious Slow Cooker Minestrone. Choose the right veggies and beans. And don’t be afraid to try new ingredients to make it your own.

Step-by-Step Slow Cooker Method

To make a tasty minestrone soup, start by layering your ingredients. This way, everything cooks evenly and stays firm. Begin with aromatic vegetables like onions and garlic at the bottom. Then, add your beans and tomatoes, followed by vegetable broth and seasonings.

For  Slow Cooker Soup Recipes, setting the right cooking time is key. Cook minestrone soup on low for 6-8 hours or high for 3-4 hours. This ensures your ingredients are tender and the flavors blend well. Minestrone soup is ideal for a cold evening or a quick weeknight dinner.

Here are some tips for making minestrone soup in a slow cooker:

  • Use a variety of vegetables to add depth and texture to the soup
  • Don’t overfill the slow cooker, as this can lead to a messy cleanup
  • Check the soup for doneness by tasting and adjusting the seasoning as needed

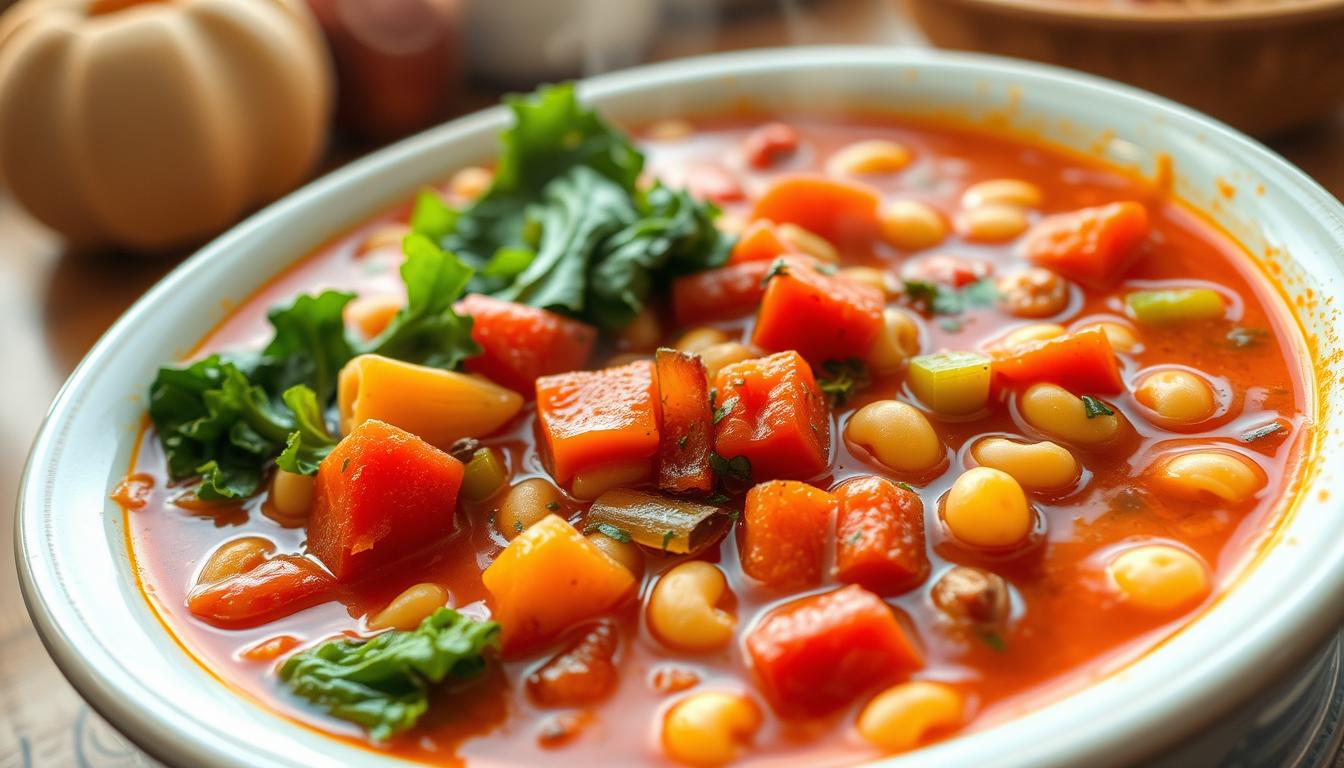
hearty slow cooker minestrone soup recipe

By following these steps and tips, you’ll make a delicious minestrone soup. This hearty soup is perfect for a comforting meal. It’s also a great way to use up leftover vegetables and beans. With its rich flavors and tender ingredients, minestrone soup will become a favorite in your household.

Customizing Your Minestrone Soup

To make your Slow Cooker Minestrone special, think about what you like and what you need. This Hearty Vegetable Soup is perfect for adding your favorite things. You can change it up to add more protein or fit special diets.

Customizing your minestrone is all about trying new things and having fun. You can add Protein Additions like turkey meatballs or cannellini beans. Or, you can make Dietary Modifications like using gluten-free pasta or skipping certain ingredients for a vegan soup.

  • Adding seasonal vegetables, such as butternut squash in the fall or kale in the winter
  • Using different types of beans, such as kidney beans or black beans, to change up the flavor and texture
  • Adding a splash of red wine or tomato paste to deepen the flavor of the soup

With a few tweaks, you can make a Slow Cooker Minestrone that’s just right for you. So, don’t be shy. Get creative and make this Hearty Vegetable Soup your own!

Perfect Pasta Timing and Tips

Timing is key when making a tasty Slow Cooker Minestrone. Adding pasta at the right time is important to avoid mushiness. Hearty Vegetable Soup like Minestrone needs a mix of flavors and textures. The right pasta can make a big difference.

Choosing the right pasta is the first step. Different pasta shapes cook at different rates. For example, small pasta like elbow macaroni cooks faster than bigger shapes like penne. Add pasta towards the end of cooking time in Slow Cooker Soup Recipes like Minestrone to avoid overcooking.

Here are some tips for picking the right pasta and adjusting cooking times:

  • Choose a pasta shape that complements the other ingredients in the soup.
  • Adjust the cooking time based on the type of pasta and the desired level of doneness.
  • Consider adding the pasta in the last 30 minutes of cooking time to prevent overcooking.

By following these tips and using the right pasta, you can make a delicious Slow Cooker Minestrone. It’s perfect for a hearty and comforting meal.

Serving Suggestions and Pairings

There are many ways to serve Slow Cooker Minestrone. This Hearty Vegetable Soup is a key part of Italian cuisine. It’s great for any time, thanks to its rich flavors. Try it with crusty bread and a simple green salad for a traditional Italian meal.

A warm, crusty loaf is perfect with Slow Cooker Comfort Food like minestrone. You can dip the bread into the soup for more flavor. Or, serve the minestrone in a bread bowl for a fun twist.

For a modern twist, pair the soup with a grilled cheese sandwich or roasted vegetables. These add new flavors and textures. Here are more ideas:

  • Serve with garlic knots or breadsticks.
  • Add parmesan cheese on top for extra taste.
  • Pair with a simple green salad and light vinaigrette.

When serving Slow Cooker Minestrone, have fun and be creative. This Slow Cooker Comfort Food is delicious and versatile. It’s perfect for a comforting meal.

Storage and Reheating Guidelines

Storing and reheating Slow Cooker Minestrone right is key to keep its taste and quality. Making Healthy Slow Cooker Meals like minestrone is great for meal prep. You can cook a big batch and save it for later.

To keep Slow Cooker Minestrone fresh in the fridge, cool it down first. Then, put it in an airtight container. It stays good for up to 5 days. For longer, freeze it. Here’s how to freeze and reheat:

  • Let the soup cool completely before transferring it to a freezer-safe container or bag.
  • Label the container or bag with the date and contents.
  • Store the frozen soup for up to 3 months.
  • To reheat, thaw the soup overnight in the refrigerator, then reheat it on the stovetop or in the microwave.

When you reheat Hearty Vegetable Soup, make sure it’s hot enough. It should reach 165°F (74°C) for safety. Adding fresh veggies or beans can also enhance the flavor and nutrition. Follow these tips to enjoy your Slow Cooker Minestrone all week, perfect for Healthy Slow Cooker Meals.

Slow Cooker Minestrone

Health Benefits of Slow Cooker Minestrone Soup

Slow Cooker Minestrone Soup is a nutritious and tasty choice for a healthy diet. It’s full of vitamins, minerals, and antioxidants from the veggies. It’s a great mix of carbs, proteins, and fats, making it a balanced meal.

The health benefits of Slow Cooker Minestrone Soup include:

  • High vegetable content, providing essential vitamins and minerals
  • Lean protein options, such as beans and lean meats, for a balanced diet
  • Low calorie count, making it an excellent option for weight management

Adding Slow Cooker Minestrone Soup to your meals can greatly improve your health. It’s full of flavor and offers many health perks. It’s perfect for those seeking Healthy Slow Cooker Meals. By including it in your diet, you get the benefits of a hearty soup while keeping your diet balanced and nutritious.

Conclusion: Mastering Your Slow Cooker Minestrone Journey

Discovering the perfect Slow Cooker Minestrone soup is a fun journey. You now know the secrets of the slow cooker and the key ingredients. This lets you make a Hearty Vegetable Soup that warms your heart and feeds your body.

The magic of Slow Cooker Comfort Food is in its flexibility. Try new veggies, proteins, and tweaks to make it yours. The most important thing is to enjoy the journey and the amazing smells that fill your kitchen.

Now, use what you’ve learned to start your slow cooker minestrone adventure. Share your dishes, exchange recipes with friends, and enjoy the process of cooking wholesome meals. Happy cooking!

Cozy Coconut Curry Chickpea Soup


Coconut Curry Chickpea Soup

What makes a warm bowl of coconut curry chickpea soup so comforting? Can it really nourish our bodies? Exploring vegetarian cuisine, we find that vegan coconut curry soup is packed with benefits. It offers rich flavors and health perks.

The mix of coconut curry and chickpeas gives a unique taste. This makes coconut curry chickpea soup a favorite among soup lovers.

This soup has a creamy texture and the warmth of coconut curry. It’s ideal for a tasty and fulfilling meal. You can enjoy it whether you like spicy or mild flavors.

As we dive into vegan coconut curry soup, we’ll uncover its secrets. We’ll see why it’s a hit with both vegetarians and non-vegetarians.

Key Takeaways

  • Coconut curry chickpea soup is a nutritious and flavorful vegetarian option
  • Vegan coconut curry soup is a great alternative for those with dietary restrictions
  • The combination of coconut curry and chickpeas provides a unique taste experience
  • This soup is perfect for anyone looking for a comforting and satisfying meal
  • Coconut curry chickpea soup can be tailored to suit individual spice preferences

Discovering the Magic of Coconut Curry Chickpea Soup

Coconut Curry Chickpea Soup is loved worldwide for its unique flavors and simplicity. It’s a easy chickpea curry recipe that’s become a favorite. Its transformation into a homemade coconut curry soup has won many hearts.

Curry soups have a long history, with cultures adding their own twist. From India’s spicy curries to Thailand’s creamy soups, each place has made its mark. This easy chickpea curry recipe shows how a simple dish can become a comforting meal.

Origins of Curry-Based Soups

Curry soups started in India, where curry was first used as a spice blend. It then spread to Asia, where locals modified it to their liking. Now, curry soups are enjoyed globally, each region adding its own flavor.

Why This Recipe Works

This homemade coconut curry soup recipe is a hit because of its spice and coconut milk balance. Chickpeas add protein and fiber, making it nutritious and filling. The easy chickpea curry recipe also lets you customize it to your taste.

Key Flavor Profiles

The flavors in this homemade coconut curry soup are key. You get the warmth of curry spices, the creaminess of coconut milk, and the earthiness of chickpeas. Together, they make a rich, comforting soup. It’s perfect for any time, whether you want a quick easy chickpea curry recipe or a hearty meal.

Essential Ingredients for the Perfect Bowl

To make a tasty and healthy dairy-free curry soup, picking the right ingredients is key. The base of this soup is high-quality items that add flavor and nutrition. These include chickpeas, coconut milk, and aromatic spices.

Chickpeas are packed with protein, fiber, and vitamins and minerals. They are also low in calories and full of antioxidants. Coconut milk makes the soup creamy without using dairy.

Onions, garlic, and ginger add flavor and health benefits. They have anti-inflammatory properties and boost the immune system. Spices like turmeric, cumin, and coriander add flavor and health perks, such as reducing inflammation and improving digestion.

  • Leafy greens, like spinach or kale, for extra vitamins and minerals
  • Sweet potatoes, which are full of fiber, vitamins, and minerals
  • A squeeze of fresh lime juice, which boosts flavors and adds vitamin C

By mixing these ingredients, you can make a delicious and nutritious dairy-free curry soup. It’s not just tasty but also good for your health, making it a great choice for a balanced diet.

Kitchen Tools and Equipment Needed

To make a tasty spicy coconut chickpea soup, you need the right tools. Cooking this soup means handling spicy ingredients. So, you need tools for cooling and serving.

Having the right utensils is key. A well-stocked kitchen makes cooking easier. You’ll need a large pot, a blender, and measuring cups and spoons. These help you prepare, cook, and serve the soup.

Must-Have Utensils

  • Large pot: for cooking the soup
  • Blender: for blending the ingredients
  • Measuring cups and spoons: for measuring the ingredients
  • Spatula: for stirring and serving the soup

Optional but Helpful Tools

Some tools are nice to have but not essential. An immersion blender, a food processor, and serving bowls are good examples. They can make cooking faster and easier.

Having the right ingredients is also important. With the right tools and ingredients, you can make a delicious soup. It’s perfect for any time.

Step-by-Step Cooking Instructions

To make a tasty vegetarian curry soup, start by cooking onions, garlic, and ginger in a big pot. This makes a great base for your soup. Then, add your favorite veggies like carrots, potatoes, and bell peppers. Cook them until they’re soft.

Next, add a can of coconut milk and a cup of veggie broth to the pot. Mix in a tablespoon of curry powder and a teaspoon of turmeric. Let it boil, then lower the heat and simmer for 20-25 minutes.

While the soup cooks, get your chickpeas ready. You can use canned ones or cook them yourself. Once the soup is done, add the chickpeas and some fresh cilantro.

  • Use fresh ingredients for the best taste
  • Keep your cooking area safe to avoid accidents
  • Adjust the spice to your liking

By following these steps, you can make a delicious and cozy vegetarian curry soup. It’s perfect for any time and is a healthy, tasty meal choice.

Mastering the Art of Curry Spice Blending

To make a flavorful chickpea coconut stew, you need to know how to blend curry spices. This means mixing different spices to get a special and aromatic taste. By getting good at this, you can turn your dish into something amazing, making it a tasty and fulfilling flavorful chickpea coconut stew.

When blending curry spices, there are a few important things to think about. The kind and quality of spices you use really matters. High-quality spices give a more lively and complex taste. Also, how much of each spice you use is key, as it affects the dish’s flavor balance.

  • Turmeric, coriander, and cumin for a warm, earthy flavor
  • Cinnamon, cardamom, and cloves for a sweet, aromatic flavor
  • Cayenne pepper, ginger, and garlic for a spicy, savory flavor

Try out different spice mixes and adjust the heat to your liking. This way, you can make a unique and tasty flavorful chickpea coconut stew. It will surely wow your friends and family.

Health Benefits and Nutritional Information

The Coconut Curry Chickpea Soup is not just tasty and comforting. It’s also packed with nutrients. The chickpea is a big part of this soup. It’s full of protein, fiber, and important vitamins and minerals. When you mix chickpeas with coconut and spices, you get a healthy chickpea soup that’s both good for you and delicious.

Some of the key health benefits of the ingredients in this soup include:

  • High protein content from chickpeas, which can help with muscle growth and repair
  • Healthy fats from coconut, which can support heart health and provide a feeling of fullness
  • Fiber from chickpeas, which can aid in digestion and promote a sense of satiety

This soup is also rich in vitamins and minerals like vitamin C, vitamin K, and potassium. The healthy chickpea soup is perfect for a nutritious and filling meal any time of day.

healthy chickpea soup

In summary, the Coconut Curry Chickpea Soup is a nutritious and tasty meal. It’s good for you because of its healthy ingredients. Adding this healthy chickpea soup to your diet means you can enjoy a satisfying meal while taking care of your health.

Creative Recipe Variations and Adaptations

There are many ways to change the easy chickpea curry recipe to fit different tastes and diets. You can add seasonal ingredients to the vegan coconut curry soup. This makes it perfect for any time of the year. It keeps your soup fresh and exciting, meeting many preferences.

Think about changing the recipe with the seasons. In summer, add fresh veggies like bell peppers, zucchini, and corn for a light taste. In winter, use sweet potatoes, carrots, and kale for a cozy soup. These changes keep the core flavor of the easy chickpea curry recipe.

Seasonal Ingredients

  • Summer: bell peppers, zucchini, corn
  • Winter: sweet potatoes, carrots, kale

You can also change the vegan coconut curry soup for different diets. Try using tofu, tempeh, or seitan instead of chickpeas. You can also make the soup spicier or milder, depending on what you like.

Dietary Modifications

  • Protein sources: tofu, tempeh, seitan
  • Spice level: adjust to suit individual tastes

These creative changes let you enjoy the easy chickpea curry recipe and vegan coconut curry soup in many ways. You can use seasonal ingredients or meet different dietary needs. There are lots of options to fit your taste.

Serving Suggestions and Accompaniments

When serving spicy coconut chickpea soup, the right sides make a big difference. Try pairing it with crusty bread or fluffy rice. These choices complement the soup’s flavors without taking over.

A perfect pairing is a simple green salad with light vinaigrette. The salad’s freshness balances the soup’s richness. You could also serve it with naan bread or roti for a heartier meal.

Perfect Pairings

Adding fresh herbs like cilantro or scallions brings color and taste. A sprinkle of toasted spices or a dollop of yogurt (for non-dairy options) adds texture.

dairy-free curry soup

Garnishing Tips

Get creative with garnishes to elevate your spicy coconut chickpea soup. With a bit of imagination, you can make a simple soup into a satisfying meal for any time.

Storage and Reheating Guidelines

To keep your homemade coconut curry soup fresh, follow these storage and reheating tips. Store it in airtight containers to keep out moisture and other tastes. You can keep it in the fridge for up to 3 days or freeze it for 3 months.

When reheating, you can use the stovetop or microwave. On the stovetop, heat it over low heat, stirring now and then, until it’s hot. In the microwave, heat it in 30-second bursts, stirring between each, until it’s steaming. This way, you’ll keep the soup’s flavors and texture just right.

Here are some extra tips for storing and reheating your coconut curry soup:

  • Label and date the containers so you know how long they’ve been stored
  • Keep the soup in the coldest part of the fridge to avoid spoilage
  • Heat the soup to at least 165°F (74°C) to ensure it’s safe to eat

By following these guidelines, you can enjoy your homemade coconut curry soup for longer. It will stay delicious and fresh.

Conclusion: Embracing the Comfort of Homemade Soup

As we wrap up our exploration of coconut curry chickpea soup, it’s clear that homemade meals are special. Making a nourishing, vegetarian curry soup from scratch fills our kitchens with amazing smells. It also nourishes our souls.

There’s nothing like enjoying a warm, creamy bowl of this coconut-infused delight. Each spoonful is a mix of flavors that delight us. It’s a comfort that we all need sometimes.

If you’re looking for a cozy meal or a tasty, plant-based dish, this soup is perfect. It will become a favorite in your family. Making homemade soups is not just about food. It’s about taking care of ourselves and our taste buds.

So, when you want a satisfying and healthy meal, put on your apron. Gather your ingredients. Let the joy of making homemade soup take you to a world of delicious flavors.

Warm Up with Comforting Turmeric Ginger and Carrot Soup


Ginger and Carrot Soup -

Are you looking for a healthy soup to warm up with? Turmeric ginger carrot soup is a great choice. It’s full of anti-inflammatory ingredients and easy to make at home. Follow our simple recipe to enjoy its health benefits.

Introduction to Turmeric Ginger Carrot Soup

This healthy soup recipe needs just a few ingredients. You’ll need 3 large carrots, 1 medium white onion, and 3 cloves of minced garlic. It also calls for 1-inch piece of fresh ginger and 2-inch piece of fresh turmeric. These add antioxidants and anti-inflammatory benefits.

Key Takeaways

  • You can make turmeric ginger and carrot soup with a few simple ingredients.
  • The soup is a healthy soup recipe, packed with anti-inflammatory ingredients.
  • You can adapt the recipe to suit your taste preferences.
  • Turmeric ginger carrot soup is a comforting meal option.
  • The soup can be made easily at home.
  • The recipe serves 3 to 4 people.

The Health Benefits of Turmeric Ginger Carrot Soup

Exploring immune-boosting soups, you’ll find turmeric ginger carrot soup is tasty and good for you. It’s a mix of turmeric, ginger, and carrots that boosts your health. This combo is powerful for your well-being.

Carrots, turmeric, and ginger are packed with health benefits. Carrots have beta-carotene, which needs oil to be absorbed. Turmeric has curcumin, linked to health perks like immune support. Ginger fights inflammation and boosts immune health.

  • Reducing inflammation, which can help alleviate symptoms of arthritis and other conditions
  • Supporting immune function, thanks to the beta-carotene in carrots and the curcumin in turmeric
  • Aiding in digestive health, due to the anti-inflammatory properties of ginger and the prebiotic effects of onions

Adding this soup to your meals can boost your health. It’s great for a comforting meal or a healthy snack. Turmeric ginger and carrot soup is a smart choice for your health.

Essential Ingredients for Your Soup

Making a tasty and healthy vegetarian soup, like turmeric ginger carrot soup, needs the right ingredients. You’ll need 2 pounds of carrots, 1 large onion, and 2 tablespoons of fresh ginger. These give a great base for a flavorful and healthy soup.

You’ll also need 1 teaspoon of salt, 1.5 teaspoons of turmeric, and 3 cups of vegetable stock. These complete the recipe.

For extra flavor, you can add 1 can of light coconut milk and 2 tablespoons of maple syrup. You can also customize it by using full-fat coconut milk or adding spices like cayenne pepper or apple cider vinegar. The secret to a great soup is using quality ingredients and trying different flavors.

Consider adding garlic, sweet potatoes, and Greek yogurt to your soup. These add depth and health benefits. Garlic fights inflammation, and sweet potatoes are full of vitamins and minerals. Mixing these with the main ingredients makes a delicious and nutritious soup for any time.

Kitchen Tools and Equipment Needed

To make a tasty winter soup like turmeric ginger carrot soup, you need some basic tools. This spicy soup is great for a chilly winter night. With the right tools, making it is easy and quick.

Having the right equipment is key for a comforting winter soup. You’ll need a big pot for simmering, a blender for pureeing, and a strainer for solids. These tools ensure your soup is smooth and flavorful, warming your belly and heart.

Basic Equipment Requirements

  • Large pot
  • Blender
  • Strainer

Optional Tools for Enhanced Preparation

  • Immersion blender
  • Spice grinder

With these tools, you can whip up a delicious winter soup. It’s perfect for a cold evening. Whether you like spicy or mild soups, the right equipment helps you get the flavor and texture you want. So, start cooking and enjoy a warm bowl of turmeric ginger carrot soup. It’s a great example of a comforting and spicy soup.

Preparing Your Vegetables

To make a delicious vegetable soup, like turmeric ginger carrot soup, you need to prep your veggies right. Chop the carrots, onions, and ginger. Then, sauté them until they’re tender. This step is key to unlocking their flavors and textures.

Think about adding celery and bell peppers to boost the soup’s taste and health benefits. The goal is to mix flavors and textures well. This way, your turmeric ginger carrot soup will be both tasty and nutritious.

Here are some tips for prepping your veggies:

  • Chop the carrots and onions into bite-sized pieces to ensure they cook evenly.
  • Grate the ginger to release its flavors and oils.
  • Sauté the vegetables in a little oil to bring out their natural sweetness.

Ginger and Carrot Soup - nourishing vegetable soup

By following these tips, you can make a nourishing vegetable soup. It’s great for a healthy meal. Whether it’s turmeric ginger carrot soup or another soup, focus on prepping your veggies well. This ensures your soup is not just delicious but also healthy and fulfilling.

The Art of Blending Spices

Making a tasty and healthy soup like turmeric ginger carrot soup needs the right spice blend. This soup gets its flavor and health benefits from the perfect mix of spices. First, measure and mix the spices, like turmeric, ginger, and cumin, for a balanced taste.

It’s important to know how each spice works with the others. Turmeric and ginger fight inflammation, while cumin adds a warm taste. By mixing these spices right, you get a unique and tasty flavor. Remember, the goal is to make a soup that tastes great and boosts your immune system.

Measuring and Combining Spices

To begin, measure the spices you need. A good starting point is using equal parts of turmeric, ginger, and cumin. But, you can adjust this to your liking. Just mix the spices together in a bowl until they’re well combined.

Creating the Perfect Flavor Balance

Finding the perfect flavor mix is all about balance. You might need to try different spice ratios to find what works for you. The aim is to make a flavor that lets each spice stand out without overwhelming the others. With a bit of practice, you’ll make a delicious and healthy soup for any time.

Step-by-Step Cooking Process

To start, sauté the vegetables in olive oil. You’ll need 1 small yellow or white onion, diced, and 2 cloves of garlic, minced. Cook these for 5-7 minutes until the onions are soft.

Then, add 2 tablespoons of turmeric root or 1 1/2 teaspoons of ground turmeric, and 1 tablespoon grated or 1 teaspoon ground ginger. Stir constantly for a minute to release the flavors.

Next, add 1 3/4 pounds of peeled and chopped carrots, about 6 cups, and 4 cups of vegetable broth. Bring to a boil, then simmer for 30 minutes or until the carrots are tender. You can also add 1/2 cup of cashew cream or full-fat coconut milk for creaminess.

This vegetarian soup is quick and nutritious.

Here is a summary of the cooking process in a step-by-step guide:

  1. Sauté the onions and garlic in olive oil for 5-7 minutes.
  2. Add the turmeric and ginger and cook for another minute.
  3. Add the chopped carrots and vegetable broth, and bring to a boil.
  4. Reduce the heat and let it simmer for 30 minutes or until the carrots are tender.
  5. Blend the soup to your desired consistency and add cashew cream or coconut milk if desired.

This easy homemade soup is delicious and full of nutrients. It can be made in under an hour. Store it in an airtight container in the fridge for up to 4 days or freeze for up to 1 month. Serve hot, garnished with your favorite toppings, and enjoy!

Storage and Reheating Tips

After making your comforting winter soup, it’s key to store it right. This keeps the flavor and nutrients in. You can keep it in an airtight container in the fridge for up to 5 days. This way, your anti-inflammatory soup stays fresh and ready for you.

To reheat your soup, use the stove or microwave. The time it takes to heat up will depend on your choice. But always aim to heat it to 165°F (74°C) for safety.

Proper Storage Methods

  • Store the soup in an airtight container in the refrigerator for up to 5 days.
  • Freeze the soup for up to 3 months and thaw it when you are ready to eat it.

Reheating Guidelines

  • Reheat the soup on the stove over low heat, stirring occasionally, until it reaches an internal temperature of 165°F (74°C).
  • Reheat the soup in the microwave in 30-second intervals, stirring after each interval, until it reaches an internal temperature of 165°F (74°C).

Freezing Instructions

To freeze your soup, pour it into an airtight container or freezer bag. Store it in the freezer. When you want to eat it, thaw it in the fridge overnight or reheat it from frozen.

By following these tips, you can enjoy your comforting winter soup for days. It’s a healthy and tasty meal option.

Serving Suggestions and Garnishes

When serving your spicy soup, think outside the box with garnishes. A dollop of yogurt can add a creamy touch to balance the heat. Fresh herbs like parsley or cilantro bring a burst of freshness to each spoonful.

A crusty bread on the side adds a nice crunch. Serving your soup in a bowl with grated parmesan cheese and bread makes it look and feel great. It’s a perfect mix of flavors and textures.

Here are some more ideas for your spicy soup:

  • Serving with roasted vegetables for extra nutrition and taste
  • Adding a squeeze of fresh lime juice for a citrus kick
  • Trying different breads like baguette or ciabatta for texture

Ginger and Carrot Soup - nourishing vegetable soup

Try different garnishes and serving styles to make your spicy soup special. It’s perfect as a starter or main dish. This nourishing vegetable soup will satisfy your taste buds and nourish your body.

Dietary Modifications and Substitutions

Making a healthy soup recipe like turmeric ginger carrot soup is all about dietary tweaks. These changes help make the soup fit for more people. It’s a way to adjust the recipe to suit different tastes and needs.

For a vegan version, swap out animal products for plant-based ones. Use vegan milk instead of regular milk. If you’re gluten-free, choose gluten-free spices and broth. To lower sodium, just cut down on salt.

Here are some other ways to tweak the recipe:

  • Try different milks like almond or soy for a unique taste and nutritional boost
  • Add new spices or herbs to give it a special flavor
  • Coconut milk or cream can add a creamy richness

These changes let you enjoy a turmeric ginger carrot soup that fits your diet. And you’ll get all the health perks of this healthy soup recipe.

Conclusion: Making This Nourishing Soup Part of Your Regular Menu

Adding this turmeric ginger carrot soup to your meals can bring many health benefits. It’s not only simple to make but also fights inflammation, boosting your health. The mix of carrots, ginger, and turmeric helps strengthen your immune system and aids digestion.

This easy homemade soup only takes 10 minutes to prepare. It’s a great way to add nutrition to your weekly meals. By making it a regular part of your diet, you’ll enjoy its health perks for a long time. So, try out this comforting and tasty recipe and see the benefits for yourself.

Delicious Sourdough Recipe: Bake Homemade Bread


Sourdough Recipe

Ever thought about how simple ingredients can turn into a delicious loaf? It’s like turning your kitchen into a craft bakery.

This sourdough bread recipe uses wild yeasts instead of commercial yeast. You need flour, water, salt, and a starter for a naturally leavened loaf. The prep is quick, under 30 minutes. This guide covers 13 sections to help you achieve bakery-quality bread.

Key Takeaways

  • You rely on wild yeasts for natural fermentation in this sourdough recipe.
  • Less than 30 minutes of hands-on prep time are needed.
  • The foundation is simple: flour, water, salt, and a healthy starter.
  • This is the first of 13 sections guiding you to a successful homemade loaf.
  • A sourdough starter makes your bread rise without commercial yeast.
  • Each section offers tips to ensure you master every phase of the process.

Why Your Homemade Sourdough Matters

Every time you cut into a homemade sourdough loaf, you notice the difference. The tangy smell and chewy texture are unmatched by store-bought bread. Your homemade sourdough brings ancient baking traditions into your home, inviting you to learn the art of slow fermentation.

How Artisan Quality Differs from Store-Bought Loaves

Artisan bread is made with care, mixing flour, water, starter, and salt. You might use 210 grams of bread flour and 90 grams of whole wheat for depth. Adding 234 grams of water for 78% hydration and 60 grams of starter and 6 grams of salt balances the flavors and structure.

This slow fermentation process creates complex tastes and a moist inside. Store-bought loaves can’t match the depth of flavor that comes from slow fermentation at home.

The Importance of Using Natural Wild Yeasts

Wild yeasts turn flour and water into the bubbles in your starter. These tiny helpers make your sourdough bread unique and tangy. Using natural yeasts means you’re caring for a living culture that improves flavor and digestibility.

Characteristic Homemade Sourdough Store-Bought Loaf
Fermentation Slow, natural yeasts Fast, commercial yeast
Depth of Flavor Distinct tang and complexity Uniform taste
Control of Ingredients Healthy flours and salt Preservatives common

Sourdough Recipe: Essentials for Beginners

Starting your baking journey should be smooth. You need good flour and an easy sourdough starter. Feed your starter 4-12 hours before baking to help the wild yeasts grow. Using a digital scale ensures each ingredient is measured accurately.

Let your dough develop a rich flavor. Fermentation takes 8-12 hours, allowing it to double in size. Be patient. Each step, from mixing to folding, is important for a great loaf. With practice, you’ll get better at shaping and baking.

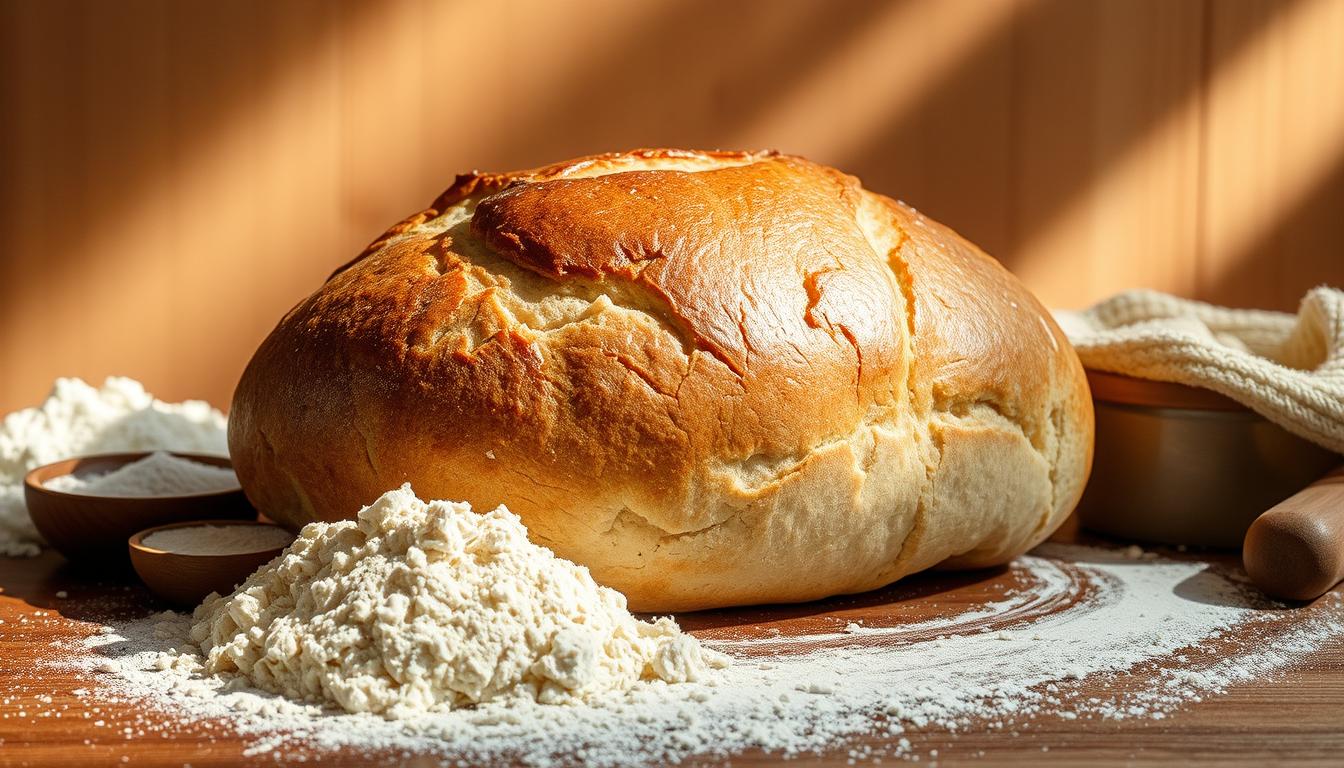
sourdough bread recipe​

Here are the key things for success:

  • Active starter ready for use
  • Accurate measurements
  • Proper time for fermentation
  • Patience through each folding session
Essential Reason
Active Starter Captures wild yeasts for natural leavening
Digital Scale Ensures precise ingredient ratios
Time for Fermentation Promotes flavor and light texture
Quality Flour Supports strong gluten development

Gathering the Right Tools and Ingredients

Choosing the right equipment and flour is key to making the best sourdough bread. An organized approach gives you confidence in each step. This ensures your dough behaves well during mixing, folding, and baking.

Essential Equipment for Sourdough Bread Making

A digital kitchen scale is essential for precise baking. It helps measure flour, water, and salt accurately. A sturdy bench scraper makes dough folding and cleanup easy.

A proofing basket (banneton) helps shape your loaf perfectly. Parchment paper prevents dough from sticking when you transfer it. A Dutch oven or covered cast iron pot keeps moisture in, giving you a crust that’s evenly browned.

Selecting High-Quality Flour for a Simple Sourdough Recipe

Fresh, unbleached flour makes a big difference in taste and texture. Brands like King Arthur Flour and Shipton Mill offer consistent results. Stone-ground flours add flavor, with a hint of sweetness and a robust crumb.

Explore local shops to find a flour that fits your baking style. This balanced approach creates a loaf with character and a tender bite.

Understanding Wild Yeast and Fermentation

You help wild yeast grow by giving it warmth, nutrients, and time. Even a simple mix of flour and water can start to ferment. This happens when natural yeasts and bacteria join forces in your dough.

Fermentation can take a few hours in a warm kitchen or overnight in cooler conditions. This process adds depth to your bread’s flavor and aroma.

There are about 160 known yeast species, with Saccharomyces being one of them. Wild yeast adds a special tang to your dough. Each yeast cell can grow and multiply, making your starter bigger.

A small amount of starter can grow into a lot under the right conditions. You can adjust time and hydration to change your bread’s texture and taste.

Understanding Wild Yeast and Fermentation
  1. Mix flour and water to form a hospitable environment.
  2. Keep the starter at moderate warmth for steady yeast reproduction.
  3. Use quality flour with enough natural enzymes.
Condition Effect on Fermentation
Warmer Environment Speeds yeast activity
Cooler Environment Extends fermentation time
Higher Hydration Promotes faster enzyme action

Preparing Your Easy Sourdough Starter

Start by mixing equal parts flour and water each day. Use reliable flours like Doves Farm or King Arthur Flour for consistent results. It usually takes a week for the starter to come to life, but it might take two weeks in cooler weather.

To keep the starter healthy, discard half each time you feed it. If you store it in the fridge, feed it once a week. But if you’re busy, feed it daily. This care helps the wild yeast create the tangy flavor in your sourdough.

Feeding Times and Ratios

Every day, add flour and water to your starter. By day four, you’ll see more bubbles. Day five might smell like yogurt, which is a good sign.

By day six, many bakers start feeding their starter twice a day. This helps it grow faster. Keep the starter at 70–75°F for best growth.

  1. Day 1–3: 1 cup flour + 1 cup filtered water
  2. Day 4–5: Discard half, feed 50g flour + 50g tepid water
  3. Day 6–7: Twice-daily feeds until it doubles

Troubleshooting Common Starter Issues

If your starter is slow, try changing how often you feed it. A vinegary smell means you might need to discard more or feed it more often. Mold is a big problem—throw away the starter and start over.

Be patient and keep up the care. With time, your starter will be lively and ready for your sourdough bread recipe.

Shaping and Folding Techniques for Perfect Crumb

Getting your dough right is key for a light, airy inside. Pre-shaping, bench resting, and final shaping help the gluten network rise beautifully. These steps create gas pockets and make your loaf stand out, just like a good sourdough starter guide suggests.

Shaping and Folding Techniques for Perfect Crumb

Using stretch-and-fold or coil-fold methods makes the dough stronger without tearing it. The right technique also builds surface tension. This helps the loaf keep its shape until it’s baked.

Developing Surface Tension

When working with dough, aim for a tight outer skin. This creates a springy surface. It keeps the shape and preserves gas bubbles. Gentle tucks help organize the dough, leading to a more open crumb.

Advanced Folding Methods for the Best Sourdough Bread Recipe

Coil folds or the classic stretch-and-fold strengthen gluten strands. Typically, three sets of four stretches and four folds each are enough. But, slack dough might need more sets and shorter rests. Firm dough might do well with fewer sets to avoid overworking.

Dough Condition Recommended Sets Rest Time
Weak or Slack Up to 4 10–15 minutes initially
Average 3 30 minutes
Firm 1–2 30–40 minutes

Overnight Fermentation Explained

Putting dough in the fridge for 12 to 48 hours can make your sourdough bread better. This method slows down yeast, letting acids and enzymes work. You get a richer taste and a bubbly inside that bread fans love.

sourdough bread making

Bakers often chill dough at 38 to 40°F (3 to 4°C). Adjusting proof times is easy with about 10% starter (50g for 500g flour). A 10 to 11 hour rest is usually best. This lets you ferment fully and bake when you want.

Step Suggested Time Notes
Refrigeration (retarding) 12–48 hours Deepens flavor and creates a lighter crumb
Starter Percentage 10% of flour weight 50g starter for 500g flour
Optimal Chill Duration 10–11 hours Balances taste with a practical schedule

Mastering Gluten Development

Your dough’s strength comes from how well you develop gluten. Letting flour rest with water before adding starter and salt relaxes the mix. This step, called autolyse, shortens mixing time and can make your dough airy.

Autolyse for Better Structure

Autolyse happens when flour and water sit together for 30 minutes or more. This pause lets proteins soften, reducing kneading time. Including autolyse makes your dough lighter and more open.

When to Perform Stretch and Folds

Stretch and folds are done every 30 minutes for a couple of hours. They create layers of gluten without overworking the dough. Each fold pulls the dough up before folding it back. This builds volume and supports your dough’s structure.

Tips for Achieving a Crispy Crust, Temperature, and Proofing Times

High heat makes the crust spectacular. A Dutch oven traps steam, helping your loaf rise and get crunchy. Keep the temperature around 450°F (232°C) or start at 500°F (260°C) then drop to 475°F (246°C). Preheating your vessel creates a hot spot that keeps moisture in, making the crust crackly.

Proofing time varies with your kitchen’s conditions. Dough rises by about one-third, then another 30–40% before baking. A cool environment helps it rise slowly, while a warm spot speeds it up. This balance lets flavors and structure develop together.

Watch the dough temperature and oven readiness for consistent results. A warm place boosts fermentation, but too much can make your loaf fall. Pay attention to visual signs and follow a baking schedule for a perfect crust every time.

Baking Stage Temperature Key Tip
Preheat Vessel Up to 500°F (260°C) Traps steam for better oven spring
Initial Baking 450–475°F (232–246°C) Caramelizes crust surface
Internal Doneness Above 200°F (93°C) Ensures fully baked loaf

Common Mistakes, Alternative Flours, and Flavor Variations

Watch out for over-fermentation and the right flour when baking. Small things like water ratios and mixtures can change your bread’s taste.

Overproofing and Underproofing

Too long proofing can make your dough fall flat. Cutting it too soon makes it dense. Find a balance that keeps the dough just right.

Misjudging Hydration Levels

Too little or too much water makes dough hard to handle. Match the water to your flour’s needs. Whole wheat often needs more water than white flour.

Experimenting with Whole Wheat or Spelt

Spelt can add depth to your bread. Its protein is different from regular flour, so knead carefully. Remember, the right water helps achieve a great texture.

Infusing Herbs and Seeds for Unique Twists

Try adding rosemary, sesame seeds, or dried tomatoes for a twist. Mix them gently to keep the dough strong. Be creative but keep the moisture right for a memorable loaf.

Sourdough Baking Tips for Consistent Results

Keeping a steady routine and controlling the temperature helps make each loaf reliable. Your starter likes it around 75°F. This means keeping feeding times and the environment consistent is key. A simple test to see if your starter is ready is the spoonful drop test. If it floats in water, it’s ready to go.

Warm dough ferments faster, leading to a lighter crumb and more holes. To keep the dough warm, try using the oven light or placing it in a cozy corner. A preheated baking vessel is also a must for a crisp crust and even baking.

“Adjusting temperature by just a few degrees changed everything about my loaf,” recalled Chad Robertson, lauded baker and author of award-winning cookbooks.

Monitoring the bulk fermentation is vital for consistent loaves. Dough that ferments too little stays dense, while too much leads to a yellowish crust. Look for a rise of 20% to 50%. Using grams to measure ingredients helps avoid mistakes.

Kitchen Temperature Water Temperature
68°F (20°C) 98°F (37°C)
70°F (21°C) 94°F (34°C)
72°F (22°C) 90°F (32°C)
74°F (23°C) 86°F (30°C)
76°F (24°C) 82°F (28°C)
78°F (25°C) 78°F (26°C)
80°F (26°C) 74°F (23°C)

Storing, Serving, and Final Thoughts

Homemade sourdough bread can last up to a week or more, thanks to the WSU Bread Lab. It starts to lose freshness right after baking. But, using the right storage methods can slow down this process.

Short-Term Storage at Room Temperature

Store your loaf in a sealed bag or beeswax for a few days. A breadbox is helpful in dry climates. But, high humidity might need refrigeration to stop mold. Let it rest for at least an hour after baking to avoid a soggy center.

Extended Freezing Techniques

Freeze sliced portions for longer storage. Wrap each slice in plastic, then put them in a freezer bag. Defrost in the fridge for a few days or on the counter overnight. A quick reheat at 140°F (60°C) can revive the crust.

Serving Suggestions and Pairings

Enjoy fresh slices with olive oil or quality cheeses. Pair it with a hearty stew or soup for a complete meal. Whole grain loaves may taste better after resting for a day or two before cutting.

Reflection

You’ve learned about overnight fermentation, wild yeasts, and shaping. Each loaf is a new journey in natural fermentation. Keep trying new things with your easy sourdough starter and enjoy every fresh loaf.

FAQ

Which flour works best for homemade sourdough bread?

Use high-protein, unbleached bread flour like King Arthur Flour or Bob’s Red Mill. This gives a sturdy structure. For extra depth and flavor, try stone-ground or whole wheat varieties.

How do I maintain my easy sourdough starter over time?

Feed it equal parts flour and water by weight to keep it active. A healthy starter doubles in a few hours. If it smells off or doesn’t rise, check a sourdough starter guide for help.

What causes dense loaves in my sourdough bread recipe?

Dense loaves often mean underproofing or kneading issues. Try longer bulk fermentation or more stretch-and-folds. Make sure dough temperature is right and wild yeast has enough time.

How do I choose a simple sourdough recipe if I’m a beginner?

Choose a simple recipe with minimal folds and easy hydration. Use an established starter and follow clear instructions. This builds confidence as you learn.

How can I achieve the airy crumb associated with the best sourdough bread?

Build dough strength with gentle folds and enough fermentation time. Autolyse can also help. Ensure dough is well proofed but not overproofed, and bake in a preheated Dutch oven for the best rise.

What are some flavor variations I can try in my sourdough bread making?

Try whole wheat, rye, or spelt flour for a nutty taste. Add herbs like rosemary and thyme for aroma. Seeds like sunflower, pumpkin, or flax add texture. Adjust hydration levels to keep dough manageable.

How do I store my freshly baked loaf after following a sourdough bread recipe?

Cool your bread thoroughly before storing. Store in a paper or linen bag for a day or two. For longer storage, slice and freeze in airtight bags. Reheat in a toaster or oven for a fresh taste.