Welcome To Soup Meets Bowl - The Best Soup Recipes & More

Warm Up With Our Latest Soup Recipes

Sorghum Bread: A Healthy, Tasty Gluten-Free Option


Sorghum Bread

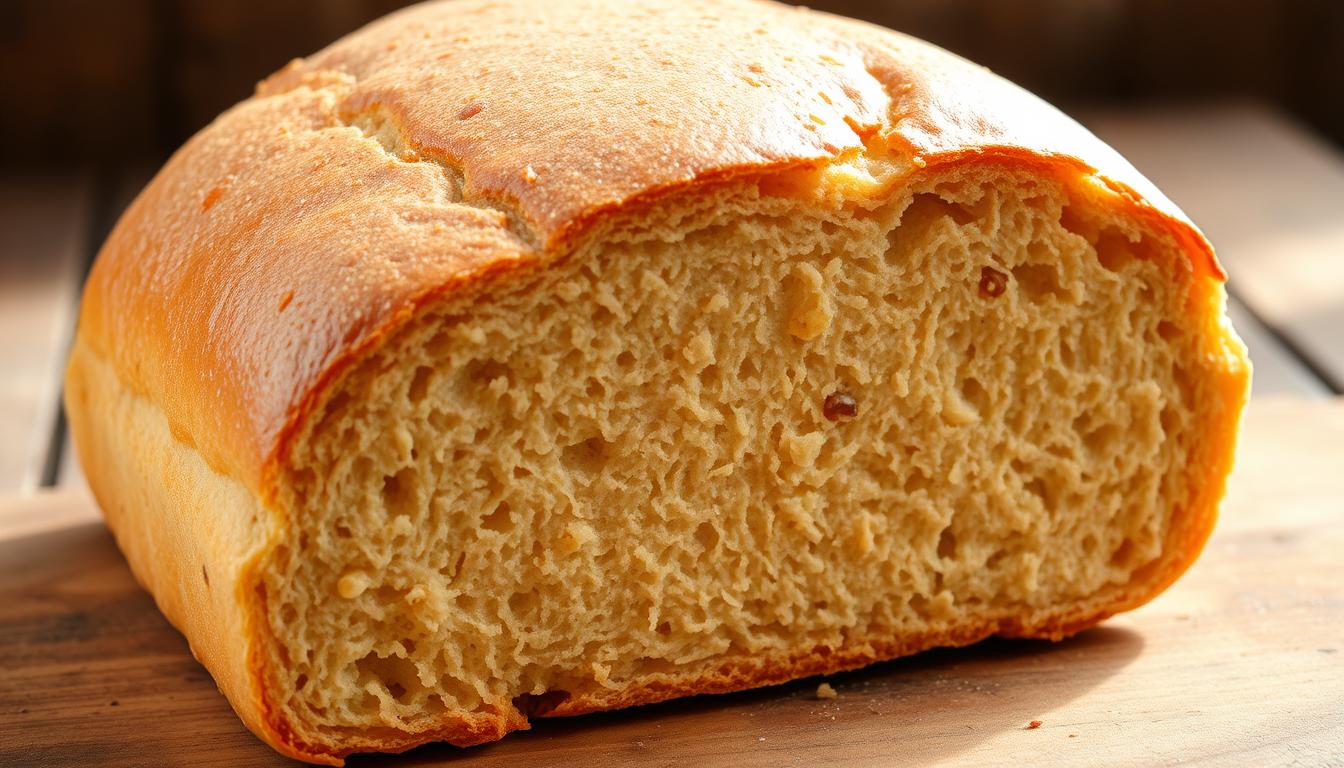
Are you searching for a tasty and healthy bread option? Sorghum bread is a fantastic choice for those on a gluten-free diet. It’s packed with nutrients and offers many health benefits. This makes it a top pick for baking healthy meals.

Key Takeaways

  • Sorghum bread is a type of gluten-free bread made from sorghum flour, which is rich in nutrients and has numerous health benefits.
  • Sorghum flour is a primary ingredient in gluten-free baking and is highly popular in Australia, India, and other Southeast Asian countries.
  • Sorghum bread has a total of 1983 kcal per loaf, with 391g of carbohydrates, 38g of protein, and 35g of fat.
  • The recommended baking temperature for sorghum bread is 350°F, with a total baking time of 60 minutes + 45 minutes after removing the water dish.
  • Sorghum bread can be stored at room temperature for 3-4 days, in the fridge for up to 5 days, and frozen for up to 3 months.
  • Sorghum bread is an excellent option for those seeking a gluten-free and lectin-free diet, with a low yeast-to-flour ratio typical for gluten-free breads.

Exploring sorghum bread opens up the world of ancient grain bread. It’s a great addition to your healthy baking routine. With its unique nutritional profile and delicious taste, sorghum bread is a perfect gluten-free alternative to traditional bread.

Understanding Sorghum: An Ancient Grain for Modern Baking

Sorghum is an ancient grain that has been around for thousands of years. It’s packed with nutrients and has a low glycemic index. This makes it perfect for people with gluten-free diets because it’s gluten-free.

Sorghum is full of dietary fiber, protein, and important minerals. It’s great for health-focused diets, like those that include ancient grains. Eating sorghum can help your gut health and lower inflammation.

  • High in dietary fiber and protein
  • Low glycemic index
  • Rich in essential minerals
  • Gluten-free, making it suitable for those with celiac disease or gluten sensitivity

Sorghum is a nutritious and flexible ancient grain. It can be used in many dishes, from baked goods to porridges. Its health benefits and gluten-free status make it a great choice for a healthier diet.

Essential Equipment for Baking Sorghum Bread

To bake delicious sorghum bread, you’ll need some key baking tools. You’ll need a mixing bowl, measuring cups, and a baking sheet. A stand mixer or hand mixer is also a must for mixing the dough. Lastly, a bread loaf pan is needed to shape the bread.

For gluten-free baking, the right tools are very important. You’ll need a baking sheet that’s at least 18×12 inches. A 9×5-inch bread loaf pan is also required. A digital scale is helpful for accurate ingredient measurements.

Other important tools include a whisk, a rubber spatula, and a pastry brush. These help mix ingredients, scrape the bowl, and brush the bread with egg wash or water.

There are many brands to choose from for baking equipment. It’s best to pick a well-known brand for quality. Brands like KitchenAid, Cuisinart, and Le Creuset are popular choices.

Key Ingredients for Perfect Sorghum Bread

To make perfect sorghum bread, you need the right ingredients. Sorghum flour is key, and it comes in whole grain and refined types. Choose based on your bread type and gluten-free needs.

Binding agents like xanthan gum are vital for dough structure. They help the bread rise and improve texture. Common ones include psyllium husk and potato starch.

You can also add nuts, seeds, and dried fruits for extra flavor and nutrition. These add-ins make your bread more delicious and satisfying.

Understanding each ingredient’s role is key in gluten-free baking. The right mix of sorghum flour, binding agents, and add-ins creates a tasty and healthy gluten-free bread.

Preparing Your Kitchen for Gluten-Free Baking

To start baking gluten-free bread, like sorghum bread, you need to get your kitchen ready. This means taking steps to avoid gluten contamination. First, clean and sanitize all your kitchen tools and surfaces. Use different utensils and containers for gluten-free ingredients to keep them separate from gluten foods.

Here’s how to set up your kitchen for gluten-free baking:

  • Clean and sanitize all equipment and surfaces that will come into contact with gluten-free ingredients.
  • Use separate utensils, such as spoons, whisks, and spatulas, for gluten-free ingredients.
  • Designate a specific area of your kitchen for gluten-free baking to minimize the risk of cross-contamination.

By following these steps, you can ensure a safe and successful gluten-free baking experience, even with sorghum bread. Always handle gluten-free ingredients carefully to avoid contamination and get the best results in your kitchen preparation.

Gluten Free Bread Recipe

The Science Behind Sorghum Bread

Baking sorghum bread requires knowing the science behind it. The protein structure and dough development are key to its texture and structure. The fermentation process also impacts the bread’s final texture and taste.

Temperature is vital in baking sorghum bread. It influences the fermentation and the bread’s texture. To make the perfect sorghum bread, you need to grasp the fermentation process and its interaction with the dough’s protein structure. By managing temperature and fermentation, you can make a tasty and healthy sorghum bread for those with gluten intolerance.

  • Using the right type of sorghum flour
  • Controlling the temperature and fermentation process
  • Understanding the protein structure and the development of the dough

By considering these factors and understanding the science behind sorghum bread, you can create a delicious and healthy bread that is perfect for any occasion.

Step-by-Step Sorghum Bread Recipe

Making a delicious and healthy sorghum bread is easy. It’s perfect for those who need a gluten-free option. You only need a few ingredients: sorghum flour, psyllium husks, and water.

First, mix 3 cups of sorghum flour, 1/3 cup of whole psyllium husks, and 2 and 3/4 cups of water. Let it rest for a few hours. Then, shape it into a loaf and bake at 350°F (180°C) for 85 to 90 minutes.

Here is a summary of the recipe in a table format:

Ingredient Quantity
Sorghum flour 3 cups (420 grams)
Whole psyllium husks 1/3 cup (27 grams)
Water 2 and 3/4 cups (651 mL)
Cider vinegar 1 tablespoon (15 mL)

This gluten-free recipe is not only easy but also nutritious and tasty. It’s high in fiber and low in calories. It’s a great choice for a healthy and simple bread option.

sorghum bread recipe

Mastering the Mixing Technique

To make perfect sorghum bread, mastering the mixing technique is key. It’s about mixing the ingredients right and getting the dough just right. The dough should be stiff, breaking when lifted from the mixer, showing it’s ready for gluten-free bread.

The way you mix the dough greatly affects the bread’s texture and structure. If you mix too much or too little, the bread might turn out dense or crumbly. So, it’s important to stick to a consistent mixing method and keep an eye on the dough’s consistency.

Here are some tips to help you master the mixing technique for sorghum bread:

  • Use a mix of sorghum flour and other gluten-free flours for the right texture.
  • Watch the dough’s consistency and adjust the mixing time as needed.
  • Use a stand mixer or hand mixer for a consistent mix.

By perfecting the mixing technique and getting the dough just right, you can make delicious and healthy sorghum bread. It’s great for those with gluten intolerance or celiac disease.

Ingredient Quantity
Sorghum flour 110 g (3.9 oz or 1 cup)
Light Flour Blend 240 g (8.5 oz or 2 cups)
Granulated cane sugar 48 g (1.7 oz or 1/4 cup)

Proofing and Shaping Your Bread

Making sorghum bread involves important steps like proofing and shaping. These steps can greatly impact the bread’s texture and look. It’s vital to do them correctly.

Proofing lets the dough rise in a warm, draft-free spot for hours. This is when yeast works its magic, making the dough light and airy. After rising, you shape the dough into a loaf and let it rise again before baking.

Shaping the dough is key for the bread’s look and feel. You can make it into various shapes, like a round or oblong loaf. Be gentle when handling the dough to prevent it from becoming dense.

Here are some tips for proofing and shaping your sorghum bread:

  • Let the dough rise in a warm, draft-free place for several hours
  • Handle the dough gently to avoid overworking it
  • Shape the dough into a loaf and let it proof again before baking
  • Use a banneton or proofing basket to give the bread a more rustic, artisanal shape

sorghum bread

By following these tips, you can make a tasty, gluten-free sorghum bread. It’s great for sandwiches, toast, or just enjoying on its own.

Baking Temperature and Timing Guidelines

Baking sorghum bread right is key. You want it cooked but not too hard. It should taste great and feel just right. Here are some basic tips for temperature and timing.

First, bake at 450°F (230°C) for 30 minutes. This makes the crust nice. Then, lower the heat to 350°F (175°C) and bake for 45 more minutes. Make sure the bread’s internal temperature is 205-210°F (95-100°C) for it to be done.

  • Using the right amount of sorghum flour, typically around 370 grams
  • Adding the right amount of psyllium husk, usually around 20 grams
  • Not overmixing the dough, as this can lead to a dense bread
  • Letting the bread cool completely before slicing, to ensure it retains its texture and flavor

Follow these guidelines to make tasty sorghum bread. It’s great for sandwiches, toast, or just eating by itself. Always watch your bread while it bakes. Adjust the temperature and time as needed for the best loaf.

Storage and Shelf Life Tips

Proper storage and handling can extend the shelf life of sorghum bread. Store the bread in an airtight container at room temperature or in the fridge. Freezing the bread is also an option for longer storage.

Sorghum can stay usable for up to three years if stored well. Sorghum flour lasts about six months when stored correctly. The moisture in sorghum should not be more than 13 percent for long-term storage.

Here are some tips for storing sorghum bread and extending its shelf life:

  • Store the bread in an airtight container to prevent moisture and air from entering.
  • Keep the bread at room temperature or in the fridge to maintain a consistent temperature.
  • Freeze the bread for longer storage, making sure to wrap it tightly to prevent freezer burn.

By following these storage and shelf life tips, you can enjoy your sorghum bread for a longer period. This way, you maintain its quality and freshness.

sorghum bread storage

Troubleshooting Common Sorghum Bread Issues

When baking sorghum bread, you might face some problems. These issues can affect the bread’s quality. Common problems include texture issues, which can stem from wrong ingredient ratios or poor mixing.

To fix texture problems, you need to tweak the recipe and baking method. If the bread feels too dense, try cutting down on sorghum flour or adding more liquid. For a crumbly bread, add eggs or xanthan gum to bind it better.

Rising issues are another common problem. They can be due to not enough yeast or the wrong oven temperature. Make sure you use the right yeast and check your oven’s temperature. You might also consider mixing yeast with baking powder for better rising.

Moisture balance is also key in making sorghum bread. If the bread is too wet, it could be from too much liquid or not enough baking time. To fix this, reduce the liquid or bake it longer. By tackling these issues, you can make a tasty, gluten-free bread that fits your diet.

Variations and Flavor Enhancements

There are many variations and flavor enhancements you can try with sorghum bread. You can add nuts, seeds, or dried fruits to the dough. This changes the taste and texture.

For flavor enhancements, you can use different flours or binding agents. Mixing sorghum flour with other gluten-free flours can create a unique taste.

Here are some ideas for variations you can try:

  • Adding nuts or seeds, such as walnuts or chia seeds, for added texture and nutrition
  • Using different types of flour, such as almond flour or coconut flour, for a unique taste
  • Incorporating dried fruits, such as cranberries or raisins, for natural sweetness

By trying different variations and flavor enhancements, you can make a delicious and unique sorghum bread. It can be a sweet treat or a savory snack. Sorghum bread is versatile and can be tailored to your taste.

Health Benefits of Choosing Sorghum Bread

Sorghum bread is a great choice for a healthy bread option. It’s good for your digestive health. The high fiber in sorghum bread helps keep your bowels regular and prevents constipation.

This bread is also packed with nutrients and has a lower glycemic index than regular bread. It’s perfect for managing blood sugar levels. The resistant starch in sorghum bread slows down carb digestion, which helps keep blood sugar stable. Sorghum bread is a nutritious and healthy addition to any diet.

  • High fiber content for improved digestive health
  • Lower glycemic index for better blood sugar control
  • Rich in nutrients, including iron, potassium, and magnesium
  • May help reduce insulin resistance and protein glycation

Adding sorghum bread to your diet can greatly improve your health and wellbeing. It’s not only healthy but also tastes great. Sorghum bread is a smart choice for anyone seeking a healthier bread option.

Adapting Recipes for Dietary Restrictions

Adapting recipes for dietary restrictions can be tough, like with sorghum bread. But, with a few tweaks, you can make a tasty and safe dish for those with special diets.

Understanding the role of ingredients is key in recipe adaptation. For example, in sorghum bread, you can swap out traditional binders for better options for certain diets.

Here are some ideas for making changes:

  • Try different flours or binders for gluten-free, vegan, or paleo diets.
  • Add nuts, seeds, or dried fruits for texture and taste.
  • Use various oils or spreads to meet different dietary needs.

These changes let you enjoy sorghum bread while considering dietary restrictions. The secret to good recipe adaptation is knowing your ingredients. This way, you can make smart swaps and tweaks.

Conclusion

Sorghum bread is a tasty and healthy choice compared to regular bread. It’s packed with nutrients and has a low glycemic index. This makes it perfect for those looking for a gluten-free option.

By following the tips in this article, you can make sorghum bread at home. Enjoy its health benefits and the joy of baking.

Sorghum is great for those with dietary needs or just for its flavor. It’s a versatile grain that can be used in many dishes. Try it in sandwiches or as a sweet breakfast treat.

With a bit of practice, you can make delicious sorghum bread. It will please your taste buds and be good for you.

FAQ

What is sorghum bread?

Sorghum bread is a tasty and healthy option instead of regular bread. It’s made from sorghum flour, which is gluten-free and packed with nutrients.

What are the benefits of sorghum bread?

Sorghum bread is full of protein, fiber, and minerals. It’s great for those who need to avoid gluten. It also has a low glycemic index, which is good for your digestion.

What equipment is needed to bake sorghum bread?

You’ll need basic tools like a mixing bowl, measuring cups, a baking sheet, and a stand mixer or hand mixer. A bread loaf pan is also needed to shape the bread.

What are the key ingredients for sorghum bread?

Sorghum flour is the main ingredient. It comes in whole grain and refined types. You’ll also need xanthan gum to hold the dough together. Adding nuts and seeds can make the bread taste and feel better.

How do I prepare my kitchen for gluten-free baking?

Clean and sanitize your kitchen to avoid gluten contamination. Use separate utensils and storage for gluten-free ingredients.

What is the science behind sorghum bread?

The dough’s protein structure and fermentation process are key. Temperature also affects the bread’s texture and structure.

How do I master the mixing technique for sorghum bread?

Mixing ingredients well and getting the right dough consistency are key. Too much or too little mixing can ruin the bread’s texture.

How do I proof and shape my sorghum bread?

Let the dough rise before shaping it into a loaf. How you shape it can also affect the bread’s texture.

What are the guidelines for baking sorghum bread?

Make sure your oven is at the right temperature. Bake for the right time. Look for visual signs like color and texture to know when it’s done.

How do I store and handle sorghum bread?

Store the bread in an airtight container at room temperature or in the fridge. Freezing is also an option for longer storage.

What are common issues with sorghum bread, and how can I troubleshoot them?

Issues like texture problems and rising challenges can be fixed. Adjust the recipe, try different ingredients, or change your baking method.

How can I enhance the flavor and texture of sorghum bread?

Add nuts, seeds, or dried fruits to the dough. Try different flours or binding agents for unique flavors and textures.

What are the health benefits of sorghum bread?

Sorghum bread is full of nutrients and fiber. It has a low glycemic index, which is good for digestion and those with gluten-free diets.

Can I adapt sorghum bread recipes for other dietary restrictions?

Yes, you can make sorghum bread recipes work for vegan or paleo diets. Just use the right substitutions and ingredients.

Creamy Parsnip & Apple Soup – Warm Up This Winter


Creamy Parsnip & Apple Soup (Winter)

Have you thought about what makes a great winter comfort food? Is it the creamy texture, the mix of sweet and savory, or the health benefits? Creamy parsnip & apple soup is a seasonal recipe that blends parsnips’ earthy taste with apples’ sweetness. It’s a delicious and comforting dish perfect for warming up during winter.

This soup is a great choice for winter, with a unique flavor and nutritional value. You can make it in under an hour. It takes 15 minutes to prepare and cooks in less than an hour. Each serving has a good mix of calories, carbs, protein, and fat, making it both nutritious and filling.

Key Takeaways

  • Creamy parsnip & apple soup is a delicious and comforting winter comfort food.
  • This seasonal recipe combines the earthy flavor of parsnips with the sweetness of apples.
  • The soup is rich in nutrients, with each serving providing a good balance of calories, carbohydrates, protein, and fat.
  • You can prepare and cook the soup in under an hour, making it a convenient option for a weeknight dinner.
  • Creamy parsnip & apple soup is a versatile dish that can be served as a main course or as a side dish, and it can be paired with a variety of toppings and breads.
  • The soup can be stored in the refrigerator for 3-4 days or frozen for 3-6 months, making it a great option for meal prep.

Understanding the Magic of Creamy Parsnip & Apple Soup (Winter)

Exploring winter soup reveals a special mix of parsnips and apples. This seasonal recipe is tasty and good for you. It’s packed with fiber, vitamins, and minerals, perfect for a homemade soup.

This creamy soup warms you up on chilly winter days. The apples’ sweetness meets the parsnips’ earthiness for a unique flavor. It cooks in about 30 minutes, ideal for a quick dinner.

The parsnip and apple combination offers many benefits:

  • It’s high in fiber, with 6g per serving
  • It’s rich in vitamins A and C, with 544 IU and 23mg per serving, respectively
  • It’s a good source of potassium, with 687mg per serving

This creamy soup is perfect for warming up in winter. Its health benefits make it a great choice for a healthy diet. It’s a comforting homemade soup or a delicious seasonal recipe that everyone will enjoy.

Essential Ingredients for Your Winter Soup

To make a delicious winter soup, you need the right ingredients. You’ll need parsnip and apple soup ingredients. The secret to a great soup is using fresh, seasonal ingredients. For this creamy soup, you’ll need parsnips, apples, onions, garlic, and vegetable broth.

The quality and amount of each ingredient matter a lot. You’ll need 14 ounces of parsnips, 2 large apples, 1 large onion, and 2 cloves of garlic. Use 2 to 2 and 1/3 cups of vegetable broth. And, 1/2 cup of liquid cream adds a rich, creamy texture.

Here’s a list of the essential ingredients you’ll need:

  • 4 large parsnips, peeled and roughly chopped
  • 2 large apples, peeled, cored, and roughly chopped
  • 1 large onion, diced
  • 2 cloves of garlic, crushed
  • 500 ml of vegetable stock
  • 3 tablespoons of double cream (optional)

winter soup ingredients

By using these ingredients and a simple recipe, you can make a delicious winter soup. Choose the freshest seasonal ingredients for the best flavor and texture.

Kitchen Equipment You’ll Need

To make the creamy parsnip and apple soup, you’ll need some specific kitchen tools. A blender or immersion blender is key for the creamy texture. Also, a large soup pot is needed for cooking the ingredients.

Having the right tools for soup is important. A good blender or immersion blender will make your soup smooth. A soup pot is also a must, as it helps cook the ingredients evenly and prevents burning.

Essential Tools

You’ll need a large soup pot, a blender or immersion blender, and a cutting board. A knife, spoon, and measuring cup are also necessary for chopping and measuring ingredients.

Optional but Helpful Equipment

Optional tools include a hand blender or food processor for pureeing the soup. A slow cooker can also be used if you’re short on time.

Blending Options

There are a few ways to blend the soup. A blender gives a smooth texture, while an immersion blender is easier to use and clean. You can also use a hand blender or food processor.

kitchen equipment for soup

With the right kitchen tools, like a blender, immersion blender, and soup pot, you can make a delicious parsnip and apple soup. It’s perfect for the winter season.

Preparing Your Ingredients

Peeling and chopping parsnips into small pieces is key. You’ll need 3 parsnips for this creamy soup. Also, preparing apples is important, as they add sweetness. You’ll need 1 large apple, peeled and cored, for the right balance.

Chopping onions is a must. You’ll need 1 large onion, roughly sliced, for depth of flavor. Mincing garlic is also necessary. 3 cloves of garlic, minced or finely sliced, will do the trick.

Here’s a list of the ingredients you’ll need to prepare:

  • 3 parsnips, peeled and chopped
  • 1 large apple, peeled and cored
  • 1 large onion, roughly sliced
  • 3 cloves of garlic, minced or finely sliced

preparing parsnips and apples

By following these steps, you’ll make a delicious and creamy parsnip and apple soup. Handle each ingredient with care. Take your time when chopping and mincing for the best results.

The Step-by-Step Cooking Process

To start, sauté onions and garlic in a large pot. This step, called sautéing onions, is key to unlocking the flavors in your parsnip soup. After the onions are soft, add parsnips, apples, and other ingredients to the pot.

Then, add liquids and seasonings like vegetable broth and water. This mix creates a rich, creamy soup. As it simmers, add spices and herbs like nutmeg and salt to taste.

Blending the Soup

After simmering for 15-20 minutes, blend the soup with an immersion blender. This makes the soup smooth and creamy. Or, blend it in batches in a blender and then return it to the pot.

Here’s a summary of the cooking process in a structured manner:

  • Prep Time: 15 minutes
  • Cook Time: 20 minutes
  • Total Time: 45 minutes
  • Servings: 8

cooking parsnip soup

By following these steps, you can make a delicious parsnip and apple soup. Adjust the seasoning and spices to your liking. Enjoy it with a swirl of cream or some crusty bread.

Mastering the Perfect Consistency

To get the perfect soup consistency, focus on blending soup until it’s smooth and creamy. You can use an immersion blender or a regular blender. Blend in small batches to avoid overloading and ensure even heating.

It’s important not to over-blend the soup. This can make it too thin and lose its soup consistency. Blend in short pulses and check the consistency after each pulse. This helps you find the perfect balance of creamy texture and soup consistency.

Here are some tips to help you master the perfect soup consistency:

  • Use a mix of cooked and raw ingredients for the best creamy texture.
  • Avoid over-blending, as it can make the soup too thin.
  • Use an immersion blender or a regular blender to blend soup until it’s just right.

By following these tips and practicing your blending soup technique, you’ll get the perfect creamy texture and soup consistency. The key is to blend until smooth and creamy, without overdoing it.

Serving Suggestions and Garnishes

How you serve soup can really make a difference. For creamy parsnip and apple soup, try adding toppings like croutons or chopped herbs. A sprinkle of grated cheese is also great. You can also pair it with different breads, like crusty bread or crackers, for a nice crunch.

It’s important to control the temperature of your soup. You want it to be just right, not too hot or cold. Use a thermometer to check the temperature. Also, think about the atmosphere where you’re eating, as it can affect your experience.

To elevate your soup, add some creative garnishes. Chopped fresh herbs like parsley or thyme can add a fresh touch. Sour cream or grated cheese can also add flavor and texture. Try sliced apples, toasted nuts, or paprika for more ideas.

Here are some tips for serving soup and choosing the right toppings and bread pairings:

  • Choose toppings that match the flavor of your soup
  • Find the perfect bread pairing for your soup
  • Be creative with your garnishes
  • Make sure the soup is at a comfortable temperature

Storage and Reheating Tips

Storing soup right is key to keeping it fresh. Use airtight containers for the creamy parsnip and apple soup. It stays good in the fridge for up to three days or frozen for six months. This is great for meal prep or planning.

There are ways to reheat your soup. You can warm it on the stovetop or in the microwave. If using the microwave, use a safe container and heat in short bursts. Check the soup’s temperature until it’s hot.

Here are some tips for storing and reheating your soup:

  • Use airtight soup storage containers to prevent spoilage and keep the soup fresh.
  • Label and date the containers so you can easily keep track of how long they’ve been stored.
  • When reheating, make sure the soup is hot and steaming to ensure food safety.

By following these tips, you can enjoy your creamy parsnip and apple soup for longer. It keeps its flavor and nutrients.

Conclusion: Enjoying Your Homemade Winter Comfort

Making a homemade soup like this creamy parsnip and apple soup is perfect for winter. The mix of parsnips and apples gives a sweet and savory taste. It’s also packed with nutrients.

Parsnips get sweeter in cold weather, and apples add a sweet touch. This makes the soup a hit. It’s a great way to enjoy winter comfort food.

By cooking this soup at home, you get to enjoy its warmth and health benefits. It’s easy to make and serves 8 people. This makes it perfect for sharing with family and friends.

So, invite everyone over and enjoy this cozy soup together. It’s a tasty way to stay warm and happy all winter.

FAQ

What makes the combination of parsnips and apples so special in this soup?

Parsnips and apples together create a sweet and savory mix. The apples add natural sweetness, which complements the parsnips’ earthy taste. This makes the soup a perfect blend of flavors.

What are the nutritional benefits of this creamy parsnip and apple soup?

This soup is full of good stuff. Parsnips offer fiber, vitamins, and minerals. Apples add antioxidants and more fiber. Together, they make a warm, nourishing soup for winter.

Why does this soup work well for the winter season?

Its creamy texture and mix of flavors are perfect for winter. The use of root vegetables and apples in season adds freshness and flavor.

What key ingredients do I need to make this creamy parsnip and apple soup?

You’ll need parsnips, apples, onions, garlic, broth, and cream or milk. Don’t forget salt, pepper, and herbs for flavor.

What kitchen equipment is required to prepare this soup?

You’ll need a knife, cutting board, large pot, and blender or immersion blender. These tools help with chopping and blending.

How do I prepare the ingredients for the creamy parsnip and apple soup?

Start by peeling and chopping parsnips and apples. Then, finely chop onions and mince garlic. This ensures even cooking and blending.

Can you walk me through the step-by-step cooking process?

First, sauté onions and garlic. Add chopped parsnips and apples, broth, and seasonings. Simmer until tender, then blend until creamy.

How can I achieve the perfect consistency for this creamy soup?

Blend the soup well with a blender or immersion blender. Adjust broth or cream for the right creaminess.

What are some suggested serving ideas and garnishes for this soup?

Top with croutons, herbs, or cream for a beautiful look. Serve with bread or crackers for a cozy meal.

How should I store and reheat the leftover creamy parsnip and apple soup?

Store in an airtight container in the fridge for up to 4 days. Reheat gently on the stovetop or in the microwave, stirring often.

Slow Cooker Rustic Lentil & Tomato Soup


tomato and lentil soup​

Looking for a meal that’s both hearty and easy to make? Try the slow cooker rustic tomato and lentil soup. It’s a great example of simple slow cooker recipes. This homemade soup is full of healthy ingredients and tastes amazing.

It’s perfect for a quick, satisfying meal after a long day. The slow cooker makes it easy to prepare, so you can enjoy a warm, comforting dish without much work.

Introduction to Slow Cooker Rustic Lentil & Tomato Soup

This slow cooker rustic lentil & tomato soup recipe is great for a comforting meal with little effort. The slow cooker makes it easy to cook, perfect for when you’re busy. It’s full of nutritious ingredients and has rich flavors.

You can enjoy it as a main dish or with some crusty bread for a more filling meal. It’s sure to become a favorite in your household.

Key Takeaways

  • Slow cooker rustic lentil & tomato soup is a hearty and comforting meal option.
  • This recipe is an example of easy slow cooker recipes that require minimal effort.
  • The soup is packed with nutritious ingredients, including lentils, tomatoes, and vegetables.
  • The slow cooker allows for a hands-off approach, making it ideal for busy days.
  • This homemade tomato soup can be served as a main course or paired with other dishes for a filling meal.
  • The recipe is perfect for those seeking a healthy and delicious meal option.

Understanding the Magic of Slow Cooker Lentil Soups

Slow cooker lentil soups are a top pick for healthy soup recipes. They taste great and are full of nutrients. The slow cooking makes lentil nutrients easier to get.

This is a big plus for vegetarian slow cooker meals. Lentils are a good source of protein and iron.

A crockpot lentil soup is a simple vegetarian slow cooker recipe. Just put all the ingredients in the slow cooker. Set it to low and cook for 6-8 hours.

You’ll get a rich broth with tender lentils and veggies. It’s perfect for a busy day. You can make it in the morning and enjoy it by evening.

Slow cooker lentil soups are also very nutritious. They’re full of fiber, protein, and vitamins and minerals. Lentils are low in calories but high in nutrients.

This makes them a great choice for a healthy soup recipe. It’s no surprise that slow cooker lentil soups are loved for their taste and health benefits.

Essential Equipment for Perfect Results

To get the best results with your slow cooker rustic lentil & tomato soup, you need the right tools. A slow cooker, also known as a crockpot, is key. It cooks food low and slow, which is perfect for breaking down lentils and bringing out flavors.

An immersion blender is also handy for blending some soup to make it creamy. This is great if you like your soup smooth. You’ll also need a cutting board, knife, and measuring cups.

tomato and lentil soup​ - slow cooker equipment

When picking a slow cooker, think about size and features. A 6-quart slow cooker is a good size for this recipe. Some models have timers and temperature controls, which can help you get the soup just right.

With the right equipment, like a slow cooker and immersion blender, you can make a delicious rustic lentil & tomato soup. It will quickly become a favorite dish.

Ingredients for Slow Cooker Rustic Lentil & Tomato Soup

To make a delicious lentil soup recipe, you need the right ingredients. A great easy slow cooker soup combines lentils, tomatoes, and herbs. Brown or green lentils work well, but brown lentils are better for a rustic tomato soup.

For tomatoes, choose canned diced or fresh, based on flavor and texture you prefer. Herbs and spices like cumin, chipotle pepper powder, and agave nectar add depth. Here’s what you’ll need:

  • 1-1/4 cups brown lentils
  • 1-1/2 cups chopped tomatoes
  • 1/2 tablespoon ground cumin
  • 1/2 tablespoon chipotle pepper powder
  • 1 whole chipotle pepper in adobo, minced
  • 2 teaspoons agave nectar
  • 1 teaspoon kosher salt
  • 1/2 teaspoon fresh black pepper
  • 3/4 cup plain yogurt
  • 1/4 cup chopped cilantro
  • 3 cups water

With these ingredients, you can create a hearty lentil soup recipe perfect for a cold day. The easy slow cooker soup is ideal for a weeknight dinner. The cozy soup recipes will quickly become a favorite. And the rustic tomato soup will warm you up on a chilly day.

tomato and lentil soup​

Preparation Methods and Techniques

To make a tasty and healthy dish like slow cooker tomato lentil stew, knowing how to prepare it is key. Start by sautéing onions, carrots, and garlic. This step is important for bringing out the flavors of the dish.

By sautéing these ingredients, you enhance their natural tastes and smells. These flavors then mix well with the lentils and broth as they simmer. This method is essential for a stew that’s both delicious and good for you. It has about 12 grams of protein and 8 grams of fiber per serving, making it a great choice for a healthy meal.

Here are some tips for making your slow cooker tomato lentil stew:

  • Use a mix of vegetables like onions, carrots, and garlic to add depth to the dish.
  • Add different spices and herbs to boost the flavor and aroma of the stew.
  • Let the stew simmer for a long time. This helps the flavors mix well and the lentils become tender.

tomato and lentil soup​ - slow cooker tomato lentil stew

By using these preparation methods, you can make a delicious and healthy comfort food recipe. It’s perfect for a weeknight dinner or a special event. These tips will help you create a flavorful and nutritious dish, whether you’re making a simple soup or a hearty stew.

Step-by-Step Cooking Instructions

To make a tasty easy crockpot lentil soup, start by getting your ingredients ready in the morning. First, sauté the spices and veggies. Then, add the lentils and broth to your slow cooker. This morning prep is key for the flavors in the hearty tomato lentil stew.

The soup cooks for 6-8 hours on low or 3-4 hours on high. It’s perfect for a busy day as a slow cooker vegetarian soup. The cooking time might change based on your slow cooker and how thick you like the soup.

tomato and lentil soup​ - slow cooker vegetarian soup

To know if the soup is ready, check if the lentils are soft and the flavors are mixed well. You can also blend some of the soup for a creamier taste. Follow these steps to make a delicious easy crockpot lentil soup for any time.

Cooking Method Cooking Time Servings
Slow Cooker 6-8 hours (low), 3-4 hours (high) 6 servings

Customizing Your Soup

Creating a tasty homemade lentil and tomato soup is fun. You can make it your own by changing the recipe. For a vegetarian soup, just leave out the meat and focus on the lentils, tomatoes, and herbs.

Healthy slow cooker recipes are great because you can easily change them. Add your favorite spices or herbs to make it special. For example, smoked paprika or crushed chiles can add a smoky or spicy taste.

Try adding kale or spinach for extra nutrition. Or use different tomatoes like pelati or cherry tomatoes. You can also try different lentils, like black beluga or green French lentils, to change the soup’s texture and taste.

These healthy slow cooker recipes let you make a delicious, nutritious soup that fits your taste and diet. So, don’t be shy to try new ingredients and flavors. Make your rustic lentil soup recipe truly unique.

Serving Suggestions and Garnishes

Serving the best slow cooker soups, like vegan lentil soup, can be enhanced. Try pairing it with sides like crusty bread, salad, or roasted veggies. Adding a dollop of yogurt or sour cream can make it creamy and tangy, perfect for a cozy meal.

For a boost, add fresh herbs, toasted seeds, or croutons to your soup. You can also blend it for a smooth, creamy texture. Serving it with toasted garlic crostini or crusty bread adds extra flavor.

Here are some serving suggestions for your vegan lentil soup:

  • Crusty bread or toasted garlic crostini
  • Roasted vegetables, such as carrots or sweet potatoes
  • A side salad with mixed greens and a light vinaigrette
  • A dollop of yogurt or sour cream for added creaminess

By using these serving tips, you can make a delicious and comforting meal with your vegan lentil soup. It’s one of the top slow cooker soups and comfort food recipes out there.

Storage and Reheating Guidelines

Enjoying your favorite vegetarian soup recipe, like hearty tomato soup, on a cold winter day is special. Knowing how to store and reheat it right keeps the flavors rich and the texture great. Making a big batch of your favorite hearty tomato soup is a great idea for a cozy meal.

Store your soup in an airtight container in the fridge for up to 5 days. This is great for cozy winter meals when you want a warm soup ready anytime. To reheat, thaw it overnight in the fridge, then heat it on the stovetop or in the microwave, stirring every 30 seconds.

Freezing Instructions

Freeze the soup in an airtight, freezer-safe container for up to 3 months. This lets you enjoy your vegetarian soup recipe all winter. Just thaw it in the fridge overnight and reheat as you like.

Portion Control Tips

Portion your hearty tomato soup into individual servings for easy meals. Each serving is about 1.5 cups. This helps you plan your cozy winter meals ahead, ensuring the right amount of soup for each meal.

By following these tips, you can enjoy your favorite vegetarian soup recipe anytime. Whether it’s a quick lunch or a cozy winter meal with loved ones, having a big batch of hearty tomato soup ready is convenient. So, make a big batch and enjoy a delicious, comforting meal whenever you want.

Troubleshooting Common Issues

When making a lentil soup, you might run into some common problems. These can mess with the soup’s texture and taste. For example, if your soup is too thick, just add more broth or water to fix it.

Seasoning can also be an issue. If your soup tastes bland, add more salt, pepper, or herbs. But, if it’s too salty, a raw potato can help soak up the salt. Remember, cooking tomatoes for too long can lose some of their vitamin C, which is good for you.

Here are some tips for fixing common problems with your lentil soup:

  • Adjust the seasoning to taste by adding more salt, pepper, or herbs
  • Add more broth or water if the soup becomes too thick
  • Simmer the soup for a longer period to reduce the liquid if it’s too thin
  • Use a thickener, such as cornstarch or flour slurry, to achieve the desired density

By using these tips, you can make a tasty lentil soup for a cozy night in. Whether it’s a slow cooker soup or a rustic tomato soup, the goal is to find the perfect mix of flavors and textures.

Issue Solution
Too thick Add more broth or water
Too thin Simmer for a longer period
Too salty Add a raw potato to absorb excess salt

Making Ahead and Meal Prep Tips

Homemade soup ideas are perfect for healthy comfort food. Hearty slow cooker recipes are great because you can make them ahead of time. This saves you from last-minute cooking stress.

Think about making a big batch of soup on the weekend. Then, portion it out into individual containers for the week. This way, you always have a comforting meal ready when you need it. Here are some tips for meal prep:

  • Portioning out the soup into individual containers and refrigerating or freezing for later use
  • Labeling and dating the containers so you can easily keep track of what you have and how long it’s been stored
  • Considering a “cook once, eat twice” approach, where you cook a large batch of soup and use it for multiple meals throughout the week

By following these tips, you can enjoy healthy comfort food and save time in the kitchen.

Storage Method Shelf Life
Refrigeration Up to 5 days
Freezing Up to 3 months

With a bit of planning, you can have a delicious, healthy meal whenever you want. So, why not try it out and make hearty slow cooker recipes a part of your meal prep routine?

Conclusion

This slow cooker rustic lentil & tomato soup is a true masterpiece. It’s simple yet full of flavor. Its rich aroma and nutrient-rich ingredients make it perfect for any time of the year.

It’s ideal for busy people or parents with a lot on their plate. This easy recipe offers a hearty lentil soup that everyone will enjoy. It’s a wholesome and satisfying meal.

So, what are you waiting for? Get your ingredients ready and start your slow cooker. Prepare to enjoy the delicious and nourishing flavors of this rustic lentil and tomato soup. It’s a dish that will surely become a favorite in your home.

FAQ

What are the benefits of slow cooking lentils?

Slow cooking lentils makes their nutrients easier to get. It also makes the lentils taste better and feel softer. This results in a delicious and hearty soup.

Why does this Slow Cooker Rustic Lentil & Tomato Soup recipe work so well?

This recipe combines lentils with spices and veggies for a tasty broth. The slow cooking mixes the flavors, making the soup comforting and filling.

What are the nutritional benefits of lentils?

Lentils are packed with protein, iron, and fiber. They’re great for a healthy diet. This soup is a nutritious and satisfying meal.

What equipment is needed to make this soup?

You’ll need a slow cooker for this recipe. It’s key for the slow cooking that makes the broth rich. An immersion blender helps make the soup creamy.

What type of lentils should I use for this recipe?

Brown or green lentils work well. Brown lentils stay firmer during cooking.

Can I use fresh or canned tomatoes?

Choose fresh or canned diced tomatoes. It’s up to you and what you like in your soup.

How do I know when the soup is done?

The soup is ready when the lentils are soft and the flavors blend. It takes 6-8 hours on low or 3-4 hours on high.

Can I make this soup vegetarian?

Yes, just leave out any meat or animal products to make it vegetarian.

How can I adjust the spice level of the soup?

To change the spice, add more or less red pepper flakes. Or use hot sauce to your liking.

How long can I store and reheat the soup?

Store it in the fridge for up to 5 days or freeze for 3 months. Thaw it in the fridge, then reheat on the stovetop or in the microwave.

Flavorful Cabbage, Carrot & Turmeric Detox Soup


cabbage and vegetable soup​

cabbage and vegetable soup​

Are you searching for a tasty and healthy detox soup? A cabbage, carrot & turmeric detox soup could be just what you need. It’s full of nutrients and has a vibrant flavor. This vegan and gluten-free recipe uses a whole head of cabbage, savory spices, garlic, veggies, and fresh ginger.

Key Takeaways

  • This cabbage, carrot & turmeric detox soup recipe is vegan and gluten-free, making it suitable for individuals with dietary restrictions.
  • The soup is packed with flavor and nutrients, thanks to the combination of savory spices, garlic, veggies, and fresh ginger.
  • Cabbage contains as much calcium as oranges, according to USDA data, making it a great ingredient for a healthy detox soup.
  • The recipe serves 4-6 people, indicating a portion size suitable for a small group or family meal.
  • The soup can be stored in the fridge for up to 5 days or frozen for up to 3 months, making it a great option for meal prep enthusiasts.
  • The recipe suggests adding chickpeas, lentils, or shredded chicken for a heartier meal, appealing to various dietary preferences and protein needs.

Understanding the Power of Detox Soups

Thinking about adding a detox soup cleanse to your routine? It’s key to know how detox soups can help your body. A soup made with cabbage, carrots, and turmeric is a good start. It’s important to pick a recipe that’s easy to make and helps detoxify your body.

Choosing the right ingredients for your homemade detox soup is critical. Spices like garlic, ginger, and turmeric are packed with health benefits. Garlic fights inflammation and supports liver health. Ginger boosts brain and heart functions and eases pain. Turmeric is great for your heart, joints, and digestion.

Here are some benefits of using a detox soup cleanse:

  • Boosts energy and immunity
  • Supports weight loss
  • Improves digestion and reduces inflammation
  • Helps to remove toxins from the body

Adding an easy detox soup to your diet can be beneficial. It’s a great way to enhance your health or boost energy and focus. So, why not try making a homemade detox soup today and see the difference it can make in your life?

Health Benefits of Key Ingredients

Vegetable soup is great for your health because of its ingredients. Cabbage, a main ingredient, is low in calories but packed with nutrients. It has calcium, magnesium, fiber, and potassium. The fiber in cabbage helps you feel full longer, which can stop you from overeating.

Cabbage, carrots, and turmeric make this soup boost your immune system. Carrots give you beta-carotene, which turns into vitamin A. Vitamin A is good for your skin and immune system. Turmeric has curcumin, which fights inflammation. This is good for your health.

Some benefits of this soup are:

  • Low in calories, making it ideal for weight management
  • High in fiber, helping individuals feel fuller for longer
  • Rich in vitamins and minerals, including calcium, magnesium, and potassium
  • Contains anti-inflammatory compounds, such as curcumin, to reduce inflammation

cabbage and vegetable soup​

This soup is full of nutrients and boosts your immune system. It’s low in calories and high in fiber. It’s a great choice for a healthy meal.

Essential Ingredients for Your Cabbage, Carrot & Turmeric Detox Soup

To make a tasty detox soup, you need the right ingredients. You’ll need extra virgin olive oil, onion, garlic, and green cabbage. Also, celery, carrots, kosher salt, and black pepper are needed. Don’t forget turmeric, cumin, coriander, Aleppo pepper, diced tomatoes, and vegetable broth. Add parsley, green onions, and fresh ginger for extra flavor.

This soup is full of vitamins and minerals. It’s made with cabbage, carrots, and turmeric. These ingredients help support your health. The soup is delicious and good for you.

Core Vegetables and Spices

The main veggies are green cabbage, carrots, and celery. They’re full of vitamin C, vitamin K, and fiber. The spices like turmeric, cumin, and coriander add flavor and health benefits. Turmeric is known for its anti-inflammatory properties.

Optional Enhancing Ingredients

You can add diced tomatoes, vegetable broth, and fresh parsley to make it even better. These ingredients add flavor and nutrients. It’s a great choice for healthy soups.

Ingredient Substitutions

Want to try something different? You can swap coconut oil for olive oil or add paprika or garlic powder. You can also add kale or spinach for more nutrients.

By using these ingredients, you can make a healthy and tasty soup. It’s perfect for a meal or to boost your health.

Kitchen Tools and Equipment Needed

To make a tasty and nutrient-rich soup, you need the right tools. A big Dutch oven or pot with a lid is key. It helps cook the soup evenly, bringing out the flavors.

For a homemade soup, the right tools matter a lot. A large pot with a lid lets you cook for many people. It also keeps the soup warm and moist, making it flavorful and healthy.

kitchen tools for homemade soup

You’ll also need a cutting board, knife, and spoon. A blender or immersion blender is handy for smooth soup. With these, you can make a delicious and nutrient-rich soup for any event.

Having the right tools makes making homemade soup easy. Whether it’s a simple easy soup recipe for dinner or a special nutrient-rich soup for a party, the right equipment helps a lot.

Step-by-Step Preparation Method

To make the cabbage soup, start by cooking the onions, carrots, and celery in olive oil. This step is key to unlocking the flavors in the clean eating soup. Then, add the cabbage and carrots to the pot, along with some turmeric for its health perks and taste.

After the veggies soften, pour in the vegetable broth and let it simmer. Wait until all the veggies are tender. Then, season with salt, black pepper, and any other spices you like. This carrot soup is not just tasty but also full of nutrients. For a cleanse soup, think about adding ginger or lemon juice to boost the flavor and health benefits.

cabbage soup preparation

Lastly, top with fresh herbs like parsley or green onions, and serve it hot. This turmeric recipes inspired soup is great for a healthy meal or as part of a cleanse soup diet. It’s low in calories and high in fiber, making it a fantastic choice for a nutritious and satisfying meal.

Maximizing the Nutritional Benefits

To get the most out of your immune-boosting soup, think about making it fit your dietary needs. This weight loss soup is tasty and full of nutrients for your health goals.

This vegetarian soup is full of antioxidants, which fight inflammation and chronic diseases. It’s also rich in vitamins and minerals, making it great for a healthy diet.

Here are some tips to boost your soup’s nutrition:

  • Use a variety of colorful vegetables to increase the antioxidant content
  • Add lean protein sources, such as chicken or tofu, to support muscle health
  • Experiment with different spices and herbs to find the combination that works best for you

By following these tips, you can make this immune-boosting soup a key part of your diet. It’s perfect for those looking to lose weight or just want a healthy, tasty meal. This vegetarian soup is a great choice.

anti-inflammatory soup recipe

Storage and Reheating Guidelines

After making your tasty detox soup with turmeric, it’s key to store it right. This keeps its nutrients and taste fresh. You can keep the cabbage and carrot soup in a sealed container in the fridge for up to 5 days. Or, freeze it for up to 3 months. Always reheat it gently to keep the nutrients in.

Here are some tips for storing and reheating your homemade detox soup:

  • Let the soup cool completely before refrigerating or freezing it.
  • Use airtight containers to prevent contamination and spoilage.
  • Label the containers with the date and contents.
  • Reheat the soup gently over low heat, stirring occasionally.

By following these tips, you can enjoy your healthy soups for a longer time. This way, you keep their nutritional value. Always check the soup for any signs of spoilage before eating it.

Storage Method Shelf Life
Refrigeration Up to 5 days
Freezing Up to 3 months

Serving Suggestions and Pairing Ideas

There are many ways to serve your healthy soup. You can have it alone or with sides to enhance its taste. Try adding white beans, chickpeas, or shredded chicken for protein and texture. This way, the soup’s detoxifying benefits stay strong, and you get more variety.

Exploring different pairing ideas is key to enjoying your soup. A side of whole grain bread or a green salad can be perfect. It’s all about finding what you like best. This soup’s creamy texture and vibrant flavors will quickly become a favorite.

Here are some great pairing ideas for your vegetable soup:

  • Adding a squeeze of fresh lemon juice for an extra burst of citrus flavor
  • Swirling in a spoonful of creamy yogurt for added richness
  • Sprinkling a pinch of fresh herbs, such as parsley or cilantro, for a pop of color and freshness

This soup is very versatile. Don’t be afraid to try new things to make it your own. With its healthy ingredients and tasty flavors, it’s a great addition to any meal.

Customization Options for Dietary Needs

When making your detox soup with turmeric, cabbage, and carrot, you can adjust it to fit your needs. It’s already vegan and gluten-free, perfect for those with dietary restrictions. About 3% of Americans have gluten intolerance, so this soup is a great choice.

The soup is packed with nutrients, including 25% of your daily fiber in one serving. It’s made with cabbage, carrots, and other veggies, making it filling and low in calories. You can also change it to fit your taste, making it a great vegetarian detox soup.

Here are some ways to customize your soup:

  • Change the spice level by adding jalapeno or red pepper flakes
  • Add veggies like Brussels sprouts or mushrooms for more nutrients
  • Use low-sodium broth to lower the sodium in the soup

By tweaking these options, you can make a detox soup that’s just right for you. It can be vegan, gluten-free, or low-sodium, making it a top pick for a detox or vegetarian soup.

Troubleshooting Common Issues

When making healthy soups like the cabbage, carrot, and turmeric detox soup, you might run into some common problems. One issue is if the soup is too thick or too thin. To fix this, add more broth or water if it’s too thick. Or, simmer it longer if it’s too thin.

Another problem is if the soup tastes too bland. To make it taste better, add more spices or herbs like turmeric, ginger, or thyme. Remember, detox recipes use the natural flavors of ingredients. So, feel free to experiment and find the perfect taste for you.

If you’re looking for more turmeric recipes or different versions of cabbage soup and carrot soup, keep it simple. Focus on the natural flavors of the ingredients. This way, you can make a tasty and healthy meal that’s great for a detox diet.

Here are some more tips to help you:
* Use fresh ingredients for the best flavor and nutrition.
* Adjust the amount of spices and herbs to your liking.
* Try different ingredient combinations to find your favorite healthy soups.

Conclusion

This cabbage, carrot, and turmeric detox soup is not just tasty. It’s also great for helping your body get rid of toxins. With ingredients like ginger, turmeric, and lemon, it boosts your metabolism and fights inflammation.

The soup’s high fiber content helps with digestion and prevents bloating. Its water-rich broth also keeps you hydrated. Plus, the nutrient-dense veggies like cabbage, carrots, and onions are full of antioxidants, vitamins, and minerals that feed your body.

Adding this detox soup to your meals is a big step towards better health. It supports your liver function, gut health, and overall well-being. Let this delicious and healthy soup lead you to a more vibrant life.

FAQ

What makes this soup detoxifying?

This soup is detoxifying because of its ingredients. Cabbage, carrots, and turmeric are key. Cabbage helps with detox, carrots aid digestion, and turmeric fights inflammation.

What are the health benefits of the key ingredients in this soup?

Cabbage is full of fiber and vitamins. It fights inflammation. Carrots boost your immune system and gut health. Turmeric reduces inflammation and supports liver health.

What are some optional enhancers I can add to this soup?

You can add fresh ginger, garlic, lemon or lime juice, and leafy greens. Chickpeas or lentils are great for protein. These add flavor and nutrition.

How can I customize this recipe to suit my dietary needs?

This recipe is vegan and gluten-free. You can use low-sodium broth and adjust spices. Substitute ingredients for other diets, like nut-free or low-carb.

How long can I store the leftover soup, and how should I reheat it?

Store leftover soup in an airtight container for 4-5 days. Reheat in a saucepan over medium heat, or in the microwave. Be careful not to overcook.

Savor the Taste of Artisanal Rye Crispbread


Rye Crispbread

What makes a perfect rye crispbread? How can you make this tasty, whole-grain treat at home? Artisanal rye crispbread is known for its strong flavor and dense texture. It’s a great choice for healthy snacks, with low calories and a crunchy bite.

Looking for a gluten-free option or a tasty way to add more whole grains to your diet? Rye crispbread is a fantastic choice.

Exploring artisanal rye crispbread, you’ll find its rich, earthy taste and dense crumb. It’s perfect for snacking, making sandwiches, or pairing with savory toppings. Rye crispbread is packed with health benefits and is versatile in recipes. Making your own artisanal rye crispbread lets you enjoy this delicious treat anytime, knowing what goes into it.

Key Takeaways

  • Artisanal rye crispbread is a delicious, whole-grain treat with a robust flavor and hearty texture.
  • Rye crispbread is a great choice for healthy snacks, with low calories and a satisfying crunch.
  • With its numerous health benefits and versatility in recipes, rye crispbread is an excellent addition to any meal or snack.
  • Learning to craft your own artisanal rye crispbread allows you to enjoy this delicious treat whenever you want, knowing exactly what ingredients go into it.
  • Rye crispbread can be made gluten-free, making it a great option for those with dietary restrictions.
  • Whole grain rye crispbread provides a good source of fiber, protein, and other essential nutrients.

Understanding the Heritage of Rye Crispbread

Rye crispbread has a long history in Scandinavian cuisine. It’s been a key food in Northern Europe for ages. Rye grows better in cold weather than wheat.

Eating whole grain rye breads, like rye crispbread, can help you feel full. It also keeps your blood sugar steady.

Rye crispbread is a great wholesome snack because it’s full of dietary fiber. This fiber is good for your digestion and prevents constipation. Rye bread lasts months, unlike many wheat breads that spoil quickly.

In scandinavian cuisine, rye flatbreads are loved for soups, stews, and snacks. They’re also tasty as crunchy crackers on their own.

Rye crispbread is more than just food; it’s a piece of history. It fed cities like London and Paris. It even supported empires like Charlemagne’s and Peter the Great’s.

Exploring rye crispbread, you’ll learn about its deep heritage. You’ll see how it’s enjoyed today, from classic open-faced sandwiches to new snack ideas.

Essential Ingredients for Perfect Rye Crispbread

To make perfect rye crispbread, you need the right ingredients. Whole grain rye flour is a must. It gives the bread the fiber and nutrients it needs. The high fiber in whole grain rye flour makes the crispbread crunchy, just like traditional Nordic recipes.

Other key ingredients are water, salt, and yeast. The type of flour used is important. It affects the texture and flavor of the bread. Choose a high-quality whole grain rye flour for the best results.

Rye flour makes up about 60-70% of the ingredients in traditional Swedish crispbread. Water is used in about 30-40% of the mixture. This helps form the dough. Together, whole grain rye flour and water make a delicious, healthy crispbread with lots of fiber.

Here are some key ingredients and their proportions:

  • Whole grain rye flour: 60-70%
  • Water: 30-40%
  • Salt: 1-2%
  • Yeast: 1-2%

By using these essential ingredients and following a traditional Nordic recipe, you can make a delicious and healthy whole grain rye crispbread. It will have a crunchy texture and lots of fiber.

The Nutritional Power of Whole Grain Rye

Whole grain rye is packed with nutrients, making it a great choice for your health. It’s high in fiber, which is good for your digestion and blood sugar. It’s also a healthy snack option, rich in vitamins and minerals like iron, potassium, and magnesium.

Compared to other grains, whole grain rye shines with its high fiber and nutritional value. It offers many benefits, such as:

  • Reduced total cholesterol levels
  • Lower LDL (bad) cholesterol
  • Improved insulin sensitivity
  • Increased feelings of fullness and satiety

Whole grain rye is perfect for those seeking a whole grain snack that’s tasty and healthy. Its high fiber and numerous health perks make it a top pick for better health and wellbeing.

Choosing Your Rye Flour Types

Choosing the right flour is key to making great rye crispbread. Rye flour comes in different types like light, medium, dark, and whole grain. Each type has its own taste and health benefits. For a Scandinavian snack, whole grain rye flour is best for its high fiber content.

The different types of rye flour are:

  • Light rye flour: contains only the starchy endosperm
  • Medium rye flour: contains more bran than light rye, leading to a darker color and more robust flavor
  • Dark rye flour: usually milled from the entire rye kernel, resulting in a coarser texture and darker color
  • Whole grain rye flour: contains all parts of the rye kernel, including bran, germ, and endosperm

Popular brands like Bob’s Red Mill and King Arthur offer rye flour. Look at the ash and protein content to affect flavor and texture. Also, the flour’s moisture content impacts its shelf life.

rye flour

The following table summarizes the characteristics of different types of rye flour:

Type of Rye Flour Ash Content Protein Content Moisture Content
Light Rye Flour 0.00-1.00% 6.5-8.5% 11-14%
Medium Rye Flour 1.01-1.30% 8.0-9.0% 11-13.5%
Dark Rye Flour 2.00-3.00% 12.0-14.0% 10-12%
Whole Grain Rye Flour 1.61-1.80% 9.0-10.5% 10-12%

By picking the right rye flour, you can make a tasty and healthy scandinavian snack. It will be rich in high fiber and full of flavor.

Required Equipment and Tools

To make delicious rye crispbread with a crunchy texture, you’ll need some essential equipment and tools. Having the right tools can make a big difference in the quality of your healthy snack. Good quality baking tools are key when baking.

A digital scale is necessary for measuring ingredients by weight, which simplifies the process. A digital thermometer is used to ensure the correct water temperature when building the starter and later for bread dough. For creating a steamy baking environment, a dutch oven is highly recommended, but optional. It’s essential to have a few whole grain crackers on hand to test your creations.

Here are some essential tools you’ll need to get started:

  • Digital scale
  • Digital thermometer
  • Glass containers (at least 20 oz in size)
  • Dutch oven (optional)
  • Banneton basket (optional)

Using these tools, you can create a variety of delicious whole grain crackers and other baked goods. Always use baking tools that are in good condition to ensure the best results. With practice and patience, you can become a skilled baker, creating tasty healthy snack options for yourself and your loved ones.

By investing in the right equipment and tools, you’ll be well on your way to creating delicious crunchy texture treats that are perfect for snacking. Happy baking!

Mastering the Basic Rye Crispbread Recipe

To make tasty rye crispbread, you need to get the basic recipe right. Mix whole grain rye flour, water, salt, and yeast. Then, bake it in the oven. The secret to perfect rye crispbread is using the right ingredients and following the right steps.

When making rye crispbread, remember that rye flour needs wheat flour to rise well. A good mix is 1 cup of rye flour (4 1/4 ounces / 120 grams) with white flour. You can also add flavors like rosemary or olive oil for a unique taste.

Here are some tips to help you master the basic rye crispbread recipe:

  • Use a mix of whole grain rye flour and wheat flour for the best results.
  • Let the dough rest for at least 1 hour at room temperature to let the yeast work.
  • Bake the rye crispbread in a hot oven (450 degrees F / 230 degrees C) for about 30 minutes, or until it’s golden brown.

By following these tips and mastering the basic rye crispbread recipe, you can make delicious and crispy healthy snacks. They’re perfect for any time. Whether you’re looking for a gluten-free option or just want to try something new, rye crispbread is a great choice.

Perfecting Your Dough Consistency

To make perfect whole grain crackers, focus on the dough’s consistency. The right consistency is key for a crunchy texture and great taste. Working with whole grain flours means the dough acts differently than refined flours. Mastering kneading techniques is the secret to perfect dough consistency.

A smooth, elastic dough is essential for great crackers. Knead the dough enough to develop the gluten but avoid overworking it. The right kneading will give you a dough that’s easy to handle and results in a crunchy texture. By focusing on dough consistency and kneading, you’ll make crackers that taste and look amazing.

Here are some tips to perfect your dough consistency:

  • Use the right amount of water: The water you add affects the dough’s consistency. Make sure to use the correct amount for your flour type.
  • Knead the dough long enough: Kneading is vital for developing the gluten and achieving a smooth dough.
  • Let the dough rest: Resting the dough relaxes the gluten, making it easier to work with.

By following these tips and mastering kneading, you’ll create whole grain crackers with the perfect dough and a delicious, crunchy texture.

Flour Type Water Content Kneading Time
Whole Grain 60-70% 10-15 minutes
Rye Flour 50-60% 5-10 minutes

Rolling and Shaping Techniques

To get the perfect crunchy texture in your whole grain crackers, you need to master rolling and shaping. These steps can change the texture and taste of your crackers. It’s key to roll the dough to about 1/16 inch thick for even baking and a great crunch.

The way you roll can depend on the shape and size you want. A rolling pin makes the dough even, while hand-shaping gives a more rustic look. When shaping, make sure the dough’s outer skin is tight to keep its shape until it’s baked.

For better rolling and shaping, use a bench scraper to help form a tight skin, which is important for small shapes. Also, make sure the dough is strong by mixing, kneading, and stretching during bulk fermentation. With these techniques, you can make delicious whole grain crackers with a crunchy texture.

Temperature and Timing Guidelines

To get the perfect crunchy texture in your whole grain crackers, follow the right temperature and timing. The best baking temperature is between 375°F and 400°F. Look for a lightly browned color and a firm texture to check if they’re done.

The baking temperature is key for the perfect texture. Crackers baked at the right temperature will be crunchy on the outside and soft inside. Keep an eye on the doneness indicators like color and texture to ensure they’re perfect.

Here’s a summary of the temperature and timing guidelines for whole grain crackers:

Parameter Value
Baking Temperature 375°F – 400°F
Baking Time 10-16 minutes
Doneness Indicators Lightly browned color, firm texture

By following these guidelines, you’ll make delicious whole grain crackers. They’ll have the perfect crunchy texture and flavor.

Creating Flavor Variations

Exploring rye crispbread opens up a world of flavors. With just a few ingredients, you can make your own unique and tasty flavors. Try using seed and spice combinations like caraway seeds and coriander. They give the bread a nutty and aromatic taste.

Exploring Seed and Spice Combinations

Some favorite seed and spice mixes include:

  • Caraway seeds and coriander
  • Sesame seeds and poppy seeds
  • Fennel seeds and anise seeds

These mixes can make your bread taste savory or sweet. Feel free to adjust the amounts to match your taste.

Herb-Enhanced Options

Herbs like rosemary and thyme can also spice up your rye crispbread. They bring a fresh and savory flavor. You can mix them with seeds and spices for even more taste. Or, use whole grain crackers as a base and add herbs and spices for a tasty snack.

flavor variations

Troubleshooting Common Challenges

When making rye crispbread, you might face some common issues. These can affect the bread’s texture and taste. One big problem is overmixing the dough, which makes the bread dense and tough. To fix this, mix the ingredients just until they form a shaggy mass. Then, let the dough rest so the flour can soak up the liquid.

Another issue is using the wrong flour. Whole grain rye flour is key for a tasty and healthy crispbread. But, using fresh organic rye grains can be tricky. It might need recipe and baking time adjustments.

To solve these problems, knowing how to troubleshoot is important. Here are some helpful tips:

  • Make sure the bread is cooked right by checking the temperature and baking time.
  • Adjust the recipe and ingredients to fit your taste and needs.
  • Don’t overmix the dough to avoid a dense and tough bread.
  • Use whole grain rye flour for a delicious and nutritious crispbread.

By following these tips, you can make a tasty and crunchy whole grain crispbread. It’s great for snacking or as a side dish.

Storage and Preservation Methods

To keep your rye crispbread fresh, use the right storage methods. Store it at room temperature for 4 to 5 days. Refrigerating it shortens its life to 2 to 3 days.

Freezing is a great way to preserve it. Wrapped and frozen, rye bread stays fresh for about 3 months.

For long-term storage, wrap a cooled loaf in plastic. Then, put it in a freezer Ziplock bag. This keeps your whole grain crackers fresh for later use.

Storing bread in the fridge can make it stale faster. Freezing individual slices can keep them fresh for a month or more. This is because freezing slows down the staling process.

Here are some tips to keep your rye crispbread crunchy:

  • Store it in an airtight container
  • Freeze it to keep it fresh
  • Reheat it to 140°F (60°C) to reverse staling

By following these tips, you can enjoy your homemade rye crispbread longer. Always cool your bread completely before storing. This way, you can keep your whole grain crackers fresh and tasty for longer.

storage methods

Serving Suggestions and Pairings

There are many ways to serve rye crispbread. You can enjoy it alone, loving the crunchy texture and nutty taste. Or, pair it with foods for a tasty snack or meal. Top it with cheese, meats, and spreads, or use it for appetizers.

For a healthy snack, try rye crispbread with whole grain crackers and your favorite toppings. Hummus, avocado, or peanut butter work great. The crispbread’s crunchy texture contrasts well with creamy toppings. It’s also good as a base for a charcuterie board with meats, cheeses, and pairings like grapes and figs.

Here are more serving suggestions and pairings:

  • Cranberry goat cheese, candied walnuts, and pomegranate seeds for a sweet and tangy mix
  • Gruyère, prosciutto, and roasted red peppers for a savory and fulfilling snack
  • Truffle honey, grainy mustard, and fig jam for a sweet and savory dip

The secret to great serving suggestions and pairings is to mix flavors and textures. Try different combinations to find your favorite rye crispbread ways.

Health Benefits of Regular Consumption

Eating rye crispbread regularly can bring many health benefits. It helps with weight management and keeps blood sugar levels stable. The high fiber in whole grain rye boosts digestive health and supports blood sugar.

Some key health benefits of whole grain rye are:

  • High fiber content, which aids in digestive health and blood sugar control
  • Rich in vitamins and minerals like iron, magnesium, and selenium
  • Lower glycemic index than white bread, meaning it doesn’t raise blood sugar as much

Adding whole grain crackers, like rye crispbread, to your meals is beneficial. It supports weight management and overall health. Rye crispbread is a healthy choice for your diet.

whole grain crackers

Changing your diet to include whole grain crackers and other whole grains can improve your health. It helps with weight management and blood sugar control.

Incorporating Crispbread into Your Daily Diet

Adding crispbread to your daily meals can bring whole grain goodness into your life. Its crunchy texture and nutty taste make it perfect for many dishes. Enjoy it alone or with toppings for a healthy snack or sandwich base.

Crunchy crispbread boosts your whole grain intake. It’s packed with dietary fiber, which aids digestion and keeps blood sugar stable. Plus, it’s rich in iron, magnesium, and potassium.

Here are some ways to add crispbread to your meals:

  • Use it as a base for sandwiches or toast
  • Enjoy it as a healthy snack on its own
  • Pair it with your favorite spreads or toppings, such as avocado or hummus

Crunchy crispbread can spice up your meals with its nutritional benefits. It’s a great fit for any healthy diet. Try it out and see how it can enhance your daily meals.

Nutrient Amount per 100g
Carbohydrates 82.2g
Fiber 16.5g
Protein 7.9g

Gluten-Free Rye Crispbread Alternatives

If you can’t have gluten, don’t worry. There are gluten-free options for rye crispbread. These are made with flours like almond or coconut. They taste and feel like real rye crispbread.

These alternatives are great for a healthy snack. You can enjoy them with your favorite spreads or toppings.

Whole grain crackers are a popular choice. They’re tasty and full of fiber and nutrients. When picking a gluten-free option, check the ingredients and nutrition to make sure it’s healthy.

Here are some tips for making your own gluten-free rye crispbread alternatives at home:

  • Use a mix of gluten-free flours, like almond, coconut, and rice.
  • Add seeds and spices for flavor and texture.
  • Watch the baking time and temperature to get crispy, golden crackers.

With a bit of creativity, you can make your own gluten-free rye crispbread alternatives. You can choose from whole grain or seed crackers. There are many options to fit your taste and dietary needs.

Conclusion: Embracing the Art of Homemade Crispbread

Making homemade rye crispbread is a rewarding experience. It combines the joy of baking with the health benefits of whole grain crackers. This guide has shown you how to make a snack that’s good for you and tastes great.

Whether you’re new to baking or have experience, this guide has given you the tools to make delicious rye crispbread at home. You’ve learned how to choose the right flour, mix the dough, and bake it perfectly. Now, you can enjoy the real taste of homemade healthy snacks.

Keep exploring the world of rye crispbread and don’t be afraid to try new things. Share your creations with family and friends. This way, you’ll not only nourish your body but also connect with the rich history and tradition of this bread.

FAQ

What are the key ingredients for making perfect rye crispbread?

To make rye crispbread, you need whole grain rye flour, water, salt, and yeast. The type of rye flour used can change the bread’s texture and taste.

What are the health benefits of whole grain rye?

Whole grain rye is full of nutrients. It has lots of fiber, which is good for your digestion and blood sugar. It also has vitamins and minerals like iron, potassium, and magnesium.

What types of rye flour are available, and how do they differ?

You can find light rye, medium rye, and dark rye flour. Each type has its own taste and nutritional value. This affects the crispbread’s texture and flavor.

What equipment and tools are needed to make rye crispbread?

You’ll need a wooden spoon, a mixing bowl, and a baking sheet to make rye crispbread. You can also use a stand mixer and a baking stone to make the process easier.

How do you achieve the right dough consistency for perfect rye crispbread?

The dough should be smooth and elastic, a bit sticky. Use the right amount of water and knead well to get this consistency.

What are some common challenges in making rye crispbread, and how can they be troubleshooted?

Issues like overmixing, wrong flour, and bad baking temperature can happen. Fix these by adjusting ingredients and baking methods.

How can rye crispbread be stored and preserved to maintain its crispness and freshness?

Keep rye crispbread crisp by storing it right. Use methods like maintaining humidity, freezing, and vacuum-sealing to keep it fresh longer.

What are the health benefits of regular consumption of rye crispbread?

Eating rye crispbread regularly can help with weight and blood sugar control. Its high fiber content is good for digestion and blood sugar.

Are there gluten-free alternatives to rye crispbread?

Yes, you can make gluten-free rye crispbread with flours like almond or coconut. These alternatives offer a similar taste and texture to traditional rye crispbread, great for those with gluten issues.

Delicious Slow Cooker White Bean & Kale Soup


Kale Soup

Looking for a healthy, easy meal that’s quick to make? Try the slow cooker white bean & kale soup. It’s a hearty option for a weeknight dinner. The soup is rich in flavor and packed with nutrients, making it a guilt-free choice.

It’s perfect for those busy days. Cook it all day and come home to a warm, comforting meal. It’s a great choice for a slow cooker white bean & kale soup.

This soup is not just healthy but also easy to make with few ingredients. It’s a great vegetarian option. With its nutritional value and low calories, it’s a smart choice for a healthy meal.

Introduction to Slow Cooker White Bean & Kale Soup

This soup is a low-calorie meal with only 522 kcal per serving. It has 47 g of carbs, 29 g of protein, and 25 g of fat. It’s also high in dietary fiber with 18 g per serving and low in sugar at just 3 g.

Key Takeaways

  • You can make a delicious slow cooker white bean & kale soup with minimal ingredients.
  • This slow cooker white bean & kale soup is a healthy soup recipe with low calories per serving.
  • The soup is an excellent option for a weeknight dinner, as it can be cooked all day while you are busy with other activities.
  • The slow cooker white bean & kale soup is a hearty soup that is perfect for a vegetarian meal.
  • The soup has a high nutritional value, with 18 g of dietary fiber and 29 g of protein per serving.
  • You can store the soup in the refrigerator for up to 5 days or freeze it for up to 6 months.

Benefits of Making White Bean & Kale Soup in Your Slow Cooker

Thinking about making a tasty and healthy soup? Wondering about slow cooker benefits? Making White Bean and Kale Soup in a slow cooker saves time. It only takes 5 minutes to prep, and then the slow cooker cooks it for you. This is perfect for a winter soup recipe that cooks all day while you’re busy.

This slow cooker soup recipe is also a great way to get a lot of nutrients. It’s full of protein, fiber, and vitamins. The mix of white beans and kale boosts your health and energy. And, it’s ready in just 25 minutes, so you can enjoy a hot meal quickly.

  • High protein content: 10 grams per serving
  • High fiber content: 7 grams per serving
  • Low calorie count: 198 calories per serving
  • Rich in vitamins and minerals: including Vitamin A, Vitamin C, and potassium

In summary, making White Bean and Kale Soup in a slow cooker is a smart choice. It’s quick, nutritious, and budget-friendly. This winter soup recipe is a great choice for any meal plan.

Essential Ingredients for Perfect Slow Cooker White Bean & Kale Soup

To make a tasty healthy white bean soup, you need some key ingredients. You’ll need cannellini beans, kale, onions, garlic, and Italian seasoning. The cannellini beans are packed with protein and fiber. Kale is full of vitamins and antioxidants.

Onions and garlic add a lot of flavor. Italian seasoning gives it an extra kick.

Choosing the right ingredients is key for an easy slow cooker soup. You can add diced tomatoes or spinach to customize it. For a vegetarian kale soup, use vegetable broth instead of chicken broth. The goal is to find ingredients that complement each other well.

slow cooker white bean and kale soup

  • 2 cans of cannellini beans (15 oz. each)
  • 5 cups of vegetable broth
  • 8 oz. of kale
  • 2 tablespoons of olive oil
  • 2 tablespoons of minced garlic
  • 2 teaspoons of Italian herb seasoning

These ingredients will help you create a delicious and nutritious healthy white bean soup. It’s perfect for a weeknight dinner or a special occasion.

Kitchen Equipment and Preparation Tips

To make a delicious winter soup, like the slow cooker White Bean and Kale Soup, you need the right tools. Your slow cooker’s size and settings are key. Choose a 5-quart slow cooker and set it to low or high, based on your schedule.

You’ll also need basic kitchen tools like a cutting board, knife, and spoon. These help when chopping onions and garlic, and washing and chopping kale. Prepping ingredients ahead of time is also helpful. This makes the soup one of the most convenient crockpot meals.

hearty slow cooker recipes

You might also need a can opener, measuring cup, and wooden spoon. With these tools and some prep, you can make many comforting winter soups. The slow cooker White Bean and Kale Soup is a great example. By following these tips, you can enjoy a delicious, hearty meal any time of the year.

Step-by-Step Guide to Making Slow Cooker White Bean & Kale Soup

To make a delicious and healthy soup with kale, follow this easy slow cooker recipe. Start by chopping the onions and garlic. Then, wash and chop the kale. These ingredients will be the base of your homemade soup with vegetables.

Next, add the ingredients to the slow cooker. Include the cannellini beans, diced tomatoes, and Italian seasoning. You can also add some smoked sausage for extra flavor. This easy slow cooker recipe is perfect for a weeknight dinner or a weekend meal.

Here are the steps to follow:
* Chop the onions and garlic
* Wash and chop the kale
* Add the ingredients to the slow cooker
* Cook on low for 6-8 hours or high for 3-4 hours
* Add the kale and cook for an additional 30-45 minutes

This healthy soup with kale is not only delicious, but it’s also packed with nutrients. With a total of 382 calories per serving, it’s a great option for a healthy meal. The homemade soup with vegetables is also easy to make and can be customized to your taste.

slow cooker white bean and kale soup

The nutritional information for this recipe is as follows:
| Nutrient | Amount per serving |
| — | — |
| Calories | 382 kcal |
| Carbohydrates | 30 g |
| Protein | 18 g |
| Total fat | 22 g |
| Saturated fat | 7 g |
| Polyunsaturated fat | 3 g |
| Monounsaturated fat | 8 g |
| Cholesterol | 44 mg |
| Sodium | 1371 mg |
| Potassium | 976 mg |
| Dietary fiber | 6 g |
| Sugar | 2 g |
| Vitamin A | 4351 IU |
| Vitamin C | 42 mg |
| Calcium | 150 mg |
| Iron | 5 mg |

Selecting and Preparing Your White Beans

Choosing the right white beans is key for a tasty vegetarian slow cooker meal. White beans are a staple in many comfort food recipes, like white bean soup. With so many types, picking the right one can be tough.

First, you can pick between dried and canned beans. Dried beans need soaking and cooking. Canned beans are pre-cooked and go straight into the slow cooker. Your choice depends on what you like and the recipe you’re using.

white bean soup

Differences Between Dried and Canned Beans

Dried and canned beans differ in texture, taste, and nutrition. Dried beans are firmer and taste stronger. Canned beans are softer and milder. Dried beans have more fiber and protein but less sodium.

Popular White Bean Varieties

Popular white beans include cannellini, navy, and Great Northern beans. Each has its own taste and texture. For example, cannellini beans are creamy and mild, perfect for white bean soup.

Choosing and Preparing the Perfect Kale

Choosing the right kale is key for a hearty soup. Opt for lacinato or curly kale for its tender texture and mild taste. These varieties will enhance your crockpot soup with their delicious and nutritious qualities. To get ready, wash and chop the kale, then remove the stems and ribs.

For a nutritious meal like slow cooker White Bean and Kale Soup, pick the right kale amount. You can use fresh or frozen kale, with 10 to 12 ounces of frozen being a good substitute. If using frozen kale, thaw it first and squeeze out excess water before adding it to your soup.

Here are some tips for preparing kale:

  • Choose fresh kale with crisp leaves and no signs of wilting
  • Wash the kale thoroughly and remove the stems and ribs
  • Chop the kale into small pieces to release its nutrients
  • Use frozen kale as a convenient alternative to fresh kale

By following these tips, you can make a delicious and nutritious hearty soup with kale. This crockpot soup recipe is packed with nutrients and flavor, making it a favorite for healthy meals.

Nutrient Amount per serving
Calories 209
Total fat 4.0 g
Saturated fat 4.0 g
Cholesterol 0 mg

Enhancing Your Soup’s Flavor Profile

Exploring slow cooker recipes opens up a world of flavors. Enhancing your dishes’ taste is an art that needs patience and creativity. For healthy soups like White Bean and Kale Soup, the secret is in the herbs, spices, and seasonings. Adding vegetarian slow cooker meals to your cooking can broaden your taste and offer healthy, plant-based options for everyone.

To make your soup taste better, try these tips:

  • Play with herbs and spices, like Italian seasoning or red pepper flakes, to add depth and warmth.
  • Use seasoning tips, such as a bay leaf or fresh rosemary, to make a rich, aromatic broth.
  • Layer flavors by adding ingredients at different times. This lets each part blend together beautifully, just like in vegetarian slow cooker meals.

Using these methods in your slow cooker recipes will help you make healthy soups. These soups will not only be good for you but also a joy to eat. Vegetarian slow cooker meals will become a favorite in your kitchen.

Storage and Freezing Guidelines

Enjoying your easy crockpot dinners, like the tasty white bean soup, requires proper storage and freezing. To keep the flavor and nutrients of your kale soup slow cooker meal, follow some simple steps.

Let the soup cool down to room temperature after cooking. This step is key to prevent bacteria growth and keep the soup fresh. Once it’s cooled, put it in an airtight container. Make sure there’s space for it to expand if you plan to freeze it.

You can keep the soup in the fridge for up to 5 days or freeze it for 3 months. To reheat, thaw it in the fridge overnight or directly from the freezer. Freezing it in individual portions can be very convenient.

Some important tips for storing and freezing your white bean soup include:

  • Use airtight containers or heavy-duty freezer bags to avoid freezer burn and keep it fresh.
  • Label and date containers or bags so you can use the oldest items first and know how long they’ve been stored.
  • Reheat the soup gently to avoid it getting too hot or having an unpleasant texture.

By following these simple storage and freezing tips, you can enjoy your easy crockpot dinners, including the delicious kale soup slow cooker recipe, for weeks. Whether you’re meal prepping or just want a healthy meal ready, proper storage and freezing will help you enjoy your white bean soup recipe for longer.

Serving Suggestions and Pairings

There are many ways to serve your slow cooker white bean & kale soup. It’s not just tasty but also pairs well with different sides and garnishes. Try it with crusty bread or a green salad for a full meal. A grilled cheese sandwich or roasted veggies also make great pairings.

Customizing your soup is easy and fun. As one of the simplest slow cooker meals, you can add your favorite garnishes. Parmesan cheese, sour cream, or fresh herbs like parsley or rosemary can make it even better. These touches can really enhance the flavor and texture.

Pairing your soup with wine is a great idea. A Pinot Grigio or Sauvignon Blanc can complement its flavors nicely. This adds a touch of elegance to your meal. Whether it’s the main dish or part of a bigger meal, these pairings will make it memorable.

Here are some popular pairings for the slow cooker white bean & kale soup:

  • Crusty bread for dipping into the soup
  • A green salad with a light vinaigrette
  • A grilled cheese sandwich for a comforting combination
  • Raised croutons for added texture
  • Fresh parsley or rosemary for garnish

These options let you enjoy your slow cooker white bean & kale soup in many ways. It’s a versatile and satisfying choice for any meal.

Customization Options and Dietary Variations

Slow cooker comfort food is great for everyone, no matter their dietary needs. This winter soup recipe can be changed to fit different diets. You can make it vegetarian or gluten-free with a few tweaks.

To make it vegetarian, swap the chicken broth for vegetable broth. You can also add more veggies like diced tomatoes or spinach. For gluten-free, use gluten-free bread or pasta. Or, replace wheat with gluten-free options. Adjust the spice by adding more or less red pepper flakes.

  • Use vegetable broth instead of chicken broth for a vegetarian option
  • Add more vegetables like diced tomatoes or spinach for added nutrition
  • Use gluten-free bread or pasta for a gluten-free option
  • Adjust the spice level to your taste with red pepper flakes

These simple changes make the slow cooker comfort food delicious and healthy. It’s perfect for a chilly day. With these options, it’s a great choice for a nutritious meal.

Customization Option Description
Vegetarian Replace chicken broth with vegetable broth
Gluten-Free Use gluten-free bread or pasta
Spice Level Adjust with red pepper flakes

Conclusion

Slow cooker White Bean and Kale Soup is a tasty and healthy meal option. It’s easy to make and doesn’t take up a lot of time. This dish is perfect for anyone looking for a quick and nutritious meal.

With just the right mix of white beans, kale, and spices, you’ll make a soup that’s both comforting and delicious. The slow cooker makes it simple to prepare, leaving you more time to do other things. Try out different beans, spices, and toppings to make it your own. You’ll love the cozy flavors that will make your meal special.

FAQ

What are the benefits of making White Bean and Kale Soup in a slow cooker?

Making White Bean and Kale Soup in a slow cooker saves time. You can cook it all day while doing other things. It’s also healthy and can be made in large batches, saving money.

What are the essential ingredients for perfect slow cooker White Bean and Kale Soup?

Key ingredients are cannellini beans, kale, onions, garlic, and Italian seasoning. They add protein, fiber, vitamins, and flavor.

What kitchen equipment and preparation tips are needed for making slow cooker White Bean and Kale Soup?

You’ll need a 5-quart slow cooker, a cutting board, knife, and spoon. Chop onions, garlic, and kale before cooking. You can prep ahead and store in the fridge.

How do you select and prepare the white beans and kale for the soup?

Choose between dried or canned beans. Dried beans need soaking and cooking. Canned beans are ready to go. For kale, pick tender varieties like lacinato or curly kale. Wash and chop, removing stems and ribs.

How can you enhance the flavor profile of your slow cooker White Bean and Kale Soup?

Add Italian seasoning, red pepper flakes, or lemon juice for flavor. Try a bay leaf or rosemary for extra taste. Layer flavors by adding ingredients at different times.

How do you store and freeze the slow cooker White Bean and Kale Soup?

Cool the soup, then put it in an airtight container. Store in the fridge for 5 days or freeze for 3 months. Reheat from the fridge or freezer.

How can you customize the slow cooker White Bean and Kale Soup recipe to accommodate dietary needs and preferences?

For vegetarians, use vegetable broth instead of chicken. Add veggies like tomatoes or spinach. For gluten-free, use gluten-free bread or pasta. Adjust spice levels with red pepper flakes or hot peppers.